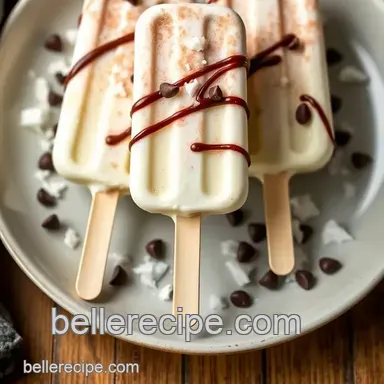
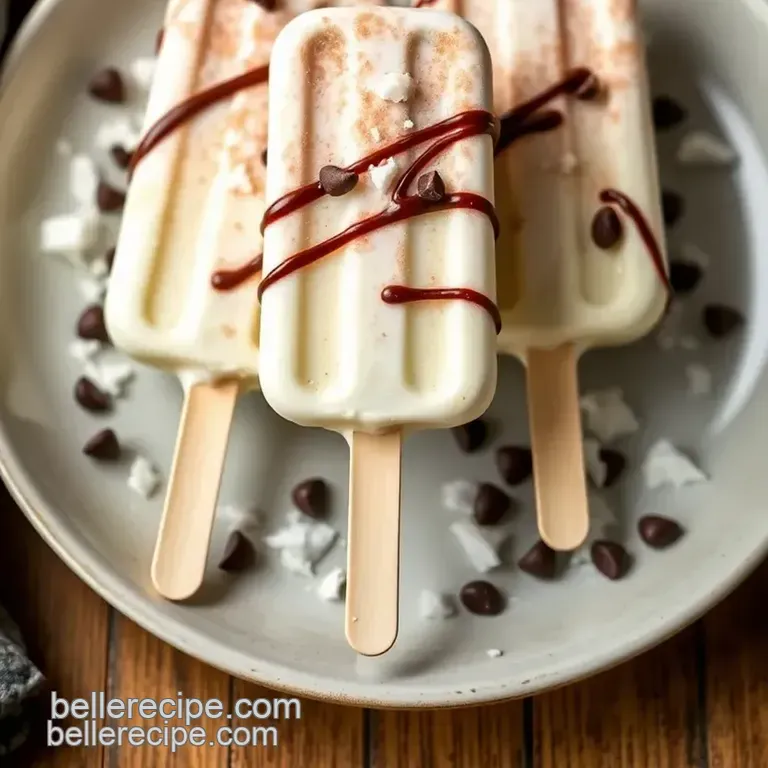
Melt-In-Your-Mouth Eskimo Pie Popsicles

- A Taste of Nostalgia: Melt-in-Your-Mouth Eskimo Pie Popsicles
- Your Essential Ingredients Guide for Melt-in-Your-Mouth Eskimo Pie Popsicles
- Look into Into Professional Cooking: Secrets to Crafting Melt-in-Your-Mouth Eskimo Pie Popsicles
- Pro Tips & Secrets for Melt-in-Your-Mouth Eskimo Pie Popsicles
- 📝 Recipe Card
A Taste of Nostalgia: Melt-in-Your Mouth Eskimo Pie Popsicles
Oh my gosh, there’s something magical about summer days when you would race to the ice cream truck. remember the sound of that jingle, like a siren call to all kids? i can still taste those sweet treats as they melted on my tongue.
One popsicle that always had me dreaming was the eskimo pie. it was like a frozen chocolate dessert that wrapped creamy bliss in its chocolaty embrace.
Fast forward to now, and i’ve whipped up a recipe that captures that nostalgia perfectly: melt-in-your mouth eskimo pie popsicles . trust me, you’ll want to make these for all those hot days ahead!
The Story Behind the Eskimo Pie
So, where did these delightful pops come from? the original eskimo pie made quite an entrance in the early 1920s.
It was a simple yet genius idea: creamy vanilla ice cream dipped in rich chocolate! fast forward to today, and we still can’t resist that iconic taste.
It’s not just a dessert; it’s a slice of history! nowadays, you can catch these treats everywhere, but nothing beats making your own at home.
Plus, this easy popsicle recipe means you can customize it to your heart’s content!
Are We Ready for Some Popsicle Magic?
Now, let's get real. making these homemade popsicles is super rewarding. it takes about 20 minutes of active prep time and a little patience because you’ll need to let them chill for roughly 4 hours .
But hey, once you taste that first bite, all that waiting will feel worth it! plus, the ingredients are simple and fairly affordable.
You’re looking at around 8 popsicles for a fraction of what you’d pay at the store.
Why You’ll Love These Popsicles
I can’t stress enough the health benefits and sheer joy these bring. with heavy cream and real milk, each popsicle has a creamy center that will make your taste buds dance.
Not to mention, these are a fantastic frozen yogurt alternative if you're looking to indulge a bit!
Perfect for birthdays or just because you want to indulge, these pops share a special spot for summer bbqs and pool parties.
You can even make them a little fancy with sprinkles or nuts for an easy party treat. they stand out in any crowd, entering the ranks of those nostalgic frozen treats and sweet summer snacks that everyone loves.
Concluding with Sweet Anticipation
Ready to dive into the fun? if you’re dreaming of satisfying summer desserts that satisfy every craving, these melt-in-your mouth eskimo pie popsicles are your answer.
We’ve got the creamy vanilla ice cream, the decadent chocolate coating, and the thrill of diy-ing your own treats! let’s jump into the ingredients, and start bringing back those sunny memories with every bite.
You’ll be the hero of your summer parties, serving up these delicious ice cream recipes that’ll leave everyone wanting more!
Your Essential Ingredients Guide for Melt-in-Your Mouth Eskimo Pie Popsicles
Alright, let’s talk about the soul of cooking: essential ingredients . you know this part; the right components can make or break your dish.
If you're gearing up to create those melt-in-your mouth eskimo pie popsicles , it’s crucial to start with premium core ingredients.
Let's dive in!
Premium Core Components
First off, measurements can be a little tricky, so here’s a heads-up. the ice cream base needs 2 cups (480 ml) of heavy cream , and trust me, you’ll want to use the good stuff! quality indicators? look for cream with more than 36% fat .
If it's labeled "heavy whipping cream," you’re golden.
Now, about storage : keep that heavy cream in the fridge. it should stay fresh for about a week, longer if you freeze it just remember, frozen cream isn’t the same magic when you thaw it out.
Signature Seasoning Blend
For the eskimo pie recipe , you want simple but effective flavors. the star here is the combination of vanilla extract , and honestly, go for pure vanilla if you can.
It’s a game changer! when i whip up those homemade popsicles, i swear by 1 tablespoon of vanilla to add that dreamy aroma.
A lot of folks overlook the power of a pinch of salt . Just a quarter teaspoon works wonders for balancing the sweetness. Think of it as the secret handshake among flavors.
Smart Substitutions
Now, here's where it gets fun: substitutions ! if you realize you’re out of whole milk, no sweat. you can swap in almond milk or even coconut milk to keep it dairy-free.
If you've got ice cream popsicles on your mind but no ice cream maker in sight, no-churn options are totally doable, just whip that cream up and mix with sweetened condensed milk.
And oh! If chocolate chips are sold out at your local market (what a sad day!), melt down some chocolate bars instead. It's still going to taste divine, trust me!
Kitchen Equipment Essentials
Now let's chat about gear those must have tools ! you’ll definitely need popsicle molds. i used a simple 8-cavity mold , and it does the trick every single time.
If you don’t have one, check your kitchen for mini paper cups those work like a charm! just pop in a stick, and you’re good to go.
For melting chocolate, a double boiler is ideal, but you can also microwave it. just be sure to melt in short bursts.
Don’t want burnt chocolate ruining that rich chocolate coating we all love!
Tips & Tricks for Your Homemade Popsicles
A little quick tip: when you pour your ice cream mixture into the molds, leave a bit of space at the top .
This helps prevent overflow and makes it easier to insert sticks. also, blend the mixture for about 30 seconds for smoother results.
And for the chocolate coating? Pay attention to temperature around 90° F ( 32° C) is perfect for dipping. If it cools too much, just set it back over low heat.
A Sweet Transition Into Your Popsicle Instructions
Before you start dreaming about that creamy vanilla ice cream goodness, keep these essentials in mind as you prepare to make your melt-in-your mouth eskimo pie popsicles .
Getting everything lined up right will make your dessert journey flow smoothly. it's gonna be a blast! stay tuned for the instructions; i promise you won’t want to miss that part! plus, who can resist the idea of homemade treats during those warm summer days, right? let's make some magic happen in your kitchen!
Look into Into Professional Cooking: Secrets to Crafting Melt-in-Your Mouth Eskimo Pie Popsicles
Alright, my sweet toothed friends, let’s get down to the nitty gritty of professional cooking methods that’ll take your kitchen game from basic to fabulous! today, we’re talking about a classic treat with a twist: melt-in-your mouth eskimo pie popsicles .
These homemade popsicles are not just any summer snack; they’re the stuff of ice cream dreams! let’s break down the essential steps to whip up these delightful chocolate coated popsicles, while tossing in some pro cooking tips.
Essential Preparation Steps
Before we jump into the recipe, a little chat about mise en place is in order. honestly, getting your ingredients lined up and ready to go is key.
You don’t want to be halfway through mixing and realize you’re out of vanilla extract. so, set everything out ahead of time!
Time management tips: Set a timer for each step. You’ll find that keeping tabs on the clock like that pesky allergic reaction your friend has to better planning can help you stay organized.
Organization is king! assign a space for everything: utensils in one spot, ingredients in another. and let’s not forget safety! hot melted chocolate can be tricky.
Always be careful when melting it, and work on a clean surface.
Step-by-step Process
Now that you're prepared, let’s conquer the recipe!
Make the ice cream base: start by whisking together 2 cups heavy cream , 1 cup whole milk , 3/4 cup granulated sugar , 1 tablespoon vanilla extract , and 1/4 teaspoon salt .
Blend that baby for about 30 seconds to smooth it out.
Chill, Baby, Chill! Let the mixture sit in the fridge for at least 1 hour . This waiting is crucial for making sure that ice cream is creamy and dreamlike.
Mold it up! pour the chilled mixture into your popsicle molds, leaving a little space at the top. don’t forget to pop in those sticks and freeze for a minimum of 4 hours .
Chocolate magic: while waiting, prepare the chocolate coating. you’ll need 1 1/2 cups semi sweet chocolate chips and 2 tablespoons coconut oil .
Melt ’em using a double boiler until it’s smooth and decadent.
Dip, Dip, Hooray! Take your popsicles out of the molds and dip ‘em in that melted chocolate! Don’t go too slow; we want it set before it drips everywhere.
The Last Chill: Pop the coated beauties back in the freezer for approximately 30 minutes to set completely.
Expert Techniques
Let’s sprinkle in a few expert techniques here. timing is everything when it comes to melting chocolate. aim for around 90° f ( 32° c) for perfect dipping.
If it thickens up too fast, just reheat gently.
Now, a little troubleshooting: if your popsicles won’t come out of the mold, try running warm water on the outside of the molds for a few seconds.
Nothing’s worse than a ruined night of ice cream pop excitement!
Success Strategies
So, what's the key to making sure your popsicles are perfect? avoid common mistakes like not mixing the ice cream base well or over chilling the chocolate.
That could lead to clumpy, sad coatings.
Also, to ensure quality assurance, always taste! that's right, sneak a spoonful of that creamy filling before it gets frozen.
You won’t regret it! if you want to make these ahead of time, they can last in the freezer for a couple of weeks, but let’s face it, they probably won’t survive that long!
Time to Enjoy!
Ahh, nothing says summer like munching on a melt-in-your mouth popsicle! these eskimo pie popsicles are perfect for pool parties, barbecues, or just a hot day on the porch.
Plus, they offer a rich chocolate coating and a creamy vanilla ice cream center that’ll take you back to those nostalgic childhood days.
Stay tuned for our next section where we’ll dive deeper into even more interesting stuff like unique popsicle variations and the ins and outs of frozen dessert perfection! Let's keep those summer treats coming, shall we?
Pro Tips & Secrets for Melt-in-Your Mouth Eskimo Pie Popsicles
Alright, friends, let’s dive into the delicious world of melt-in-your mouth eskimo pie popsicles . seriously, how nostalgic do these sound? i couldn't help but giggle remembering those hot summer days after school when i’d dive into a frozen treat like there was no tomorrow.
So, let’s make your own version, but with some pro tips to elevate your popsicle game.
Chef's Personal Insights
First off, one of my secrets is to whisk like there’s no tomorrow! making that creamy vanilla ice cream mixture is all about getting the sugar to dissolve completely.
It creates that silky smooth texture we all crave. oh, and if you want a richer flavor , throw in a splash of milk or cream instead of plain water for blending.
Trust me, it’s worth it.
Time Saving Techniques
Want to save some time? blend your ice cream base and chill it overnight . that way, the next day is a breeze.
You just pour it into molds, freeze, and dive right into the chocolate coating. while your eskimo pie popsicles are freezing, you can whip up lunch or catch up on that show everyone keeps talking about!
Flavor Enhancement Tips
For those flavor ensoiasts, you can sprinkle in some espresso powder or almond extract. it gives a light nutty kick that really shines through.
Whether you’re making these for a summer barbecue or just an afternoon treat, don’t forget the rich toppings like crushed nuts or coconut flakes for extra crunch!
Perfect Presentation
Alright, let’s talk about looking good! the presentation can make or break your popsicle experience. when your eskimo pie popsicles are coated in that homemade chocolate, try swirling your pops while they are setting on the baking sheet.
It gives such a gourmet touch.
Garnish Ideas
Once the pops are set, drizzle some extra chocolate or sprinkle with colorful sprinkles for that kid-friendly vibe. And hey, if you’re feeling crafty, even a fresh mint leaf or a cherry on top could elevate your dessert game!
Storage & make-ahead
Now, let’s chat storage. you can keep these beauties in the freezer in a ziplock bag for up to two weeks .
Just make sure to wrap them tightly! to reheat, you don’t need to dive into a science project; just let them sit at room temp for a few minutes or run under warm water for a few seconds.
Honestly, a great frozen treat should be super easy to revisit.
Creative Variations
As fun as the classic chocolate and vanilla is, why not experiment? swap out the vanilla ice cream for a rich chocolate or even a fruity flavor like strawberry for an unexpected twist.
I mean, who doesn’t love indulging in some gourmet popsicles ?
Think about what’s in season, and toss some fresh fruit in your molds before pouring in the ice cream mix. It’s like getting a DIY dessert surprise!
Complete Nutrition Guide
Okay, let’s keep it real. this treat is definitely a sweet indulgence , clocking in at around 280 calories per pop.
But, it’s a delight! enjoying these is about balance, right? you can easily share or make mini pops for a lighter take on treat time.
Expert FAQ Solutions
You might be wondering if these pops melt too quickly. don’t worry! if you make sure the chocolate coating is nice and thick, you should be good to go.
Just make a double dip if you want that rich coating to take it over the top.
You might also ask, “Are these easy for kids to make?” Absolutely! It can be a fun activity you whip up together. Imagine the memories!
Conclusion: Get Creative with Your Melt-in-Your Mouth Eskimo Pie Popsicles!
So there you have it! with these tips and guidelines, creating your own melt-in-your mouth eskimo pie popsicles is not just a dessert; it’s an experience.
Whether you're chilling out with family, treating your kids after a day in the sun, or just indulging after a long day at work, these popsicles are guaranteed to hit the spot.
Get ready for some cool summer vibes and enjoy this delightful journey into frozen bliss. you totally got this!
Melt In Your Mouth Eskimo Pie Popsicles