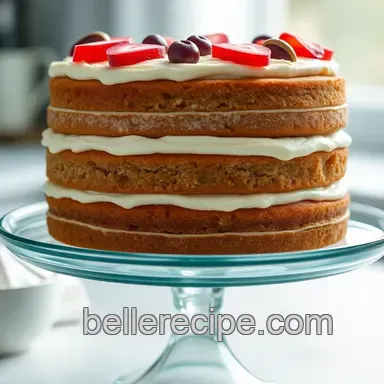
Stunning Layered Cake on a Glass Cake Stand
The Sweet Spotlight: Your New Favorite Layered Cake on a Glass Cake Stand
Oh my gosh, listen up! let me take you back to my best friend’s birthday last year. we were all huddled around a simple, yet gorgeous glass cake stand , excitedly chatting when the birthday girl unveiled this stunning layered cake .
Honestly, it stole the show. the moment she cut through those fluffy layers, the aroma filled the kitchen, and i thought, “why didn’t i think of this sooner?” that's when i knew i had to learn how to bake my own layered cake.
Trust me, once you master this, you’ll be the star of every gathering!
Recipe Overview: A Slice of History
Layer cakes have been around since the 19th century, popping up in america and taking celebrations by storm! fast forward to today, and they’re everywhere, from pinterest boards to bake sales.
You can spot them at weddings, birthdays, or just sunday family dinners. the best part? this recipe doesn’t ask for any super skills.
You’ll need a few basic baking techniques, but i promise it’s more about patience than perfection.
In terms of time, expect to spend about three hours on this beauty, including baking and cooling. trust me, the moist cake layers and rich fill will make every minute worth it.
And as for cost, it’s friendly on the wallet. you can whip up this centerpiece for approximately $20, which serves about 10 to 12 people.
So, if you’re looking for a crowd pleaser, look no further!
Key Benefits: Why You Should Bake This
First things first, let’s talk nutrition. while cake isn't exactly a health food, using fresh ingredients like berries can add a touch of goodness.
Plus, baking with fruit can infuse natural sweetness into your cake layers yes, please! imagine finding the perfect frosting for cakes that not only tastes divine but looks like a masterpiece on your glass cake stand .
Now, if you’re wondering when to break this recipe out, the answer is: any occasion! birthdays? definitely. anniversaries? for sure.
Or maybe just an elegant gem at a brunch gathering. and let’s be real, who doesn’t love a show stopping dessert that makes everyone go “wow”? in a sea of cakes, this layered beauty stands out like a diamond in the rough.
Not only does it taste incredible, but it also ranks high in the cake decoration ideas department; you’ll feel like a professional cake artist after decorating it!
Transition to Ingredients Section
Alright, are you drooling yet? let’s dive into what you need to bring this masterpiece to life. gather your ingredients, and prepare those baking essentials ! whether you’re whipping up flavored cake layers infused with chocolate or seasonal fruits, i’ll guide you through step-by-step as we create a cake that’ll earn its place on your kitchen table.
Get ready to bake a layered cake that will not only impress your guests but also turn your glass cake stand into a stunning centerpiece.
Trust me, it’ll be a dessert everyone remembers long after the last slice is gone!
Your Essential Ingredients Guide for Baking Success
Oh my gosh, if there’s one thing that can make or break your baking game, it’s knowing your essential ingredients .
Whether you’re crafting an impressive layered cake for a birthday celebration or just trying out a new weekend hobby, this guide is gonna be your best buddy in the kitchen.
Premium Core Components
Let’s dive right into the premium core components you need.
Detailed measurements : get your measuring cups ready, folks! for the perfect texture, use 2 ½ cups of all-purpose flour (310g) and 1 cup of unsalted butter, softened (227g) .
No guesswork here!
Quality Indicators : When buying ingredients, look for freshness. Check that the flour is smooth and not clumpy, the butter should be creamy, and eggs should have a clean, uncracked shell.
Storage Guidelines : Store your flour in an airtight container at room temperature. Butter? Keep it in the fridge! Most of these ingredients will last a few months, but do check expiration dates, folks!
Freshness Tips : Always go for seasonal fruit if you’re adding a fruity layer to your cake. Trust me, there’s nothing like fresh strawberries or blueberries to elevate your dessert.
Signature Seasoning Blend
Now, onto the signature seasoning blend ! Spice it up!
Essential Spice Combinations : A hint of cinnamon or nutmeg can transform your cake layers. Just a touch can elevate your dessert from basic to amazing!
Herb Selections : Feeling adventurous? Fresh mint can add a refreshing twist when paired with chocolate layers.
Flavor Enhancers : Vanilla extract is a must. You can also use almond extract for a unique flavor.
Regional Variations : Love spices? Try adding some pumpkin spice if you’re in the mood for autumn vibes. Or, a dash of cardamom for that international flair!
Smart Substitutions
Sometimes you just don’t have what you need. No sweat, I gotcha covered with some smart substitutions .
Common Alternatives : Out of eggs? You can use 1/4 cup of unsweetened applesauce as a substitute in most cakes. It’ll give you moisture without adding eggs!
Dietary Modifications : Going gluten-free? Just swap regular flour for your favorite gluten-free blend.
Emergency Replacements : Don’t have heavy cream? Grab some coconut milk; it can work wonders in frosting.
Seasonal Options : Use whatever fruit is fresh from the market. Strawberries in the summer or apples in the fall are perfect for fillings!
Kitchen Equipment Essentials
When it comes to equipment , the right tools can make a world of difference.
Must Have Tools : You’ll definitely need a glass cake stand for that elegant presentation. Plus, 3 round cake pans and a sturdy mixer are essentials absolutely required for a show stopping layered cake.
Alternative Equipment Options : No cake pans? You could use a muffin tin, just adjust your baking time accordingly!
Preparation Tips : Always prep by getting all your ingredients at room temperature, which makes mixing so much easier!
Storage Solutions : Keep your baking tools organized. I love using labeled containers to hold my flour, sugars, and spices. It saves time!
So, now that you’ve got the inside scoop on your essential ingredients and equipment, you're just about ready to start baking.
Keep your head up, have fun experimenting with flavors, and don’t hesitate to mix things up a bit!
Next up, let’s get into the layered cake recipe that'll not only look stunning on that glass cake stand of yours but will have everyone asking for a slice stay tuned for those instructions!
Professional Cooking Method
So, you wanna nail that stunning layered cake on your glass cake stand? Well, let’s break it down and turn that baking dream into a reality! Just think of all the birthday parties, potlucks, or casual Tuesdays where you can shine like a superstar baker with your show stopping dessert!
Essential Preparation Steps
First off, we gotta talk about mise en place a fancy french term that just means having everything in its place.
Gather your ingredients before you start. it’ll save you from frantically searching for that missing cup of sugar halfway through your mixing.
Time management tips? you’ll want to prepare as much as you can. get those cake layers baked and cooled, while you whip up your frosting.
Make a schedule if you need. seriously, i can’t tell you how many times i’ve gone off-course because i didn’t plan my steps.
When it comes to organization , think about your workspace. Keep it clutter free and have your tools ready like measuring cups, spatulas, and all that jazz.
And let’s not forget about safety. Always use oven mitts when handling hot pans. It might sound silly, but you don’t wanna end up with a brutal burn when you’re just trying to make a beautiful cake!
Step-by-step Process
Okay, let’s get to the good stuff. Here’s how to bake that layered masterpiece like a pro:
- Preheat your oven to 350° F ( 175° C) . Grease and flour your cake pans.
- In a bowl, combine your dry ingredients: 2 ½ cups all-purpose flour , 2 ½ tsp baking powder , and ½ tsp salt . Set that aside.
- In another bowl, cream your butter (1 cup) and sugar (2 cups) until it's light and fluffy. You want it airy!
- Add in your 4 eggs one at a time. Mix well.
- Gradually mix in your 1 cup of whole milk and 1 tsp of vanilla extract until smooth.
- Combine the dry ingredients into the wet mix gently. Don't overmix!
- Pour the batter evenly into your prepared pans and bake for 25 minutes . Check with a toothpick; it should come out clean.
- After baking, let the layers cool for 10 minutes , then transfer to a rack.
When it’s time to assemble , let’s keep an eye on temperature. the frosting works best when your cakes are at room temperature.
Start with that first layer, spread some frosting for a delightful filling, and repeat!
Expert Techniques
Let’s chat about some pro tips. Critical steps here are all about layering. Make sure your cake layers are level; trim them if necessary! Use a serrated knife for that fine touch.
Now, about the frosting : it’s the most important part, right? whip that butter until fluffy before adding in your powdered sugar.
Want to add some unique flavors? go for it! mocha, citrus, or even a fresh berry twist are perfect options.
And if you mess something up? troubleshooting tip: if your cake layers are too domed, just level them out. if your frosting is too runny, add a bit more powdered sugar.
Simple, right?
Success Strategies
Now, let’s avoid common pitfalls. One mistake? Not letting your cakes cool properly. That leads to a melted frosting disaster! Ensure your cakes are completely cool, which takes about 1 hour .
For quality assurance, take a moment before you dive into the decorating. is the frosting smooth? are you happy with the flavor? if you're unsure, taste it! it’s a great excuse to sneak a bite of deliciousness.
Want some perfect results? Don’t be afraid to make this cake ahead of time. You can even freeze your layers! Just wrap them tightly, and they’ll keep well.
Wrapping It Up
Baking this layered cake not only helps refine those baking techniques, but it also brings pure joy when presenting it on your glass cake stand .
Imagine everyone's eyes lighting up when you unveil it!
Remember, this delightful cake can be customized for any occasion, whether you’re celebrating with friends or just treating yourself.
I can’t stress enough every bake is a chance to learn. So go on, channel your inner pastry chef, and get that cake made! Now, let’s transition into some Additional Information for more tips and tricks to elevate your baking game!
Delicious Layered Cake Secrets: Make It Shine on Your Glass Cake Stand
You know that satisfying feeling you get when someone takes a bite of your homemade cake and their eyes light up? yeah, that’s the magic of baking! and when you present a scrumptious layered cake on a gorgeous glass cake stand , you’re not just serving dessert; you’re creating an experience.
Let’s dive into some personal tips, tricks, and fun ideas that’ll make your cake the talk of the town!
Pro Tips & Secrets
Alright, so let’s get real. baking a layered cake isn’t rocket science, but it does come with a few nifty techniques to help you out.
First things first : make sure your ingredients are at room temperature. this is key to getting that fluffy, mouth watering texture.
Room temp butter and eggs blend like a dream, trust me!
Now, time saving techniques ? oh, i’ve got a few! when you're planning to bake a multi layer cake, bake your layers ahead of time and freeze them.
Just layer them between parchment paper and they’ll be ready to frost when you are. and when it comes to flavor enhancements, consider infusing your cake layers with extracts or zest for a citrusy kick.
Lemon zest? yes, please!
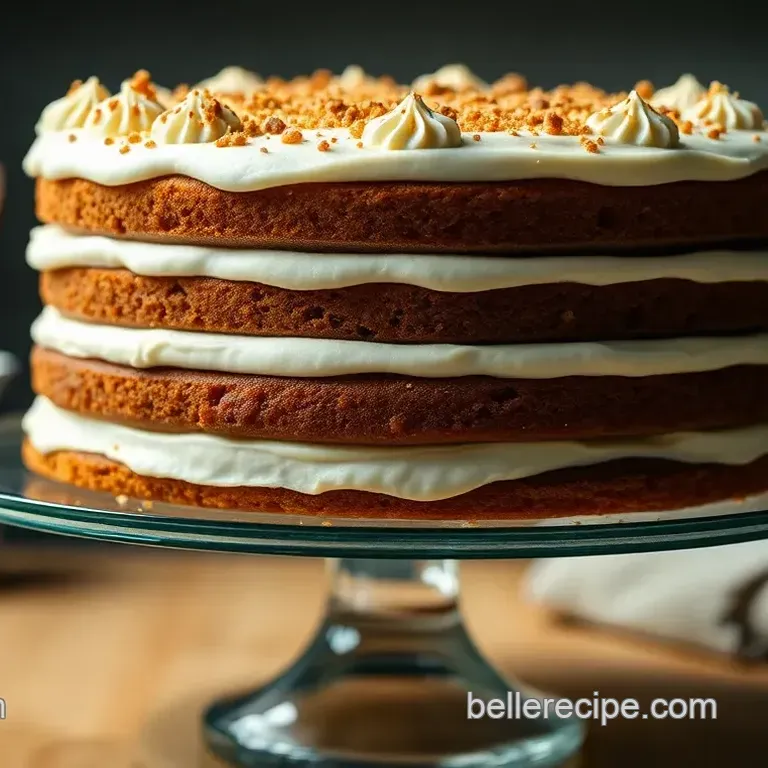
And let’s talk presentation . A well frosted cake looks extra inviting. Use an offset spatula for smooth frosting. Adding a final touch like chocolate shavings or fresh berries? It’s a game changer!
Perfect Presentation
When you place that stunning cake on your glass cake stand , it’s time to showcase your masterpiece. but how do you make it stand out? plating techniques matter! start with a clean, level cake on your stand.
Trim any domes off the top of the layers to ensure they're even nobody wants a lopsided cake.
Now, for the garnish! fresh mint leaves or colorful fruit like raspberries can add a pop of color. don’t shy away from creative cake garnishing; it can really elevate your dessert.
Pairing different colors think vibrant strawberries with creamy white frosting adds visual appeal that no one can resist.
Storage & make-ahead
Let’s face it, we can’t always wolf down an entire layered cake in one sitting (though i’ve tried!). if you think ahead and store properly, you’ll be enjoying your cake days later.
To store, wrap the cake well in plastic wrap and then keep it in an airtight container. it should stay fresh for about 3-5 days that’s if you can resist the temptation to eat it all at once!
And when it comes to reheating? No worries there. If you stick it in the microwave for 10 seconds, you can bring back that fresh baked taste without looking dry or sad.
Creative Variations
Getting creative is where the fun really begins! Want to switch it up a bit? Try flavored cake layers how about a chocolate layer paired with orange zest frosting? Or maybe a gluten-free layered cake for that health conscious friend?
Seasonal twists are easy too! Use pumpkin spice for a fall celebration or fresh berries in summer. What about regional variations? If you’re feeling adventurous, go for a spiced rum cake inspired by Caribbean flavors now that’ll get everyone raving!
Complete Nutrition Guide
Okay, so we all love cake, but it’s also nice to know what we’re getting into. honestly, when life gives you cake, you’ve gotta enjoy every bite! this gorgeous layered wonder clocks in at about 450 calories per slice .
It's packed with some good fats from butter, along with those heavenly carbs. keep in mind portion sizes, especially if sharing with a crowd.
Now, if you’re tweaking the recipe for dietary needs, just remember to keep those favorite flavors intact. you’ll be whipping up elegant cakes without losing the essence of what makes them so special.
Celebrate with Cake!
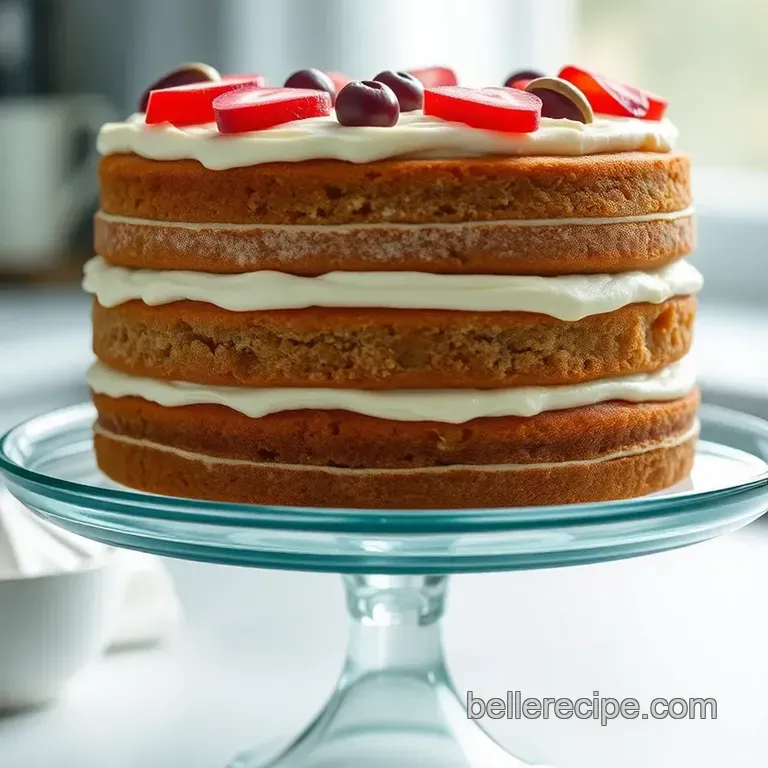
So, whether you’re hosting a birthday bash or just treating yourself after a long week, this stunning layered cake on a glass cake stand will make your dessert display an absolute show stopper.
Get creative with flavors and don’t forget those cake decorating tips. don’t be afraid to experiment it’s all part of the joy of baking.
You got this! happy baking, friends!
Frequently Asked Questions
What is the best way to display my cake on a glass cake stand?
To highlight your cake beautifully on a glass cake stand, ensure the bottom is clean and dry. Place the cake on the stand slightly off-center for an artistic look, or center it for a classic presentation. Garnishing the edges with fresh fruits or edible flowers can also elevate the visual appeal.
How can I make my layered cake more stable on a glass cake stand?
To ensure your cake is stable, chill each layer before stacking to firm them up. Use a cake board or thin cardboard circle under each layer, as this provides additional support. Additionally, applying a crumb coat of frosting before the final layer can help lock in crumbs and make the decoration process easier.
Can I make this stunning layered cake ahead of time?
Yes, you can prepare the layers one day in advance. Store the cooled cake layers wrapped in plastic wrap to keep them fresh. You can also freeze the layers longer and frost them once thawed, which can be especially helpful for time management on special occasions.
What are some suitable storage tips for a layered cake on a glass cake stand?
If you're using a glass cake stand, cover the cake with a cake dome or bell jar to protect it from dust and keep it fresh. Store the cake at room temperature for up to 3 days. If you need to store it longer, consider refrigerating it, but be aware that refrigeration might dry out the cake.
What nutritional tips should I consider when making this cake?
For a healthier version of this layered cake, consider using reduced fat butter, less sugar, or substitutes like applesauce. You can also add fiber by incorporating whole wheat flour or adding ground flaxseed. Just be sure to adjust cooking times, as these substitutions can alter the texture.
Are there any variations for the flavors in the layered cake?
Absolutely! You can add cocoa powder for a chocolate cake or citrus zest for a lemon flavored cake. For a more fun twist, consider using flavored extracts, such as almond or coconut, in the frosting. The possibilities are endless, allowing you to customize the cake to suit your preferences!
Stunning Layered Cake On A Glass Cake Stand