Authentic New York Bagels Recipe
- Time: Active 45 mins, Passive 1 hours 35 mins, Total 2 hours 20 mins
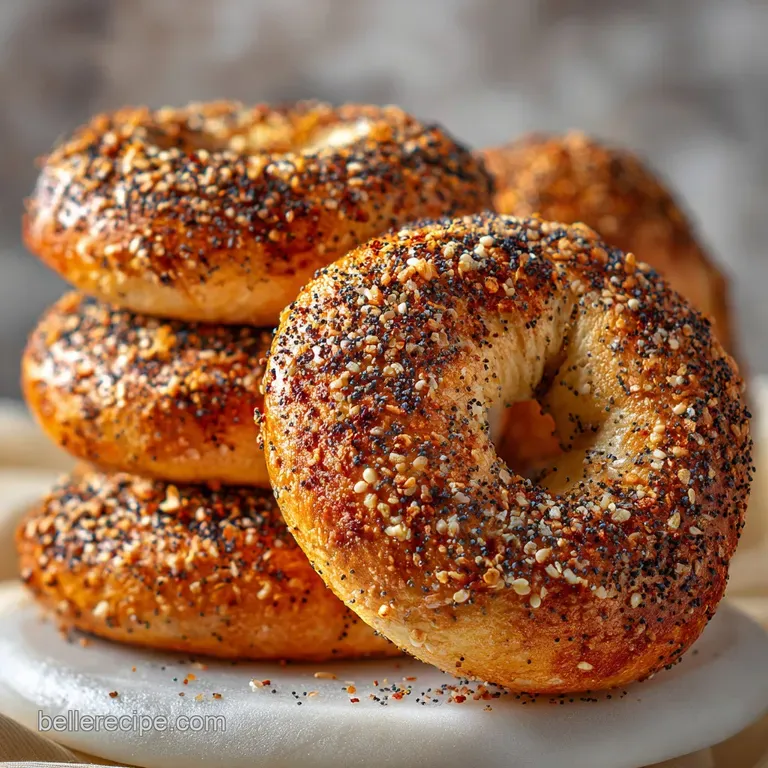
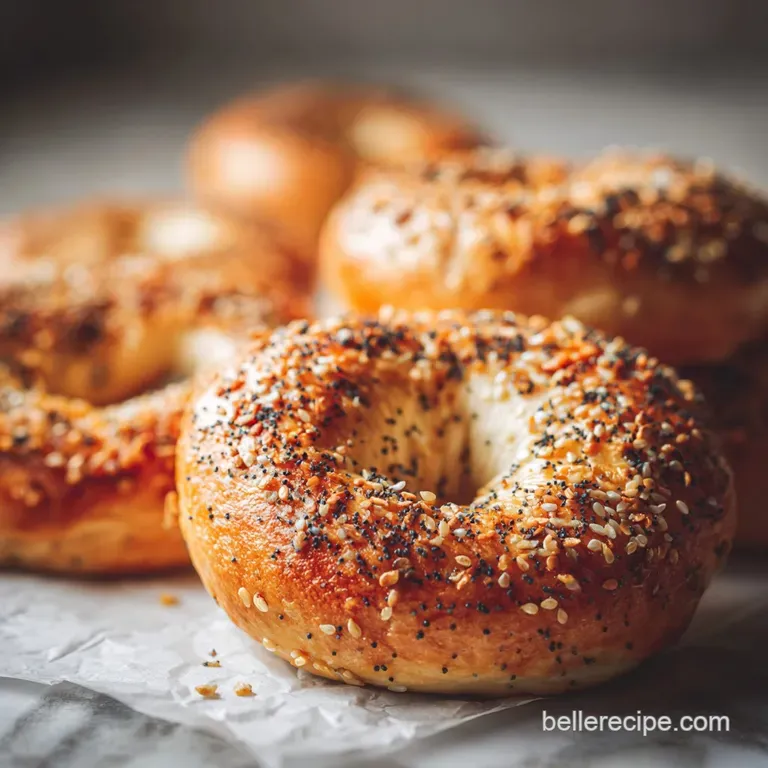
- Flavor/Texture Hook: A shatter crisp exterior with a malty, dense, and pull apart interior
- Perfect for: Slow weekend mornings, showing off at brunch, or freezer meal prep
- Experience the Authentic Crunch of This New York Bagels Recipe
- The Hidden Physics Behind That Signature New York Bagel Chew
- A Component Analysis of High Protein Dough and Malt
- Handpicking Your Elements for a Traditional Jewish Style Bagel
- Essential Tools for Crafting Professional Quality Rings at Home
- Stepping Through the Process to Achieve a Mahogany Finish
- Navigating Common Texture Hurdles for Smoother Dough Surfaces
- Adjusting Your Batch for Small Brunches or Big Crowds
- Debunking Ancient Bread Legends and Exploring Flavor Variations
- Maintaining Freshness and Repurposing Every Single Everything Crumb
- Culinary Partners That Transform Your Bagel Into a Masterpiece
- Recipe FAQs
- 📝 Recipe Card
Experience the Authentic Crunch of This New York Bagels Recipe
The first time I heard the "shatter" of a real bagel crust, I was standing on a damp sidewalk in Brooklyn, shivering slightly as the steam from a brown paper bag warmed my hands. Before that moment, I thought bagels were just round pieces of bread. I was so wrong.
That first bite was a revelation of textures a defiant, blistered exterior that gave way to a dense, almost creamy chew that required actual effort to bite through. It was salty, slightly sweet from the malt, and entirely life changing.
Coming home to my own kitchen, I spent months trying to replicate that specific magic. I had my fair share of "bready" failures and flat, sad rings that looked more like donuts than NYC icons. I realized quickly that you can't treat this dough like a standard loaf.
It’s stiff, it’s stubborn, and it demands a little bit of tough love. But when you pull that tray out of the oven and see that deep mahogany glow, you'll know exactly why we put in the work.
We're going to walk through this together, from the specific way we develop the gluten to that critical flash boil that makes or breaks the crust. This isn't just about making food; it's about creating a memory that tastes like a crisp New York morning.
Grab your flour and let’s get into the details of what makes this new york bagels recipe actually work in a home kitchen.
The Hidden Physics Behind That Signature New York Bagel Chew
Starch Gelatinization: The brief boiling stage pre gelatinizes the exterior starches, creating a thickened "skin" that prevents the bagel from rising further in the oven and results in a dense, chewy crumb.
The Maillard Reaction: Adding barley malt syrup to the water bath provides the necessary sugars and alkaline environment to accelerate browning, producing that iconic mahogany color and complex toasted flavor.
Gluten Tension: A low hydration dough (stiff dough) creates a tightly wound protein network that offers resistance when bitten, distinguishing a "New York" style from softer, machine made varieties.
Alkaline Surface Modification: Using baking soda in the water increases the pH level, which breaks down proteins on the surface to ensure a glossy, blistered finish rather than a dull, matte crust.
| Method Type | Texture Result | Time Commitment | Skill Level |
|---|---|---|---|
| Authentic Hand Rolled | Shatter crisp crust, dense chew | 2 hours 20 mins | Intermediate |
| Shortcut store-bought | Soft, pillowy, bread like | 0 mins | Beginner |
| Bread Machine Dough | Uniform crumb, softer exterior | 1 hours 45 mins | Beginner |
Choosing the authentic method ensures you get that specific resistance in the chew that shortcuts simply cannot provide. While a bread machine is great for mixing, the hand rolling and boiling stages are where the soul of the bagel is truly formed.
A Component Analysis of High Protein Dough and Malt
| Ingredient | Science Role | Pro Secret |
|---|---|---|
| High Protein Bread Flour | Provides the structural framework for a dense, chewy crumb | Look for flour with at least 12.7% protein for maximum "pull" |
| Non Diastatic Barley Malt | Adds a subtle sweetness and fuels the browning process | Never skip this; it's the specific "smell" of a New York deli |
| Warm Water (105°F) | Hydrates the flour and activates the yeast precisely | Use filtered water to ensure no chlorine interferes with the yeast |
| Fine Sea Salt | Regulates yeast activity and enhances every other flavor | Weigh your salt; even a 2g difference affects the rise and taste |
The interaction between the malt and the high protein flour is what separates a gourmet bagel from a grocery store roll. The malt doesn't just sweeten; it creates a depth of flavor that lingers, while the protein ensures the bagel doesn't collapse during the boiling phase.
Handpicking Your Elements for a Traditional Jewish Style Bagel
To get the best results, start with 500g high protein bread flour. Why this? Essential for that characteristic "toothsome" bite and structural integrity during the boil. If you only have all purpose flour, you can add two tablespoons of vital wheat gluten to boost the strength.
You'll also need 275ml warm water, kept strictly around 105°F. For the flavoring, 1 tbsp non diastatic barley malt powder is non negotiable for authenticity.
Why this? It provides the classic "NYC" aroma without over fermenting the dough.
Rounding out the dry ingredients are 2 tsp fine sea salt and 2.25 tsp instant yeast. For the boiling water, have 2 tbsp barley malt syrup or honey and 1 tsp baking soda ready.
Finally, 0.25 cup everything bagel seasoning will give you that iconic finish.
| Original Ingredient | Substitute | Why It Works |
|---|---|---|
| Barley Malt Powder | Brown Sugar | Adds sweetness and color, though lacks the specific malty depth |
| Barley Malt Syrup | Honey | Provides the necessary sugar for browning and a floral sweetness |
| Bread Flour | All Purpose + Gluten | Boosts protein levels to mimic high gluten flour properties |
| Everything Seasoning | Sesame or Poppy Seeds | Offers a simpler, more focused flavor profile for traditionalists |
Using honey instead of malt syrup in the water bath is a common "Montreal style" tweak that results in a slightly sweeter crust, though it won't be quite as dark as the traditional New York version.
Essential Tools for Crafting Professional Quality Rings at Home
Don't let the simplicity of bagels fool you; having the right gear makes the stiff dough much easier to handle. A heavy duty stand mixer (like a KitchenAid Artisan) is a lifesaver here because this dough is incredibly dense and can burn out smaller motors.
If you're kneading by hand, prepare for a serious 10 minute forearm workout!
A large, wide pot is essential for the boiling stage the more surface area you have, the more bagels you can boil at once without them sticking together. I also highly recommend using a spider strainer or a wide slotted spoon to flip the bagels gently.
For the bake, a heavy rimmed baking sheet lined with high-quality parchment paper or a silicone mat is a must to prevent the bottom of the bagels from burning before the tops are golden.
Chef's Tip: Freeze your everything seasoning for 10 minutes before topping. This prevents the dried garlic and onion bits from burning in the high heat of the oven, keeping them savory rather than bitter.
Stepping Through the Process to Achieve a Mahogany Finish
- Hydrate the yeast. Combine 275ml warm water with 2.25 tsp instant yeast in your mixer bowl. Note: Let it sit for 5 mins until a light foam appears on the surface.
- Incorporate dry ingredients. Add 500g bread flour, 1 tbsp malt powder, and 2 tsp salt. Mix on low until a shaggy mass forms.
- Develop the structure. Knead for 8-10 mins using the dough hook until the dough is smooth, stiff, and bounces back when poked.
- Initial fermentation. Place dough in a lightly oiled bowl, cover, and let rise for 1 hour until doubled in size.
- Divide and round. Punch down the dough and divide into 8 equal pieces (approx. 100g each). Roll each into a tight, seamless ball.
- Shape the rings. Poke a hole through the center of a ball and gently stretch until the hole is about 2 inches wide.
- Final proof. Place shaped bagels on parchment, cover, and let rest for 30 mins until they look slightly puffed and airy.
- Prepare the bath. Boil a large pot of water with 2 tbsp malt syrup and 1 tsp baking soda until it reaches a vigorous simmer.
- Flash boil. Drop bagels in (2-3 at a time) and boil for 1 min per side until the skin looks wrinkled and set.
- Season and bake. Dip the wet bagels into the 0.25 cup seasoning and bake at 425°F for 20 mins until deep mahogany and sounding hollow when tapped.
The dough will feel much tougher than pizza or sandwich bread dough. Don't be tempted to add more water! That stiffness is exactly what creates the "New York" texture we’re chasing. If you find the dough is too bouncy to shape, let it rest for 5 minutes to relax the gluten before trying again.
Navigating Common Texture Hurdles for Smoother Dough Surfaces
One of the biggest frustrations for home bakers is the "lumpy" bagel. This usually happens when the dough hasn't been kneaded enough or if the shaping wasn't tight enough. If your dough feels like it’s fighting you, it’s actually a sign that the gluten is strong you just need to give it time to relax.
Another common issue is the "flat" bagel. This typically occurs if the water bath isn't hot enough or if the bagels over proofed before hitting the water. If they sit too long after shaping, the air bubbles become too large and collapse when they hit the heat.
Aim for a "just puffy" look rather than a doubled in-size look for the second proof.
Why Your Bagels Deflated
This usually happens because the dough was handled too roughly after the boiling stage. Once they come out of the water, they are at their most vulnerable. Move them quickly but gently to the baking sheet.
If they sit in the water too long (over 2 minutes), the internal structure weakens and they won't have the "spring" needed for the oven.
| Problem | Root Cause | Solution |
|---|---|---|
| Bagels are too soft | Too much water in dough | Stick strictly to the 275ml measurement; don't eye ball it |
| Skin is matte/dull | No baking soda in water | Ensure the water bath is alkaline to promote the Maillard reaction |
| Bottoms are burnt | Sugar in seasoning | Use a double baking sheet or move the rack to a higher position |
Common Mistakes Checklist
- ✓ Never skip the malt it is the soul of the New York flavor profile.
- ✓ Don't overcrowd the boiling pot; 3 bagels at a time is the limit for a standard pot.
- ✓ Pat the bottom of the bagels on a dry towel for a split second after boiling to prevent soggy bottoms.
- ✓ Ensure your oven is fully preheated for at least 30 minutes to get that initial "oven spring."
- ✓ Use a kitchen scale for the flour; "cups" are too inconsistent for this stiff dough.
Adjusting Your Batch for Small Brunches or Big Crowds
If you want to scale this york bagels recipe down for a solo treat, you can easily halve the ingredients. For the yeast, since half a packet is awkward, I recommend using 1.25 tsp and keeping the proofing time the same. Use a smaller pot for the boil to save on malt syrup, but keep the boiling time identical.
When scaling up for a party (doubling or tripling), do not simply double the yeast. Use 1.5x the yeast for a double batch to avoid an overly "beery" flavor. You’ll need to work in batches for the kneading unless you have a commercial grade mixer.
I find it’s better to make two separate doughs than one massive one that might overheat your machine.
- For the Stiff Dough: If doubling, increase the kneading time by 3-4 minutes as the sheer mass of dough takes longer to develop gluten.
- For the Boiling Liquid: You don't need to double the water, just make sure there’s enough depth (about 4 inches) for the bagels to float freely.
- Baking Large Batches: If using two racks in the oven, rotate the pans halfway through to ensure even browning.
Debunking Ancient Bread Legends and Exploring Flavor Variations
There is a long standing myth that you can only make a real New York bagel using New York City tap water because of the specific mineral content. While the low calcium and magnesium levels in NYC water do help soften the gluten slightly, you can replicate this by using filtered water at home.
The technique the low hydration and the malt boil is far more important than the zip code of your faucet.
Another myth is that "egg bagels" are just regular bagels with yellow food coloring. In reality, a true egg bagel replaces some of the water with egg yolks, which adds a rich, fatty crumb and a softer texture. If you want to try this, reduce the water by 50ml and add two large egg yolks.
The Sweet Cinnamon Twist
To turn this into a breakfast dessert, add 1 tbsp of cinnamon and 50g of raisins to the dry mix. You’ll need to increase the water by about 10ml because the raisins will soak up some moisture. These smell incredible while baking and pair beautifully with a honey walnut cream cheese.
Transitioning to Sourdough
If you have a mature starter, you can swap the instant yeast for 100g of active starter. You'll need to reduce the flour by 50g and the water by 50ml to keep the hydration consistent.
Keep in mind that sourdough bagels require a much longer bulk fermentation usually 8-12 hours in the fridge to develop that signature tang.
Maintaining Freshness and Repurposing Every Single Everything Crumb
Bagels are notorious for going stale quickly because of their low moisture content. For the best experience, eat them within 6 hours of baking. If you have leftovers, do not store them in the fridge! The refrigerator actually accelerates the staling process (retrogradation of starch).
Store them in a paper bag at room temperature for 24 hours, or move them to a plastic bag if you live in a very dry climate.
To freeze, slice the bagels before putting them in the freezer. This allows you to pop a frozen half directly into the toaster without needing to defrost the whole ring. They stay perfect in the freezer for up to 3 months. To reheat, a quick toast is all you need to bring back that "shatter" crust.
For zero waste, those leftover "everything" crumbs at the bottom of the bag are gold. Toss them with a little melted butter and use them as a crunchy topping for a mac and cheese or a savory salad. If a bagel does go rock hard, don't toss it.
Slice it thin, brush with olive oil, and bake at 300°F until crispy to make the best bagel chips you've ever had.
Culinary Partners That Transform Your Bagel Into a Masterpiece
The beauty of this bagels recipe is its versatility. For a classic experience, you can't go wrong with a thick "schmear" of full fat cream cheese and high-quality smoked salmon. If you're feeling adventurous, try using these as the base for a How to Make recipe — the structural integrity of the bagel holds up perfectly to the juicy corned beef and sauerkraut.
If you enjoy the process of shaping dough, you might also find a lot of joy in my Sourdough Baguette Recipe, which uses a similar focus on crust development. For a heartier meal, use these bagels to build a Classic New York Style recipe by topping a toasted bagel with chopped beef and melted cheese.
The contrast of the salty everything seasoning against a sweet scallion cream cheese is a flavor map that never gets old. Whether you go savory with capers and red onion or sweet with a simple slab of salted butter, the key is the bagel itself.
Once you've mastered the boil and the bake, you'll never look at a grocery store bag the same way again. Trust me, your kitchen is about to become the best deli in town.

Recipe FAQs
What is the secret to New York bagels?
High protein flour and an alkaline boil. The secret lies in developing a stiff dough that yields a dense interior, followed by a brief boil in water often treated with malt syrup or baking soda to set the crust.
What makes it a New York style bagel?
A dense, chewy interior with a thin, blistered, shatter crisp crust. This texture is achieved through a low-hydration dough and the crucial pre-bake stage where the exterior starches gelatinize in hot water.
How is a New York bagel different from a regular bagel?
Regular bagels are often steamed or baked immediately, resulting in a softer, breadier texture. New York style demands boiling first, which locks in moisture and creates that signature resistance to the bite.
What makes a great NYC bagel?
The balance of chewiness and crust integrity is paramount. Mastering the sensory cues of dough handling especially during shaping and the flash boil is key to achieving that authentic, malty flavor profile.
Is it true I must use barley malt syrup for authenticity?
No, this is a common misconception, but highly recommended. Barley malt provides the specific sugars and pH shift that accelerates browning and imparts the classic, deep toasted aroma you expect from a true NYC bagel.
How do I prevent my bagels from collapsing after boiling?
Transfer them quickly and gently after the boil, aiming for only 30 60 seconds per side. If you enjoyed controlling the gluten strength in this recipe, see how the same tension principles apply when preparing dough for our NY Pizza Dough: The Authentic Cold Ferment Recipe for Snappy Crust.
Can I substitute high protein flour if I want a slightly richer flavor?
Yes, you can substitute up to 25% of the flour with eggs for richness, but it changes the texture. Reducing the water slightly is necessary to compensate for the added liquid from the egg yolks, similar to how you adjust moisture when making a rich spread like our The Best Homemade Reuben Sandwich with Tangy Russian Dressing.
Authentic New York Bagels

Ingredients:
Instructions:
Nutrition Facts:
| Calories | 284 kcal |
|---|---|
| Protein | 9.8 g |
| Fat | 2.2 g |
| Carbs | 55.8 g |
| Fiber | 2.4 g |
| Sugar | 3.1 g |
| Sodium | 645 mg |
