Bake Creamy Custard Tarts - Delightful Nata

- Bring Delight to Your Kitchen: Bake Creamy Custard Tarts - Delightful Nata
- Your Go-To Guide for Essential Ingredients
- The Art of Professional Cooking: Essential Strategies for Success
- Pro Tips & Secrets for Baking Delightful Nata
- Perfect Presentation: Making Your Tarts Shine
- Storage & Make-Ahead: Keeping it Fresh
- Creative Variations: Shake Things Up
- Complete Nutrition Guide: Know Your Treat
- Expert FAQ Solutions: Your Questions Answered
- Wrapping It Up: Go On, Get Baking!
- 📝 Recipe Card
Bring Delight to Your Kitchen: Bake Creamy Custard Tarts - Delightful Nata
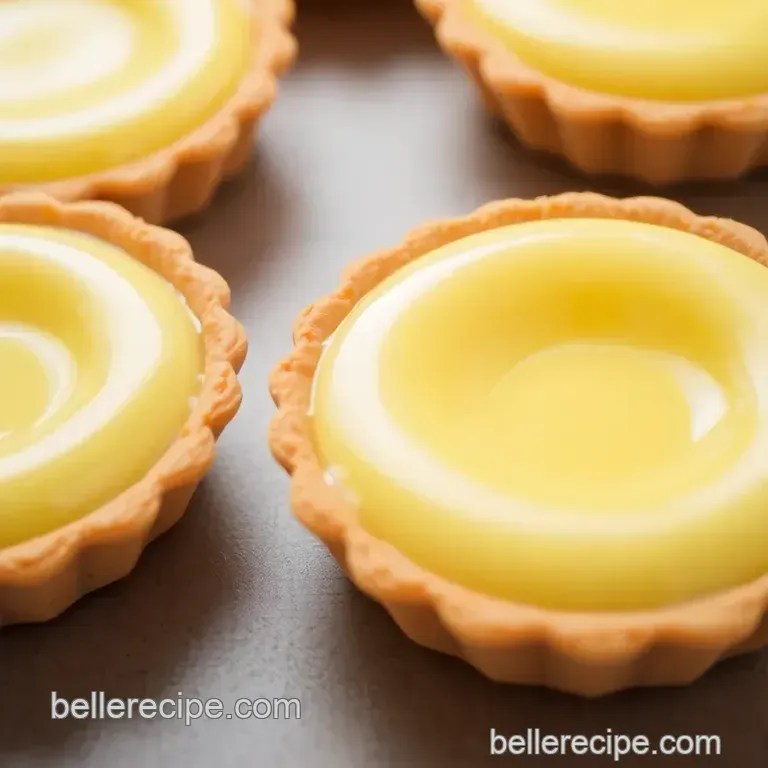
Oh my gosh! have you ever tried a portuguese dessert that just makes your heart skip a beat? i remember the first time i bit into a pasteis de nata at this little café in lisbon.
The crust was so flaky , the custard was rich and creamy, and that touch of caramelization on top pure bliss! i couldn't help but think, “i need to recreate this at home.
” so here we are, diving into how to bake creamy custard tarts - delightful nata .
A Little Backstory
These buttery little gems originated from the belem district of lisbon, almost by accident. nuns were whipping up recipes, and voilà the creamy custard tart was born! fast forward to today, and they’re all the rage not just in portugal but everywhere you look.
From coffee shops to fancy restaurants, everyone loves these egg custard tarts . it’s like having a slice of history with every bite.
Honestly, if you're worried about how tough it might be, rest easy this recipe is marked medium in difficulty. sure, you've got to make some homemade custard and a flaky pastry shell, but hey, think of the bragging rights you’ll have!
plus, it takes about an hour to get it all done (not counting chilling time).
Perfect for a weekend project, i’d say!
Why You’ll Love These Tarts
First off, they’re a treat for your taste buds. the rich vanilla lemon custard is balanced so well; it's sweet without being overwhelming.
Plus, they pack in some health benefits. with milk, eggs, and a smidge of sugar, they’re not just delicious but kinda good for the soul too.
That caramelized top? let’s just say it'll make you feel like a gourmet chef. and the best part? these tarts are incredibly versatile.
Whether you’re prepping for a cheerful brunch, hosting a dinner party, or just want a delightful after dinner treat, they fit right in.
Unlike some cream filled pastries , these can be served warm or chilled, so they’re perfect for any occasion.
You can even have fun with custard tart variations ! try a fruity twist with some fresh berries or whip up a chocolate custard tart the possibilities are endless.
Seriously, you could get lost in a world of gourmet dessert ideas with these tarts as your base.
The Lowdown
Now let’s talk about costs. this recipe can yield 12 tarts for a relatively low investment, especially when comparing it to many other dessert options.
Those beautifully crafted sweet pastry dough and rich custard filling won’t break the bank. it's a budget friendly way to impress your friends or family with your baking skills!
And speaking of family, this could be a fun project to do with the kiddos. imagine them rolling out dough and pouring in that creamy custard it’s a recipe you can all make lasting memories around.
Remember to show them those key baking tips for tarts, like chilling the dough and keeping an eye on that golden brown top.
So, ready to dive into the details? Let’s gather our ingredients and get this party started. Stay tuned for the next section, where I’ll break down the simple ingredients you'll need to recreate these heavenly egg custard tarts right at home!
Your Go-To Guide for Essential Ingredients
Alright, friends! let's break down the essential ingredients you need to whip up some scrumptious baked goodies like bake creamy custard tarts - delightful nata those portuguese desserts that are just crying out to be devoured!
sure, you could just grab anything off the shelves, but knowing your ingredients makes all the difference.
Let's dive in!
Premium Core Components
Before we even think about mixing things, let’s chat about the basics.
Detailed measurements: for the best results, you'll need 1 ½ cups of all-purpose flour (that’s about 190 grams ) and ½ cup unsalted butter ( 115 grams ).
It's super important to be precise, especially when dealing with that flaky pastry shell!
Quality Indicators: Always look for fresh eggs (bright yolks are key), and your butter should be cold not soft, but firm to the touch. Trust me; skip past the outdated stuff!
Storage guidelines: keep your flour in a cool, dry place. most of the ingredients have a decent shelf life, but keep an eye on those eggs.
They’re usually good for about 3-5 weeks .
Freshness tips: when picking up eggs, do the shake test if you don’t hear ‘splosh,’ you’re golden! and, buddy, when it comes to that lemon zest ? go fresh! it elevates the flavor in your custard tart recipe .
Signature Seasoning Blend
Flavor is the heart of any good dessert.
Essential Spice Combinations: While the classic vanilla is a must (trust me, you want that aroma mixed into your rich custard filling), a little hint of lemon zest takes it to the next level!
Herb Selections: Believe it or not, a sprig of rosemary or a pinch of nutmeg can add a unique twist if you’re feeling adventurous.
Regional Variations: Depending on where you’re at, consider mixing up your flavors. How about a coconut custard filling ? It's a tropical take!
Smart Substitutions
We’ve all been there you start a recipe, only to realize you’re missing an ingredient. No sweat!
Common Alternatives: No heavy cream? Use half and-half or even coconut cream for that creamy texture, especially if you wanna switch things up with a chocolate custard tart .
Dietary Modifications: dairy-free? Almond milk works beautifully! And for sugar alternatives, coconut sugar’s your go-to.
Emergency Replacements: If you’re out of eggs for that rich custard filling, a flax egg can do wonders if you're in a pinch.
Kitchen Equipment Essentials
Alright, let’s talk tools.
Must have tools: you really wanna invest in a good mixing bowl (because who wants to clean up flour everywhere?), a whisk , and a solid rolling pin for that perfect sweet pastry dough.
Alternative Equipment: No tartlet pan? Use a muffin tin! Just make sure to watch the cooking time, as they might bake quicker.
Preparation Tips: Always flour your surface when rolling out dough, or you’ll be peeling it off like a bad facial!
Storage Solutions: After you’ve whipped up those egg custard tarts , let 'em cool and pop them in the fridge if not devoured immediately; they’ll keep well for a couple of days.
You know what’s super exciting about all this? once you've got your ingredients and tools sorted, you're well on your way to creating something amazing.
Just imagine that golden brown finish on those flaky crust baking wonders when you pull them from the oven.
Next up, let’s dive into the instructions for how to bake these Delightful Nata and create a memory that’ll stick around longer than the leftover crumbs! Get your aprons ready, 'cause here we go!
The Art of Professional Cooking: Essential Strategies for Success
Cooking isn't just about throwing ingredients in a pot; it's a symphony of flavors and techniques that can take a meal from basic to extraordinary.
Today, i'm diving into some professional cooking methods that can elevate your kitchen game, especially when you’re looking to bake creamy custard tarts - delightful nata .
Whether you're a hobbyist or just someone who enjoys whipping up a killer dessert, following these steps will get you there without a hitch.
Essential Preparation Steps
First things first! before you embark on a cooking adventure, mise en place is your best friend. it’s a fancy french term that simply means “everything in its place.
” measure out your flour, sugar, and butter beforehand. this not only speeds up the cooking process but ensures you don’t miss an ingredient.
Oh my gosh, have you ever been knee deep in a recipe only to realize you forgot the sugar? not fun!
Next, let's talk time management tips . set a timer while you prep your ingredients. for the custard filling, you’ll need to watch the clock like a hawk .
You'll be cooking it on medium heat for about 5- 7 minutes . paying attention to timing helps avoid overcooking and keeps everything flowing smoothly.
Organization is key too. keep your workspace clutter free. use small bowls for each ingredient, so you don’t have a chaotic kitchen disaster on your hands.
And don’t forget those safety considerations ! always have a fire extinguisher handy, and be cautious with hot surfaces and equipment.
step-by-step Process
Alright, time to get our hands a little dirty! Let’s get into the nitty gritty with clear, numbered instructions. Here’s your roadmap.
Prepare the dough: combine 1 ½ cups of all-purpose flour, ½ cup of cold, cubed unsalted butter, ¼ cup of sugar, and a pinch of salt.
Chill this for 30 minutes for the perfect flaky crust.
Roll It Out: Preheat your oven to 375° F ( 190° C) . Once chilled, roll out your dough to about 1/8 inch thick and cut circles to fit your muffin tin.
Make the filling: heat 1 ½ cups milk and 1 cup heavy cream until steaming. meanwhile, whisk together your sugar, 1 tablespoon cornstarch, 3 egg yolks, and hints of vanilla and lemon zest.
Combine them and heat until thickened, about another 5- 8 minutes .
Fill and bake: pour your silky custard into each pastry shell, filling just below the top. pop them in the oven and bake for about 20- 25 minutes until golden brown.
Just keep your eyes on them look for that caramelized top.
Expert Techniques
Now you’re in the zone! let’s go pro with some expert techniques. when rolling out dough, don’t be afraid to use a little extra flour to prevent sticking; you want to ensure that flaky crust is perfection .
For your custard, remember to strain it through a fine mesh sieve before pouring it into the shells. this guarantees a smooth custard texture sans any lumps.
Final quality control? after baking, let those beauties cool slightly before digging in. trust me, a little cooling helps the flavors settle into their full glory, making for great tart variations .
Feel free to experiment with flavors like tropical coconut or a rich chocolate custard!
Success Strategies
As with all things cooking, there are common traps to avoid. don’t rush through the chilling of your dough patience is essential for that perfect flaky pastry shell .
And keep an eye on your bake time; those custards can go from perfectly golden to burnt in a blink.
Quality assurance is a theme here! after baking, the best way to guarantee your tarts are on point is to taste a few variations of your custard before pouring.
Use different flavors to see which ones really zing!
Making ahead? easy! you can prep the dough a day in advance and store it in the fridge. this gives you that spontaneous flavor party you were looking for without all the morning chaos.
Additional Information...
If you’re intrigued by these custard tart recipes , you’re in for a treat. not only are you about to experience the culinary elegance of classic portuguese cuisine with these custard tarts, but you'll also be memorizing the techniques that can be used in a variety of gourmet dessert ideas .
So, buckle up and get ready to impress your taste buds. happy baking, friends!
Pro Tips & Secrets for Baking Delightful Nata
Alright, my fellow kitchen adventurers! If you're ready to Bake Creamy Custard Tarts - Delightful Nata , let me share some super practical tips and tricks to elevate your game.
Inside Chef’s Kitchen: Personal Insights
First off, i gotta tell ya, the egg yolk custard filling is where the magic happens. take your time heating it up.
You don’t want scrambled eggs in your tarts! seriously, whisk that mixture gently and watch it thicken like a pro.
Time Saving Techniques
You’ve got a busy life, right? so, consider making your sweet pastry dough ahead of time. you can chill that sucker overnight.
Just make sure it’s wrapped tight, like a burrito, so it doesn’t dry out. nobody wants a dry crust trying to crash your dessert party.
Flavor Enhancement Tips
Wanna take that vanilla lemon custard to the next level? just a pinch of nutmeg or cinnamon can work wonders.
It’ll have your friends saying, “what is this sorcery?” oh, and don’t skimp on fresh ingredients! real lemon zest makes a world of difference, trust me.
Presentation Advice
Now, let’s talk aesthetics. a well presented tart can go from “meh” to wow in seconds. dust that caramelized top with powdered sugar or drizzle some flavorful dessert sauces around the plate.
A pop of fresh mint or berries can bring some great color contrast, too.
Perfect Presentation: Making Your Tarts Shine
Okay, once your egg custard tarts are out of the oven, it’s time for the finishing touches.
Plating Techniques
Grab a nice plate, and let’s get creative! center a tart on the plate and sprinkle on some crushed pistachios for a crunchy texture, or place a few fresh raspberries around it.
It’s all about making it look mouthwatering!
Garnish Ideas
How about a dollop of light whipped cream topping ? so simple yet so effective. just don’t go overboard, or you’ll lose that lovely custard flavor.
A thin ribbon of chocolate silk can also contrast beautifully against the creamy filling.
Color Combinations
Mix ye olde colors; it’s crucial! The golden brown of your tarts against vibrant fruits makes your dessert pop. Play with cherries, blueberries, and greens just a little will go a long way.
Visual Appeal Tips
Trust me, we eat with our eyes first. Arrange everything neatly, and maybe even drizzle a little of that vanilla lemon custard sauce on the plate for a splash of flair.
Storage & make-ahead: Keeping it Fresh
Now, if you’re like me and can’t resist having these tarts on hand, let’s talk storage options.
Storage Guidelines
If there are any left (doubtful!), store them in an airtight container. Honestly, they’re best eaten fresh, but I get it life’s busy.
Preservation Methods
Pop ‘em in the fridge if you plan to keep them longer than a day. they’ll last about three days in there.
Just know that the crust won’t be as flaky after chilling.
Reheating Instructions
To reheat, toss them in a preheated oven at 350° F for about 10- 15 minutes. This brings back that warm, cozy feel and gets the custard nice and creamy again.
Freshness Duration
Try to eat your tarts within three days for optimal freshness. Beyond that, they might lose that fab texture we love!
Creative Variations: Shake Things Up
Feeling a little adventurous? Let’s tweak that classic tart recipe!
Flavor Adaptations
How about a tropical coconut tart recipe ? Swap half the cream for coconut milk. It’s a vacation for your taste buds!
Dietary Modifications
Need it dairy-free? Use almond milk and vegan butter. They still come out rich and delightful, I promise!
Seasonal Twists
In fall, stir in some pumpkin puree for a seasonal egg custard tart that’ll have your friends raving.
Regional Variations
You can even try a chocolate custard tart! Just mix melted dark chocolate into your custard. It’s like a rich dessert hug.
Complete Nutrition Guide: Know Your Treat
Let’s break it down. While Delightful Nata isn’t exactly health food, it can be enjoyed in moderation.
Detailed Breakdown
A single tart has about 210 calories . Not too shabby for a homemade custard treat!
Health Benefits
Hey, eggs and dairy give you protein and calcium, and there’s joy in every bite. Remember to savor it desserts are for moments of happiness.
Dietary Considerations
Keep in mind anyone with allergies. You can easily swap things out as needed.
Portion Guidance
I know they’re addictive, but try to limit yourself to one or two. Pair them with coffee for the ultimate dessert experience!
Expert FAQ Solutions: Your Questions Answered
Got questions? I’ve had ‘em too.
Common Questions
“Why is my custard watery?” Simple! You probably didn’t heat it long enough. Give it a little more time!
Troubleshooting Guide
If the crust falls apart, it’s likely too crumbly. A bit more water during mixing can save the day.
Success Tips
Always strain your custard before pouring it into the shells. Clumps are not the vibe we’re going for!
Variations Explained
Feel free to mix flavors; that's the beauty of these tarts! Vanilla, chocolate, coconut choose your adventure.
Wrapping It Up: Go On, Get Baking!
So there you have it! with these tips, you’re ready to bake creamy custard tarts - delightful nata like a seasoned chef.
Don’t stress over the details; just enjoy the process. cooking is meant to be fun! get your ingredients together, gather your friends, and let’s whip up some magic in the kitchen.
Happy baking!
Bake Creamy Custard Tarts Delightful Nata
Ingredients:
Instructions:
Nutrition Facts:
| Calories | 210 |
|---|---|
| Protein | 3g |
| Fat | 12g |
| Carbs | 22g |
| Fiber | 0g |
| Sugar | 9g |
| Sodium | 55mg |
