Delicious Pan Pita: a Quick and Easy Guide to Middle Eastern Flatbreads
- Essential Ingredients Guide for Pan Pita
- Delicious Pan Pita: A Quick and Easy Guide to Middle Eastern Flatbreads
- Pro Tips & Secrets for Pan Pita Perfection
- Perfect Presentation of Your Pita
- Storage & Make-Ahead Hacks
- Creative Variations to Spice Things Up
- Complete Nutrition Guide for Your Pan Pita
- Frequently Asked Questions
- 📝 Recipe Card
Oh my gosh! is there anything better than fresh, warm bread straight from the pan? seriously, nothing brightens up a meal like the smell of pan pita sizzling away in the kitchen.
I remember the first time i made pan pita. it was that classic moment: late afternoon, my friends were coming over, and i thought, “what could go wrong with making some homemade flatbread?” spoiler alert: everything! but hey, that's how you learn, right?
The joy of rolling out that dough and seeing those little circles puff up in the frying pan is pure magic!
And like many things in life, pan pita has some deep roots in history. this darling of the middle eastern cuisine has evolved over time, becoming a staple not just in homes, but on restaurant menus across america.
Think of that warm, soft pita wrapping around some spicy chickpeas, or even better, paired with a tzatziki dip or your grandma’s famous hummus recipe.
You'll see why humankind has fallen head over heels for this versatile treat.
Now, if you’re anything like me, you might be thinking, “how on earth do i make this?” not to worry; making pan pita is a breeze! it's relatively simple, even for those of you who might break a sweat at the thought of baking.
You’ll need around 1 hour and 15 minutes from start to finish (including a little time for the dough to rest).
Plus, it’s an easy bread recipe that yields 6-8 pitas . talk about a crowd pleaser without breaking the bank!
Recipe Overview
So let’s take a quick stroll down memory lane! like so many delicious things, pan pita comes from the heart of the middle east.
This flatbread isn’t just any bread; it’s been nourishing folks for centuries. the modern spin we enjoy today is often served in homes and restaurants, making it a popular choice for a quick snack or a delightful dinner base.
And let’s be real, who doesn’t love a good bread for their wraps?
There's something so satisfying about making your own bread at home. not only is it healthier than store-bought options, but it also packs a flavor punch that many store brands can’t match.
Plus, with minimal ingredients (mostly pantry staples), you won’t be shelling out your paycheck to make a batch of easy dough recipes .
Key Benefits
Making pan pita at home has a ton of benefits! for starters, it's healthier than most bread options. you get to control what goes in, and you can tweak it to fit your dietary needs.
For instance, if you're seeking vegan pita options , just remove any dairy ingredients (though, spoiler alert, this recipe doesn't have any!).
It's also perfect for special occasions. imagine a backyard bbq with friends. you can serve these freshly cooked pitas as party appetizers, maybe with some hummus recipes or a zesty dip.
Another great idea? stuff them with grilled meats or veggies for a perfect mediterranean meal pairing!
You’ll be surprised how versatile these little breads can be. from breakfast wraps with eggs to spicy falafel snacks for a midday treat, they fit right into any meal.
Speaking of which, think of all the different pita stuffing ideas you can try! seriously, the options are endless.
By the way, don’t let the idea of ‘yeast dough’ scare you off! Once you understand the bread leavening tips , it’s all a piece of cake or, should I say, flatbread?
So, are you ready to dive into making your very own pan pita ? let’s move on to what you’ll need to get started.
You'll find that gathering the ingredients is half the fun, and soon you'll be enjoying the delightful aroma filling your home!
Essential Ingredients Guide for Pan Pita
Making pan pita , that delightful middle eastern flatbread, is so much easier when you know what you're working with.
Let’s break down the essentials to elevate your pita game, from the ingredients to the kitchen tools. trust me, you’ll be whipping up authentic pita bread in no time!
Premium Core Components
First up, you gotta nail the ingredients . Here’s what you need for a pita bread recipe that’ll impress:
- 3 cups (375g) all-purpose flour
- 1 teaspoon (5g) salt
- 1 teaspoon (4g) sugar
- 2 teaspoons (7g) instant yeast
- 1 tablespoon (15ml) olive oil
- 1 cup (240ml) warm water (about 110° F or 43° C)
Quality indicators for each ingredient ? easy! make sure your flour is fresh and free from lumps. check your yeast's expiration date because old yeast will ruin your soft pita dreams.
Fresh olive oil should smell fruity not musty!
For storage guidelines , keep unopened flour in a cool, dark place. once opened, it can last up to six months in the pantry or a year in the fridge.
Yeast can hang out in the fridge too, but once opened, it should be used within four months.
Signature Seasoning Blend
While pan pita is fabulous on its own, adding a little flair can take it to the next level. try blending in herbs like oregano or thyme into your dough for a mild yet tasty kick.
Flavor enhancers ? think garlic powder or smoked paprika!
Smart Substitutions
Life happens, ya know? so, let’s talk about smart substitutions . if you run out of all-purpose flour, you can use whole wheat flour instead.
It’ll create a heartier, chewy texture bread that’s just as delish. for a vegan pita option , skip the olive oil and replace with aquafaba from canned chickpeas works like a charm!
If you’re in a pinch with no yeast, you can whip up a no-knead bread version using baking powder. Not quite the same, but hey, desperate times call for creative measures, right?
Kitchen Equipment Essentials
Now, let’s chat gear. Here’s a kitchen equipment essentials list for your pita making journey:
- Mixing bowl: For combining dough.
- Rolling pin: A must for flattening out your pita!
- Non-stick frying pan or skillet: Your best friend for cooking flatbreads.
- Clean kitchen towel: To keep those pitas warm and soft after cooking.
If you don’t have a rolling pin, a wine bottle works great in a pinch bonus points if it’s a good vintage!
Quick Cooking Tips
Here are some quick cooking tips that have saved my bacon (or my pita, rather):
- Resting time is key! Letting the dough rest for an hour develops the gluten, helping those pitas puff up beautifully.
- Monitor that heat! If your frying pan is too hot, you’ll end up with burned pitas that didn’t stand a chance at puffing up.
- Check that temperature control and adjust if needed, because no one wants burnt bread, am I right?
Conclusion
Getting these essential ingredients and tips down will massively up your pita game. it’s all about balance and a dash of creativity.
Next up, i’ll guide you through the step-by-step pita instructions that will have you crafting fresh bread servings like a pro.
So grab those ingredients and let’s get baking; the world of mediterranean cuisine awaits you!
Keep your mind open, your flour handy, and let’s dive into creating those delicious pan pitas !
Delicious Pan Pita: A Quick and Easy Guide to Middle Eastern Flatbreads
Making pan pita is like rolling up a slice of the middle east right in your kitchen! i mean, who doesn’t love bread that’s chewy, warm, and oh-so-versatile? a quick homemade pita recipe can take your meal game to the next level, whether you're pairing it with hummus or using it as a wrap for your favorite fillings.
Yum!
Essential Preparation Steps
Mise en place: before you even think about mixing that dough, get everything out. flour, salt, water, and yeast should be ready to roll.
Seriously, nothing is worse than realizing you forgot to grab an ingredient when you’re knee deep in dough.
Time management: think of this like a cooking show you need to be on your toes. first, let that yeast do its thing while you measure out your dry ingredients.
You’ll save time and avoid doubling back.
Organization Strategies: Clean as you go, trust me! After adding each component, put the empty containers away. A tidy workspace will keep your mind clear for the important stuff like watching for that perfect golden char on your pitas!
Safety Considerations: Watch that warm water temperature! Aim for about 110° F ( 43° C) . Too hot, and you’ll kill your yeast nobody wants that flat result, right?
Step-by-step Process
Alright, let’s get down to business. Here’s how to whip up those delicious pitas, step by step.
Activate yeast: in a bowl, mix 1 cup (240ml) of warm water with 1 teaspoon (4g) of sugar and 2 teaspoons (7g) of instant yeast.
Let it sit for 5 minutes till it gets all frothy.
Mix dough: in a large bowl, whisk 3 cups (375g) of flour and 1 teaspoon (5g) of salt. make a little well in the center and pour in that frothy yeast mix plus 1 tablespoon (15ml) of olive oil.
Stir until it forms a mess oops, i mean a dough!
Knead Dough: Turn your dough onto a floured surface and knead for about 8- 10 minutes until smooth and elastic. Seriously, it's a workout!
Rest dough: put the dough into an oiled bowl, cover it with a damp cloth, and let it rise for 1 hour .
Time to watch some netflix while it does its thing.
Shape Pitas: Once the dough’s doubled, punch it down (yes, it’s satisfying, isn’t it?) and divide it into 6-8 equal balls . Roll each ball into about ¼ inch thick disks.
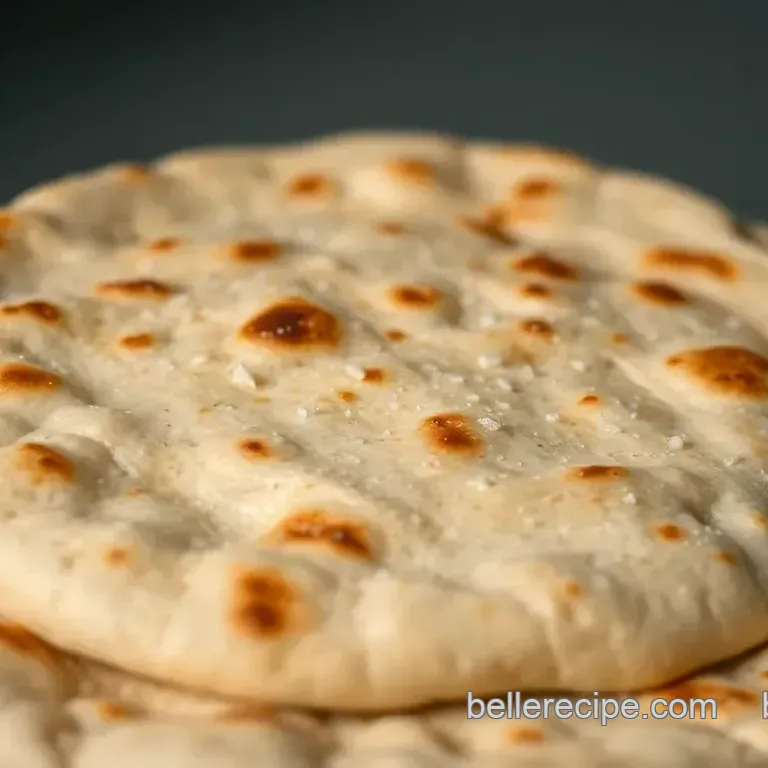
Cook pitas: heat a non-stick frying pan over medium high heat. lay those beauties on the skillet and cook for 2- 3 minutes on each side until they puff and turn golden.
Store Pitas: As each pita finishes, wrap it in a clean towel to keep it soft and warm.
Expert Techniques
Now that you’ve got the basics down, let’s level up.
Critical steps explained: the key to a perfect pita is temperature control . your skillet shouldn't be too hot or cold.
The goal is to create that steam pocket inside for the charming puff!
Quality Checkpoints: After cooking, check those pitas! They should be puffy and fluffy. If they aren’t, let’s just call them flatbreads and try again next time!
Troubleshooting Tips: If they burn, lower the heat. If they don’t puff, either your dough was too thick or the pan wasn’t hot enough. No worries, you'll nail it next time!
Success Strategies
To avoid any hiccups, here are some common pitfalls and how you can sidestep them.
Common Mistakes to Avoid: Don’t skip the resting stage. It’s what gives you that delightful chewy texture.
Quality Assurance Tips: If your pitas aren’t tender, you might’ve overcooked them. Keep an eye on ‘em!
Perfect Results Guide: Trust your instincts. If it looks good and smells divine, you’re on the right track!
make-ahead Options: You can freeze these flatbreads! Just wrap them tightly and they’ll be ready when you want an easy meal. Perfect for quick snacks!
So grab your ingredients and get to it your very own pan pita awaits! and let’s be real, once you get the hang of this, you’ll be rolling out homemade dips and creating epic wraps in no time.
Additional Information
As you dive deeper into the art of flatbread cooking , remember this: every kitchen adventure comes with a few lessons.
You've got this! enjoy experimenting with flavors, fillings, and dips. happy cooking, party planners and bread makers alike!
Pro Tips & Secrets for Pan Pita Perfection
When i first ventured into the world of making pan pita , i had my fair share of mishaps. i mean, who knew flatbreads could be so tricky? but don’t worry, i’m here to spill the secrets that’ll have you looking like a pro in no time.
Resting is key! letting that yeast dough rest is super important. this is how you achieve that soft, chewy texture that makes middle eastern flatbreads so addictive.
Go figure, right? just cover it up and walk away for an hour totally worth it!
Time savers & flavor boosts: want to spice things up? toss in some herbs or spices into your dough for a flavor infusion that’ll make your taste buds sing.
A pinch of garlic powder? yes, please! or if you really want to get fancy, a drop of olive oil can add a delightful richness.
But hey, if you’re short on time, don’t sweat it. Roll that dough a bit thinner to speed up cooking time!
Perfect Presentation of Your Pita
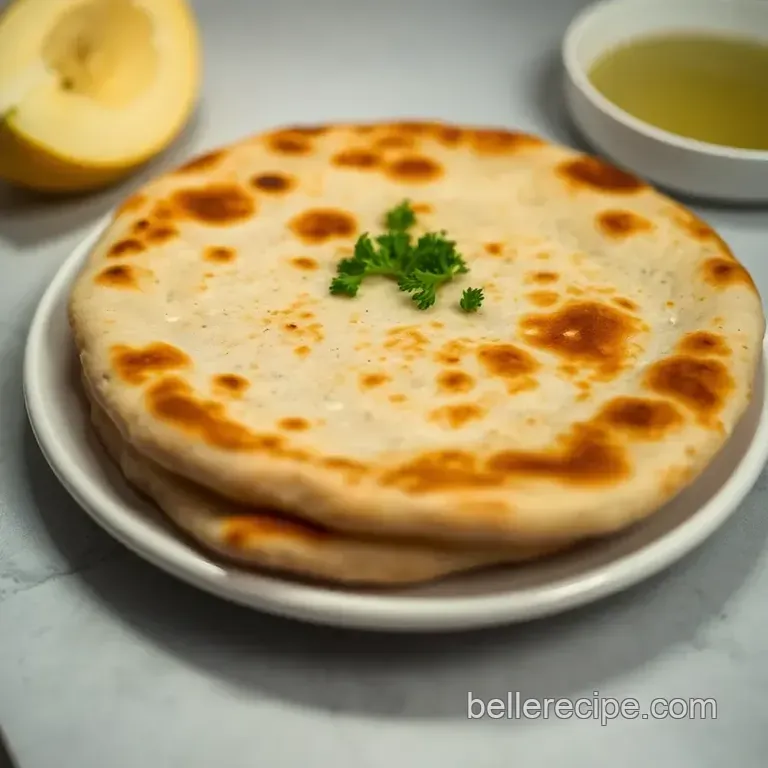
After devouring one or two, you’ll want to make your pan pita look as good as it tastes. Plating is key, friends!
Garnish like a chef: drizzle some olive oil on top and sprinkle a dash of sea salt before serving. this will give a beautiful shine.
You could also toss on some chopped herbs to add a pop of color and freshness. who doesn’t love a splash of green?
When arranging your pitas for serving, stack them neatly, and maybe even place a colorful dish of hummus or tzatziki dip beside them. Instant party vibes!
Storage & make-ahead Hacks
Let’s face it: Sometimes you just want to make a big batch of homemade pita and enjoy it at your leisure. So, how to store all this deliciousness?
Keep it fresh: place any leftover pitas in an airtight container lined with parchment paper. they freeze surprisingly well! just pop them in the toaster or a skillet to reheat.
And trust me, there's nothing quite like freshly reheated pan pita i dare say, it rivals the original!
If you’ve got a little flexibility in your day, you can also prep the dough ahead. after kneading, just let it rise, then punch it down and refrigerate until you're ready to cook.
How easy is that?
Creative Variations to Spice Things Up
Okay, but here’s where you get to flex those culinary muscles! Want to switch things up?
Flavor that fits you: feeling adventurous? play with flavors! add roasted garlic or even some za’atar to the dough. or if you’re like me and live in the midwest, you might want to incorporate some local herbs into your pitas.
If you're looking for dietary modifications , you can definitely swap out half of the all-purpose flour with whole wheat for a heartier bread.
And don’t forget it’s perfectly okay to go vegan here, just use some olive oil or aquafaba instead!
Complete Nutrition Guide for Your Pan Pita
Despite being a bread lover, I always pay attention to what I’m eating. So, let’s break down what makes this dish not just delicious, but also somewhat nourishing:
Each serving of your delightful pan pita has about 180 calories, 5g of protein, and just 4g of fats. it’s a great source of simple carbs, but with a slight tweak like adding more whole grain this bread can be even healthier!
And if you load it up with some fresh veggies and dips, you’re getting a complete meal in no time.
Serving Size Alert: Stick to 1 or 2 pitas per person; it’s easy to go wild around a warm batch!
And look, i get it. making pan pita can seem daunting at first, but once you get into the groove, it’s honestly super simple and fun.
Plus, the compliments from friends and family? totally worth every single second spent in the kitchen. so gather your ingredients and get ready to delve into this satisfying, soft, and chewy flatbread journey! your taste buds like mine will thank you.
And remember, be open to experimenting; that’s where the real fun happens! happy cooking!
Frequently Asked Questions
What is pan pita and how is it different from regular pita bread?
Pan pita is a quick and easy version of pita bread that’s cooked on the stovetop in a frying pan, giving it a lovely char and a soft interior. Unlike conventional pita that’s baked in an oven, pan pita allows for more control over the cooking process and can be made in just a fraction of the time!
How do I know when my pan pita is perfectly cooked?
Your pan pita is perfectly cooked when it puffs up nicely and achieves a golden brown color on both sides. It should take about 2-3 minutes per side over medium high heat. Keep an eye on them to avoid burning a bit like when you’re keeping an eye on your sausages on a summer BBQ!
Can I make pan pita in advance and freeze them?
Absolutely! Cooked pan pita can be stored in an airtight container at room temperature for a day or so, but if you want to keep them for longer, freeze them. Just remember to separate layers with parchment paper before freezing, and they can be easily reheated in a frying pan or microwave later!
What are some tasty fillings or toppings for pan pita?
Pan pita is incredibly versatile! You can fill it with traditional Middle Eastern stuff like hummus, tabbouleh, or grilled chicken. Alternatively, get creative with sweet toppings like Nutella and banana, or even use it as a base for brunch with poached eggs and avocado it's a bit like a breakfast burrito but with a twist!
What should I do if my dough isn’t rising?
If your dough isn’t rising, it may be due to the yeast being expired or the water being too hot or cold. Make sure to use warm water (about 110°F or 43°C), and try to create a warm environment, like placing the bowl in a turned off oven.
If all else fails, don't fret; your pan pita will still taste good, though the texture might be a bit denser!
How healthy is pan pita?
Pan pita can be quite healthy, especially if you adjust the recipe to include whole wheat flour for added fiber. With moderate use of olive oil and a balanced portion size, it makes a great accompaniment to nutrient rich fillings like vegetables and lean proteins.
Just keep an eye on the toppings, as they can add extra calories!
Delicious Pan Pita A Quick And Easy Guide To Mid

