Chocolate-Dipped Vanilla Ice Cream Treats
- Indulgent Delights: The Joy of Chocolate-Dipped Vanilla Ice Cream Treats
- Essential Ingredients Guide: Assembling Your Ice Cream Dream Team
- Professional Cooking Method: Mastering Chocolate-Dipped Vanilla Ice Cream Treats
- Pro Tips & Secrets
- Perfect Presentation
- Storage & Make-Ahead
- Creative Variations
- Complete Nutrition Guide
- Expert FAQ Solutions
- 📝 Recipe Card
Indulgent Delights: The Joy of Chocolate Dipped Vanilla Ice Cream Treats
A Sweet Memory
Oh my gosh, let me tell you about one of my favorite summer memories! i was at a family barbecue, and my cousin brought these chocolate dipped vanilla ice cream treats .
They were icy, creamy, and just exploding with flavor. honestly, it felt like taking a bite of nostalgia! ever since then, i’ve been on a mission to recreate that perfect combo of vanilla ice cream and rich chocolate.
If you’ve ever had a soft spot for easy ice cream desserts , read on, because i’m about to spill all the secrets!
What’s the Big Deal?
Chocolate dipped vanilla ice cream is a classic treat that’s been around for decades. think ice cream bars from your childhood, but even better because you can customize them just the way you like.
It's delicious, fun, and a total crowd pleaser, especially on those hot summer days. full stop!
Now, here’s the scoop: this recipe is super easy . seriously, anyone can do it! you only need about 50 minutes, and that includes time for chilling the ice cream.
The total cost? minimal! you can whip up a batch of these joy bombs for less than what you'd spend at an ice cream shop, and trust me, it yields a satisfying six servings although you might want to double that if your friends are anything like mine!
So Many Perks!
Let’s talk benefits. first off, these treats pack a punch of health benefits too. using vanilla ice cream as your base means you're enjoying calcium and some protein, while the chocolate coating gives you a delightful little dose of antioxidants.
Now i’m not saying these are a health food, but hey, it’s all about balance, right?
Also, special occasions ? these treats are perfect for birthday parties, summer cookouts, or even just as a fun family dessert.
Imagine a diy ice cream bar where everyone can dip and sprinkle their favorites now that’s instagram gold! you could have toppings ranging from nuts to colorful sprinkles; the possibilities are endless, and a lot of fun for kids (and kids at heart!).
And let’s not forget how satisfying that crunch is when you bite into the chocolate shell . it’s way better than just plain ice cream, and a fun twist on your typical dessert options.
Let's Get This Party Started!
Now that i've whetted your appetite, let’s hop into the ingredient section! you’re going to need some vanilla ice cream (because duh), chocolate for that luscious coating, and a little coconut oil or shortening to make everything silky smooth.
Trust me on this no one likes a lumpy chocolate dip!
Get ready to transform your ordinary vanilla ice cream into a frozen dessert masterpiece that will make you the star of any gathering.
Whether you’re enjoying a stay-at-home movie night or throwing a backyard shindig, chocolate covered treats are bound to impress.
So, grab your scoop, and let’s dive into those ingredients! It’s time to make some sweet summer memories, one chocolate dipped scoop at a time!
Essential Ingredients Guide: Assembling Your Ice Cream Dream Team
Hey there, dessert lovers! today we’re diving into the world of vanilla ice cream recipes and, oh boy, are you in for a treat! whether you want to dip vanilla ice cream in chocolate coating or whip up no-bake ice cream desserts , knowing your ingredients is key.
Let’s break down what you need so grab your spoon, and let’s dig in!
Premium Core Components
First off, let’s talk about your premium core components . each ingredient plays its part, so let’s make sure we’re using the best! when it comes to chocolate coating for ice cream , you’re gonna want 8 ounces of semi sweet chocolate .
Use that metric brain: that’s about 225 grams .
Now, quality matters! You want that chocolate to have a nice shine and a smooth melt. Premium chocolate can be pricier, but it’s worth it for the taste.
Storage guidelines ? stash your chocolate in a cool, dry place. and here’s a pro tip: chocolate lasts a ton longer if you keep it wrapped up tight.
After unwrapping, use it within 6 months for the best flavor.
Freshness tips ? Always sniff your ingredients! If something smells funky drop it. Nobody wants that in their ice cream, trust me.
Signature Seasoning Blend
Next up, your signature seasoning blend . sure, vanilla ice cream is delicious on its own, but a sprinkle of sea salt or a dash of cinnamon can elevate your dessert game.
These are excellent flavor enhancers and pair beautifully with chocolate.
If you’re feeling adventurous, how about some strawberries or crushed nuts for an extra crunch? there are tons of regional variations too.
Ever tried adding a bit of coconut ? it turns that vanilla treat into a tropical paradise! you can even swap vanilla for almond extract if you want a fun twist.
Smart Substitutions
Now, we all know life doesn’t always go as planned. maybe you ran out of coconut oil, or someone in your fam is vegan.
No worries! check out these smart substitutions . if you’re out of coconut oil, grab some vegetable shortening it’ll do the trick.
Need a dairy-free option? go for vegan ice cream brands that use almond or coconut milk. your guests will be none the wiser.
For quick fixes, when you're in a pinch , just think about what you’ve got on hand. craving chocolate dipped treats but out of chocolate? how about drizzling some caramel sauce instead?
Kitchen Equipment Essentials
Let’s not forget about our tools! having the right kitchen equipment essentials makes all the difference. you’ll need a solid ice cream scoop the kind that actually scoops and doesn’t throw a fit when you dig in.
If you don’t have a double boiler for melting chocolate, no sweat! just use a microwave safe bowl. just microwave in 30-second intervals while stirring; that’s the best way to avoid seizing and burning.
Chocolate melts like a dream when you’re patient.
And hey, make sure you’ve got parchment paper lined on your baking sheet . It’s a game changer when transferring those little frozen desserts .
Wrapping it All Up
Alright, friend, you’re now equipped with the essential ingredients and tips to create something truly divine. Just imagine biting into that cold ice cream with chocolate shell , a blissful mix of creamy and crunchy yum!
When you're ready to get started, you'll follow the simple step-by-step dessert recipes outlined in our upcoming instructions. before you know it, you’ll be serving up diy ice cream bars that’ll wow the crowd.
So grab those ingredients, and let’s get that party started! trust me; your taste buds are gonna thank you.
Professional Cooking Method: Mastering Chocolate Dipped Vanilla Ice Cream Treats
Alright, my fellow dessert lovers! let’s dig into the world of professional cooking methods think of it like leveling up your kitchen game.
Today, we’re not just making any ordinary treat. we’re going to dip vanilla ice cream in chocolate coating and turn it into something special.
Trust me, this recipe will have you, your fam, and your friends begging for more!
Essential Preparation Steps
Mise en Place Details
First things first. before you even start melting that chocolate, get everything ready. scoop that 1 quart of vanilla ice cream into balls and lay them out on a lined baking sheet.
We don’t want you scrambling for stuff while the chocolate's melting.
Time Management Tips
Try to block out about 50 minutes total for this project 15 minutes for prep and 35 minutes for chilling.
Seriously, set a timer! it’ll help you stay on track.
Organization Strategies
Keep your workspace tidy. Have your ingredients and tools handy. It’ll save you from an ice-cream melting disaster!
Safety Considerations
Oh, and here’s a quick safety tip: when you’re melting the chocolate, watch it closely. it can go from smooth to burnt in a flash.
No one wants to eat a bitter chocolate mess!
Step-by-step Process
Alright, time to get into the nitty gritty. Let’s nail down this chocolate dipped ice cream treat!
Scoop the Ice Cream: Using an ice cream scoop, portion out the vanilla ice cream into ball shapes. Space them out on your baking sheet.
Chill the Ice Cream: Pop that tray in the freezer for at least 30 minutes . This makes sure your scoops are nice and firm.
Prepare the chocolate coating: grab a microwave safe bowl and toss in 8 ounces of chopped semi sweet chocolate with 2 tablespoons of coconut oil .
Melt it in 30-second bursts , stirring in between. we want smooth chocolate, not a clumpy nightmare!
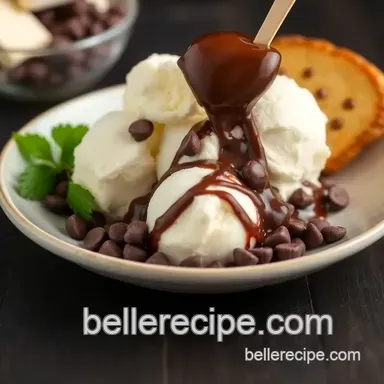
Dip the ice cream: pull those ice cream scoops out of the freezer. dip each one into the melted chocolate, covering it like a warm blanket.
Give it a little shake to let the excess drip off.
Set the Chocolate Coating: Back to the lined baking sheet they go! Want to jazz it up? Sprinkle some crushed nuts on top before the chocolate sets.
Chill Again: Stick that tray back in the freezer for 10 minutes . This will help your chocolate set perfectly.
Expert Techniques
Now, let’s talk about some pro tips.
Temperature Control Points: Remember, the chocolate should stay below 90° F while melting. If it goes too hot, it can seize up no bueno!
Timing Precision: Don’t rush through the chilling steps. If the ice cream isn’t firm enough, the chocolate won’t coat well.
Visual cues for doneness: you’ll know the chocolate is ready when it's shiny and fully melted. if it looks chalky, it’s time to rescue it with a little coconut oil or a splash of cream.
Success Strategies
Avoid some common pitfalls and make your treats perfectly indulgent!
Common Mistakes to Avoid: Don’t dip warm ice cream it’ll melt the chocolate right off. And please don’t skip the chilling time!
Quality Assurance Tips: Keep an eye on your chocolate melting process. Stir frequently, and you’ll avoid burnt bits.
Perfect Results Guide: Make sure you use high-quality chocolate to get luscious, decadent results.
make-ahead Options: You can prep these chocolate covered snacks a week ahead just keep them stored in an airtight container in the freezer. Boom, dessert ready when guests show up!
So there you have it! you can easily whip up these easy ice cream desserts to wow your friends and family.
And honestly, if you want to switch it up, use different flavors like mint chocolate chip or even coffee ice cream for a fun twist.
Now that you’ve nailed the method for making these chocolate dipped treats, stay tuned for the next part, where we’ll dive into Additional Information on flavor combinations, toppings, and even some vegan options! So keep your spatula handy we're just getting started!
Pro Tips & Secrets
Let’s kick off with some of my little secrets that’ll take your chocolate dipped vanilla ice cream treats to the next level.
Trust me, these tips will make you feel like a pro even if you’re just a home cook like me!
First up, time saving techniques . if you want to whip this up without wasting time, make sure your ice cream is at a slightly soft state before scooping.
It’ll save you time when you’re forming those perfect scoops and dipping into that rich chocolate coating. pro tip: only take out one scoop at a time from the freezer.
Trust me, it’ll stay perfectly firm!
Now, let’s get into some flavor enhancement tips . adding a pinch of sea salt to your melted chocolate will elevate the flavor like you wouldn't believe.
It’s that sweet and salty combo that makes every bite even more indulgent.
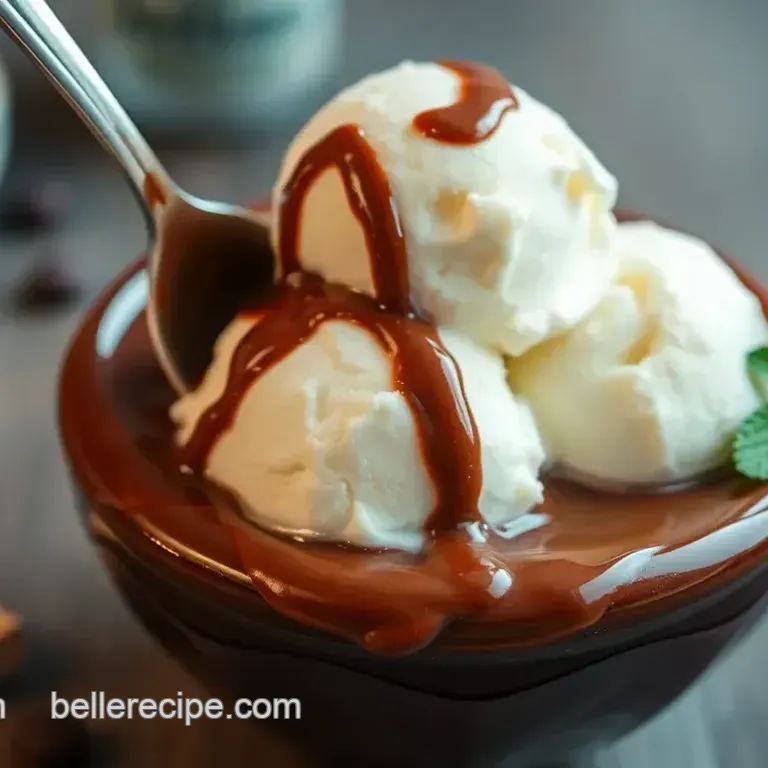
And presentation advice ? Plate those chocolate dipped treats with a flourish! Arrange them on a colorful platter, sprinkle some chopped nuts or sprinkles on top right before the chocolate sets, and watch them go from ordinary to Instagram worthy in seconds!
Perfect Presentation
Speaking of presentation, let’s chat about plating techniques . you can set the stage for your delicious homemade chocolate covered treats by using wedge shaped slices of lemon or orange on the side.
The pop of color looks stunning next to those creamy, chocolate covered ice cream delights.
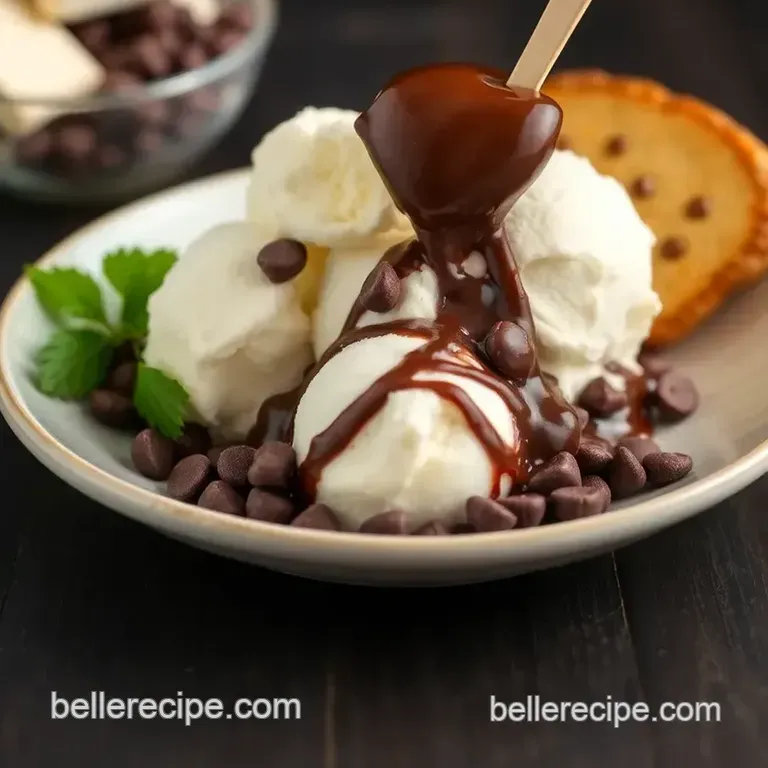
When it comes to garnish ideas , fresh mint leaves are fantastic! they not only look great but add a hint of refreshing flavor.
You could also drizzle a bit of caramel or extra melted chocolate for that extra indulgence.
Color combinations matter, folks! You want your chocolate ice cream balls to pop against the backdrop. Think powdered sugar , toasted coconut flakes, or even vibrant sprinkles. Keep it bright and lively!
Storage & make-ahead
Wanna enjoy these sweet treats all week? you can! just remember these storage guidelines : keep the chocolate covered ice cream in an airtight container in the freezer.
They should remain good for up to three weeks if you can resist eating them all first!
For the preservation methods , you can separate layers of ice cream balls with parchment paper so they don’t stick together.
As for reheating instructions , well, there is none needed here these are meant to be frozen ! but if they get too hard, let them sit out for a couple of minutes for the perfect creamy bite.
Creative Variations
Now let's get creative! if you’re looking for flavor adaptations , why not try dipping those treasures in white chocolate for a delightful twist? you could also mix in some peanut butter or nutella for a rich chocolate peanut butter experience.
For dietary modifications , explore vegan ice cream options and dark chocolate to keep things plant based. You’ll be surprised how rich and creamy the vegan versions can be!
Feeling adventurous? try some seasonal twists add pumpkin spice for fall or crushed peppermint candies for something refreshing around the holidays.
You can even go regional with flavors think key lime pie ice cream for a tropical vibe.
Complete Nutrition Guide
Okay, let’s get real for a sec. if you’re curious about the nutritional breakdown , one scoop of these dreamy treats clocks in around 300 calories .
Not too bad, right? you get a solid hit of 4g of protein and 18g of fat from that deliciousness, so keep that in mind if you’re counting macros!
Every treat is an indulgent experience that’s guilt free when you embrace moderation. Balance these out with fresh fruit or a light meal to keep things fresh and exciting!
Expert FAQ Solutions
Now, a few common questions i often get: “what if my chocolate seizes?” don’t panic, just add a teaspoon of coconut oil to get it smooth again.
It saves the day every time!
And if your chocolate doesn’t set quite right? pop it back in the freezer! that’s your best shot if you’re feeling a bit rushed.
You know what they say: good things come to those who wait !
In the end, making these chocolate dipped treats is all about enjoying the process. whether you’re serving them at a summer cookout or just indulging on a lazy afternoon, take your time and have fun with it.
Try new variations, mix flavors, and experiment. you got this!
Whether you make these stunning desserts to impress guests or keep them all for yourself, just remember: there's nothing quite like the joy of dipping vanilla ice cream in chocolate coating on a hot day.
Happy scooping!
Dip Vanilla Ice Cream In Chocolate Coating