Deliciously Sweet Deep-Fried Oreos
- Look into into the Sweet World of Deep-Fried Oreos
- Your Essential Ingredients Guide for Frying Deep-Fried Oreos Deliciously Sweet Treats
- Unpacking the Art of Frying Deep-Fried Oreos: A Sweet Adventure
- Pro Tips & Secrets to Fry Deep-Fried Oreos Deliciously Sweet Treats
- Perfect Presentation: Making Your Deep-Fried Oreos Instagram-Worthy
- Storage & Make-Ahead
- Creative Variations: Fun Twists on Your Favorite Treats
- Complete Nutrition Guide
- Frequently Asked Questions
- 📝 Recipe Card
Look into into the Sweet World of Deep Fried Oreos
Oh my gosh, have you ever taken a bite of something so sweet and crispy that it makes your taste buds party? that’s exactly how i felt the first time i tasted deep fried oreos at a local fair.
The memory’s still so vivid! i was with my friends, the smell of popcorn was swirling in the air, and boom! i saw that golden, crispy goodness frying away.
Just had to try it. fast forward to now, and guess what? i’m sharing my version of these deliciously sweet treats you can make right at home.
You know that nostalgia, the fun of fairground food? well, these oreos epitomize it! deep fried desserts have become a beloved staple at carnival events, and honestly, they’re not just for the fairs anymore.
People are whipping them up at home for parties, celebrations, or do-it-yourself (diy) fair food nights. giving these a try is more than just a cooking session; it's an excuse to gather your friends, grab a few ingredients, and enjoy some simple frying techniques that’ll have you feeling like a kitchen pro.
The Delightful Journey of Deep Fried Oreos
Now, where do these crispy creations come from? originally, deep fried oreos made their splash in fairs across the u.s.
, becoming a hit in the early 2000s. they blend the all-time favorite oreo cookie everyone's classic with a fluffy, sweet batter.
They quickly became the poster child of indulgent treats, making appearances at fairs, festivals, and now, right in our kitchens! making these crispy, sweet snacks at home can take about 55 minutes total and has an easy difficulty level.
Trust me, anyone can do it even if you can barely fry an egg!
Benefits You’ll Love
Alright, let’s talk about the perks because, honestly, who doesn’t want to know the good stuff, right? first off, deep fried desserts like this are a total crowd pleaser.
You can serve them at birthday parties, family gatherings, or just when you need a little sweet tooth satisfaction.
While traditional oreos might seem like a guilty pleasure, frying them takes it to a whole new level of comfort food treats.
You have the crisp outer layer that beautifully contrasts the soft, rich chocolate cookie inside. plus, it's an excellent way to impress your friends with your creative fried snack ideas.
Not to mention, they just look so darn good with a dusting of powdered sugar or a drizzle of chocolate sauce.
When you serve these irresistible sweets , you unleash a wave of nostalgia. they bring back fair memories of laughter and joy.
Who wouldn’t want to enjoy those vibes at home? and hey, kids love them! they’re the perfect end to birthdays or festive get-togethers.
Let's Talk Ingredients
Ready to dive into the kitchen? awesome! you’ll find the ingredient list pretty straightforward, which is what makes this such an excellent easy dessert recipe.
Gather up some all-purpose flour, sugar, baking powder, and of course, a pack of oreos. you’ll be amazed at how simple it is to whip these up.
Let’s get frying!
So buckle up, and soon you’ll be guiding your friends through the delightful experience of biting into a crispy oreo ball filled with sweet memories.
Next up, we'll break down the ingredients and get you all set to create these decadent desserts for your next gathering.
Get ready to feast on those sweet and crispy snacks that’ll take your taste buds on a ride!
Your Essential Ingredients Guide for Frying Deep Fried Oreos Deliciously Sweet Treats
Ah, deep fried oreos! it’s one of those nostalgic fairground foods that brings me right back to countless summer nights with friends.
You know that moment when you bite into a crispy, hot exterior, and that rich, creamy oreo cookie just melts in your mouth? yeah, that’s pure bliss! i'm here to break down everything you need to know to get your frying game on point with some easy dessert recipes that are sure to impress at your next gathering.
Get ready for sweet indulgence like no other!
Premium Core Components
First up, let's chat about your premium core components ! Your base ingredients definitely matter when you’re whipping up these easy party snacks .
Key Ingredients (with measurements):
- 1 cup all-purpose flour (120g)
- 1 tablespoon granulated sugar (12g)
- 1 teaspoon baking powder
- 1 large egg
- 1 cup whole milk (240ml)
- 1 teaspoon vanilla extract
- Powdered sugar (for dusting)
Quality indicators: when you’re choosing your ingredients, look for the freshest items. a good flour should feel smooth with no lumps, and your baking powder should be fresh (it should fizz when mixed with a little vinegar).
Storage guidelines: store your flour in a cool, dark place. it can last about 1 year in the pantry, but to keep things fresh, put it in the fridge.
Eggs and milk? well, just keep them in the fridge and use by the expiration date.
Freshness Tips: Give your eggs a float test. If they sink, they’re good; if they float, toss 'em!
Signature Seasoning Blend
Okay, now let's move on to crafting that signature seasoning blend . For deep fried goodness, we want simple yet powerful flavors that enhance your treats.
- Essential Spices: A dash of cinnamon is optional, but trust me, it’s a game changer. It adds warmth and coziness to your all-time favorite Oreo dessert ideas .
- Regional Choices: Depending on where you are, you can switch it up! If you’re feeling adventurous, consider adding some crushed nuts or sprinkles right into the batter for some texture.
Smart Substitutions
Now for those unexpected moments like when you're out of milk or the grocery store didn’t have Oreos. No worries, I got you!
- Common Alternatives: If you run out of flour, almond flour can be a solid substitute. It’ll make your fried snacks a tad nuttier!
- Dietary Modifications: For a gluten-free version, use gluten-free flour blend .
- Seasonal Options: In fall, why not toss in some pumpkin spice to your batter? Seasonal flavors rock!
Kitchen Equipment Essentials
Alright, gear up because cooking without the right tools is like trying to go bowling in flip flops.
- Must Have Tools: A heavy bottomed pot or a deep fryer is key for frying up those crispy treats. Keep a candy thermometer handy to monitor oil temp (aim for 350° F - 375° F ).
- Alternative Options: No deep fryer? A heavy pot will do just fine. Just keep an eye on the temperature!
- Preparation Tips: Make sure to whip your batter together smoothly. Lumps aren’t a huge deal if you’re frying up sweet fried recipes , but we’re aiming for even coating!
- Storage Solutions: Keep your leftover batter in the fridge for a day, but honestly, these treats are best when fresh!
When you’ve got your essentials lined up and ready, you’ll be more than prepped to deep fry those deliciously sweet deep fried oreos like a pro.
Trust me, the sweet tooth satisfaction people will get from these will have them begging for more!
Just stick around because next, we’ll dive into the magical part the cooking instructions. You’re about to create some mouthwatering carnival treat recipes that will take you back to the fairgrounds in no time! Keep that frying spirit alive, and let's get cooking!
Unpacking the Art of Frying Deep Fried Oreos: A Sweet Adventure
Oh my gosh! deep fried oreos are like a bite sized piece of carnival heaven. seriously, if you've ever wandered around a fair, tasting the dizzying array of deep fried desserts , you’ll know exactly what i mean.
So, if you’re wondering how to bring that magical fairground food experience to your kitchen, stick with me! let’s dive into this deliciously sweet treat that’s both simple and oh-so-satisfying.
Essential Preparation Steps
First things first, let’s talk mise en place . it’s a fancy french term that basically means “everything in its place.
” gather your ingredients: flour, sugar, baking powder, eggs, and, of course, those oreos. trust me, it’ll save you time later, and there’s nothing worse than realizing you’re out of something halfway through.
While you're at it, let’s sprinkle in some time management tips . set a timer for each step, especially for cooking.
Keep your oil temperature right around 350° f ( 175° c) . if it’s too hot, that batter might burn before the oreos are warm and gooey inside.
Too cool? they’ll just absorb the oil like a sponge, and nobody wants greasy oreos.
Organize your workspace. clean as you go! pile up those dishes, and suddenly you’ll feel overwhelmed. plus, safety is key.
Hot oil is no joke. make sure to have a slotted spoon handy and a pot that’s deep enough to keep any splashes contained.
Step-by-step Process
Let’s get to the good stuff here’s how to whip these up:
Prepare the Oil: Heat your vegetable oil in a deep pot to 350° F ( 175° C) . Keep an eye on it with a candy thermometer.
Make the batter: in a mixing bowl, whisk together 1 cup of all-purpose flour , 1 tablespoon of sugar , and 1 teaspoon of baking powder .
In another bowl, beat 1 egg , then mix in 1 cup of whole milk and 1 teaspoon of vanilla extract .
Combine the wet and dry ingredients; it’s alright if it’s a bit lumpy.
Chill the Batter: Cover that sweet concoction and pop it in the fridge for 30 minutes . It’ll concentrate flavors and help it stick to the Oreos better.
Coat the Oreos: After chilling, dip each Oreo into the batter, making sure it's fully covered.
Fry the Oreos: Gently place each battered Oreo in your hot oil, frying in batches for about 2- 3 minutes on each side until they look golden brown.
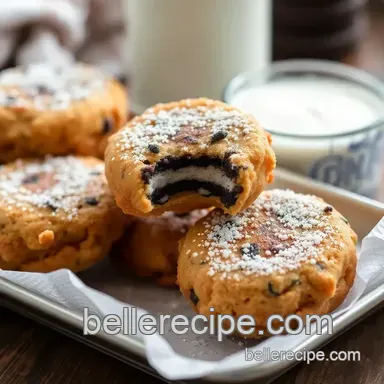
Serve: remove with your slotted spoon, drain any excess oil on a paper towel, and then dust those beauties with powdered sugar.
If you’re feeling extra, drizzle with chocolate sauce or whipped cream. trust me on this one!
Expert Techniques
Now, for some expert techniques : remember to fry in small batches! this keeps the oil at the right temperature and ensures they cook evenly.
Also, if you have a friend nearby, ask them to help with the frying so you can be on timing precision .
Keep an eye on the visual cues for doneness . you want them to be golden brown, not burnt. and don’t shy away from experimenting! some folks love a sprinkle of cinnamon in the batter or even a dip into chocolate syrup right after frying.
Success Strategies
Ah, the sweet taste of success! but here are some common mistakes to avoid: don’t overcrowd the pot. seriously, it’ll mess with your temp.
Also, fry at that precise temperature i keep mentioning. a thermometer will be your best buddy here.
Set those quality checkpoints if they don’t look golden brown, give them a bit more time. and let’s be real; making these ahead of time can save you stress when hosting.
Just fry them up right before serving for that fresh out-of-the-oil vibe.
Wrapping It Up
So there you have it, friends! with these tips, you’ll master the art of creating deliciously sweet deep fried oreos that are perfect for parties or cozy nights at home.
Honestly, every bite is pure sweet tooth satisfaction !
Now, let's transition to additional information to ensure you make the most of this decadent dessert. you’ll be the hero of your next gathering, and trust me, there’s nothing like the nostalgia of sharing classic fair food at home.
Get ready to enjoy some truly indulgent treats !
Pro Tips & Secrets to Fry Deep Fried Oreos Deliciously Sweet Treats

Alright, let’s talk about some insider tips that’ll take your deep fried oreos from good to absolutely scrumptious! when i first tried making these, i thought it’d be a breeze.
Spoiler alert: it wasn’t all smooth sailing at first. here’s how i learned to make these delightful snacks even better.
Chef's Personal Insights
First off, don’t rush the batter chilling step. it's tempting to skip it, but trust me, giving it that 30 minutes makes a huge difference in texture.
You want it fluffy, not runny! plus, the cold batter helps prevent those oreos from sinking to the bottom of the fryer, which we definitely don't want.
Time Saving Techniques
If you’re crunched for time, you can actually make the batter ahead of time and store it in the fridge.
Just give it a quick stir before dipping those oreo cookies. also, prepare your frying station in advance having everything ready to go will save you from running around the kitchen like a headless chicken.
Flavor Enhancement Tips
Want your deep fried desserts to taste next level? add a pinch of cinnamon or nutmeg to the batter. it’s like giving a little hug to every bite.
And if you’re feeling particularly adventurous, toss in some crushed candy canes or toffee bits. trust me, your taste buds will throw a party!
Presentation Advice
Now, onto presentation! use a slotted spoon for fishing those oreos out of hot oil. this keeps them crispy. once drained, stunningly dust them with powdered sugar and maybe drizzle some chocolate sauce.
Or, if you're feeling fancy, add a sprig of mint for a pop of color. your guests will be snapping pics before they even take a bite!
Perfect Presentation: Making Your Deep Fried Oreos Instagram Worthy
Let’s face it, we eat with our eyes first! Plating techniques can elevate your carnival treat recipes into something that looks boutique.
Garnish Ideas
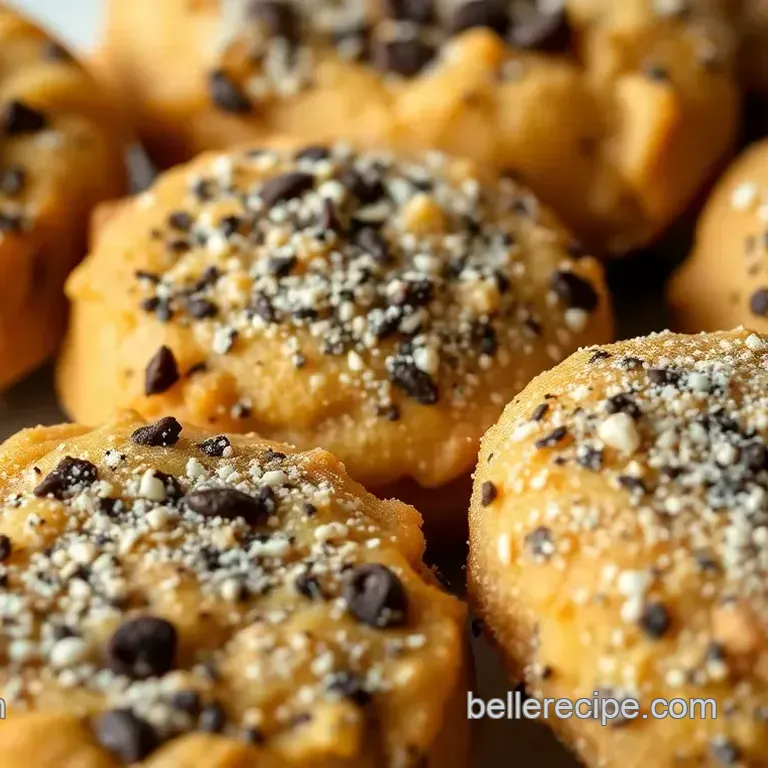
Try serving your sweet fried recipes on a wooden board. lay a few oreos askew, and then sprinkle with a mix of colorful garnishes.
Think crushed nuts, edible flowers, or even colorful sprinkles for that fun factor!
Color Combinations
Pairing the chocolatey Oreos with bright raspberries or strawberries makes everything pop. It's all about that contrast! Plus, those red hues just scream dessert delight.
Storage & make-ahead
Let’s keep it real: we don’t always finish a whole batch of fried snacks in one go (though I wish we could!). Here’s how to keep your comfort food treats fresh.
Storage Guidelines
If you have leftovers, store them in an airtight container. Just know, they’re best eaten fresh. They’ll still be delish but may lose their crispy magic over time.
Preservation Methods
For an easy make-ahead , you can pre-batter the Oreos, cover them in cling wrap, and toss them in the fridge. Just fry them when you’re ready!
Reheating Instructions
When reheating, toss them back into the oven (not the microwave). Heat them at 350° F (about 175° C) for 5- 7 minutes. This helps restore the crispiness!
Creative Variations: Fun Twists on Your Favorite Treats
There are so many fun routes to take with your Oreo dessert ideas .
Flavor Adaptations
Feel free to swap in Golden Oreos for a vanilla kick or even the seasonal Pumpkin Spice variety for that autumn vibe.
Dietary Modifications
Worried about gluten? Use gluten-free flour. Vegan? Try a plant based egg substitute! The world’s your oyster (or Oreo, in this case).
Seasonal Twists
In the mood for summer? Add some freshness with a lemon zest batter. Trust me, it will surprise everyone!
Complete Nutrition Guide
Now let’s touch on the nitty gritty. While these sweet indulgence recipes aren’t exactly health food, they do bring joy!
Detailed Breakdown
A serving of Fried Oreos yields about 150 calories. Not too shabby for a treat! Remember, moderation is key.
Health Benefits
While we can’t call them “health food,” Oreos have their place in the sweeter side of life. They definitely satisfy that sweet tooth we all have.
Portion Guidance
Make sure to portion them out if they’re for a party. Believe me, it’s so easy to munch on more than intended.
So there you have it! With these tips and tricks, you'll be ready to whip up some Deliciously Sweet Deep Fried Oreos that will impress friends, family, and your sweet tooth! Remember, cooking should be fun so enjoy the process and, most importantly, enjoy every decadent bite !
Frequently Asked Questions
What is the best oil for Frying Deep Fried Oreos Deliciously Sweet Treats?
For frying Deep Fried Oreos, it's best to use vegetable oil, canola oil, or peanut oil due to their high smoke points and mild flavors. These oils will help achieve the perfect crispy texture without overpowering the taste of the cookies.
Can I make the batter for Fry Deep Fried Oreos Deliciously Sweet Treats ahead of time?
Yes, you can prepare the batter for your Deep Fried Oreos in advance and store it in the refrigerator for up to 24 hours. Just remember to give it a quick stir before using, as it may thicken slightly while chilling.
What are some common variations for making Fry Deep Fried Oreos Deliciously Sweet Treats?
You can experiment with different Oreo flavors like Golden Oreos or even seasonal varieties such as Pumpkin Spice. Additionally, try adding crushed nuts or colorful sprinkles to the batter for added texture and visual appeal.
How do I store leftover Fry Deep Fried Oreos Deliciously Sweet Treats?
Leftover deep fried Oreos can be stored in an airtight container at room temperature for up to 2 days. If you want to keep them longer, refrigerate them, though the texture may not be as crispy once reheated.
Can I make a healthier version of Fry Deep Fried Oreos Deliciously Sweet Treats?
Yes, for a healthier alternative, consider using gluten-free flour or a whole grain flour in the batter. You can also try baking the Oreos in an air fryer for a lower fat option while still enjoying the delicious flavor.
What serving suggestions go best with Fry Deep Fried Oreos Deliciously Sweet Treats?
Deep Fried Oreos are delightful when served warm and dusted with powdered sugar. Pair them with a scoop of vanilla ice cream, fresh berries, or a drizzle of chocolate sauce for an extra special treat that enhances their sweetness.
Fry Deep Fried Oreos Deliciously Sweet Treats