Immunity Shots: the Golden Hour Ginger-Turmeric Recipe
- Introducing The Golden Hour: Your Essential Homemade Immunity Shots
- Balancing the Burn: The Science of Flavor in Immunity Shots
- Sourcing Your Powerhouse Elements: Detailed Ingredients List
- Step-by-Step Method: Crafting the Potent Ginger & Turmeric Concentrate
- Troubleshooting the Process: Expert Tips for Maximum Yield
- Preserving the Potency: Storage and Shelf Life of Immunity Shots
- Recipe FAQs
- 📝 Recipe Card
Introducing The Golden Hour: Your Essential Homemade Immunity Shots
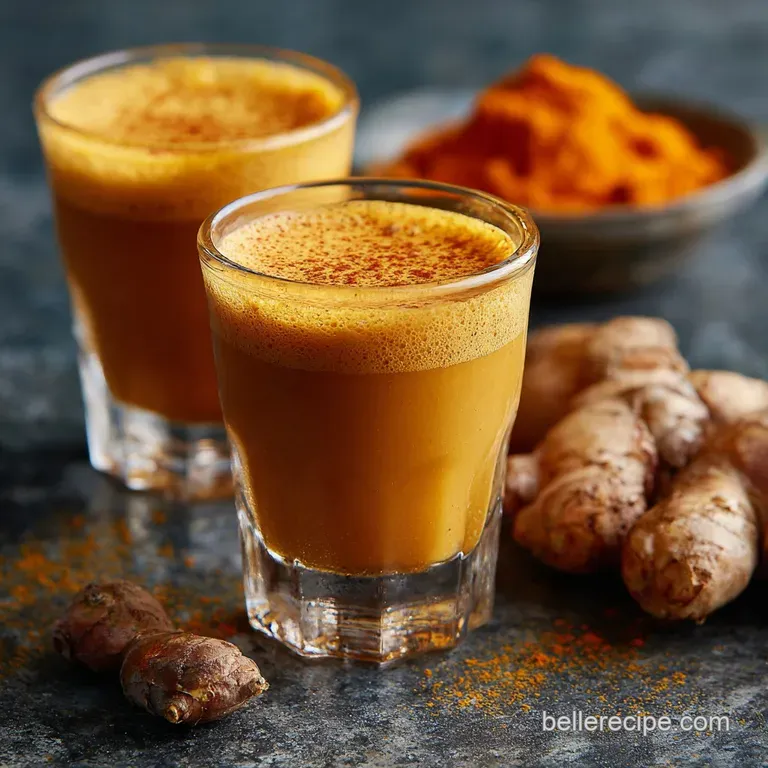
The first thing you notice when you blend this stuff is the smell, right? It's intense. That potent, almost medicinal aroma of raw ginger and earthy turmeric instantly fills the kitchen, promising a serious flavor punch and a serious energy boost.
The color, this vibrant, neon orange yellow, literally looks like pure, concentrated sunshine.
I used to spend a ridiculous amount of money on those little glass bottles labeled "wellness shots." Stop doing that immediately. Making your own batch of immunity shots at home is shockingly fast, incredibly cheap, and allows you to control exactly how much fiery spice or natural sweetness goes into the mix.
This recipe is my absolute favorite, especially when everyone around me starts reaching for the tissue box.
This isn't just a recipe; it's a potent, concentrated ritual for keeping yourself running smoothly. We’re going to walk through how to blend this fiery concentrate perfectly, ensuring maximum potency and minimum grit. Let's make some liquid gold.
Balancing the Burn: The Science of Flavor in Immunity Shots
This specific immunity shots recipe isn't just about throwing roots in a blender and hoping for the best. It’s a careful balance between the powerful anti inflammatory agents, the acid needed for preservation, and the sweetness required to make it actually palatable.
Getting the ratios right is everything, or you end up with something that feels like battery acid trust me, I’ve been there.
What Makes This Shot "Golden"?
The key to this vibrant color and power is fresh turmeric. Curcumin, the active compound in turmeric, is known for its incredible anti inflammatory properties, but it needs a little help to work optimally in your system.
We use plenty of fresh ginger for its zingy heat and digestive benefits, creating a complex, layered burn that instantly wakes you up.
The Quick Case for Homemade Wellness
Why bother when you can buy them pre-made? Simple: freshness and potency. When you make immunity shots at home , you ensure the maximum concentration of gingerols and curcuminoids, which begin to degrade once exposed to air and light for too long.
Plus, those store-bought versions often add tons of high fructose corn syrup, which defeats the entire wellness purpose.
Nutritional Snapshot: Quick Benefits Overview
While I’m certainly no doctor, the benefits I feel when I take these consistently are undeniable. This immunity shots recipe is loaded with Vitamin C from the citrus base, which is crucial for immune function.
We are essentially maximizing the density of potent compounds, making it easy to consume a large dose quickly.
The Role of Black Pepper for Turmeric Absorption
This is the non-negotiable step that too many recipes miss. Turmeric’s curcumin is fat-soluble and poorly absorbed by the body on its own. Always add the black pepper.
The piperine in the pepper acts as a biological enhancement, increasing the bioavailability and absorption of curcumin by an astonishing amount.
Achieving Peak Tanginess: Citrus Selection Strategy
We use both lemon and orange juice strategically. The lemon provides the essential acidity and Vitamin C punch, but it would be too aggressive alone. Adding fresh orange juice introduces natural sweetness, softening the acidic edges and making the intense ginger/turmeric combination enjoyable, not painful.
Muting the Gritty Texture: Optimal Blending Techniques
Nothing ruins a shot faster than tiny fibrous bits of ginger scratching your throat on the way down. The secret to a smooth finish is running the blender for a full 2– 3 minutes on high speed, completely pulverizing the roots.
Then, you absolutely must use a fine mesh sieve lined with a nut milk bag or muslin cloth for the final, clean strain.
Sourcing Your Powerhouse Elements: Detailed Ingredients List
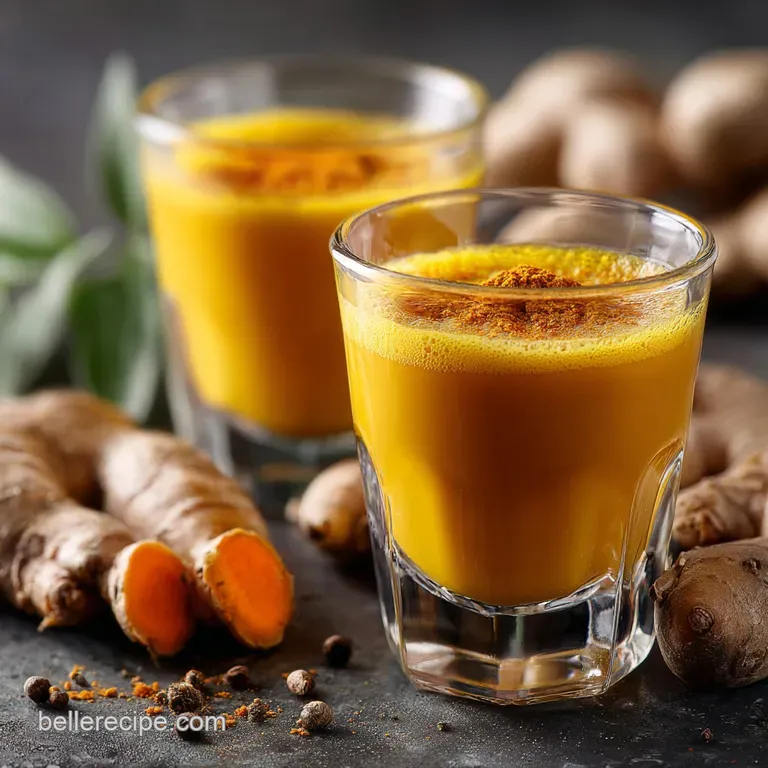
The quality of your roots really matters here. Skip the limp, sad-looking ginger at the bottom of the bin; you want firm, heavy roots that are screaming with potential. We aim for high potency ingredients for the best immunity shots benefits .
| Ingredient | Why We Use It | The Smart Substitute |
|---|---|---|
| Fresh Ginger Root | Digestive aid, fiery heat, anti nausea. | Ginger powder (1 2 Tbsp), though texture suffers. |
| Fresh Turmeric Root | Anti inflammatory power, vibrant color. | Organic Turmeric Powder (1 Tbsp). |
| Large Lemons | Acidity, Vitamin C, preservative quality. | Lime juice, or Apple Cider Vinegar (add 1 Tbsp ACV after straining). |
| Medium Oranges | Natural sweetness, flavor balancer. | Pineapple or grapefruit juice (use 1/2 cup). |
| Honey/Maple Syrup (Optional) | Smooths out the burn. | Agave or stevia drops to taste. |
Prepping the Roots: Peeling Ginger vs. Turmeric
Ginger skin is thin, and if it's organic and clean, I usually just wash it vigorously and leave it on for extra nutrients. Turmeric, however, should absolutely be peeled, mostly because the skin tastes bitter and can harbor dirt.
Use a spoon to scrape the skin off both roots it's way easier and less wasteful than using a vegetable peeler.
Choosing Your Citrus Base: Lemon vs. Orange Ratios
My recipe calls for more orange juice than lemon juice, and that’s deliberate. Lemon is potent, but orange provides necessary liquid volume and a sweetness that rounds out the fiery heat of the cayenne and ginger. You want power, not pain.
Essential Add-Ins: Honey, Cayenne, and Black Pepper
The honey is optional, but it definitely makes the shots more palatable if you are sharing them with someone new to the spice level (or making immunity shots for kids recipe —just use less cayenne!).
The cayenne adds an immediate punch of heat, while the pepper ensures you actually absorb the curcumin from the turmeric.
Smart Substitutions for Dietary Restrictions
If you're avoiding natural sugars, you can easily omit the orange juice and replace it with water or unsweetened coconut water, but you will need to add extra honey or maple syrup if you want the flavor tamed.
For strict sugar avoidance, ACV (Apple Cider Vinegar) can replace some of the lemon, but be warned: it’s intense.
step-by-step Method: Crafting the Potent Ginger & Turmeric Concentrate
This is so straightforward, you’ll wonder why you ever paid $5 for one tiny shot. Remember to wear gloves when handling the fresh turmeric!
- Chop and Peel: Scrape the skin from your ginger and turmeric. Roughly chop both roots into pieces small enough for your blender to handle easily think 1 inch chunks.
- Juice Everything: Extract the juice from all your lemons and oranges and measure them out.
- The Blender Dump: Place the chopped roots, all the citrus juice, the filtered water, black pepper, and cayenne into your high speed blender.
- Full Power Blend: Secure the lid and blend on the highest setting for a minimum of 2 minutes. We need to completely liquify those fibrous roots. Stop only when the mixture is uniformly bright yellow and frothy.
- The Strain Set-Up: Place a large bowl below a fine mesh sieve that is lined with a muslin cloth or nut milk bag.
- Extract the Gold: Pour the blended mixture into the lined strainer. Let it drip naturally for a few minutes, then use a sturdy spoon or spatula to press down firmly on the remaining pulp. Squeeze the cloth until not one more drop of liquid comes out.
- Bottle Up: Pour the final, smooth liquid into your airtight storage containers. Give it a good shake before you take your first victorious shot!
Chef's Note: If you want a slightly sweeter shot, stir in 1 tablespoon of raw local honey or maple syrup into the final strained liquid before bottling. Do not blend the honey with the roots, as this can affect the texture.
Troubleshooting the Process: Expert Tips for Maximum Yield
I’ve learned the hard way that a few small adjustments make all the difference between a watery mess and a powerful, smooth concentrate.
The Initial Chop: Preparing Hard Ingredients
Don't be lazy here! If your chunks of ginger and turmeric are too large, they will put massive strain on your blender blades and you’ll end up with unevenly pulverized pieces. Small, even chunks help the blender break down the tough fibers effectively.
Achieving the Purest Extract: Proper Straining Methods
If you skip the cloth and just use a standard sieve, your shot will be full of fine sediment. This is why I use a nut milk bag; it forces you to squeeze out every drop of concentrated goodness and ensures the final liquid is smooth. That extra minute of squeezing is worth it, I promise.
Batching Strategy: Scaling the Recipe Up
This recipe is super easy to scale if you are making immunity shots for kids (adjusting the cayenne, obviously!) or making enough for the whole week. You can easily double or triple this batch, provided your blender can handle the volume of fibrous material.
Always scale up the liquid (citrus/water) proportionally with the roots.
The Turmeric Staining Warning (And How to Clean Up)
This stuff will stain everything yellow. Countertops, plastic spatulas, your favorite white t-shirt. Always wear gloves. If you spill, wipe it up immediately with soap and water, followed by a quick spray of white vinegar it helps lift the color remarkably well.
Adjusting the Heat: Taming the Ginger Burn
If the shot is too spicy for your preference, you have two options. You can slightly reduce the amount of fresh ginger root next time, or, more simply, increase the amount of fresh orange juice to dilute the intensity without adding extra water.
Mistake Check: Why Your Shots Taste Too Watery
If your shots lack that dense, powerful punch, it’s usually because you added too much water or didn’t pack your ginger/turmeric roots tightly enough when measuring. Remember, the added water (¼ cup) is strictly to help the high speed blender blades move the solid ingredients; it’s not meant to dilute the concentrate significantly.
If your shots taste weak, reduce the water by half next time.
Preserving the Potency: Storage and Shelf Life of Immunity Shots
You’ve made this incredible concentrate, so let’s make sure it stays fresh and potent for as long as possible.
Best Containers for Refrigeration
Small, glass 2 ounce dropper bottles or mason jars work perfectly for daily grab and go shots. They should be airtight to prevent oxidation. Stored tightly sealed in the fridge, your homemade immunity shots will last reliably for 5 to 7 days.
How to Properly Freeze for Long Term Use
If you made a massive batch (which is smart!), freezing is your best friend. Pour the concentrate into standard silicone ice cube trays each cube is roughly a serving. Once frozen solid, transfer the cubes to a heavy duty freezer bag, squeezing out all the air.
They will stay potent in the freezer for up to three months. To thaw, just pop one into a small glass overnight.
Diluting the Concentrate: Making a Daily Health Tonic
Sometimes you want something to sip on all morning instead of slamming a shot. This concentrate is perfect for dilution. Stir 1 shot (2 fl oz) into a large glass of sparkling water or even hot water it makes a zesty, invigorating tea that’s especially comforting on cold days.
Pairing Suggestions for Breakfast Routines
I love having this immediately after I wake up to fire up my system. It pairs beautifully with a simple yogurt and granola bowl or before a smoothie. If you’re feeling extra daring, and you’re having an adults only brunch, a tiny splash of this concentrate makes a killer base for a spicy cocktail though that’s a very different kind of shot than the ones in my Foolproof Eggnog Pudding Shots Rich Silky Spiked recipe!
 : PIN FOR LATER")
Recipe FAQs
How long will these immunity shots stay fresh, and how should I store them?
Store the shots immediately in air-tight glass containers (like small, sealed bottles) in the refrigerator. They maintain peak potency and freshness for 5 to 7 days, but ensure you shake them vigorously before consuming, as separation is entirely natural.
My shot is too intensely spicy or strong. How can I adjust the heat level?
The fiery heat comes primarily from the fresh ginger root. To dial back the intensity, reduce the amount of ginger by up to half, or balance the flavor profile by adding a splash more orange juice or an extra teaspoon of honey or maple syrup to the batch.
Can I use turmeric powder instead of fresh turmeric root?
While fresh root is highly recommended for maximum potency and a smoother texture, you can substitute with high-quality organic turmeric powder. Use 1 teaspoon of powder for every 1 inch of fresh root specified in the recipe, keeping in mind the final texture may be slightly more chalky.
Do I need a juicer, or can I use a blender for this recipe?
A high powered blender is perfectly suitable; you must follow blending by straining the mixture through a fine mesh sieve or a nut milk bag to remove the tough fibers. Juicers offer a quicker straining process but typically yield slightly less final liquid volume from the raw ingredients.
How do I prevent the turmeric from staining my cutting board and hands?
Turmeric root is intensely pigmented and will aggressively stain porous surfaces and clothing. Always handle turmeric on non-porous surfaces like glass or ceramic, and wear rubber gloves when peeling and chopping the root to protect your hands.
Can I use alternative sweeteners or omit sweeteners entirely?
Yes, you can use any liquid sweetener you prefer, such as agave nectar or date syrup, although these may slightly alter the final flavor profile. If omitting sugar completely, use extra high acid citrus juice to help better mask the naturally earthy flavor of the turmeric and ginger.
Why is my immunity shot separating or looking thick after refrigeration?
Separation is completely normal, as the heavy ginger and turmeric sediment settles at the bottom; just shake vigorously before drinking. If the initial blend is too thick, incorporate an extra 1/4 cup of water or citrus juice before the final straining step to achieve a thinner consistency.
Golden Hour Ginger Immunity Shots

Ingredients:
Instructions:
Nutrition Facts:
| Calories | 177 kcal |
|---|---|
| Protein | 3.9 g |
| Fat | 3.3 g |
| Carbs | 36.4 g |
