Pumpkin Crunch Cake: Silky Custard and Nutty Crust
- Time: Active 15 minutes, Passive 55 minutes, Total 70 minutes
- Flavor/Texture Hook: A velvety spiced base beneath a shatter crisp pecan topping.
- Perfect for: Stress free holiday entertaining or a comforting weeknight dessert.
- The Unforgettable Pumpkin Crunch Cake
- Why Typical Dump Cakes Fail
- Essential Timing and Prep Specs
- Selecting the Best Pantry Staples
- Minimal Tools for Success
- Step-By-Step Baking Instructions
- Avoiding Common Baking Pitfalls
- Customizing Your Flavor Profile
- Dispelling Common Baking Myths
- Storage and Reheating Guidelines
- Thoughtful Pairings for Serving
- Recipe FAQs
- 📝 Recipe Card
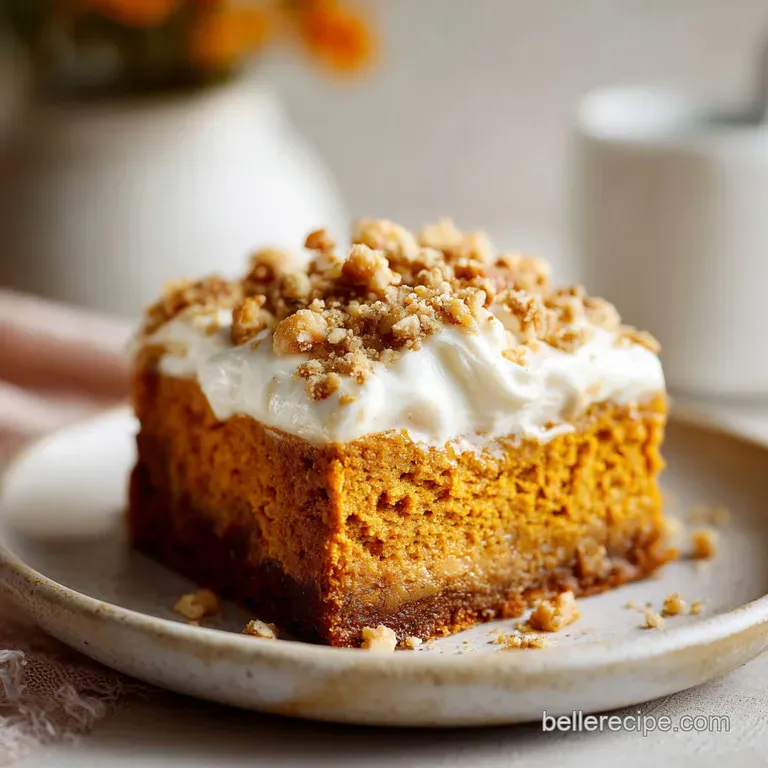
The Unforgettable Pumpkin Crunch Cake
There is a specific sound that happens when you press a spoon into a freshly baked Pumpkin Crunch Cake. It is a distinct, rhythmic crackle the sound of toasted pecans and butter soaked cake mix giving way to a soft, steaming custard underneath.
The first time I smelled this in my kitchen, the aroma of warm cinnamon and nutmeg didn't just fill the room; it felt like a heavy, hand knitted blanket draped over my shoulders. It was a Tuesday afternoon, the rain was tapping against the glass, and I realized I had accidentally stumbled upon the most comforting thing I’d ever baked.
I used to be skeptical of anything involving a boxed mix, thinking I needed to do everything from scratch to be a "real" cook. But then I saw how the melted butter sizzled when it hit the dry flour, bubbling up and creating these little craggy peaks that turned into golden brittle in the oven.
That sizzle changed my mind. This isn't just a shortcut; it's a clever bit of kitchen magic that yields a texture you simply cannot get with a traditional batter.
We are going to walk through this together, focusing on the simple, mindful movements that make this dish sing. You don't need a fancy stand mixer or a degree in pastry arts. Just a bowl, a whisk, and a little bit of patience while your house begins to smell like the best parts of autumn.
Trust me, once you see those pecans toast to a deep mahogany, you'll understand why this is the only pumpkin dessert I bother with anymore.
Why Typical Dump Cakes Fail
Most people approach this style of baking with a "set it and forget it" attitude that leads to dry, floury pockets. We've all seen it: a beautiful cake ruined by a clump of raw cake mix that never met a drop of butter.
This version fixes that by focusing on how the layers interact during the 55 minutes they spend in the heat.
- Gravity Saturation: Drizzling melted butter over the dry mix allows it to seep downward, hydrating the starch while the steam from the pumpkin custard rises to meet it halfway.
- Protein Structure: Using three large eggs provides enough structure to lift the heavy pumpkin puree, preventing the bottom layer from feeling like a dense, wet brick.
- Maillard Enhancement: The sugar in the cake mix and the fats in the butter work together under the heat to create a toasted, caramelized crust that contrasts the soft interior.
- Vapor Barrier: The layer of chopped pecans acts as a heat shield, protecting the delicate cake mix from burning while the nuts themselves undergo a deep, aromatic roasting process.
| Method | Cook Time | Top Texture | Best Use Case |
|---|---|---|---|
| Standard Oven | 55 minutes | Shatter crisp | Classic holiday gatherings |
| Stovetop (Dutch Oven) | 65 minutes | Chewy/Steamed | Camping or outdoor cooking |
| Slow Cooker | 3 hours | Soft/Cobbler like | Potlucks with limited space |
Choosing the right method depends on how much "crunch" you really want. The oven is truly the king here because the dry, circulating heat is what creates that signature brittle like topping.
If you try to do this in a slow cooker, you'll get a lovely flavor, but you’ll lose that satisfying "crack" when your fork hits the plate.
Essential Timing and Prep Specs
Before we get our hands into the flour, let's talk about the roadmap for this bake. Knowing exactly what to look for at each stage is the difference between a "good" cake and one people ask for every year.
We are aiming for a total time of 70 minutes, with only 15 minutes of that being hands on work. It’s a generous ratio of effort to reward.
The pumpkin custard layer is the foundation of the Pumpkin Crunch Cake. We want it to be thick enough to support the topping but loose enough to feel like silk on the tongue. When you whisk the eggs into the evaporated milk and puree, look for a uniform, sunset orange color.
There shouldn't be any streaks of white or yellow left behind.
| Component | Role in Dish | Pro Secret |
|---|---|---|
| Pumpkin Puree | Dense Moisture | Avoid "pie filling" to control the sugar levels yourself. |
| Evaporated Milk | Creamy Stability | Use full fat for a richer, more velvety mouthfeel. |
| Yellow Cake Mix | Structural Topping | Sift it over the pumpkin to avoid giant lumps. |
| Unsalted Butter | The Hydrator | Melt it slowly so the milk solids don't burn. |
Using evaporated milk is a trick I learned from my grandmother. It has less water than regular milk, which means the custard sets firmly without becoming watery as it cools. It’s these little choices that turn a simple recipe into something that feels deeply intentional and mindful.
Selecting the Best Pantry Staples
I always tell my friends to look at their ingredients as the building blocks of a quiet afternoon. For this Pumpkin Crunch Cake, we are using specific quantities that balance the earthiness of the squash with the sharpness of the spices.
You’ll need 15 oz pumpkin puree and 12 oz evaporated milk as your liquid base.
The sweetness comes from 1 cup granulated sugar, which we’ll balance with 0.5 tsp fine sea salt. Don't skip the salt; it’s the secret to making the pumpkin flavor actually "pop" rather than just being sweet. For the spice, 2 tsp pumpkin pie spice provides that nostalgic warmth.
We’ll bind it all with 3 large eggs.
The "crunch" part of the name comes from 15.25 oz yellow cake mix and 1.5 cups chopped pecans. Finally, the glue that holds the topping together is 1 cup unsalted butter, melted. If you're out of pecans, walnuts are a fine substitute, though they have a slightly more bitter edge that some people love. If you find yourself with extra pumpkin, you can use it to make a Homemade Pumpkin Butter to serve on the side.
Minimal Tools for Success
One of the things I love most about this recipe is that it doesn't demand a kitchen full of gadgets. I like to keep things simple and mindful, focusing on the tactile experience of cooking. You really only need a few basic items to get this from the pantry to the table.
- 9x13 inch Baking Pan: Metal or glass works fine, but glass allows you to see the layers clearly.
- Large Mixing Bowl: Plenty of room to whisk without splashing.
- Whisk: A sturdy balloon whisk is best for emulsifying the eggs and milk.
- Small Saucepan: For melting that cup of butter gently.
- Offset Spatula: This is my favorite tool for smoothing the pumpkin layer and ensuring the cake mix is even.
If you don't have an offset spatula, the back of a large spoon works just as well. The goal is to avoid over complicating the process. We want to spend our energy on the flavors, not on washing a dozen different attachments.
step-by-step Baking Instructions
- Warm the heart of the kitchen. Preheat your oven to 350°F (175°C). Liberally grease a 9x13 inch baking pan with butter or non stick spray. Note: Greasing the sides well prevents the sugar in the custard from sticking and burning.
- Blend the base. In a large mixing bowl, whisk together the 15 oz pumpkin puree, 1 cup granulated sugar, 12 oz evaporated milk, 3 large eggs, 2 tsp pumpkin pie spice, and 0.5 tsp sea salt until the mixture is smooth and uniform.
- Create the foundation. Pour the pumpkin custard mixture into the prepared baking pan, smoothing the top with a spatula. Look for a level surface to ensure the topping doesn't slide to one side.
- Sift the topping. Sprinkle the 15.25 oz dry yellow cake mix evenly over the pumpkin layer, ensuring full coverage to the edges. Note: Use your fingers to break up any large clumps of flour before they hit the pan.
- Add the texture. Distribute the 1.5 cups chopped pecans evenly over the dry cake mix layer. Ensure the nuts are in a single layer to promote even toasting.
- The golden drizzle. Carefully drizzle the 1 cup melted butter over the entire surface. Use a 'drizzle and tilt' technique to ensure the butter hydrates the cake mix and prevents dry flour pockets.
- Watch the magic. Bake for 55 minutes until the topping is golden brown and the pumpkin layer has set. You’ll know it’s ready when the edges are bubbling and the center has a very slight, stable jiggle.
- The final rest. Allow to cool slightly before serving. This resting period is crucial as it lets the custard firm up so you can get those clean, beautiful squares.
During that 55 minutes in the oven, the kitchen will start to smell like a toasted spice shop. I like to sit nearby with a cup of tea and just enjoy that transition. It’s a reminder that good things take time, even if the preparation was fast.
Avoiding Common Baking Pitfalls
The most common heartbreak with a Pumpkin Crunch Cake is the "flour ghost" those white, powdery spots of un hydrated cake mix that ruin the texture. It happens when the butter isn't distributed properly.
If you see a large patch of dry mix before it goes in the oven, don't be afraid to use a fork to very gently swirl the butter into that specific spot.
Solving the Soggy Center
If your cake comes out looking a bit wet in the middle, it’s usually because the oven temperature was slightly off or the pan was too deep. Always use a standard 9x13 pan. If it’s still wobbly after 55 minutes, give it another 5 minutes, but keep a close eye on those pecans so they don't burn.
| Problem | Root Cause | Solution |
|---|---|---|
| Dry Flour Spots | Uneven butter distribution | Use the "drizzle and tilt" method next time. |
| Burnt Pecans | Oven rack was too high | Move to the center rack and tent with foil. |
| Runny Custard | Underbaked or too many eggs | Increase bake time by 5-7 minutes. |
The key to success is observation. Baking is a conversation between you and your oven. If you see the edges browning too fast, just slide a piece of aluminum foil over the top to protect the nuts while the center finishes setting.
- ✓ Always use a standard sized 15 oz can of puree, not a larger "family size."
- ✓ Melt the butter completely; cold butter chunks won't hydrate the mix.
- ✓ Sift the cake mix through a mesh strainer if it looks particularly lumpy.
- ✓ Let the cake sit for at least 20 minutes before slicing for the best texture.
- ✓ Check your oven temperature with an external thermometer to ensure accuracy.
Customizing Your Flavor Profile
Once you’ve mastered the classic version, it’s fun to play with the ingredients to suit your mood. I’ve found that a little bit of dark chocolate chips tucked under the cake mix layer creates a "pumpkin mocha" vibe that is absolutely decadent.
Or, if you want something a bit brighter, a teaspoon of orange zest whisked into the pumpkin puree adds a lovely citrus note.
If you are feeding a smaller crowd, you can easily scale this down. For a 8x8 inch square pan, simply halve all the ingredients. You’ll want to reduce the bake time by about 10 to 15 minutes, but keep using those visual cues look for the golden brown "crunch" on top. If you have leftover pumpkin seeds from a fresh carving, you can learn how to roast pumpkin seeds for a savory snack while the cake is in the oven.
| Original Ingredient | Substitute | Why It Works |
|---|---|---|
| Pecans | Walnuts | Similar fat content. Note: Provides a more earthy, slightly bitter crunch. |
| Yellow Cake Mix | Spice Cake Mix | Amplifies the cinnamon/clove notes for a bolder flavor. |
| Granulated Sugar | Brown Sugar | Adds a deep molasses undertone and more moisture. |
Adding a splash of bourbon or spiced rum to the pumpkin mixture is another "chef's secret" that takes this from a family dessert to something a bit more sophisticated for a dinner party. Just a tablespoon will do it won't make it boozy, but it will deepen the overall complexity of the spices.
Dispelling Common Baking Myths
One myth I hear often is that you have to stir the cake mix into the pumpkin. Please, don't do this! If you stir them together, you'll end up with a standard, dense pumpkin cake.
The whole "crunch" magic relies on those distinct layers remaining separate so the top can dehydrate and crisp up while the bottom stays moist.
Another misconception is that fresh pumpkin is always better than canned. In this specific recipe, canned pumpkin puree is actually superior because it has a consistent moisture content. Fresh pumpkins can vary wildly in how much water they hold, which can turn your custard into a soup.
Stick to the can for this one; it’s one of the few times the "shortcut" is actually the better culinary choice.
Storage and Reheating Guidelines
This Pumpkin Crunch Cake is one of those rare treats that actually tastes better the next day. As it sits in the fridge, the spices have more time to mingle, and the custard becomes even more stable. I usually store it right in the baking pan, covered tightly with plastic wrap or foil.
It will stay fresh in the refrigerator for up to 4 days.
If you want to freeze it, I recommend cutting it into individual squares first. Wrap each square in parchment paper and then place them in a freezer safe bag. They’ll keep for about 2 months. To reheat, just pop a square in the oven at 300°F for about 10 minutes.
This helps the topping regain its "crunch," which usually softens a bit in the fridge. Avoid the microwave if you can, as it tends to make the crust chewy rather than crispy.
For a zero waste tip, if you find you have half a cup of pecans left over, don't let them go stale in the pantry. Toast them with a little honey and salt for a quick snack, or toss them into your morning oatmeal. Even the leftover evaporated milk can be used in your morning coffee for a creamier start to the day.
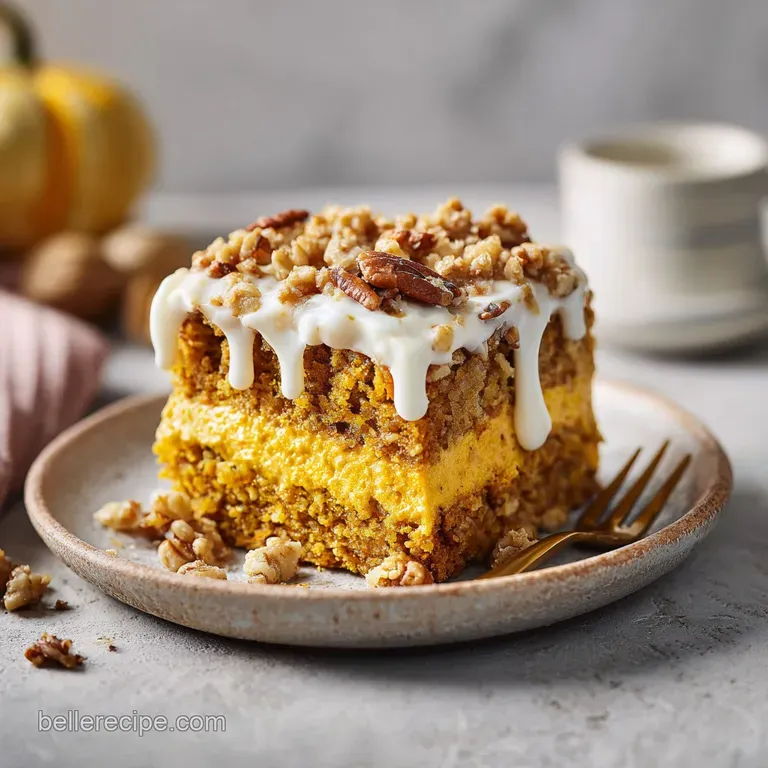
Thoughtful Pairings for Serving
Serving this cake is the best part. I love to offer it slightly warm with a massive dollop of freshly whipped cream. If you’re feeling extra indulgent, a scoop of high-quality vanilla bean ice cream is the way to go. The way the cold cream melts into the warm, spicy pumpkin is nothing short of heavenly.
- The Classic: Homemade whipped cream with a pinch of cinnamon.
- The Decadent: A drizzle of warm salted caramel sauce.
- The Simple: A hot cup of dark roast coffee or a spicy chai tea.
- The Festive: A small glass of tawny port or a nutty sherry.
Whatever you choose, remember to take a moment to breathe in that aroma before you take the first bite. Baking is about more than just the end result; it’s about the warmth it brings into your home and the joy of sharing something handmade with the people you love.
This Pumpkin Crunch Cake isn't just a dessert; it's an invitation to slow down and savor the season. Happy baking!

Recipe FAQs
Can I prepare this cake in advance for a party?
Yes, it tastes even better the next day. The flavors have more time to meld while the custard stabilizes in the refrigerator, making it perfect for hosting.
How to ensure the cake mix isn't powdery after baking?
Drizzle the melted butter carefully across the entire surface. Using a slow drizzle and-tilt technique ensures the butter fully hydrates the dry cake mix, preventing any stubborn dry flour pockets from remaining.
Is it true I can use a different size baking pan?
No, this is a common misconception. You must use a 9x13 inch pan to maintain the correct depth for the custard and topping ratios; using a different size will cause the bake time and texture to fail.
How to store leftovers properly?
Cover the baking pan tightly with plastic wrap or foil and refrigerate for up to 4 days. For longer storage, slice the cake into squares, wrap them individually in parchment, and freeze them for up to 2 months.
How to prevent the custard from sticking to the pan?
Grease the pan liberally with butter or non-stick spray before adding the custard. Properly coating the sides of the dish prevents the high sugar content in the pumpkin mixture from caramelizing onto the glass or metal.
How to know when the cake is finished baking?
Look for a golden brown topping and a set pumpkin layer. If you enjoyed mastering these visual doneness cues, apply the same observational logic to our fluffy cheese soufflé for perfectly consistent results every time.
How to distribute the pecan topping evenly?
Sprinkle the chopped pecans by hand across the entire cake mix layer before drizzling the butter. This ensures every bite has a consistent crunch and that the nuts toast uniformly during the 55-minute bake time.
Pumpkin Crunch Cake

Ingredients:
Instructions:
Nutrition Facts:
| Calories | 491 kcal |
|---|---|
| Protein | 6.1 g |
| Fat | 29.6 g |
| Carbs | 53.2 g |
| Fiber | 2.9 g |
| Sugar | 36.4 g |
| Sodium | 345 mg |
