Rachel Ray-Style Yellow Cake
- Have You Ever Wondered What Makes a Cake Truly Special?
- The Heart and History of Yellow Cake
- Secrets Behind the Perfect Yellow Cake
- Why This Recipe Will Amaze You
- Health and Nutrition Highlights
- Recipe at a Glance
- Master Ingredient List
- Kitchen Equipment Essentials
- Foolproof Cooking Steps for Rachel Ray-Style Yellow Cake
- Professional Secrets
- Perfect Presentation
- Storage and Make-Ahead
- Creative Variations
- Complete Nutrition Guide
- Expert FAQ Solutions
- 📝 Recipe Card
Have You Ever Wondered What Makes a Cake Truly Special?
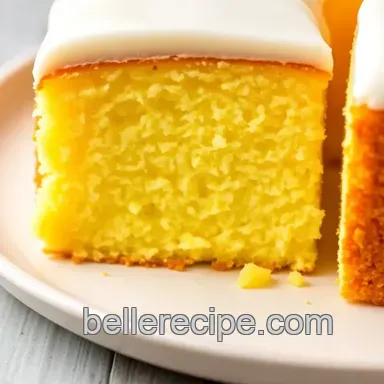
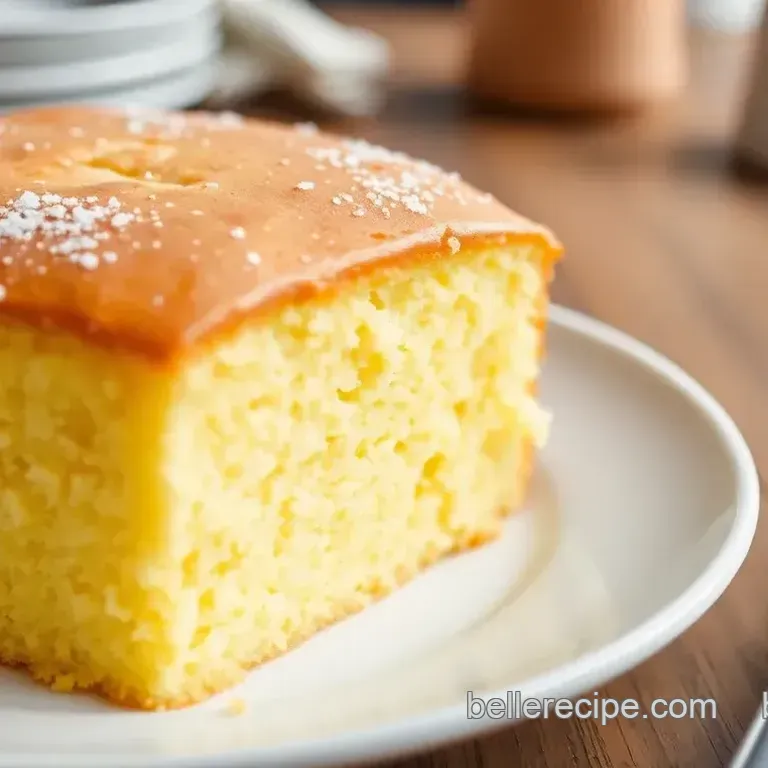
Picture this: a golden yellow cake, moist and fluffy, perfectly made for any celebration or just because it’s tuesday. does it really matter? you bet it does! ever thought about what sets a yellow cake apart? is it the tender crumb? the rich flavor? or maybe the comforting smell wafting from your oven?
This rachel ray-style yellow cake is not just an ordinary dessert; it’s a celebration of simple ingredients, love, and a dash of nostalgia.
With just 50 minutes from start to finish and labeled as easy , this recipe is perfect for both seasoned bakers and newbies alike.
The Heart and History of Yellow Cake
Let’s take a wee trip through time. yellow cake, with its luscious golden hue, has its roots planted firmly in american baking, dating back to the 19th century.
It brings together classic dessert traditions while being embraced by modern bakers everywhere. what makes this cake stand out in the family of desserts is its versatility.
Not only can it serve as a birthday cake, but its adaptability also allows it to shine as a layer cake or even a simple snack with a cup of tea.
The unique selling points of this recipe? well, it’s not just about sweetness. this cake offers a nostalgic nod to childhood birthday parties and family gatherings.
The familiar simplicity of it reminds me of my own baking adventures not all of them were pretty, let me tell you! some of my earliest tries ended up as glorified pancake blobs, and i can still hear my relatives trying to be polite while chewing.
Secrets Behind the Perfect Yellow Cake
Every great dish has its secrets, and this cake is no exception. the rich culinary heritage wrapped around yellow cake is like a cozy blanket on a cold day.
Now, listen to this: historically, yellow cakes often used egg yolks, giving them their delectable color and luscious texture. and today? these adorable desserts have found their place in countless households.
Why do you think it’s so popular? because it just feels right.
What’s also fascinating is how cultural significance plays a role in its popularity. each family in the u.s. has likely had their own version, passed down through generations maybe one baked with love by your grandma while wearing flour covered aprons.
Fast forward to now, and you’ll find influencers and bakers sharing their own spins , creating delicious variations. i mean, who doesn’t love a slice of cake with a touch of whipped cream or buttercream frosting?!
Why This Recipe Will Amaze You
Now, we’re diving into the good stuff . the flavor combinations in this yellow cake are downright enchanting. imagine biting into a slice that rings true to its name: fluffy yellow cake , that is both light and indulgent at the same time.
My favorite part is the charming frosting oh sweet heaven sweetened buttercream melts in your mouth.
Foolproof techniques abound in this recipe, so even if your previous attempts have met with disaster, don’t fret. this method has been tested and tweaked, with a few secrets i learned from past baking faux pas.
Here’s a hot tip: letting your ingredients reach room temperature makes a world of difference. it’s simple, but trust me, it works wonders.
Health and Nutrition Highlights
Now, i’m no nutritionist, but this cake does have some key nutritional benefits . it’s a great source of energy, thanks to the carbohydrates, and it keeps the smiles coming with a moderate amount of protein, too.
If you’re wondering about dietary considerations, you’ll find a many milk alternatives in baking that can be swapped in, like using almond or oat milk if dairy’s not your thing.
Even better, this cake hits that sweet spot of comfort perfect for a pick-me-up during long days. it’s all about finding balance, and indulging every now and again can be part of a well rounded diet.
Recipe at a Glance
Before we jump into the mouthwatering details, let’s get down to the basic info:
- Total Preparation Time: 20 minutes
- Cooking Time: 30 minutes
- Total Time: 50 minutes
- Serving Size: Serves 8 generously
- Difficulty Level: Easy
With all this in mind, you’re probably just itching to roll up your sleeves and bake along. whether it’s a random weeknight treat or the centerpiece for a family gathering, this cake is about to bring some serious joy into your kitchen.
Ready to whip up the magic? Let’s traverse into the ingredients section and gather what you need for this culinary journey!
Master Ingredient List

Premium Core Ingredients
For this lovely yellow cake inspired by Rachel Ray, you'll want top-quality ingredients to ensure a delicious outcome. Here’s what you’ll need:
- 2 1/2 cups all-purpose flour : Look for a finely milled flour that doesn’t clump together. An all-purpose flour from a trusted brand works a charm.
- 2 1/2 tsp baking powder : Make sure your baking powder is fresh. I always check the expiration date nothing worse than flat cakes!
- 1/2 tsp salt : Just a pinch amps up the flavor. Opt for sea salt if you want a subtle difference.
- 3/4 cup unsalted butter, at room temperature : Quality butter makes a difference, trust me. I love to use organic butter when I can.
- 2 cups granulated sugar : Go for pure cane sugar; it adds that lovely sweetness without any funky aftertaste.
- 3 large eggs : Try to use free range eggs for a richer flavor. I've seen a big difference in my cakes since I switched.
- 1 tbsp vanilla extract : Real vanilla goes a long way. It’s worth spending a bit extra on.
- 1 cup whole milk : Opting for whole milk makes the cake richer. If you can't find that, any milk will work, but avoid skim.
Store the flour and sugar in a cool, dry place, and keep your butter and eggs in the fridge until you're ready to use them.
If you're like me and tend to misplace things (i’ve lost a whisk or two!), keep a checklist handy!
Signature Seasoning Blend
While this cake is a sweet treat, you can also add a touch of seasoning for more depth.
- Spice combinations : A dash of nutmeg or cinnamon can create a more complex flavor profile. Start with just a pinch you can always add more if you like.
- Herb selections : While it may sound odd, a touch of finely grated lemon zest adds brightness that pairs beautifully with the vanilla.
- Flavor enhancers : A dash of almond extract (just a little!) can enhance the vanilla flavor remarkably.
- Aromatic additions : Consider adding a splash of freshly squeezed lemon juice to your frosting for a bright kick.
Smart Substitutions
Sometimes, life throws a curveball (like running low on sugar, right?). Here are some handy swaps:
- Alternative options : If you run out of flour, you can use cake flour or even a gluten-free blend. It’ll still be delightful.
- Dietary swaps : If you need a dairy-free cake, try using coconut or almond milk instead of whole milk. Just remember, it's slightly different but still yum!
- Emergency replacements : No eggs? You can use unsweetened applesauce or even ground flaxseed mixed with water as a substitute.
- Seasonal variations : Around the holidays, swap in some pumpkin puree for a unique take!
Kitchen Equipment Essentials
Having the right tools makes a world of difference!
- Must have tools : Mixing bowls, spatulas, and measuring cups should be your best friends here.
- Recommended appliances : An electric mixer is fantastic, but you can also use a whisk just be prepared for a workout.
- Helpful gadgets : I swear by a cake tester; it takes the guesswork out of knowing when the cake’s done.
- Home alternatives : Don’t have cake pans? Use a deep oven safe dish. The shape might vary, but it will taste just as good!
Pro Ingredient Tips
I’ve learned a lot from trial and error as I’ve baked my way through countless cakes.
- Selection secrets : Always check for clumps in your flour or sugar. If you find any, sift them out you’ll thank yourself later!
- Quality markers : Smell your ingredients. If something doesn’t smell fresh, it usually isn’t.
- Storage solutions : Airtight containers are key! I’ve seen flour go stale way too fast in the wrong container.
- Money saving tips : Buy in bulk! Flour and sugar last forever when stored properly.
If you're ready to bring this cake to life, the next part is all about how to whip it together seamlessly.
I’ve got practical steps to help you become the yellow cake superstar you were born to be!
Foolproof Cooking Steps for Rachel Ray-Style Yellow Cake
It feels like just yesterday i was scrambling to make a birthday cake for a friend’s party, stressing over my baking skills.
That's when i came across this yellow cake recipe that reminded me of home - soft, fluffy, and oh-so-fun to customize! let's dive into the essential steps to whip up a delightful cake that’ll impress anyone who takes a bite, all inspired by the genius of rachel ray.
Essential Preparation Steps
Mise en Place Details
First things first, let’s talk about mise en place it sounds fancy, right? but really, it just means getting everything ready before you start cooking.
Gather your yellow cake ingredients : flour, sugar, eggs, and all that jazz. if you’re anything like me, less time rummaging through cabinets means more time enjoying your cake.
Prep Techniques
Measure out 2 1/2 cups of flour, 2 cups of sugar, and the rest of the ingredients. i can’t stress this enough: level your measuring cups and don’t scoop directly from the bag! it makes such a difference in texture.
You want a fluffy yellow cake , not a brick.
Time Management
Set a timer for yourself as you go. prep should take about 20 minutes , and the baking will follow.
With everything organized, you can make sure you're not running around like a headless chicken.
Organization Tips
Keep your workspace tidy. A clean area is easier to work in, plus fewer crumbs will make you feel accomplished! And trust me, no one enjoys cleaning up flour explosions later.
Professional Cooking Method
Step-by-step Process
Preheat your oven to 350°F (175°C) and grease your cake pans. I usually line the bottoms too; just a little parchment paper never hurt anyone, right?
In a medium bowl, whisk together 2 1/2 cups flour , 2 1/2 tsp baking powder , and 1/2 tsp salt .
This makes a fluffy foundation for our homemade cake frosting to sit on later.
In your large mixing bowl, cream 3/4 cup unsalted butter with 2 cups sugar for about 3-5 minutes . it’s a game changer for texture.
If you see it getting light and fluffy, you’re on track!
Add 3 large eggs , one at a time, and mix in 1 tbsp vanilla extract —you’ll want to breathe in that lovely aroma.
Gradually mix in your dry ingredients and 1 cup milk . I like to alternate between them to keep the batter from getting too thick too quickly.
Temperature Control and Timing Precision
Pour the batter evenly into the pans, smooth the tops, and pop them in the oven. Check them out after about 25 minutes . If a toothpick comes out clean, you’re ready!
Success Indicators
Let the cakes cool in the pans for 10 minutes before transferring them to wire racks. If they’re a bit wobbly, you’re not alone! Just gently coax them out.
Expert Techniques
Professional Methods
When it’s time for the frosting, whip 1 cup unsalted butter with 4 cups powdered sugar . It'll take about 2-3 minutes before it turns soft and fluffy think clouds.
Critical Steps
Frost your cake only when it's absolutely cool. I learned this the hard way. Once, I frosted too early, and it slid right off! Not a lovely sight at all.
Precision Points
Frost the first layer on a serving plate, add your next layer, and slather more frosting on top and around the sides.
Quality Checks
Take a moment before serving taste test that frosting! If it’s a smidge too sweet, throw in a little salt to balance it out.
Success Strategies
Troubleshooting Tips
If your cake sinks in the middle, it might be too moist. next time, maybe reduce the milk. if it’s a bit dry, try adding more, or check your oven’s temperature (it could be a rogue).
Quality Assurance
Remember to check for doneness with a toothpick it’s the classic method for a reason!
Perfect Results Guide
Let the cake sit a few minutes after frosted before slicing. This allows the frosting to set a bit and makes for prettier pieces.
All in all, this review of yellow cake rachel ray style, with its hints of nostalgia and warmth, is bound to impress.
Whether you top it with buttercream frosting or serve it with fresh whipped cream , it’s a fantastic treat for any gathering.
I hope you find joy in this baking adventure! If you’re curious about variations or serving suggestions, stick around for more delightful insights. Baking might just become your new favorite hobby!
Professional Secrets
Ah, the art of baking! Let’s dive into some professional secrets that might just elevate your cake game. Having spent countless hours in the kitchen, I’ve picked up a thing or two about creating that utterly fluffy yellow cake you know, the kind that calls out for a generous slather of homemade buttercream frosting?
Professional Insights
First off, always use room temperature ingredients. i can't stress enough how getting the butter and eggs to room temperature can create a light and airy batter.
I remember one time i was in a hurry, and i just wanted cake now! the result? a dense doorstop kind of cake.
Major bummer!
Expert Techniques
Then there’s the creaming method. beat that butter and sugar together until it's light and fluffy think of it like fluffy clouds.
This process is crucial because it creates air, which is exactly what you need for a fluffy yellow cake .
Kitchen Wisdom
If you ever see a recipe that says “gently fold,” they really mean it! get a spatula or a wooden spoon, and gently combine your mixtures instead of beating them.
I made the mistake of being a bit too forceful once. let’s just say the result wasn’t the delightful cake i’d hoped for.
Success Guarantees
And my last piece of advice? don’t rush the cooling process. let those cakes cool fully before you frost. patience is key.
I once tried to frost a warm cake and ended up with a melty mess. yikes!
Perfect Presentation
Now that you’ve got a delicious cake, let’s talk about how to make it look as good as it tastes. Presentation is half the battle, right?
Plating Techniques
A simple wooden board or a funky cake stand can do wonders. i love using a rustic wooden board that gives a cozy vibe.
Just pop your cake on it and it will look like something you'd see at a charming tea shop.
Garnish Ideas
Fresh berries are my go-to for garnishes. they not only pop in color but also add a tangy contrast to the sweetness of the cake.
A little sprinkle of powdered sugar can also add a nice touch like frosting snow.
Serving Suggestions
Always serve your cake with a side of something creamy like whipped cream or a scoop of vanilla ice cream. trust me, it takes the experience to the next level.
I mean, who doesn’t want cake and ice cream?
Visual Appeal Tips
Try adding a few sprigs of mint for that fresh pop of color. it’s all about inviting someone to take a bite before they even taste it.
You’ll find your guests gravitating towards the pretty cake.
Storage and make-ahead
Speaking of cake slices that vanish in seconds, let’s talk about storage and making this yellow cake in advance.
Storage Guidelines
You can cover your cake with plastic wrap or store it in an airtight container to prevent it from drying out.
If you need to store it for more than a day or so, pop it in the fridge just know the texture might change a bit.
Preservation Methods
Alternatively, wrap those cakes in foil and tuck them in the freezer! i’ll admit we’ve frozen leftover cake multiple times, and it still comes out delicious when thawed.
Just make sure to let it come to room temperature before serving.
Reheating Instructions
If your cake is a bit too firm from the fridge, throw a slice in the microwave for about 10-15 seconds. Voila! A warm piece of happiness.
Freshness Tips
But of course, take note: baked cakes are best fresh! i sometimes make double the batch to enjoy half now and freeze the rest for a rainy day.
Perfect for those what’s for dessert emergencies.
Creative Variations
Now, let’s shake things up! A yellow cake is a classic, but why not have some fun with it?
Flavor Adaptations
For a chocolate lover, why not sub out some of that flour for cocoa powder? You get a delightful chocolate yellow cake hybrid that will leave everyone guessing.
Dietary Modifications
If you’ve got someone with dietary needs, swap regular milk for almond milk or oat milk and use coconut oil instead of butter. It’s surprising how tasty those substitutions can be!
Seasonal Twists
In the summer, toss some fresh peaches or berries into the batter. They sink a bit and create these delightful bursts of flavor when you bite into them.
Regional Variations
Ever tried lemon cake ? just add lemon zest to the batter for a zesty surprise. or, for a more festive holiday cake, you could throw in some spiced apples or pumpkin purée depending on the season.
Complete Nutrition Guide
I know, I know calories and healthiness might not be the first things on your mind when you’re diving headfirst into a slice of cake. However, it doesn't hurt to have some insights.
Detailed Breakdown
Each slice of this yellow cake comes in at about 400 calories reasonable for such a splurge! It’s not a meal replacement, but we all deserve a treat occasionally.
Health Benefits
The unsalted butter provides fats that are essential for energy. I mean, we need that boost to keep up with our baking adventures, right?
Dietary Information
With a bit of protein and a dash of sugar, it's not totally devoid of sustenance either. But just remember, moderation is key.
Portion Guidance
I suggest cutting it into 8 equal servings. That way, you can share and delight friends or family or simply have a slice (or two) for yourself!
Expert FAQ Solutions
It’s normal to have questions! Let’s tackle a few common baking concerns everyone encounters along the way.
Common Concerns
Ever worried your cake didn’t rise properly? That usually comes down to old baking powder or not incorporating enough air. Always check the expiration date!
Expert Answers
If your cake is too dry, it might be overbaked! keep an eye on it toward the end of baking.
I tend to use the “toothpick test” pull it out when it’s just clean!
Troubleshooting Guide
For a flat cake, remember not to overmix your batter. It's tempting to beat everything until perfect, I know! But a gentle touch goes a long way.
Success Tips
If all else fails, a good frosting can save the day. It can cover a multitude of baking sins. Plus, a little sprinkle of love always helps!
This yellow cake in the style of rachel ray has a way of feeling like home. whether you’re baking for a special occasion or just because, these tips and tricks should make the process as delightful as the cake itself.
So, roll up those sleeves, gather your ingredients, and let a slice of this fluffy yellow cake bring comfort and joy into your kitchen!
Review Of Yellow Cake Rachel Ray 10 Delicious Ti