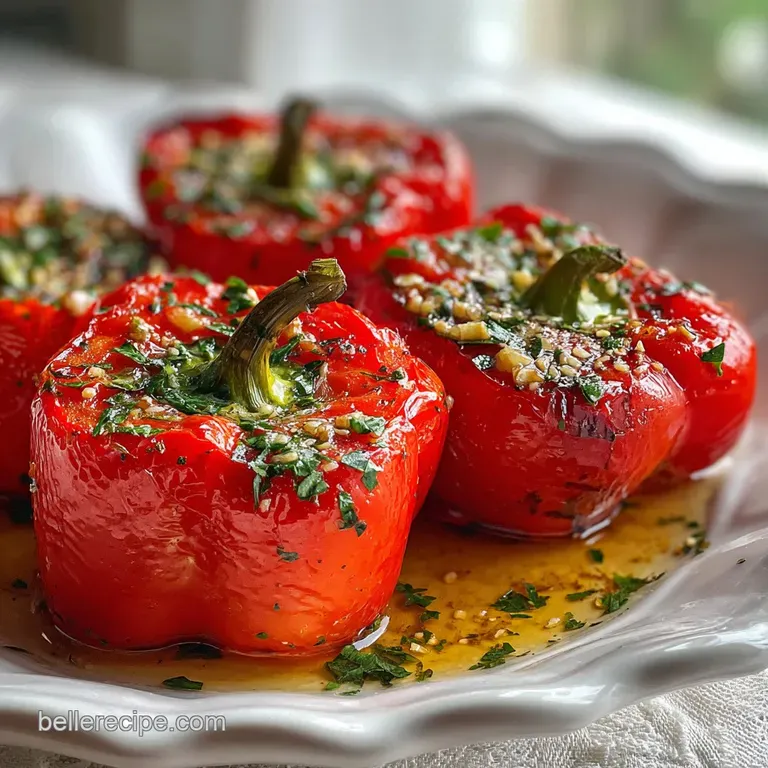
Sweet Peppers with Garlic and Herbs
- Time: Active 10 minutes, Passive 15 minutes, Total 25 minutes
- Flavor/Texture Hook: Blistered, smoky skins with a velvety, tender interior and punchy garlic oil finish
- Perfect for: Stress free weeknight dinners or a vibrant addition to a weekend tapas spread
- Mastering the Art of Sweet Peppers with Garlic and Herbs
- Essential Timing and Yields for Busy Cooks
- The Elements of a Vibrant Seasonal Medley
- Kitchen Gear for the Best Results
- A Step by Step Guide to Blistering
- Solving Common Texture and Flavor Issues
- Flexible Adaptations for Every Occasion
- Freshness Hacks and Future Meal Ideas
- Presentation Tips for Your Vibrant Dish
- Myths Regarding Pepper Preparation
- Recipe FAQs
- 📝 Recipe Card
Mastering the Art of Sweet Peppers with Garlic and Herbs
The first time I really understood the magic of this dish was on a humid Tuesday evening in late July. I was tired, the kitchen felt too small, and I had a bag of mini peppers that were starting to look a little sad in the crisper drawer.
I threw them into a heavy skillet with a glug of oil, and the immediate, sharp sizzle against the hot metal changed the energy of the whole room. As the skins began to blister and pop, releasing that nostalgic, charred aroma, I realized that cooking isn't always about complex steps; it is about respecting the ingredients.
This sweet pepper recipe with garlic and herbs will become your new favorite side dish because it bridges the gap between effortless cooking and high end flavor. We often overthink side dishes, but there is something deeply comforting about watching a handful of peppers transform from crunchy and raw into something supple, sweet, and fragrant.
You aren't just making a side; you are creating a memory of a meal that felt mindful and intentional, even on a busy night.
We've all been there where the garlic burns before the peppers are soft, or the herbs turn into bitter little sticks. Trust me, I have made those mistakes so you don't have to. We are going to focus on the timing of the aromatics and the heat of the pan to ensure every bite is balanced.
It’s about that specific moment when the peppers lose their structural rigidity and start to slump into the garlic infused oil, soaking up every bit of herbaceous goodness.
Essential Timing and Yields for Busy Cooks
The Physics of the Blister: High heat causes the air inside the pepper to expand rapidly while the natural sugars in the skin caramelize against the pan. This creates a smoky "char" without overcooking the delicate flesh inside.
Chef’s Tip: Shave your garlic with a vegetable peeler instead of a knife. This creates paper thin slivers that melt into the oil almost instantly, providing a velvety texture rather than crunchy bits.
Chef’s Tip: Toss the peppers in a bowl with the oil and salt before they hit the pan. This ensures every nook and cranny is coated, leading to even browning and preventing the salt from just falling to the bottom of the skillet.
| Method | Time | Texture | Best For |
|---|---|---|---|
| Cast Iron Skillet | 15 minutes | Heavily charred and tender | Maximum smoky flavor |
| Sheet Pan Roast | 22 minutes | Evenly softened, less char | Large batches/Hands off |
| Air Fryer | 12 minutes | Very bubbly skins, firm bite | Quick individual portions |
Adding a splash of acid at the very end is what takes this from "good" to "unforgettable." The balsamic vinegar doesn't just add sweetness; it cuts through the richness of the olive oil and wakes up the palate. If you find yourself enjoying the way these peppers work as a base for other meals, you might also want to explore the techniques in The Homemade Sweet recipe for a more preserved version of these flavors.
The Elements of a Vibrant Seasonal Medley
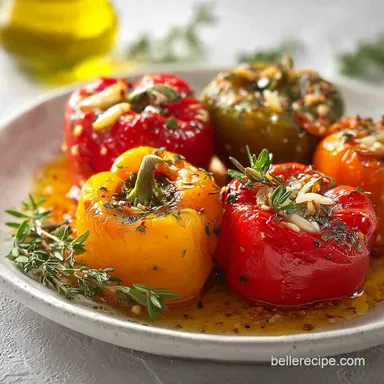
The beauty of this dish lies in the quality of the produce. When you pick up a pound of mini sweet peppers, look for skins that are taut and shiny, not wrinkled. The colors vibrant reds, oranges, and yellows aren't just for show; they signify different levels of ripeness and sweetness.
When these hit the heat, they release a fragrance that is part floral and part earthy.
| Component | Science Role | Pro Secret |
|---|---|---|
| Mini Sweet Peppers | Sugar Source | Leave stems on for a rustic look and easier flipping. |
| Shaved Garlic | Aromatic Infusion | Add in the last 3 minutes to prevent the Maillard reaction from turning bitter. |
| Rosemary/Thyme | Volatile Oil Release | Slap the herbs against your palm before adding to "wake up" the oils. |
| Balsamic Vinegar | pH Balancer | Use a glaze style balsamic for a syrupy, velvety coating. |
- - 1 lb mini sweet peppers
- These are naturally sweeter and have thinner skins than full sized bell peppers.
- - 2 tbsp extra virgin olive oil
- Use the good stuff here; the flavor is prominent.
- - 0.5 tsp coarse sea salt
- Provides a necessary crunch and draws out moisture.
- - 0.25 tsp freshly cracked black pepper
- Adds a subtle, woody heat.
- - 4 cloves fresh garlic
- Must be fresh; the pre peeled stuff lacks the necessary sulfurous punch.
- - 2 sprigs fresh rosemary or thyme
- These woody herbs stand up well to the high heat of the skillet.
- - 1 tbsp balsamic vinegar
- Acts as the finishing "brightener" for the dish.
- - 1 tbsp fresh flat leaf parsley
- Adds a hit of chlorophyll and freshness at the end.
Kitchen Gear for the Best Results
To get that specific shatter on the pepper skins, the material of your pan matters more than you might think. A heavy bottomed skillet, preferably cast iron or stainless steel, is your best friend here.
These materials hold onto heat, meaning when you dump a pound of cold peppers into the pan, the temperature doesn't plummet. If the pan gets cold, the peppers will steam in their own juices rather than sear, leaving you with a soggy mess.
You’ll also want a pair of long handled tongs. Since we are working with high heat and oil, there will be some popping and splashing. Tongs allow you to turn each pepper individually, ensuring that every side gets its moment against the hot surface.
A small bowl for pre mixing your seasonings is also helpful, as things move quickly once the garlic hits the oil.
Finally,, don't underestimate the power of a sharp mandoline or a very sharp chef's knife for that garlic. We want "Goodfellas" thin slices so thin they practically disappear into the sauce.
This ensures the garlic flavor is a gentle hum in the background of the and herbs infusion rather than a sharp, pungent interruption.
A step-by-step Guide to Blistering

- Wash and dry the peppers thoroughly.Note: Water on the surface will cause the oil to splatter and prevent the skins from charring properly.
- Toss peppers with 2 tbsp extra virgin olive oil and 0.5 tsp sea salt.Note: Coating them beforehand ensures the seasoning sticks to the smooth skins.
- Heat a heavy skillet over medium high heat for 3 minutes. Wait until you see a faint wisp of smoke.
- Place peppers in the pan in a single layer.Listen for a loud, aggressive sizzle.
- Sear for 5 minutes without moving them. Cook until the bottom side is blackened and blistered.
- Turn peppers using tongs and cook for another 5 minutes. Watch for the peppers to soften and begin to slump.
- Reduce heat to medium and add 4 cloves shaved garlic and 2 sprigs rosemary.Sauté until the garlic is golden and the herb aroma fills the room.
- Drizzle with 1 tbsp balsamic vinegar and toss well.Wait for the vinegar to bubble and thicken into a light glaze.
- Remove from heat and stir in 1 tbsp chopped parsley.The residual heat will wilt the parsley just enough.
- Transfer to a platter and finish with 0.25 tsp cracked black pepper.Serve immediately while the skins are still slightly crisp.
The scent of the rosemary hitting the hot oil is one of my favorite kitchen moments. It’s an earthy, resinous smell that signals the transition from "just cooking" to "crafting flavor." If you love this aromatic profile, you might find that it works beautifully as a topping for something more substantial, like the base of How to Make recipe where peppers provide a sweet counterpoint to savory meat.
Solving Common Texture and Flavor Issues
The biggest hurdle with this pepper recipe with garlic and herbs is managing the moisture. If you crowd the pan too much, the peppers release steam, and instead of a charred, smoky exterior, you end up with a dull, grey, boiled texture.
If you don't have a pan large enough to hold them all in one layer, it is worth the extra ten minutes to cook them in two batches. Trust me, the difference in the final shatter of the skin is worth the wait.
Why the peppers turned out soggy
Usually, this happens because the pan wasn't hot enough or was too crowded. High heat is non negotiable for that classic blistered look. If the peppers are sitting in a pool of liquid, they are steaming. Increase the heat and ensure you patted them dry with a paper towel before they hit the oil.
Dealing with bitter, burnt garlic
Garlic has a very high sugar content and almost no water, which means it goes from perfect to burnt in a matter of seconds. If your garlic turned dark brown or black, it will taste acrid.
The solution is to always add the garlic during the final few minutes of cooking, after the peppers have already done the heavy lifting of charring.
| Problem | Root Cause | Solution |
|---|---|---|
| Tough skins | Undergarmented heat | Cook longer at a lower temp after the initial sear to soften the fibers. |
| Lack of flavor | Insufficient salt | Salt the peppers before cooking to allow it to penetrate the skin. |
| Greasy finish | Oil was too cold | Ensure pan is preheated so the oil coats rather than soaks into the veg. |
Common Mistakes Checklist - ✓ Don't skip the drying step; moisture is the enemy of the sear. - ✓ Use a high smoke point oil if you are worried about the olive oil burning, though EVOO works if you watch it.
- ✓ Never add the garlic at the start; it simply cannot survive 15 minutes of high heat. - ✓ Keep the stems on; they act as a "handle" and look beautiful on the plate. - ✓ Let the pan reheat for a minute between batches if you are doubling the recipe.
Flexible Adaptations for Every Occasion
While the classic recipe with garlic and herbs is hard to beat, there is plenty of room to play. If you aren't a fan of rosemary, thyme is a much gentler, more floral alternative. I sometimes use oregano if I’m serving these alongside a heavy pasta dish.
The acidity can also be swapped; a squeeze of fresh lemon juice or a splash of sherry vinegar offers a completely different, brighter profile than the deep, raisiny notes of balsamic.
| Original Ingredient | Substitute | Why It Works |
|---|---|---|
| Balsamic Vinegar | Lemon Juice | Provides a sharper, citrusy lift. Note: Lacks the sweetness of balsamic. |
| Fresh Rosemary | Dried Oregano | Gives a more "pizzeria" vibe to the dish. |
| Mini Sweet Peppers | Sliced Bell Peppers | Same flavor but requires less cooking time as they are thinner. |
If you want a bit of heat, tossing in a pinch of red pepper flakes during the last minute with the garlic creates a wonderful "sweet and spicy" dynamic. You can also turn this into a more substantial appetizer by serving the blistered peppers over a bed of whipped feta or creamy goat cheese.
The heat from the peppers slightly melts the cheese, creating a velvety sauce that is perfect for dipping crusty bread into.
Freshness Hacks and Future Meal Ideas
Storage: These peppers keep remarkably well in the fridge for up to 4 days. In fact, some people prefer them the next day because the garlic and herb oils have had more time to penetrate the flesh of the peppers.
Store them in a glass airtight container to keep the garlic aroma from taking over your entire refrigerator.
Freezing: I don't recommend freezing these if you want to eat them as a standalone side dish. The freezing and thawing process breaks down the cell walls, making them quite mushy. However, they are great to freeze if you plan on blending them into a soup or a sauce later on.
They will last about 3 months in a freezer bag.
- - Herb Stems
- Don't throw away the rosemary or thyme stems! Toss them into your next batch of chicken stock or vegetable broth for a woody undertone.
- - Leftover Oil
- The oil left at the bottom of the pan is liquid gold. It's infused with garlic, pepper essence, and herbs. Save it to drizzle over avocado toast or use it as a base for a vinaigrette.
- - Peelings
- If you have any small pepper scraps, dice them finely and fold them into an omelet the next morning.
When it comes to reheating, avoid the microwave if possible, as it makes the skins rubbery. Instead, toss them back into a hot, dry skillet for 2-3 minutes. This helps re crisp the edges and wakes up the aromatics.
Presentation Tips for Your Vibrant Dish
When you are ready to serve this with garlic and herbs masterpiece, think about color and height. Don't just dump them into a bowl. Arrange them on a flat platter, allowing the different colors to mingle.
Pour every last drop of that balsamic garlic oil over the top that's where the soul of the dish lives. A final sprinkle of the fresh parsley and a few extra flakes of sea salt provide a professional, finished look that makes the dish pop.
One of my favorite ways to share this is on a large wooden board alongside some olives, charred bread, and maybe some Marcona almonds. It encourages people to reach in and grab a pepper by the stem, making the meal feel communal and relaxed.
It’s a dish that invites conversation, the kind where you linger over the last few bites while the sun goes down.
If you find yourself with an abundance of peppers and want to try a different texture, you could even use the flavors here as a starting point for Honey Lemon Pepper Sauce recipe, which shares that beautiful balance of sweet and zingy. Whether you serve them hot, cold, or at room temperature, these peppers are a testament to the fact that with just a little heat and some good garlic, you can transform the simplest ingredients into something truly special.
Myths Regarding Pepper Preparation
One common misconception is that all pepper seeds are spicy and must be removed. In mini sweet peppers, the seeds are actually quite soft and carry a pleasant, nutty sweetness. Removing them is a tedious task that doesn't significantly improve the dish, so feel free to leave them in!
Another myth is that you need a grill to get a "charred" flavor. While a grill is great, a heavy cast iron skillet can reach the temperatures necessary to create those dark, flavorful blisters.
The key is to leave the peppers alone once they hit the pan; moving them too much prevents the surface temperature from getting high enough to caramelize the sugars effectively.
Finally, some believe that fresh herbs and dried herbs are interchangeable. In a quick sauté like this, dried herbs often remain woody and can even burn, becoming bitter. Fresh herbs contain moisture and volatile oils that release slowly into the fat, providing a much more nuanced and "green" flavor profile that complements the sweetness of the peppers perfectly.

Recipe FAQs
What to do with an abundance of sweet peppers?
Blister them with garlic and herbs. This quick method transforms them into a flavorful side dish or appetizer. If you find yourself with a surplus, consider techniques like pickling, as seen in our Easy and Zesty: How to Pickle Banana Peppers for Flavorful Meals.
Do sweet peppers raise your blood sugar?
Generally, no, not significantly. Sweet peppers are low in carbohydrates and high in fiber, which helps to slow down sugar absorption into the bloodstream. Their glycemic index is very low.
How to make pepper and garlic seasoning?
Toast and grind dried peppers with garlic powder. For a quick seasoning, combine equal parts dried red pepper flakes (or other dried sweet pepper flakes) and garlic powder, then add a pinch of salt. You can then toast this mixture lightly in a dry pan before grinding for a more potent flavor.
What's the secret to perfectly sauteed peppers?
High heat and a hot pan are crucial. Ensure your pan is preheated to medium high or high before adding the peppers. Cook them in a single layer without overcrowding the pan, allowing them to sear and blister properly, which creates that desirable tender crisp texture and smoky flavor.
Can I use regular bell peppers instead of mini sweet peppers?
Yes, but adjust cooking time. Larger bell peppers will need to be sliced into strips or chunks, and their cooking time will be slightly longer to achieve the same tender texture as mini sweet peppers. The flavor profile will remain similar.
Is it true that cooking peppers for too long makes them mushy?
Yes, that is correct. Overcooking sweet peppers, especially over medium low heat without proper searing, will break down their cell walls and result in a mushy texture. High heat, short searing times, and not overcrowding the pan are key to maintaining a pleasant bite.
How can I add more flavor to sauteed peppers?
Incorporate aromatics and finishing touches. Add shaved garlic and fresh herbs like rosemary or thyme during the last few minutes of cooking to prevent burning and infuse maximum flavor. A splash of balsamic vinegar or a squeeze of fresh lemon juice at the end brightens the dish significantly, similar to how acid balances flavors in Marry Me Chickpeas Recipe: Creamy Sauce.
Sweet Peppers Garlic Herbs
Ingredients:
Instructions:
Nutrition Facts:
| Calories | 104 kcal |
|---|---|
| Protein | 1.4 g |
| Fat | 7.1 g |
| Carbs | 8.8 g |
| Fiber | 2.5 g |
| Sugar | 5.6 g |
| Sodium | 296 mg |
