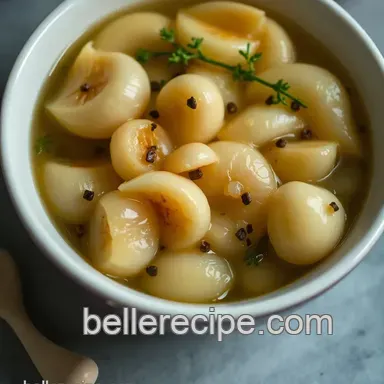
Tangy-Fresh Pickled Garlic: a Zesty Jar of Goodness
The Zesty Journey of Pickled Garlic
You ever stumbled upon a recipe that just made your taste buds do a happy dance? well, that was me when i first tried pickled garlic .
Picture this: it was a rainy saturday afternoon, and i was about to dive into my pantry, excited to experiment.
I opened a jar of pickled garlic my friend had gifted me. one bite in, and i was hooked! the tanginess, coupled with that rich garlic flavor, was unlike anything i'd experienced before.
It hit me then… i had to make this magical condiment myself!
A Little History Lesson on Pickled Garlic
Pickled garlic has roots that spread across continents from asian cuisines all the way to mediterranean diets. it’s not just about craving something tangy; it has traditions and stories attached to it.
Historically, garlic signified health and protection. you might have heard it was once used to fend off vampires okay, maybe not real ones, but you get the idea! nowadays, it’s a hit at farmer’s markets and trendy restaurants.
People just can’t get enough of pickled recipes that add flair to their meals.
The beauty of this pickled vegetables recipe is its ease. for busy folks or novice cooks, this is like a gateway drug to the world of fermentation recipes.
Grab your favorite jar, and boom! soon enough, you'll have zesty cloves at your fingertips. the hardest part? waiting for the flavors to blend.
Seriously, it’s like christmas morning, but with garlic!
Time and Cost: The Lowdown
Alright, let's break down the numbers. you’re looking at 15 minutes to prep and 5 minutes of cooking to whip up your brine.
The rest? just let it chill for a day easy peasy! it yields about 2 cups of deliciousness which will last you for weeks (if you don’t gobble it up first).
Now, let’s talk dollars and cents. making pickled garlic at home is not only cheaper than splurging at gourmet stores, but you also get to control everything that goes in.
We’re talking about a handful of ingredients that won’t break the bank. can i get a “yes please”?!
Why You’ll Love Pickled Garlic
So, why should you add this to your culinary repertoire? First off, it’s a powerhouse of flavor and nutrition. Garlic is known for its immune boosting properties, and pickling it ramps up the enjoyment factor like a shootout in a Wild West movie!
Plus, let’s chat about versatility. these zesty beauties are perfect for special occasions, like summer barbecues, or simply jazzing up your weeknight dinner.
Think about it: a fresh salad topped with pickled veggies , and bam! you’re a culinary superstar. and don’t even get me started on those late night snack cravings these cloves make a killer addition to sandwiches or cheese plates.
What about those who might say, “oh, i don’t like garlic”? well, this tangy twist just might change their minds.
It’s got that perfect balance of sweet and sour, with just the right amount of zing, making it a notable condiment in a world full of ordinary dips and sauces.
So are you ready to dive into the world of tangy goodness? Let’s gather our ingredients, and I’ll show you how to make this fabulous Garlic Recipe that you won’t be able to keep to yourself!
Essential Ingredients Guide: Unlocking Flavorful Cooking

When it comes to cooking, every meal starts with premium core components . and let me tell ya, knowing your ingredients is like having the golden ticket.
Whether you're whipping up a savory dish at home or diving into some exciting pickled recipes like spicy pickled garlic , understanding the basics is key.
Premium Core Components
First up, let’s talk about detailed measurements . you’ve got to get this right! for instance, if a recipe calls for 1 cup of vinegar (about 240 ml for my metric friends), don’t mess around! that precision makes all the difference.
Next, how do you know what’s quality? look for fresh garlic that’s firm, not sprouting. make sure it’s free from any odd smells.
.. no one wants funky garlic in their dish. plus, don’t forget storage guidelines ! store your fresh goodies in a cool, dark place.
For garlic, a mesh bag in the pantry could do wonders. bring it into the fridge only if you want to slow down the whole sprouting process.
Oh, and when selecting your garlic for that mouthwatering garlic recipe ? Pick bulbs that feel heavy for their size. Freshness matters!
Signature Seasoning Blend
Now, let’s get a little jazzy with signature seasoning blends . you can’t go wrong with herbs ! a mix of thyme, rosemary, and oregano can make your dishes sing.
And did i mention aromatics ? that’s fancy talk for things like garlic and onions that add depth to flavors.
Also, spices! just a sprinkle of fresh cracked black pepper can elevate your dishes tenfold. if you’re feeling adventurous, throw in some chili flakes for a kick just like in my favorite spicy pickled garlic recipe.
Smart Substitutions
Okay, life happens, and you don’t always have what you need. here’s where smart substitutions save the day! out of garlic? try shallots or even chopped onions in a pinch for that flavor fix.
Need to go gluten-free? simple! use brown rice instead of pasta and make it shine!
And hey, if you’re in a pickle about dietary restrictions, there are options everywhere. swap sugar for honey when making your brine for those pickled veggies , and it becomes a healthier alternative.
Plus, have you ever tried pickling other veggies? it’s a whole world of fun!
Kitchen Equipment Essentials
Let’s not forget about our trusty tools. must have kitchen equipment can make or break your cooking experience. a good chef's knife is a game changer.
Trust me on this! a solid cutting board, a glass jar for your pickled goodies, and a saucepan are all you need for your pickle journey.
And if you don’t have a special jar for pickling? no worries! use any clean glass jar you can find.
The important thing is to make sure it’s sterilized so those crunchy pickled foods last longer.
Final Thoughts
Remember that making things like pickled garlic is incredibly satisfying. It feels great to know you’re creating something flavorful from scratch!
So buckle up, grab your ingredients, and get ready for deliciousness! before we dive into the full recipe, don’t skip on picking your favorite spices and trusty tools because they’ll take your pickling adventure to the next level.
Trust me, when you taste that zesty burst of flavor, you’ll be glad you did! now, let's get to those step-by-step instructions for tangy fresh pickled garlic!
Mastering the Art of Pickled Garlic: Your Go-To Guide
Alright, let’s talk pickled garlic! this tangy fresh pickled garlic recipe isn’t just a condiment; it’s a game changer. just imagine that burst of flavor seriously, your sandwiches and salads will thank you! plus, making it yourself is super easy and fun.
Ready? let’s dive into it!
Essential Preparation Steps
Before we get into the nitty gritty, let’s set the stage. when you're about to whip up something magical like pickled garlic , it's all about mise en place .
Get everything prepped and ready to rock before turning on the heat. that means your garlic cloves should be peeled and your brine ingredients (vinegar, water, sugar, sea salt) measured out.
Time management is key here, folks. This isn’t a race, so take your time and enjoy the process. Have a little music playing in the background maybe some classic rock or a podcast? Just keep it light and breezy!
Now, let’s talk safety. when working with boiling liquids, and that brine is going to be hot, always handle it with care.
No one wants third degree burns because they were too focused on their chef’s hat to notice spilled liquid!
step-by-step Process
Prepare the Garlic : Peel about 10 to 12 cloves of garlic don't be stingy!
Make the Brine : In your saucepan, combine 1 cup of white vinegar , 1 cup of water , ½ cup of sugar , and 2 teaspoons of sea salt .
Heat It Up : Put that on medium heat until it's boiling, stirring till everything dissolves. This should take about 5 minutes .
Jar It Up : Once your brine is nice and hot, pack those garlic cloves into your glass jar, then pour the brine over them. Make sure those cloves are totally submerged!
Seal It Tight : Cover your jar and let it cool to room temperature.
Chill Out : Seriously, just stick it in the fridge for a minimum of 24 hours . The longer you let those flavors meld, the better it gets.
Expert Techniques
Here’s the fun part! professional methods are all about finesse. one critical tip: use fresh garlic, because that straight-up impacts the flavor.
A quality checkpoint here is to taste a clove after a week if it’s a little too spicy, remember that garlic gets stronger the longer it sits.
Now, if you ever run into a situation where your brine didn't cover all the cloves, don’t fret. just make a bit more brine and add it in.
No garlic should be left behind!
Success Strategies
Let’s avoid some common mistakes. don’t underestimate your brine. if it doesn’t taste right at first, adjust. that’s the beauty of experimentation ! it’s all about finding the right balance for your taste buds.
Also, if you're thinking of making this a regular gig ( pickled recipes galore, right?), try a batch with different spices.
Maybe add some red pepper flakes for a spicy kick, or experiment with herbs like dill and thyme . the possibilities are endless !
Pro Tip: make-ahead options
If you know you’ll need some pickled goodies for a gathering, you can totally make these ahead of time . Pickled foods last quite a while in the fridge, so you can have a zesty surprise ready to go at your next BBQ!
Wrapping It All Up
Now you’re all set to tackle homemade pickled garlic like a pro! it's not just about adding some tang; it's about making a statement at your next meal.
Trust me, once you serve it up with charcuterie boards or sprinkle it in your favorite salads, people will be all over it.
In the world of fermented foods, pickled garlic is an underdog that deserves the spotlight so give it a shot! next up, let’s explore some additional information to enhance your pickling journey.
Happy cooking!
Additional Recipe Information for Your Delicious Pickled Garlic
Oh my gosh, let’s dive into the nitty gritty of making tangy fresh pickled garlic ! there’s so much to explore when it comes to this zingy delight.
Whether you’re a novice in the kitchen or a seasoned pro, these pro tips and creative variations will take your pickled vegetables recipe to the next level.
Pro Tips & Secrets
Let’s start with the insider secrets, shall we? first off, when it comes to garlic, choose quality . fresh and firm bulbs make a world of difference in flavor.
Honestly, there’s nothing worse than wilty garlic ruining your creation!
For a time saving technique , peel your garlic cloves ahead of time. you can even do this while you binge watch your favorite show! once you have the cloves all ready, whip up the brine in just five minutes .
It’s like magic!
Ever wonder how to enhance those flavors? feel free to experiment with spice levels if you're feeling adventurous, toss in a teaspoon of red pepper flakes for a spicy pickled garlic vibe.
It’s perfect for your palate if you love a little heat!
And remember, presentation matters! Pour your pickled garlic into a beautiful jar. The colors! The vibrancy! You’ll want to show it off.
Perfect Presentation
Now that your jar is filled to the brim with deliciousness, it’s time to make it visually appealing. Everyone eats with their eyes first, right?
Consider using a plating technique with some fresh herbs on top to elevate the look. think rosemary or dill for some color.
You can even layer in colorful pickled veggies alongside the garlic for that instagram worthy shot.
When garnishing, don’t hold back! a splash of olive oil can make everything shimmer, or sprinkle a bit of sesame seeds for that added crunch.
Remember, the more vibrant the colors, the more inviting it looks.
Storage & make-ahead Tips
This is where it gets super practical how do we keep all that yummy goodness? store your pickled garlic in the fridge! it’ll last up to three weeks .
That being said, it always tastes best the longer it marinates so, if you can resist, let it sit for a full week before diving in.
For quick lunches or a busy week ahead, make a double batch! toss some in the freezer in an airtight container for longer storage.
Just remember to thaw them in the fridge overnight when you’re ready to enjoy.
Creative Variations
Want to take your garlic to the next level? here are some fun spins! how about a honey ginger pickled garlic ? swap out sugar for honey and add thin ginger slices.
It’s a sweet and savory combo that’s simply divine!
You could step into the heat zone with smoky chipotle pickled garlic ! Just add a teaspoon of chipotle powder or throw in a dried pepper for a fiery kick.
Don’t forget about seasonal twists ! In fall, toss in a few cranberries for a festive feel; in spring, try pairing it with asparagus. The possibilities are endless unleash your creativity!
Complete Nutrition Guide
Wait, wait, here’s an important part: the nutrition! a serving of this pickle (that’s about two to three cloves) comes in at roughly 35 calories .
Not bad for such a flavorful addition! plus, garlic has loads of health benefits, like boosting your immune system.
If you're watching your sodium intake, keep in mind that adding salt to your brine also adds a bit of sodium to the mix. Let’s just say, moderation is key here!
Wrap-Up & Encouragement
So, are you ready to tackle this garlic recipe ? this pickled garlic isn’t just any condiment; it’s a vibrant burst of flavor that can transform any dish.
Each clove is a little burst of joy!
Get in that kitchen and embrace the art of pickling! don’t get caught in a pickle take your time and enjoy the process.
Whether you're dolling it up on a sandwich or snacking straight from the jar, you know what they say: good food starts with good vibes.
Happy pickling!
Frequently Asked Questions
How long does pickled garlic need to sit before it's ready?
Pickled garlic is technically ready to enjoy after just 24 hours in the fridge, but it really shines after a week. The longer it sits, the more flavorful it becomes, so if you can resist the urge, let it marinate for a week or two for the best taste!
Can I use different types of vinegar for pickled garlic?
Absolutely! While the recipe calls for white vinegar, feel free to experiment with apple cider vinegar for a fruity splash or rice vinegar for a milder flavor. Just keep in mind that different vinegars can alter the overall taste of your pickled garlic.
What can I do with pickled garlic besides snacking on it?
Pickled garlic is a versatile delight! Toss it into salads, add it to sandwiches for a zing, or mix it into dressings and marinades. You can even serve it alongside a cheese and charcuterie board for a lovely pop of flavor that complements your favourites!
How should I store pickled garlic, and how long does it last?
Keep your pickled garlic in the fridge in a tightly sealed jar. It should last for about 3-4 months, thanks to the vinegar's preserving properties. The garlic may lose some crunch over time, but the flavor will continue to develop!
Can I add extra spices to my pickled garlic recipe?
Absolutely! Get creative! Along with the black peppercorns and thyme, feel free to add things like dill, mustard seeds, or even chili flakes for an extra kick. Each spice will add a unique twist, so have fun experimenting!
Is there a way to make pickled garlic less intense for those who find it too strong?
If the garlicky punch is a bit too much, you can cut down on how many cloves you use or even boil the garlic in water for a few minutes before pickling. This helps mellow the raw garlic flavour while still allowing for that delicious tanginess of pickled garlic!
Tangy Fresh Pickled Garlic A Zesty Jar Of Goodne