Vibrant Vegetable Tray Extravaganza
- look into into the Colorful World of Vegetable Trays!
- A Quick Peek into the History of Vegetable Trays
- Why You’ll Love This Veggie Tray
- Transitioning to the Ingredients
- Your Essential Ingredients Guide to Gorgeous Veggie Trays
- Professional Cooking Method: Elevating Your Veggie Tray Game
- Additional Recipe Information
- Frequently Asked Questions
- 📝 Recipe Card
look into into the Colorful World of Vegetable Trays!
Oh my gosh, do you remember family gatherings when you were a kid? the noise, the laughter, and the sprawling buffet of food? one dish that always caught my eye was the veggie tray .
I remember my uncle's ensoiastic comments on how not eating those crunchy, colorful bites was a missed opportunity. fast forward to today, and i find joy in creating vibrant vegetable tray ideas that can impress anyone at a barbecue, wedding, or just a friday night netflix binge!
So, what makes a veggie tray so great? well, apart from the nostalgia, it’s a fantastic way to make healthy eating fun! you know, there’s something about bright colors that beckon you to dig in.
They say you eat with your eyes first, right? and hey, who doesn’t love a snack that you can enjoy guilt free?
A Quick Peek into the History of Vegetable Trays
The origins of veggie trays are kind of fascinating! they have roots back to communal dining traditions. imagine tea parties in britain, where these shared dishes brought everyone together.
Fast forward to now, and these cool veggie trays are everywhere from thanksgiving feasts to christmas parties, they’ve become a staple at gatherings.
Plus, in today’s health conscious world, they’ve gained even more popularity. people are looking for light bites that don’t skimp on flavor!
Are you wondering about the effort involved? well, i’m here to tell you it’s super easy ! we’re talking 20 minutes of prep time no cooking, just slicing and dicing.
Honestly, even if you’ve burned a couple of dinners in your life, you can totally pull this off! and the cost? not too shabby either.
You'll whip up a visually stunning tray for about $20 and feed a crowd of 8-10 people . how’s that for a budget friendly snack?
Why You’ll Love This Veggie Tray
First off, health benefits galore! fresh veggies are packed with vitamins and fiber, making them the perfect guilt free snack. and pairing them with tasty dips like tzatziki and hummus? total game changer!
💪 you get the crunch of carrots and the creamy yum of hummus that’s winning at snacks, my friends.
Plus, think about those special occasions. there’s nothing like a vibrant veggie platter to spruce up a gathering. you can customize it for any season.
My summer veggie platter includes juicy cherry tomatoes and crispy snap peas, while my thanksgiving version might add roasted vegetables for a cozy touch.
Trust me, you’ll be the star of every occasion!
And let’s not forget about all the fun variations you can make. want to go trendy? try a small fruit and veggie charcuterie board with some colorful fruits sprinkled in.
It’s like a party in your mouth! or whip up a veggie dip board where guests can create their own flavor combos.
The possibilities are endless!
Transitioning to the Ingredients
Ready to dive into the details? let’s check out what you’ll need to make this vibrant vegetable tray extravaganza . gather your fresh veggies, pick your favorite dips, and let’s turn this colorful snack into your new obsession.
Seriously, once you’ve tried it, you might find yourself taking a platter to every gathering!
So, roll up your sleeves, and let’s get started!
Your Essential Ingredients Guide to Gorgeous Veggie Trays
When it comes to hosting, there's nothing that shines brighter than a vibrant vegetable tray . not only do they look amazing, but they’re super easy to whip up! so, let's get down to business with your essential ingredient guide, covering everything from core components to smart substitutions and kitchen tools.
Grab a snack; you'll want to snack while reading this!
Premium Core Components
Let’s kick off with the fundamentals. Knowing your ingredients is key to making any dish shine!
- Detailed measurements are crucial. Use metric when you're feeling fancy, but we all know our cups and tablespoons are basically the language of the kitchen here in the U.S.
- Look out for quality indicators . Choose vibrant, firm vegetables that whisper "fresh" when you stroll through the market. If they’re all shriveled up, keep walking!
- Storage guidelines are your besties. Most fresh veggies will be OK in the fridge for about a week, but that’s not guaranteed. Snap peas? They’re best eaten within three days for optimum crunch.
- Want to keep your veggies fresh longer? Store them in perforated bags. Yep, those will let them breathe while avoiding moisture buildup!
Signature Seasoning Blend
Now, let’s talk flavor ! No veggie board is complete without some fantastic dips and seasonings.
- Essential spice combinations ? Salt, pepper, and a sprinkle of paprika can work wonders. Or, for a bit of zing, add cayenne .
- Herb selections can transform your dips. Dill pairs beautifully with tzatziki, while basil loves hanging out with tomatoes.
- Don’t overlook flavor enhancers like garlic and lemon juice. They’re like BFFs of the flavor world!
- And hey, realize that regional variations can spice things up. A dash of cumin for a more Mediterranean vibe? You got it!
Smart Substitutions
Running low on an ingredient? No biggie! We all hit those moments where we’re staring into the fridge thinking, “What now?”
- For every ingredient, there’s a substitute. No bell peppers? Use some sliced radishes instead!
- Concerned about dietary needs? Swap regular yogurt for a dairy-free alternative . Boom! You’ve got a vegan friendly dip.
- If you’re in a pinch, you can mash up some avocados instead of making guacamole from scratch. Trust me; it still slaps!
- Seasonal options are a must. Keep your eyes peeled for whatever’s fresh and local right now, zucchini and baby carrots are on point!
Kitchen Equipment Essentials
Let’s chat about the tools of the trade. A well equipped kitchen speeds up the process!
- First things first: you need a large serving platter . Honestly, if you’re gonna make a veggie tray, make it look stunning!
- Mixing bowls are just as vital. Whether you use glass or metal, make sure they’re big enough to house your massive bowl of hummus.
- A grater or food processor makes dips easier than ever. Seriously, if you’ve never blended up a fresh dip, are you even living?
- Remember to have a good knife and cutting board on hand. Sharp knives make cutting veggies less of a chore.
As you’re preparing your next veggie board thanksgiving , or brainstorming those christmas party veggie tray ideas, these guidelines will help ensure your vegetable tray dazzles like it just walked off a cooking show set.
But wait, there's more! when you’re ready to put this vibrant vegetable tray into action, check out the step-by-step instructions coming up next! you won’t want to miss out on turning those fresh ingredients into an eye-catching delight everyone will love.
Professional Cooking Method: Elevating Your Veggie Tray Game
Okay, friends, let’s dive into the world of professional cooking methods to help you create a stunning vegetable tray that everyone will rave about.
Whether it's for a veggie board thanksgiving or a laid back summer barbecue, mastering the art of a vibrant veggie tray can be a real game changer.
Essential Preparation Steps
Mise en place is your new best friend. this fancy french term just means having everything in order before you start cooking.
Chop your veggies, set out your dips, and make sure your serving platter is ready to go. this is how the pros make it look so easy!
And let’s talk time management . if you want your tray to shine without the chaos, give yourself a solid 20 minutes to prep.
Use a timer if you have to; stay on task, like a contestant on a cooking show.
Next up, organization strategies you’ll want your cutting board, knife, and mixing bowls easily accessible. A tidy kitchen makes cooking way more enjoyable. Seriously, who wants to search for things mid-recipe? Not me!
Lastly, let’s not forget safety. always wash your veggies thoroughly. use separate cutting boards for fresh produce and other ingredients to avoid cross contamination.
No one wants a side of bacteria with their humble veggie tray, right?
step-by-step Process
Alright, here’s where the magic happens! Start by prepping those veggies:
- Wash all veggies thoroughly.
- Slice the cucumber and bell pepper, halve the cherry tomatoes, peel and chop your baby carrots, break down broccoli and cauliflower into florets, and trim those snap peas.
Pay attention to temperatures, especially if you decide to throw in a roasted element later on. generally, if you’re going for grilling , you want a medium high heat of around 400° f for cooking any extra veggies.
Now, onto dipping:
For that creamy tzatziki , combine greek yogurt with grated cucumber, minced garlic, and dill. season it up with salt and pepper.
You’ll want this chilled like a refreshing dip at a hot summer gathering!
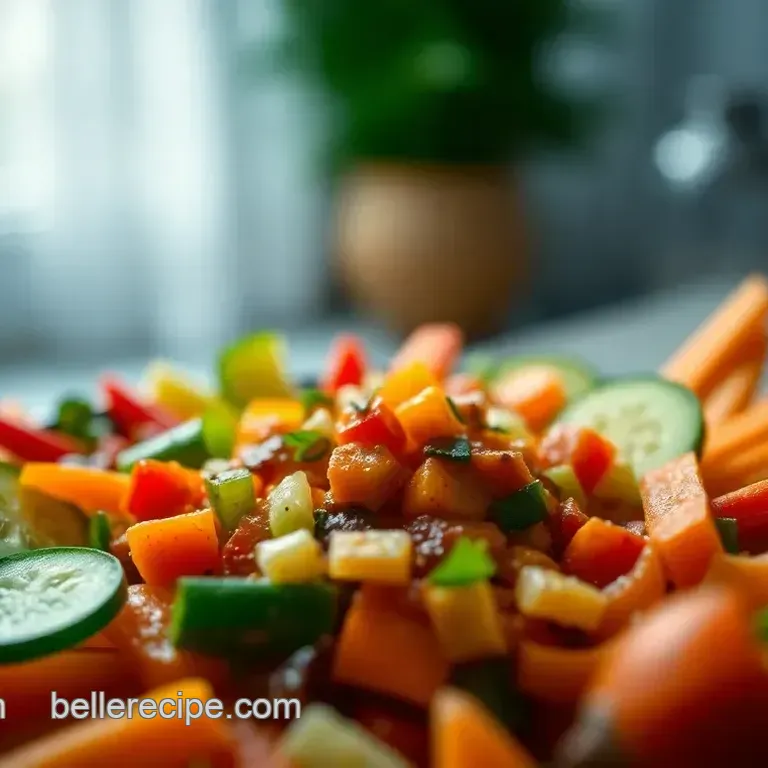
Next up, here comes the hummus ! toss those chickpeas, tahini, olive oil, lemon juice, and garlic into a food processor and blend until creamy! trust me, the smooth, tangy flavor is worth every drop of elbow grease.
Now's the fun part— arrange your veggie tray! Aim for an inviting layout, grouping colors together. It’s all about that Instagrammable presentation !
Expert Techniques
You want to nail those expert techniques now. focus on those critical steps like choosing the freshest ingredients. you won’t regret visiting a local market for crisp produce.
I still remember the first time i picked up colorful heirloom tomatoes it was like a flavor explosion!
Quality checkpoints come in handy, too. as you chop and prep, keep your eye out for any veggies that look sad.
Toss those in the compost! you deserve only the best for your cool veggie trays .
And hey, troubleshooting tip : if your hummus is too thick, add a bit of water or olive oil until it's just right smooth as silk!
Success Strategies
Now, it’s time for some success strategies . avoid the urge to neglect the presentation; the look of your best veggie tray ideas can make or break your spread.
And don’t overload your platter. less is often more!
For that all-important quality assurance , taste a few bites while prepping. Adjust your flavors it’s a total win!
Want to get ahead? make those dips the day before. they'll be even better when the flavors get a chance to meld together.
Think of it as a flavor party in the fridge!
Wrapping It Up
Whip up this colorful masterpiece at your next gathering and watch how it disappears faster than my snack stash during a netflix binge.
Get creative with your veggie platter consider variations like a christmas party veggie tray or even a small fruit and veggie charcuterie board for something out of the box.
And there you have it! These tips and tricks will have you on your way to veggie tray success. Now, let’s transition to some Additional Information you might find handy!
Additional Recipe Information
Pro Tips & Secrets
Listen up, friends! before you dive into your vibrant vegetable tray extravaganza , let me share some pro tips that will elevate your platter game.
First, don’t skimp on the freshness! visiting local farmers' markets can score you the crispiest veggies. trust me, it makes all the difference.
Now, for some time saving techniques : pre-chopping your veggies and storing them in water can keep them crunchy until you're ready to assemble.
And while we’re talking crunch, don't forget to soak your baby carrots in cold water for a bit; it keeps them extra crisp!
To really enhance those flavors , consider throwing in some cracked black pepper or a squeeze of lemon juice to your dips.
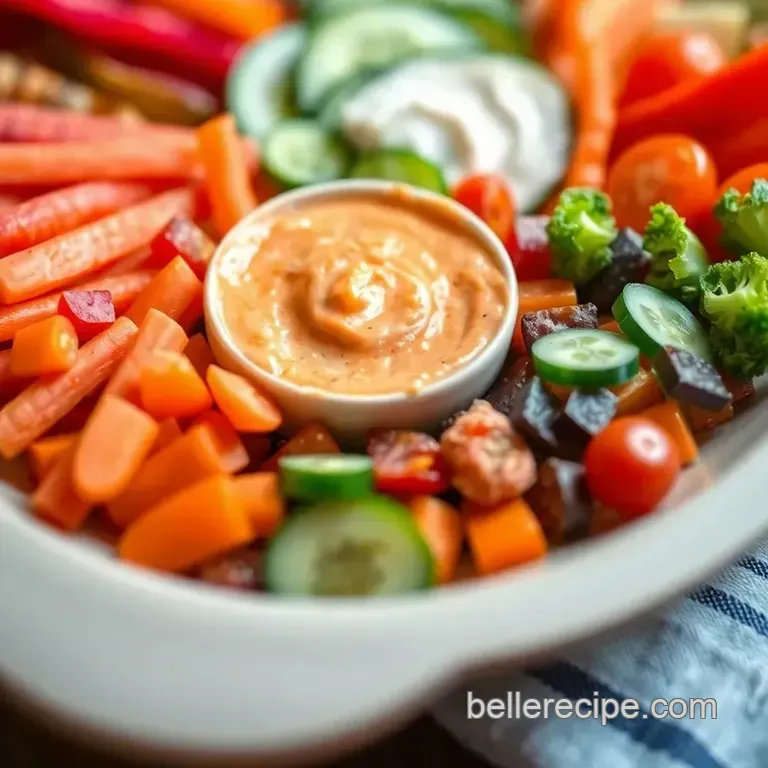
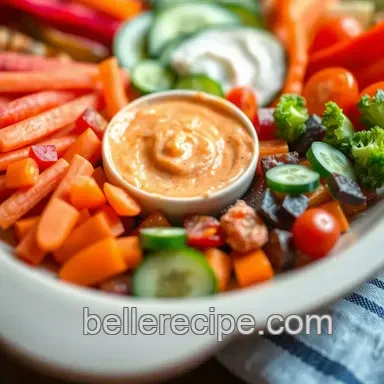
They bring the whole thing to life! oh, and for presentation , layer those colors by type. you want your tray to be a feast for the eyes as well as the stomach!
Perfect Presentation
Alright, let’s get real about making your veggie tray look instagram worthy! plating techniques can make or break your display; think rainbow.
Start with the largest veggies you know, your cucumbers and bell peppers as the anchors.
When it comes to garnishing , fresh herbs like parsley or dill can make the tray pop! i love scattering dill sprigs around my tzatziki.
For color combinations , think of a traffic light: reds, yellows, and greens. it’s like a mini art project, and trust me, everyone will be snapping pics before diving in!
Storage & make-ahead
Worried about leftovers? here’s the scoop on storage guidelines : most fresh veggies last about 3 to 5 days in the fridge.
Just keep them in airtight containers, and they’ll be good to go! you can even make the dips the night before to let those flavors meld beautifully.
A little pre-planning, and you'll have a stress free serving!
As for reheating instructions , no need here this tray is all about cool, crisp love. The freshness duration is key, so assemble it on the day of your event if possible!
Creative Variations
Now, let’s talk creativity! the best thing about veggie trays is the endless flavor adaptations . if you want a kick, try adding spicy hummus or even a sriracha dip.
For dietary modifications, swapping greek yogurt for a dairy-free option makes this a crowd pleaser.
Seasons change, and so can your platter! think of seasonal twists : roasted root veggies in the fall or even grilled zucchini in the summer.
The world is your oyster when it comes to regional variations too! incorporate southwestern spices or southern style ranch assorted with your veggies for a local flair.
Complete Nutrition Guide
This isn't just a pretty platter; it's healthy too! here’s a complete nutrition guide : each serving clocks in around 120 calories, with fiber packed goodness from those veggies.
Not to mention, you’re getting a good dose of protein from the chickpeas in your hummus.
You’ll be meeting dietary considerations with every bite. concerned about portion sizes? serve up a decent handful of veggies per person to avoid any veggie tray disasters.
The goal is to please everyone without skimping on quality or quantity!
Wrap-Up
So there you have it! your all-in-one guide to creating astonishing vegetable tray ideas that’ll wow your guests at any party be it a christmas party veggie tray , a fancy veggie dip board , or simply a small fruit and veggie charcuterie board for a relaxed summer get-together.
Honestly, these brilliant veggie platters are perfect for all occasions. just get creative, have fun, and don’t stress too much.
Your friends and family will love the effort you put in, and you’ll feel awesome serving something so vibrant and healthy.
Now, go forth and create those cool veggie trays like the culinary rockstar i know you are! cheers to crunchy, colorful, and downright delicious gatherings! 🍅🥦🥕
Frequently Asked Questions
What are some creative vegetable tray ideas for a party?
Try incorporating colorful vegetables like rainbow carrots, radishes, and purple cabbage for visual appeal. Mixing in themed dips, such as spicy salsa or beet hummus, can add an exciting twist. Don’t forget to arrange your veggies in fun shapes or patterns to wow your guests!
How can I prepare the vegetable tray in advance?
You can definitely prep your vegetable tray a few hours ahead of time. Slice your vegetables and store them in an airtight container with a damp paper towel to keep them fresh. Also, preparing dips like tzatziki and hummus the day before allows the flavors to deepen, making them even tastier!
How should I store leftovers from my vegetable tray?
Leftovers can be stored in airtight containers in the fridge for up to 3 days. For the vegetables, keep them separate from the dips to maintain their crunch. If dips are mixed with veggies, they may lose their texture, so it's best to keep things separate when storing!
What nutritional considerations should I keep in mind for a vegetable tray?
Your vibrant vegetable tray offers a nutrient rich selection of vitamins, fiber, and hydration, making for a healthy snack. Since dips can add calories, consider measuring your portions, especially if you're using rich ingredients like tahini or oil.
Using Greek yogurt for tzatziki is a great way to add protein without too much fat!
Can I customize the vegetable tray to accommodate dietary restrictions?
Absolutely! You can swap out dips based on dietary preferences try a vegan avocado spread if someone is dairy-free, or add a nut-free hummus alternative. For the veggies, you can tailor your selection to exclude any allergens, ensuring everyone can enjoy the tray without worry.
Are there any fun serving suggestions for my vegetable tray?
Serve your vegetable tray alongside a refreshing glass of elderflower cordial or a crisp white wine for some sophistication. You can also include an assortment of crackers or artisan bread to complement the dips. Another idea is to set up a DIY wrap station where guests can use the veggies in wraps!
Vibrant Vegetable Tray Extravaganza
Ingredients:
Instructions:
Nutrition Facts:
| Calories | 120 |
|---|---|
| Fat | 6g |
| Fiber | 4g |
