Ny Pizza Dough: the Real Deal Long Cold Ferment for a Snappy Manhattan Crust
- Why This Authentic NY Pizza Dough Recipe Will Change Your Pizza Night
- Mastering the Art of the Manhattan Fold
- Essential Pantry Staples for Optimal Texture
- Kitchen Tools That Simplify the Dough Making Process
- Activating the Ingredients: The Initial Mix and Knead
- The Extended Chill: Developing Flavor in Your NY Pizza Dough
- Solving Common Dough Issues and Test Kitchen Tips
- Recipe FAQs
- 📝 Recipe Card
Why This Authentic NY Pizza Dough Recipe Will Change Your Pizza Night
Okay, confession time. For years, I was chasing the ghost of the perfect slice. I tried the 30 minute dough, the one with extra oil, the one with beer... and every single time, I ended up with something closer to focaccia or, worse, a cardboard base that sagged pitifully under the weight of one mozzarella ball.
It was depressing.
But then I figured it out. It’s not about magic ingredients; it’s about time .
If you want that perfect, crispy, slightly chewy, complex and flavored crust that holds up when you fold it (you know, the Manhattan fold ), you have to slow things down. This NY pizza dough recipe isn't complicated, but it is a commitment.
We are going minimum 24 hours in the fridge, and honestly? 48 hours is even better. Trust me, once you nail this long cold ferment pizza dough , you will never look back.
This is the authentic manhattan crust recipe you’ve been searching for.
Mastering the Art of the Manhattan Fold
If your pizza slice collapses into a weeping puddle of oil and cheese when you pick it up, it’s a structural failure. It means the gluten hasn't developed enough strength, or you haven't baked it hot enough.
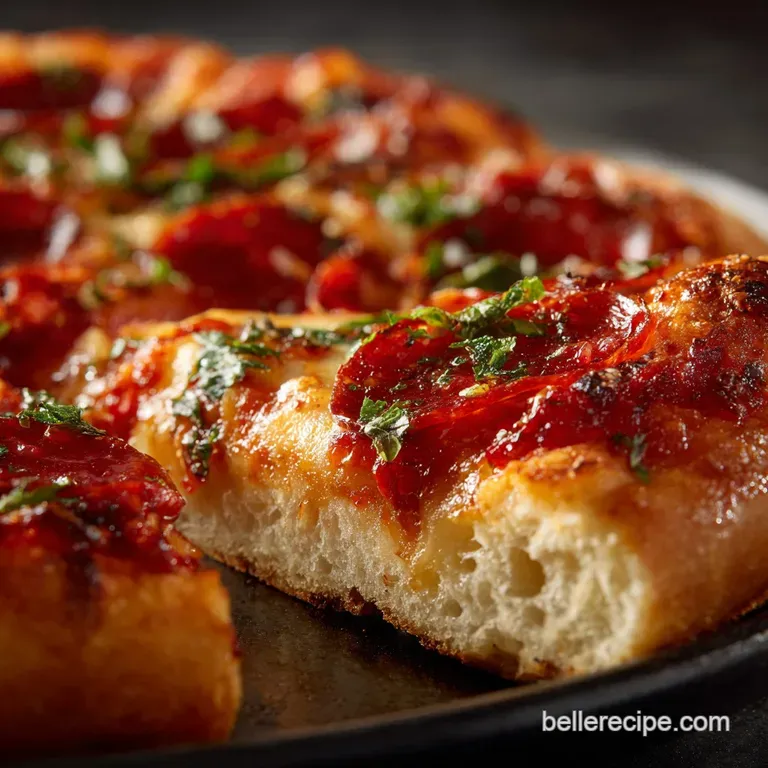
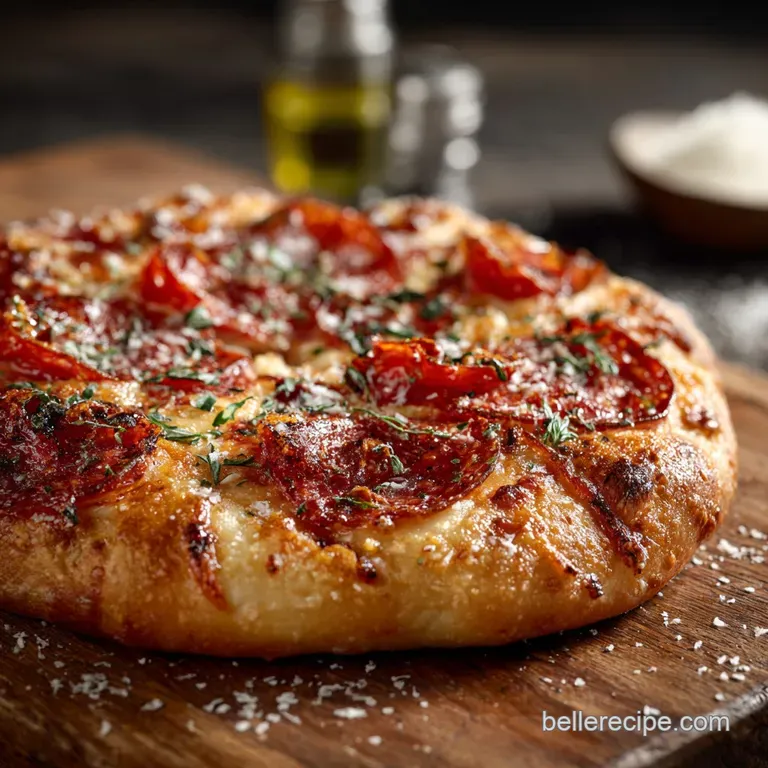
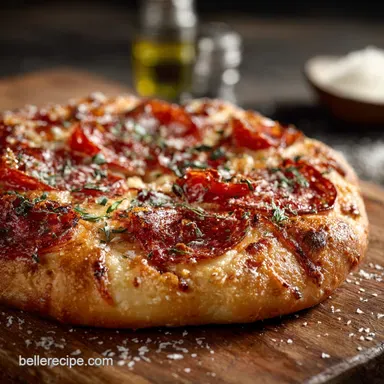
A true NY slice must be thin, crispy underneath, yet flexible enough to fold lengthwise without breaking the cornicione (that bubbly rim). The fold concentrates the flavor and helps you navigate tight city streets while eating. It’s tradition.
The Magic Behind the Cold Ferment Technique
I get asked this all the time: Why the fridge? Why can’t I just make it this afternoon?
The cold ferment is our secret weapon. When yeast works at a super slow, chilled pace, it’s not just about making gas (rise). It’s about enzyme action. The enzymes break down the complex carbohydrates in the flour into simpler sugars.
This does three crucial things: First, it gives the yeast more flavor to work with, resulting in deep, rich, slightly nutty notes instead of that raw, bready taste. Second, those simple sugars caramelize beautifully when baked, giving your crust that gorgeous golden and brown colour.
Third, it improves the overall digestibility. It’s brilliant. You simply can’t achieve this flavor complexity with a same and day NY pizza dough recipe .
From Water to Crumb: Understanding Dough Structure
We are aiming for a relatively high NY pizza dough hydration here about 62%. That seems sticky when you're mixing it, but that high water content allows steam to build inside the dough during baking. Steam is what creates those desirable, airy pockets (the crumb).
The combination of high hydration and high and protein bread flour (which we'll talk about shortly) is what creates the perfect gluten network. That network is the internal skeleton of your pizza.
It’s what keeps the base thin without tearing and allows the rim to puff up dramatically in the oven.
The Definition of a Perfect Snappy Crust
I define a perfect snappy pizza crust by what happens when you slice it. The edges should crackle slightly, but the underside must be firm enough to resist the moisture from the sauce.
It needs to hold up under the weight of the toppings, yet still yield a chewy texture when you bite into the cornicione . We achieve this contrast through extreme oven heat (550°F is non and negotiable) and that long, slow gluten development.
Essential Pantry Staples for Optimal Texture
Don't treat flour like flour. That’s a mistake I made early on. I thought my trusty all and purpose stuff would do the job. It won't. For that signature chew, you need high and protein flour, which means a minimum of 12.5% protein content.
Beyond the flour, we are using salt (flavor and structure), yeast (rise), and water (hydration). That’s it. Some people skip the oil; I include a small amount of olive oil (1 tbsp) because it helps with the extensibility, meaning the dough stretches out without fighting you.
Related Recipes Worth Trying
- Ultimate Edible NoBake Cookie Dough Safe Buttery and Ready in Minutes — Right then no more sneaking raw batter This foolproof NoBake Cookie Dough recipe is 100 safe easy peasy and ready in 15 mins Perfect for snacking or quick...
- Pesto Pizza Recipe Crispy Thin Crust with Roasted Tomatoes — Skip the heavy sauce This Pesto Pizza recipe uses fresh basil and highheat technique for a wonderfully crispy base Learn the best pesto pizza toppings here
- Sunshine Garden Veggie Pizza with Herbed Cream Cheese — Forget heavy sauce Try this light easy Veggie Pizza with Cream Cheese featuring an herbed base and garden fresh toppings Its cracking good
Kitchen Tools That Simplify the Dough Making Process
Listen, I am all for rustic cooking, but baking is science. If you try to eyeball the water for this long cold ferment pizza dough , you are setting yourself up for frustration.
Choosing the Right High and Protein Bread Flour
Look for a flour labeled "bread flour." If you can find brands that specifically cater to baking (like King Arthur or high and quality Italian 00 flour, though 00 is technically low protein, some high and gluten brands work well too), grab them.
The higher the protein, the stronger the gluten, the chewier the ny pizza dough you get. It’s that simple. Don't be cheap here.
Why Filtered Water Matters to the Final Result
In my first apartment, my dough was always sluggish. Turns out, the high chlorine content in my tap water was murdering the poor little yeast cells. Use filtered water, or at least let tap water sit out for an hour to let the chlorine evaporate.
The water temperature needs to be lukewarm, around 100°F (38°C), to gently wake the yeast without shocking it.
The Exact Yeast Ratio for Slow Fermentation
Because we are doing a long cold ferment , we use less yeast than a standard, quick recipe. If you use too much, your dough will over and proof in the fridge and taste overly yeasty and boozy. We’re using 5 grams of instant dry yeast for 500 grams of flour.
This conservative ratio is key to ensuring the yeast works slowly and consistently over those 24 to 72 hours, allowing maximum flavor development.
Mixing: Stand Mixer vs. Hand Kneading Techniques
You can absolutely do this by hand. It takes longer (maybe 15- 20 minutes of solid work), and it gets messy (it is a sticky dough), but the payoff is immense. If you’re using a stand mixer, use the dough hook and keep the speed low (Speed 2).
Over and kneading in a stand mixer heats the dough up too much, which we want to avoid before the cold proof.
Precision Weighing: Ditch the Cups and Use a Scale
This is my biggest soapbox. Get a digital scale. Now.
I made a batch once where I accidentally packed the flour too tightly into the cup. The dough was dry, stiff, and tore immediately when I tried to stretch it. It taught me the hard way: cups are wildly inconsistent. If you want proper NY pizza dough hydration , weight is the only way to go.
Activating the Ingredients: The Initial Mix and Knead
We start by bubbling the yeast in the warm water and a touch of sugar (food for the yeast). While that happens, whisk the flour and salt together separately. Salt is important for flavor, but it inhibits yeast growth, so we introduce it fully only when the flour is added.
When you dump the wet ingredients into the dry, mix just until a messy, shaggy mass forms. Then, stop. That initial 15 20 minute rest is the Autolyse Phase. It gives the flour time to absorb the water fully before you introduce the stress of kneading.
It makes the gluten structure much easier to develop later. Once the dough has rested, then you add the oil and start the heavy and duty kneading.
The Extended Chill: Developing Flavor in Your NY Pizza Dough
I know you want to skip this. Don’t. This is where the magic happens.
Bringing the Shaggy Mass Together (The Autolyse Phase)
After the autolyse, the dough should be easier to handle. Start kneading. The surface will go from bumpy and rough to surprisingly smooth and elastic. You’re aiming for a cohesive mass that doesn’t stick excessively to the bowl.
The Windowpane Test: Knowing When Kneading is Complete
This is the best way to tell if your gluten is developed. Pinch off a small piece of dough and gently stretch it with your fingers. If you can stretch it thin enough to see light through it without it tearing, congratulations, you’ve passed the windowpane test .
If it tears immediately, knead it for another two minutes and try again.
Shaping the Dough Balls for Consistent Rise
Once the kneading is done, divide the dough using a scale. A consistent NY pizza dough ball weight (around 450 500 grams for a 14 inch pie) ensures consistent baking. Take each piece and gently form it into a tight, smooth ball by pulling the edges underneath itself, creating surface tension.
Managing the Dough Temperature During the Cold Proof
The goal is to move the dough from the initial, short room and temperature rise (where it just starts to puff up) immediately into the fridge. We want it cold, but not freezing. The ideal fridge temperature is around 38°F (3°C). Cover it TIGHTLY. Air exposure will dry out the surface and inhibit the rise.
I use a slightly oiled storage container with a sealed lid, never just plastic wrap draped over a bowl.
Preparing the Dough for Baking (The Final Stretch)
After a couple of days chilling, the dough will have doubled very slowly and will feel dense and cold. You need to let it warm up (temper) for 90 minutes to two hours at room temperature before shaping. Why? Cold dough resists stretching; warm dough relaxes.
Trying to shape cold dough results in a small, thick pie. You want the dough to feel soft and yielding to the touch before you even think about stretching it.
Solving Common Dough Issues and Test Kitchen Tips
Here are the issues I see most often in my emails:
My Dough Won’t Stretch: Handling Wet vs. Dry Consistency
- If it’s too wet and sticky: You may have used volume measurement instead of weight, resulting in high hydration. Dust your surface and hands with semolina (it’s coarser and doesn't incorporate into the dough as easily as flour) and use a light touch.
- If it’s too dry and resists stretching: You likely didn't temper it long enough, or you added too much flour during the initial mix. Put it back on the bench, cover it, and let it rest for another 30 minutes before trying again. Time heals all dough wounds.
Maximizing Oven Spring for a Better Crumb Structure
- The Heat: Preheat your oven to its absolute maximum setting (550°F or even higher if it can manage it) with the baking steel or stone inside, for a minimum of one hour. That intense surface heat is what causes the dough to balloon up dramatically (oven spring) right when it hits the steel.
- The Peel Dust: Use fine semolina flour on your pizza peel instead of all and purpose flour. Semolina acts like tiny ball bearings, allowing the pizza to slide off easily onto the hot steel, reducing the chances of a catastrophic stick and fold incident.
Making a Thicker Crust: Recipe Adjustments and Variations
If you're making a slightly thicker crust, maybe a Sicilian or grandma style, you don't necessarily change the ingredients (though you might reduce the water by 10g). Instead, you adjust the NY pizza dough ball weight (using, say, 600 grams per pie) and the shaping technique.
Stop stretching when the pie reaches about 12 inches, instead of 14, and bake it on a preheated pizza tray rather than directly on the steel.

Recipe FAQs
Twenty four hours seems like a long wait. Can I make this NY Pizza Dough faster?
While you can shorten the bulk fermentation, skipping the cold ferment is a bit like skipping the Queen's speech at Christmas it just isn't right! The 24-72 hour cold rest is the crucial step that develops the complex, yeasty flavour and the glorious internal structure we’re aiming for, so please allow the dough its beauty sleep.
Help! My pizza dough is fighting me and keeps snapping back when I try to stretch it. What’s the trick?
If the dough is resisting, it means the gluten strands are too tight it needs a moment to ‘relax.’ Place the dough down, cover it with a tea towel, and let it rest on the counter for 10 to 15 minutes before attempting to stretch it again; patience always wins over force here.
I'm getting a pale, soggy centre instead of a crisp crust. Am I doing something wrong?
For that authentic, crispy NY base, heat is king! Ensure your oven is preheated to the absolute maximum setting (ideally 550°F/290°C) and that your pizza stone or steel has preheated for at least 60 minutes to store enough thermal energy.
Can I just use regular plain flour instead of the specific high protein bread flour listed?
Absolutely not, if you want the classic chewy New York texture! High protein bread flour is essential because it develops the strong gluten network needed to trap the air and maintain structure during the long cold ferment, preventing a dense, biscuit like crust.
I’ve got too much dough left over. How long can I store it, and can I freeze it?
The beauty of this dough is that it improves with time; you can keep it covered tightly in the fridge for up to 5 days. For longer storage, gently oil and freeze the portioned balls in individual bags for up to three months, ensuring you defrost them slowly overnight in the fridge before the final room temperature proof.
Authentic Ny Pizza Dough Cold Ferment
Ingredients:
Instructions:
Nutrition Facts:
| Calories | 650 calories |
|---|---|
| Fat | 4 grams |
| Fiber | 5 grams |
