Caramel Apple Dump Cake with Fresh Apples and Cinnamon

- Time: Active 15 minutes, Passive 45 minutes, Total 1 hour
- Flavor/Texture Hook: Shattering buttery crust with gooey, salted caramel fruit
- Perfect for: Cozy Sunday family dinners or effortless holiday entertaining
- Golden Caramel Apple Dump Cake with Fresh Apples
- Quick Shortcuts for Busy Cooks
- Why This Crust Stays Perfectly Crispy
- Comparing Quick and Traditional Methods
- Component Analysis
- Selecting Your Fresh Fruit and Staples
- Minimal Tools for Maximum Flavor Results
- Step-by-Step Guide for Perfect Baking
- Fixing Common Baking Failures Simply
- Creative Ways to Customize This Recipe
- Kitchen Lore and Baking Truths
- Storing and Warming Your Leftovers Correctly
- Perfect Toppings and Side Pairings
- Recipe FAQs
- 📝 Recipe Card
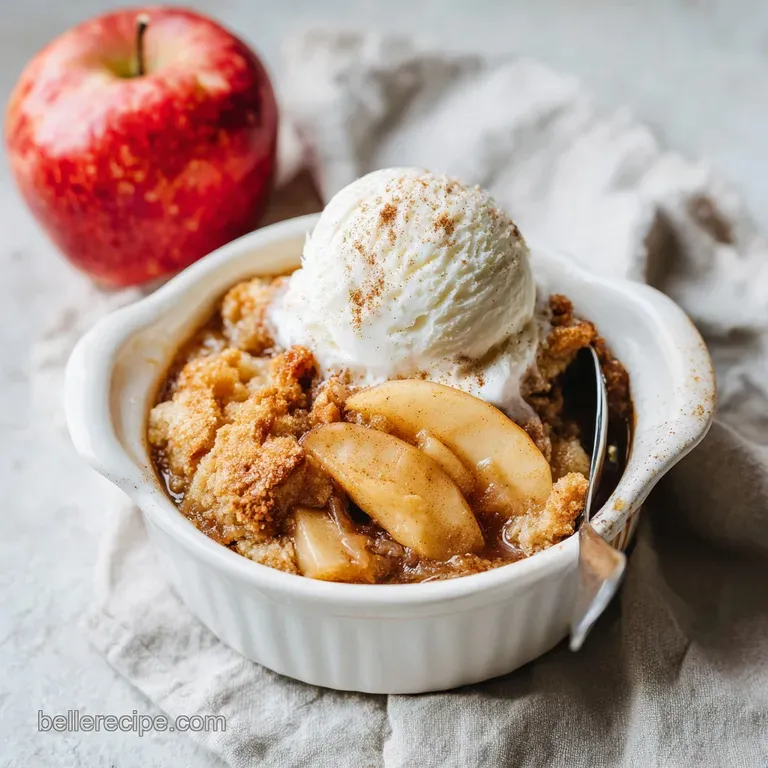
Golden Caramel Apple Dump Cake with Fresh Apples
The house is quiet, the rain is drumming a steady rhythm against the windowpane, and the kitchen smells like a warm, cinnamon scented hug. That is the magic of baking this specific treat. I remember the first time I moved away from canned fillings and used real, crisp fruit for this dish.
The difference wasn't just in the taste; it was in the way the kitchen felt alive with the aroma of tart fruit and melting sugar. It is the kind of recipe you pull out when you want to show love without spending four hours hovering over a stove.
Discover our star recipe for a delicious Caramel Apple Dump Cake made with fresh apples and warm cinnamon. This isn't just a dessert; it's a testament to how simple ingredients can transform into something truly comforting when you treat them with a bit of mindfulness.
We are skipping the heavy mixing bowls and the complicated techniques. Instead, we are letting the oven do the heavy lifting, turning a handful of pantry staples into a textured delight that rivals any fancy bakery tart.
You can expect a base of softened, tart apples that have released their juices to mingle with a sea salt caramel sauce. Above that sits a golden, biscuit like topping that offers a satisfying crunch in every bite. It is a rustic, beautiful mess that is best served warm, perhaps with a little something cold on top.
Let's walk through how to make this work every single time without the stress.
Quick Shortcuts for Busy Cooks
When you are juggling a busy schedule, you need results that don't compromise on quality. The brilliance of this method lies in the "dump" technique, which bypasses the need for emulsifying fats and sugars by hand.
By layering the dry cake mix directly over the fruit and caramel, we allow the moisture from the fruit and the melting butter to create a self hydrating dough. This saves you from cleaning extra whisks and bowls while producing a much lighter, flakier texture than a traditional stirred batter.
Another significant time saver is the use of a high-quality boxed mix as a structural base. While I love baking from scratch, a yellow or spiced cake mix provides the exact ratio of leavening agents and flour needed to react with the butter pats.
If you are in a rush, don't worry about perfectly uniform apple slices; as long as they are roughly 1/4 inch thick, they will soften beautifully in the allotted 45 minutes of bake time.
Why This Crust Stays Perfectly Crispy
The Fat Barrier: Slicing the butter into thin, cold pats ensures it melts slowly and evenly across the dry flour, creating small pockets of steam that lift the crust. This prevents the topping from becoming a dense, soggy mass and instead results in a texture that will shatter under your fork.
Starch Hydration Control: By not stirring the ingredients, the cake mix only hydrates where it touches the fruit juices or the melting butter. This creates a dual layered effect where the bottom of the crust is soft and cake like, while the top remains crisp and toasted.
| Method | Prep Time | Texture | Best For |
|---|---|---|---|
| Standard Oven | 15 minutes | Shattering, crisp top | Maximum crunch and browning |
| Slow Cooker | 10 minutes | Soft, cobbler like | Potlucks and hands off days |
| Air Fryer | 10 minutes | Extra crunchy | Small batches for two people |
Choosing the right method depends on your desired outcome. While the oven provides that classic "shatter" we look for in a Caramel Apple Dump Cake with Fresh Apples and Cinnamon, the slow cooker is wonderful if you want a more velvety, pudding style dessert.
I usually stick to the oven because the way the pecans toast alongside the butter is simply incomparable.
Comparing Quick and Traditional Methods
Understanding how this shortcut stacks up against a classic apple crisp or cobbler helps you appreciate the "dump" method's efficiency. A classic cobbler requires cutting cold fat into flour to create a dough, which can be finicky depending on the humidity of your kitchen. This recipe removes that variable entirely.
| Feature | The "Dump" Method | Classic Apple Crisp |
|---|---|---|
| Effort Level | Minimal - No mixing bowls | Moderate - Rubbing butter by hand |
| Crust Style | Light, airy, and crisp | Dense, oat heavy, and chewy |
| Consistency | Highly reliable | Variable based on mixing technique |
If you find yourself enjoying the fruity depth of this dish, you might also love the simplicity of a Pineapple Dump Cake Cobbler, which uses a similar layering logic but with tropical notes. It’s a great way to use the same technique for different seasons.
Component Analysis
| Ingredient | Science Role | Pro Secret |
|---|---|---|
| Fresh Apples | Provide moisture and acidity | Use a mix of Granny Smith and Gala for balanced tartness |
| Sea Salt Caramel | Controls sugar caramelization | Choose a thick sauce to prevent the base from becoming too runny |
| Chilled Butter | Creates the "shatter" effect | Freeze the butter for 10 mins before slicing to keep it firm |
Selecting Your Fresh Fruit and Staples
For this Caramel Apple Dump Cake with Fresh Apples and Cinnamon, the choice of fruit is paramount. I always reach for 6 cups of fresh apples, which is roughly 5 to 6 large ones. Don't feel pressured to stick to just one variety.
Combining a very tart apple like a Granny Smith with a sweeter, sturdier option like a Honeycrisp or Braeburn gives the filling a complex flavor profile that isn't just one note sweet.
- Fresh Apples (6 cups): Peeled and sliced 1/4 inch thick. Why this? Fresh fruit provides a brighter acidity than canned alternatives.
- Ground Cinnamon (1 tbsp): For that classic warm aroma. Why this? Bridges the gap between the tart apples and sweet caramel.
- Granulated Sugar (1/4 cup): Helps draw out the natural juices. Why this? Creates the syrup that hydrates the cake mix bottom.
- Lemon Juice (1 tbsp): Prevents browning and balances sweetness. Why this? Keeps the apple flavors sharp and distinct.
- Sea Salt Caramel Sauce (1 cup): high-quality is best here. Why this? Adds a velvety richness and deep salty sweet notes.
- Yellow or Spiced Cake Mix (1 box): The 15.25 oz size is standard. Why this? Provides the structure and leavening for the topping.
- Unsalted Butter (3/4 cup): Chilled and sliced into very thin pats. Why this? Even coverage ensures no dry flour spots remain.
- Chopped Pecans (1/2 cup): Or walnuts if you prefer. Why this? Adds an essential earthy crunch to the soft fruit.
If you happen to have leftovers of the fruit, they actually work beautifully when cooked down into Grandma's apple sauce, proving that fresh ingredients never go to waste in a mindful kitchen.
Minimal Tools for Maximum Flavor Results
One of the reasons I gravitate toward this recipe is the lack of clutter it creates. You won't need a stand mixer or a fleet of specialized gadgets. A simple, large mixing bowl is all you need to toss your apples with the cinnamon and sugar.
Ensuring the fruit is well coated before it hits the pan is the only "active" work that requires a tool.
The baking dish itself is the star of the show. I prefer using a 9x13 inch ceramic or glass dish. Ceramic holds heat beautifully and provides a more even bake for the bottom layer of fruit, while glass allows you to see the caramel bubbling around the edges.
A sharp vegetable peeler and a sturdy chef's knife are your best friends here. Keep your butter knife handy for slicing those cold pats as thinly as possible.
step-by-step Guide for Perfect Baking
- Preheat your oven to 350°F (175°C). Note: A fully preheated oven is vital for the butter to melt and crisp the topping simultaneously.
- Peel and slice your 6 cups of fresh apples into 1/4 inch thick crescents.
- In a large bowl, toss the apples with 1 tbsp ground cinnamon, 1/4 cup granulated sugar, and 1 tbsp lemon juice until the slices are glossy and coated.
- Spread the apple mixture evenly into the bottom of your ungreased 9x13 inch baking dish.
- Drizzle the 1 cup of sea salt caramel sauce in a zig zag pattern until the fruit is ribbons of amber.
- Sprinkle the dry cake mix evenly over the caramel covered apples.
- Use the back of a spoon to lightly level the surface, ensuring there are no large mounds of powder.
- Arrange the 3/4 cup of chilled butter slices across the top, covering as much surface area as you can.
- Scatter the 1/2 cup of chopped pecans over the butter layer until the surface looks textured and ready.
- Bake for 45 minutes until the topping is golden brown and shattering, and the juices are bubbling vigorously at the sides.
Fixing Common Baking Failures Simply
Why Your Cake Has Flour Spots
It’s a common sight: you pull the dish out and see white, dry patches of cake mix. This happens when the butter slices were too thick or spaced too far apart. The dry mix needs fat or fruit juice to hydrate; without it, it remains just powder.
| Problem | Root Cause | Solution |
|---|---|---|
| Dry flour patches | Uneven butter distribution | Space thin butter pats closer or grate frozen butter over the top |
| Runny fruit base | Apples released too much water | Use sturdier apple varieties or add 1 tsp cornstarch to the fruit toss |
| Burnt pecans | Nuts were added too early or oven was too hot | Tent with foil for the last 10 mins if browning too fast |
But what about the sogginess? If the bottom feels like mush rather than a soft cake, it’s usually because the apples were sliced too thin or they were over saturated with liquid. We want them tender but still holding their shape.
Common Mistakes Checklist
- ✓ Pat the apples dry if they seem overly wet after washing (prevents a watery base).
- ✓ Ensure the butter is truly chilled; warm butter melts too fast and soaks in rather than crisping.
- ✓ Don't skip the lemon juice it provides the necessary acidity to cut through the heavy caramel.
- ✓ Check your oven temperature with a thermometer to ensure a true 350°F.
- ✓ Use a "zig zag" drizzle for the caramel to ensure every serving gets a bit of salt and silk.
Creative Ways to Customize This Recipe
If you want to vary the flavor, the possibilities are nearly endless. I sometimes swap the yellow cake mix for a spiced version or even a butter pecan mix to double down on those nutty notes. For a festive twist, you can add 1/2 cup of dried cranberries to the apple mixture.
They rehydrate in the oven and provide little bursts of tartness that play beautifully against the caramel.
Scaling this recipe is quite simple as long as you maintain the ratios. To make a half batch (serving 6), use an 8x8 inch square pan and reduce the bake time by about 5 to 8 minutes.
When scaling up for a large crowd (using two 9x13 pans), try to rotate the pans in the oven halfway through to ensure even browning. Keep in mind that when doubling the recipe, you only need to increase the salt and cinnamon to 1.5 times the original amount to avoid overpowering the fruit.
| Serving Goal | Ingredient Adjustment | Pan Size | Cook Time |
|---|---|---|---|
| 6 People | Half all ingredients (use 1/2 box mix) | 8x8 inch | 38-40 minutes |
| 12 People | Standard Recipe | 9x13 inch | 45 minutes |
| 24 People | Double all ingredients | Two 9x13 inch | 50-55 minutes |
Chef's Tip: If you are out of pecans, try using crushed pretzels for the topping. The saltiness against the caramel is absolutely transformative!
Kitchen Lore and Baking Truths
There is a long standing myth that you must melt the butter before pouring it over a dump cake. This is actually a mistake if you want a crisp texture. Pouring melted butter often leads to "grease pools" and uneven hydration.
Slicing cold butter allows it to melt into the flour gradually, creating a much more stable and flaky crust.
Another misconception is that canned apple pie filling is "just as good" as fresh. While canned filling is convenient, it often contains thickeners like cornstarch that can make the "dump" method results feel heavy or gummy.
Fresh apples provide a natural, clean juice that interacts much better with the dry cake mix, resulting in a cleaner flavor and a superior mouthfeel.
Storing and Warming Your Leftovers Correctly
This dessert is so comforting that you might not have much left, but if you do, it stores quite well. Keep it in the refrigerator, tightly covered, for up to 4 days. The crust will naturally soften over time as it absorbs moisture from the apples, but the flavor actually deepens as the cinnamon and caramel meld.
For long term storage, you can freeze individual portions in airtight containers for up to 3 months. When you are ready to enjoy it again, avoid the microwave if possible. Reheating in a 350°F oven for 10-15 minutes will help bring back some of that original crunch to the topping.
For a zero waste tip, if you have tiny scraps left over, stir them into vanilla yogurt or oatmeal the next morning it is a breakfast of champions!
Perfect Toppings and Side Pairings
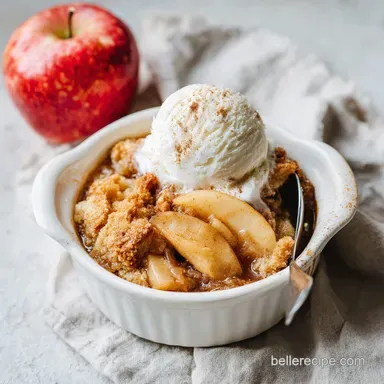
While this Caramel Apple Dump Cake with Fresh Apples and Cinnamon is a star on its own, it truly shines when paired with a contrasting temperature or texture. The classic choice is a big scoop of high-quality vanilla bean ice cream.
As it melts into the warm nooks and crannies of the shattered crust, it creates a creamy sauce that balances the tartness of the fruit.
If you prefer something less sweet, a dollop of unsweetened whipped cream with a pinch of nutmeg is a sophisticated touch. For those who love a bit of drama, a drizzle of extra sea salt caramel sauce or even a tiny sprinkle of flaky sea salt over the top can really make those apple flavors pop.
It’s about creating a moment of pure, mindful indulgence that brings everyone to the table with a smile.

Recipe FAQs
Is it necessary to grease the baking dish before adding the apples?
No, an ungreased dish is preferred. Keeping the surface clean helps the apple juices and caramel sauce cling to the bottom rather than sliding around, ensuring the cake sets correctly in your 9x13 inch pan.
How to ensure the cake topping turns out crisp rather than powdery?
Arrange the thin, chilled butter pats to cover as much surface area as possible. Since the dry cake mix relies on the butter melting to hydrate and crisp, a uniform layer of butter is essential for that shattering, golden brown finish.
Is it true that room temperature butter creates a better crust?
No, this is a common misconception. You must use chilled butter because it stays solid long enough to allow the cake mix to properly hydrate and toast under the heat; if you enjoyed mastering this moist texture technique, you will appreciate how temperature control influences the final crumb in our other dessert recipes.
How to keep the apples from becoming too watery during baking?
Pat your sliced apples dry with a paper towel before tossing them with the sugar and cinnamon. Excess moisture on the surface of the fruit can prevent the base from thickening, so starting with dry slices is a reliable way to keep the dish from turning soggy.
How to store leftovers so the topping doesn't get soft?
Cover the container tightly and place it in the refrigerator for up to 4 days. While the crust will inevitably soften as it absorbs moisture over time, you can restore some of that original texture by warming individual portions in a 350°F oven for 10-15 minutes.
Is it okay to skip the lemon juice if I don't have any?
No, the lemon juice is necessary for balancing the flavor. It provides the critical acidity needed to cut through the intense sweetness of the caramel sauce and sugar, which prevents the dessert from becoming cloying.
How to know exactly when the dump cake is finished baking?
Watch for the juices to bubble vigorously around the edges and a deep golden brown color on the topping. When the center is set and the edges are bubbling, your cake is ready to come out of the 350°F oven after the 45-minute mark.
Caramel Apple Dump Cake
Ingredients:
Instructions:
Nutrition Facts:
| Calories | 398 kcal |
|---|---|
| Protein | 2.4g |
| Fat | 20.1g |
| Carbs | 54.2g |
| Fiber | 2.6g |
| Sugar | 37.8g |
| Sodium | 214mg |
