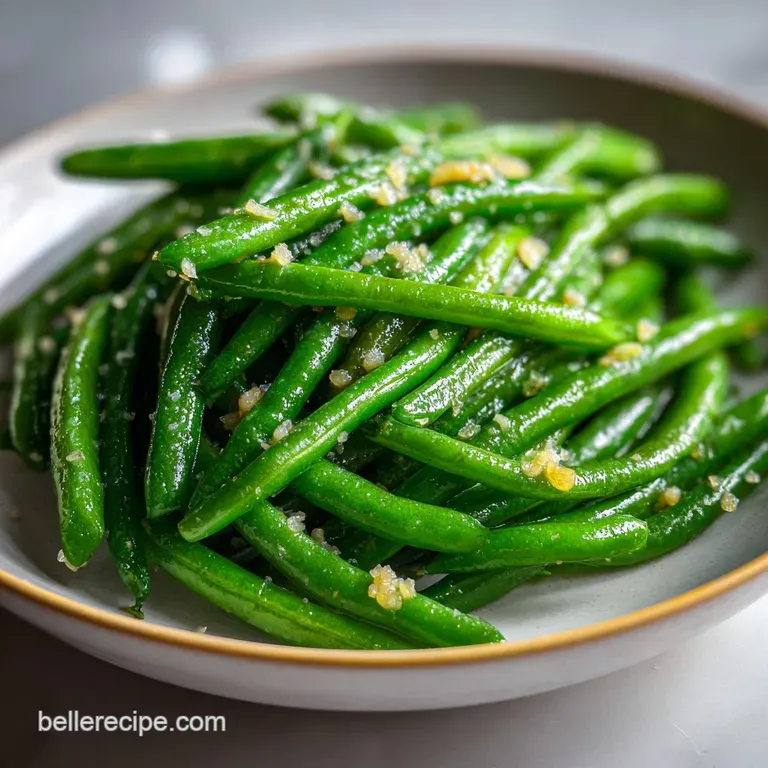
Frozen Green Bean Recipe with Garlic and Butter

- Time: Active 8 mins, Passive 2 mins, Total 10 mins
- Flavor/Texture Hook: Snappy texture with a nutty, savory garlic finish
- Perfect for: Busy weeknight dinners or a simple, healthy holiday side
- Frozen Green Bean Recipe with Garlic and Butter Success
- Quick Facts for Perfect Green Beans
- The Essential Green Bean Flavor Elements
- Tools for the Ultimate Garlic Sizzle
- Step-by-Step Green Bean Pan Searing
- Avoiding Sogginess and Burnt Garlic
- Flavorful Variations for Every Table
- Keeping Leftover Green Beans Fresh
- Serving Suggestions for Garlic Beans
- Recipe FAQs
- 📝 Recipe Card
The aroma of garlic hitting a pool of melting butter is, quite honestly, the best part of my day. I used to think frozen vegetables were just a "plan B" for when I couldn't make it to the market, but I was wrong.
This Frozen Green Bean Recipe with Garlic and Butter transforms a simple side into a flavorful dish that actually rivals the fresh stuff.
I spent years serving limp, watery beans because I followed the package instructions to steam them. Now, I treat them with more respect. We want them to sizzle, not soak, which is why the pan is your best friend here.
Trust me, once you hear that first pop of the bean hitting the hot oil, you'll know you're onto something special. We aren't just heating these up; we're giving them a whole new personality with heat and fat.
Frozen Green Bean Recipe with Garlic and Butter Success
The secret to why this works so well lies in how we handle the moisture. When you use high heat immediately, you bypass that "soggy phase" where the ice turns into a pool of water in your pan.
The Science of Why it WorksFlash Evaporation: High heat quickly turns exterior ice crystals into steam before they can soak the bean's cell walls.
Maillard Reaction: Searing the beans at high temperature creates flavor compounds that give frozen vegetables a deeper, savory profile.
We also have to be mindful of the garlic. Adding it too early results in bitter, burnt bits that ruin the velvety butter sauce. By adding it toward the end, we capture the aromatic oils without the scorched aftertaste. It’s a delicate balance that makes a massive difference in the final bite.
The High Heat Sear
When the frozen beans hit the skillet, they need room to breathe. If you crowd the pan, the temperature drops and they start to boil in their own juices. Use a large skillet I love using a heavy cast iron to keep the heat steady.
You'll see the beans go from a frosted, pale green to a vibrant, forest green as the ice vanishes.
The Fat Infusion Rule
We use a combination of extra virgin olive oil and unsalted butter. The oil has a higher smoke point, which helps with the initial sear, while the butter provides that comforting, rich finish. It’s a trick I learned from making my Garlic Parmesan Dream recipe, where layering fats creates a much more complex sauce.
| Component | Science Role | Pro Secret |
|---|---|---|
| Whole Green Beans | Structural Fiber | Keep them frozen until the second they hit the pan to maintain snap. |
| Extra Virgin Olive Oil | Heat Conductor | Provides a barrier that prevents the butter from browning too quickly. |
| Unsalted Butter | Emulsification | Creates a velvety coating that helps the salt and pepper stick to the beans. |
| Fresh Garlic | Aromatic Compounds | Slice thinly rather than mincing for a milder, sweeter flavor profile. |
The way the salt interacts with the surface moisture of the beans is also key. We add the sea salt right at the end to prevent it from drawing out too much water during the cooking process. This keeps the interior of the bean juicy while the outside stays crisp.
Quick Facts for Perfect Green Beans
This dish is all about speed and precision. Since the beans are pre blanched before freezing, they are technically already "cooked." Our job is simply to defrost, sear, and season them within a tight 8 minutes window.
If you are planning a bigger meal, these beans are the ultimate "last minute" addition. You can have them on the table faster than it takes to set the silverware. They pair beautifully with a hearty roast or even a simple pan seared chicken.
Chef Tip: Never thaw your green beans before cooking. Cooking them straight from frozen preserves the cell structure, ensuring they don't turn into mush.
If you find yourself with extra garlic and want to explore more classic sides, you might enjoy the mellow, sweet notes found in a Creamed Onions recipe, which uses a similar focus on aromatics to build flavor.
The Essential Green Bean Flavor Elements
I always keep these ingredients in my pantry and freezer because they are the building blocks of a great meal. Make sure your spices are fresh; cracked black pepper loses its punch after a few months in the cabinet.
- 1 lb frozen whole green beans: Use the "extra fine" or "haricots verts" variety if you can find them.
- 1 tbsp extra virgin olive oil: This provides the over high heat base for the sear.
- 0.5 tsp sea salt: Fine sea salt dissolves better than chunky kosher salt in this quick application.
- 0.25 tsp cracked black pepper: Freshly cracked provides a much better aroma.
- 2 tbsp unsalted butter: This adds the rich, silky finish.
- 3 cloves garlic: Thinly sliced or minced, depending on how much you love garlic.
- 0.5 tsp red pepper flakes: Adds a tiny hum of heat that cuts through the butter.
- 1 tsp lemon juice: The essential acid to brighten the entire dish.
| Original Ingredient | Substitute | Why It Works |
|---|---|---|
| Unsalted Butter | Ghee | Higher smoke point and a deeper, nuttier flavor profile. |
| Sea Salt | Soy Sauce | Adds a salty punch plus umami great for an Asian inspired twist. |
| Lemon Juice | Apple Cider Vinegar | Provides a similar acidic "lift" though it's slightly fruitier. |
Tools for the Ultimate Garlic Sizzle
You don't need a professional kitchen, but a few specific tools make this much easier. A large skillet is non negotiable. I prefer stainless steel or cast iron because they hold onto heat much better than non stick pans.
When you drop a pound of frozen veggies into a thin non stick pan, the temperature plummets, and you end up steaming the beans. A heavy bottomed skillet acts like a heat reservoir, staying hot enough to evaporate the moisture instantly. You’ll also want a sturdy pair of tongs to toss the beans frequently.
| Method | Texture Result | Time Required |
|---|---|---|
| Stovetop Sauté | Snappy and charred | 8 minutes |
| Oven Roasting | Shriveled and concentrated | 20 minutes |
While oven roasting is great for fresh beans, I find that for frozen ones, the stovetop is superior. It allows for better moisture control and keeps the garlic from burning while the beans defrost.
step-by-step Green Bean Pan Searing
- Heat the pan. Place your large skillet over medium high heat for about 2 minutes until it's quite hot.
- Add the oil. Pour in 1 tbsp extra virgin olive oil and swirl to coat the bottom.
- Sear the beans. Add 1 lb frozen whole green beans directly into the hot oil. Note: You should hear a loud sizzle immediately.
- Evaporate moisture. Cook for 5 minutes, tossing occasionally, until the beans are bright green and no water remains in the pan.
- Create the flavor well. Push the beans to the edges of the pan and drop 2 tbsp unsalted butter in the center.
- Sauté the aromatics. Add 3 cloves of sliced garlic and 0.5 tsp red pepper flakes to the melting butter.
- Infuse the beans. Once the garlic smells nutty and aromatic (about 1 minute), toss everything together to coat.
- Season the dish. Sprinkle in 0.5 tsp sea salt and 0.25 tsp cracked black pepper.
- Add the brightness. Turn off the heat and squeeze 1 tsp lemon juice over the beans. Watch the color pop even more.
- Final toss. Give it one last stir and serve immediately while the butter is still foamy and hot.
Avoiding Sogginess and Burnt Garlic
The most common mistake I see is people being afraid of the heat. If your pan isn't hot enough, the beans will "leak" their internal water, and you'll end up with a soup. If you see liquid pooling, turn the heat up to high until it's gone.
Why Your Beans Are Squeaky
If the beans feel "squeaky" against your teeth, they are slightly undercooked or the waxier outer layer hasn't broken down. A few extra minutes in the butter should soften that texture without making them mushy.
| Problem | Root Cause | Solution |
|---|---|---|
| Watery Pan | Heat too low | Increase heat to high and toss frequently until dry. |
| Bitter Taste | Burnt Garlic | Add garlic only in the last 2 minutes of cooking. |
| Dull Color | Cooked too long | Pull from heat as soon as they reach a vibrant green. |
Another quick fix: if the dish feels too greasy, you likely added the butter before the water had fully evaporated. The water and oil will create a cloudy, oily mess. Always ensure the pan is dry before the butter hits the surface.
Flavorful Variations for Every Table
You can really play with the seasonings here once you have the base technique down. Sometimes I want something a bit punchier, so I'll add a teaspoon of Dijon mustard to the butter.
Cooking Frozen Green Beans Southern Style
To give these a soul food twist, sauté some chopped bacon first until crispy. Use the bacon fat instead of olive oil to sear the beans, then toss the crispy bacon bits back in at the end with the butter and garlic. It's incredibly comforting.
Garlic Green Beans Chinese Style
Swap the butter for sesame oil and add a tablespoon of soy sauce instead of salt. Finish with a sprinkle of toasted sesame seeds and a dash of ginger. It's a faster way to get that "dry fried" bean texture you find in takeout.
Decision Shortcut
- If you want maximum crunch, use a cast iron skillet and don't stir for the first 2 minutes.
- If you want a creamy finish, toss in a tablespoon of heavy cream right before serving.
- If you want a healthy kick, double the lemon juice and omit the butter, using only olive oil.
Keeping Leftover Green Beans Fresh
While these are best served immediately, you can definitely save them for lunch the next day. They stay good in the fridge for about 3 days in an airtight container.
- Fridge
- Store for up to 3 days. The garlic flavor actually deepens overnight.
- Freezer
- I don't recommend re freezing these once cooked, as the texture becomes quite soft.
- Reheating
- Avoid the microwave if possible; it makes them rubbery. Instead, toss them back in a hot skillet for 2 minutes to revive that butter sauce.
Zero Waste Tip: If you have leftovers that are looking a bit sad, chop them up and throw them into a morning frittata or a vegetable soup. The garlic butter they were cooked in adds amazing depth to a broth!
Serving Suggestions for Garlic Beans
I love serving these alongside a heavy protein. The acidity from the lemon juice and the snap of the bean cut right through the richness of a steak or a buttery fish fillet.
If you're hosting a dinner party, these look beautiful on a large white platter. I usually garnish them with a few extra lemon wedges and a tiny sprinkle of flaky sea salt right before they hit the table. They aren't just a side dish; when they are this green and glossy, they really hold their own.
I've even served these for Thanksgiving when I didn't have enough oven space for a traditional casserole. My family actually preferred the fresh, garlicky bite over the heavy cream laden version.
It's a reminder that sometimes the simplest methods, done with a bit of science and a lot of heart, are the ones that stick with us.

Recipe FAQs
What can I do with a bag of frozen green beans?
Pan-sear them with garlic and butter. This method transforms frozen green beans into a restaurant quality side dish by quickly evaporating moisture and creating a flavorful coating. It’s a fast and delicious way to elevate a simple freezer staple.
Should I thaw frozen green beans before cooking?
No, cook them directly from frozen. Thawing releases moisture and can lead to mushy beans. Cooking them frozen helps maintain their crisp texture, similar to how we manage moisture in recipes like our Crispy Classic latke recipe: My Family's Go-To Potato Latkes.
How to cook green beans in garlic butter?
Sear frozen beans in hot oil, then add butter and garlic. First, heat a skillet with oil until very hot, then add frozen beans and toss until bright green and dry. Push beans to the side, melt butter in the center, add sliced garlic and red pepper flakes, then toss everything together to coat.
Why do restaurant green beans taste so good?
High heat cooking and flavorful fats. Restaurants often use high heat to sear vegetables, which evaporates excess moisture and promotes browning, creating deeper flavors. They also frequently use butter and aromatics like garlic to build a rich, savory coating, a technique also highlighted in our How to Make the Best Creamy Vanilla Bean Ice Cream in a Ninja Creami where ingredient temperature is key.
Can I use fresh green beans instead of frozen?
Yes, but adjust cooking time. If using fresh beans, trim the ends and cook them in hot oil for about 8-10 minutes until tender crisp, then proceed with adding butter and garlic. This ensures they have enough time to soften without becoming mushy.
How long do frozen green beans take to cook?
About 8-10 minutes total. This includes searing the beans until they're bright green and water has evaporated, and then infusing them with garlic butter. The high heat method is surprisingly quick and efficient.
What is the secret to perfectly seared green beans?
Hot pan and minimal crowding. The key is a very hot skillet (cast iron works wonderfully) and ensuring the beans have space to sear, not steam. This high heat contact quickly evaporates moisture and triggers the Maillard reaction for flavor, much like achieving a good sear on meat.
Frozen Green Bean Recipe

Ingredients:
Instructions:
Nutrition Facts:
| Calories | 120 calories |
|---|---|
| Protein | 2.0 g |
| Fat | 9.3 g |
| Carbs | 8.7 g |
| Fiber | 3.1 g |
| Sugar | 3.7 g |
| Sodium | 288 mg |
