Fudgy Chocolate Crinkle Cookies Recipe

- Time: Active 15 minutes, Passive 4 hours, Total 4 hours 15 mins (includes chilling)
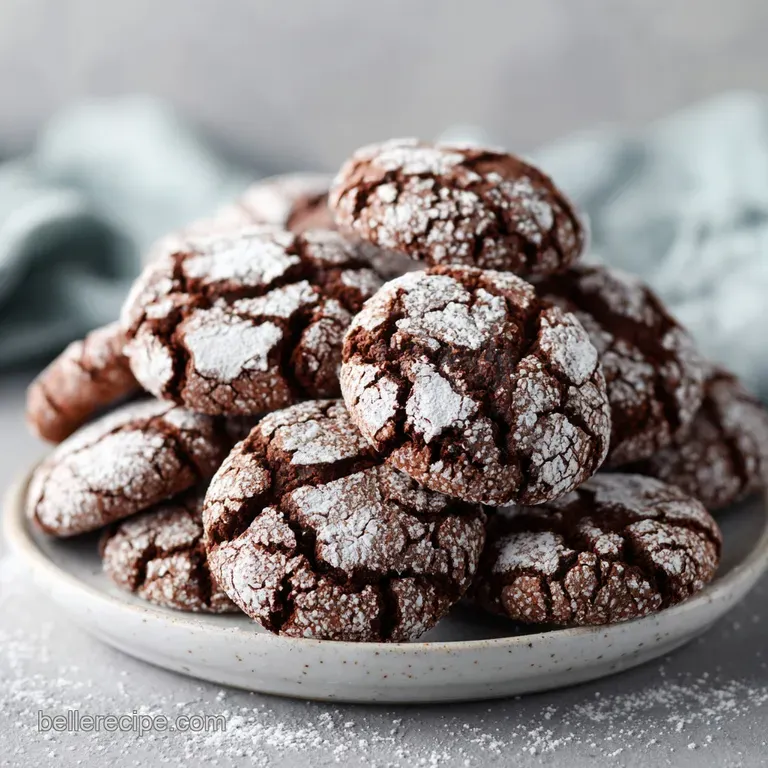
- Flavor/Texture Hook: Velvety cocoa center with a shatter crisp sugar exterior
- Perfect for: Holiday gifting, afternoon tea, or beginner bakers wanting a "wow" factor
- The Ultimate chocolate crinkle cookies recipe
- Reasons These Cookies Work Well
- Vital Recipe Specifications and Timing
- Essential Building Blocks for Dough
- Best Equipment for Perfect Results
- Step by Step Cooking Process
- Effective Troubleshooting and Fixes
- Creative Ways to Adapt Flavors
- Proper Storage and Freshness Tips
- Elegant Serving and Presentation Ideas
- Chocolate Crinkle Cookies Recipe FAQs
- 📝 Recipe Card
The Ultimate chocolate crinkle cookies recipe
I remember the first time I pulled a tray of these out of the oven on a snowy Tuesday afternoon. The kitchen was filled with the deep, earthy scent of Dutch process cocoa, and as the cool air hit the pan, I actually heard it.
A tiny, rhythmic crackling sound as the sugar crust began to shatter and reveal the dark, fudgy valleys underneath. It felt like watching a little piece of winter magic happen right on my counter, transforming simple pantry staples into something that looked like it belonged in a boutique bakery window.
We've all had those cookies that look beautiful but taste like dry cardboard, haven't we? I spent years tweaking this specific chocolate crinkle cookies recipe because I wanted that elusive combination of a brownie like interior and a crust that doesn't just melt away into a sticky mess.
This version is my pride and joy, born from countless batches where the sugar disappeared or the dough was too sticky to handle. We're going to use a few mindful tricks to make sure your kitchen smells like a chocolate dream and your cookies look exactly like the ones in your favorite childhood storybooks.
Whether you are baking these for a neighborhood swap or just because the kids are home and the pantry is calling, this process is about finding joy in the simple act of rolling dough. I’ve found that the secret isn’t just in the ingredients, but in the patience of the chill and the way we coat the sugar.
It’s a comforting ritual that results in a tin full of treats that somehow taste even better the next day. Let’s get our aprons on and start mixing.
Reasons These Cookies Work Well
Creating that signature look while maintaining a soft, fudgy center comes down to a few specific scientific reactions happening in your oven.
- Carbon Dioxide Expansion: The baking powder reacts with the heat and the moisture in the eggs, creating a rapid internal rise that forces the surface to stretch and crack.
- Sugar Recrystallization: Rolling the dough in granulated sugar first creates a dry barrier that prevents the powdered sugar from absorbing into the wet dough.
- Cocoa Hydration: Using vegetable oil instead of butter allows the Dutch process cocoa to fully hydrate without the interference of milk solids, resulting in a deeper color.
- Espresso Potential: Small amounts of espresso powder don't add a coffee taste but act as a chemical enhancer that brightens the darker notes of the cocoa beans.
Fresh vs Shortcut Method
| Feature | From Scratch Method | Box Mix Shortcut | Resulting Difference |
|---|---|---|---|
| Texture | Fudgy and dense | Cake like and airy | Scratch is more brownie like |
| Shelf Life | Stays moist 4 days | Dries out in 24 hours | Oil base retains moisture better |
| Flavor Depth | Intense, dark cocoa | Sweet, mild chocolate | Scratch has more complexity |
This table shows why taking those extra few minutes to measure out your flour and cocoa really pays off in the final bite. While a box mix can work in a pinch, the scratch version provides that "shatter" on the crust that shortcuts just can't quite replicate. If you enjoy the process of making things from your pantry, you might also find the technique for this How to Make recipe useful for those days when you don't want to turn the oven on at all.
Vital Recipe Specifications and Timing
Before we start mixing, it is helpful to see how the time breaks down so you can plan your day around the mandatory chilling period.
| Dough State | Internal Temp | Chill Time | Visual Cue |
|---|---|---|---|
| Freshly Mixed | Room Temp | 0 mins | Sticky, like thick brownie batter |
| Ready to Roll | 4°C (40°F) | 4 hours | Firm, scoops like cold ganache |
| Baked Finish | 75°C (167°F) | 10 minutes | Edges set, center looks slightly soft |
Chef's Note: Do not skip the chilling time! If the dough is warm, the powdered sugar will melt instantly, and you won't get those beautiful white mountain peaks on your cookies.
Essential Building Blocks for Dough
These simple ingredients work together to create a texture that is both soft and structured.
| Ingredient | Science Role | Pro Secret |
|---|---|---|
| Dutch process Cocoa | Provides color and fat | Sift it to avoid bitter lumps |
| Vegetable Oil | Keeps crumb tender | Use neutral oil like canola |
| Large Eggs | Structure and leavening | Use room temperature for better emulsion |
| Baking Powder | Creates the crackle | Ensure it's less than 6 months old |
Required Ingredient List
- 1 cup (125g) all purpose flour: Why this? Provides the necessary structure without making the cookie too heavy or bread like. (Substitute: 1:1 gluten-free flour blend with xantham gum).
- 0.5 cup (50g) unsweetened Dutch process cocoa powder: Why this? Gives that signature dark color and a smooth, less acidic chocolate flavor. (Substitute: Natural cocoa powder + 1/8 tsp baking soda).
- 0.75 cup (150g) granulated sugar: Why this? Sweetens the dough and helps create the initial crust during the bake. (Substitute: Light brown sugar for a chewier, more caramel like finish).
- 0.25 cup (60ml) vegetable oil: Why this? Keeps the cookies moist for days and ensures they don't get hard like butter cookies. (Substitute: Melted coconut oil).
- 2 large eggs: Why this? Acts as the primary binder and provides the moisture for the rise. (Substitute: 1/2 cup unsweetened applesauce, though the texture will be cakier).
- 1 tsp baking powder: Why this? The engine behind the "crinkle" look by creating a fast rise. (Substitute: 1/4 tsp baking soda + 1/2 tsp cream of tartar).
- 0.5 tsp espresso powder: Why this? This tiny amount intensifies the chocolate without making it taste like coffee. (Substitute: Finely ground instant coffee).
- 0.25 tsp fine sea salt: Why this? Balances the sugar and makes the chocolate flavor pop. (Substitute: Table salt).
- 1 tsp pure vanilla extract: Why this? Rounds out the flavors and adds a comforting aroma. (Substitute: Almond extract for a cherry chocolate vibe).
- 0.25 cup (50g) granulated sugar (for coating): Why this? This is the secret layer that keeps the powdered sugar white. (Substitute: Extra fine caster sugar).
- 0.5 cup (60g) powdered sugar: Why this? Creates the beautiful snowy "crinkle" effect on the dark dough. (Substitute: Sifted icing sugar).
Best Equipment for Perfect Results
You don't need fancy gadgets, but having these few items will make your life much easier.
- Whisk and Spatula: A sturdy whisk for the dry ingredients and a flexible silicone spatula for folding the dough.
- Baking Sheets: Two large rimmed sheets (like Nordic Ware) allow for even heat distribution.
- Parchment Paper: Essential for preventing the sugar from sticking and burning on the pan.
- Small Cookie Scoop: A 1 tablespoon scoop ensures every cookie is the same size, which means they all finish baking at exactly the same time.
- Fine Mesh Sieve: For dusting the cocoa and powdered sugar to ensure no lumps.
step-by-step Cooking Process
Following these steps in order ensures your dough is manageable and your crinkles are distinct.
Phase 1: Creating Chocolate Base
- Whisk dry ingredients. In a medium bowl, combine the 125g flour, 50g cocoa, 1 tsp baking powder, 0.5 tsp espresso powder, and 0.25 tsp salt until no streaks remain. Note: Sifting the cocoa here is a great way to ensure a velvety crumb.
- Mix wet ingredients. In a separate large bowl, beat the 150g granulated sugar and 60ml vegetable oil together, then add the 2 eggs one at a time, followed by the 1 tsp vanilla.
- Combine the mixtures. Gradually fold the dry ingredients into the wet mixture using your spatula until a thick, shiny dough forms. Stop as soon as the flour disappears to avoid overworking the gluten.
Phase 2: The Mandatory Chilling
- Chill the dough. Cover the bowl tightly with plastic wrap and refrigerate for at least 4 hours, or even overnight. Note: This allows the flour to fully hydrate and the oil to firm up, making the dough less sticky.
Phase 3: Rolling and Coating
- Preheat the oven. Set your oven to 180°C (350°F) and line your baking sheets with parchment paper.
- Prep the sugar stations. Place the 50g granulated sugar in one small bowl and the 60g powdered sugar in another.
- Scoop and roll. Use your scoop to form 24 balls (about 2.5cm or 1 inch each). Roll each ball between your palms until smooth.
- The double coat technique. Roll each ball first in the granulated sugar until covered, then immediately drop it into the powdered sugar and roll until it is heavily coated. Do not shake off the excess!
Phase 4: The Precision Bake
- Space and bake. Place the balls 5cm (2 inches) apart on the sheets. Bake for 10 minutes until the surface has shattered and the edges feel slightly firm to the touch.
- Cool on pan. Let the cookies rest on the hot baking sheet for 5 minutes before moving them to a wire rack. Note: This carryover cooking finishes the center without drying out the edges.
Effective Troubleshooting and Fixes
Even the most careful bakers run into trouble sometimes. Usually, it's a matter of temperature or timing.
Sugar Melting Issues Explained
If your powdered sugar seems to vanish or turn yellow in the oven, it usually means the dough was too warm or the coating was too thin. The granulated sugar layer acts as a sacrificial barrier; it absorbs the initial moisture from the dough so the powdered sugar can stay dry and white.
If you're still seeing melting, try chilling the dough balls for 10 minutes after rolling them in the first layer of sugar but before the second.
Fixing Dry Cookie Textures
A hard, crunchy crinkle cookie is usually the result of over baking or using too much flour. Since every oven runs a bit differently, I always suggest baking a "test cookie" first. If it comes out dry, reduce your next batch by 1 minute.
Remember that these cookies will look slightly underdone when you pull them out; that's the secret to that fudgy, brownie like heart.
| Problem | Root Cause | Solution |
|---|---|---|
| No Crinkles | Expired baking powder | Replace leavening agent every 6 months |
| Flat Cookies | Dough was too warm | Chill for full 4 hours or overnight |
| Burnt Bottoms | Dark baking sheet | Use parchment paper or silicone mats |
Common Mistakes Checklist
- ✓ Always weigh your flour (125g) rather than using a measuring cup to prevent dry cookies.
- ✓ Don't skip the granulated sugar roll; it's the "primer" for your powdered sugar "paint."
- ✓ Give the oven a full 20 minutes to preheat so the initial "heat shock" creates deep cracks.
- ✓ Work in small batches when rolling sugar so the dough doesn't warm up in your hands.
- ✓ Let the cookies cool completely before stacking them, or the sugar will become sticky.
Creative Ways to Adapt Flavors
This chocolate crinkle cookies recipe is a fantastic canvas for different holiday flavors.
Filipino Style Variation
In the Philippines, these are often made with a bit more sweetness and sometimes a touch of ube (purple yam) extract. You can swap the vanilla for half vanilla and half ube for a colorful twist. If you love exploring classic baked goods with a sweet twist, you might also enjoy the creamy center of this Homemade Boston Cream recipe, which pairs beautifully with a dark chocolate cookie.
Espresso Dark Chocolate Twist
For the coffee lovers, increase the espresso powder to 1 full teaspoon and use an extra dark cocoa powder. This creates a sophisticated, "grown up" version of the cookie that is less sweet and pairs perfectly with a late night decaf.
Ingredient Shortcuts
| Goal | Shortcut | Trade off |
|---|---|---|
| Faster Chilling | Spread dough flat in a pan | Dries out faster if not covered |
| Intense Shine | Use 1 extra egg yolk | Cookies will spread slightly more |
| Easy Cleanup | Use a silicone mat | Bottoms will be softer, less crisp |
Proper Storage and Freshness Tips
Because this recipe uses oil instead of butter, these cookies stay soft for a surprisingly long time.
Storage: Keep your cooled cookies in an airtight container at room temperature for up to 4 days. If you find they are softening too much, place a piece of parchment paper between the layers to prevent the sugar from sticking.
I don't recommend the fridge, as the humidity can melt the powdered sugar coating.
Freezing: You can freeze the baked cookies for up to 2 months. To thaw, just leave them on the counter for an hour. However, for the best results, freeze the dough balls before rolling them in sugar.
When you're ready to bake, let them sit at room temperature for 15 minutes, then do the double sugar roll and bake as directed.
Zero Waste: If you end up with a few cookies that have gone a bit stale, don't throw them away! Crumble them up and use them as a topping for vanilla bean ice cream or fold them into a chocolate cake batter for added texture.
You can also use the leftover powdered sugar and cocoa to make a quick hot chocolate mix.
Elegant Serving and Presentation Ideas
These cookies are naturally beautiful, but you can make them feel even more special with a few simple touches.
- The Milk Dip: Serve these in a wide rimmed glass with cold whole milk. The "shatter" of the crust holds up surprisingly well to a quick dunk.
- Holiday Gifting: Place 4-6 cookies in a clear cellophane bag tied with a deep red velvet ribbon. The contrast of the white sugar and dark chocolate is naturally festive.
- The Dessert Board: Pair these with fresh strawberries and a few pieces of sea salt fudge. If you're looking for another classic to add to your tray, the Classic Soft Sugar recipe provides a lovely pale contrast to the dark crinkles.
Chilling and Sugar Myths
Many people think you can just roll the dough once and get a thick white crust. The truth is that the moisture in the dough will always try to dissolve the sugar. By rolling twice (granulated then powdered), you are creating a physical barrier. Another myth is that you can skip the chill by adding more flour.
While this makes the dough easier to handle, it destroys the fudgy texture and turns the cookie into a dry biscuit. Trust the process and give the dough its time in the cold it's worth every minute of the wait.

Chocolate Crinkle Cookies Recipe FAQs
What is the secret to crinkle cookies?
Chilling the dough fully and using the double sugar coating technique. The dough must be very cold (firm like ganache) so it holds its shape and doesn't melt the powdered sugar immediately in the oven.
Why aren't my cookies crinkling?
No, this is usually a leavening or temperature issue. Check your baking powder expiration date, as this chemical reaction is necessary to force the top to crack. Also, ensure the dough was rolled heavily in both sugars.
Are crinkle cookies soft or hard?
They are designed to be soft and fudgy inside with a crisp exterior crust. Using oil instead of all butter helps retain moisture, keeping the center tender for days. If they are hard, they were likely overbaked by a few minutes.
Why are my chocolate crinkles flat?
Yes, flatness is almost always due to warm dough or overmixing. When the dough is warm, the fat melts too quickly, causing the cookie to spread before the structure sets. You must chill the dough for the full minimum time to prevent this.
Can I substitute butter for the vegetable oil?
No, I strongly advise against substituting butter for the oil in this specific recipe. Butter contains milk solids that interfere with the cocoa's hydration, leading to a drier, cakier texture rather than the desired fudgy result.
How do I get the powdered sugar coating to stay bright white?
Roll the dough first in granulated sugar, then immediately in the powdered sugar. The granulated sugar acts as a moisture buffer, preventing the liquid dough from dissolving and yellowing the final powdered coat during baking.
Is it true that adding coffee powder ruins the chocolate flavor?
False. Adding espresso powder actually deepens the chocolate flavor significantly. It acts as a flavor enhancer, much like salt, amplifying the cocoa notes without adding any discernible coffee taste to your finished cookie.
Fudgy Chocolate Crinkle Cookies

Ingredients:
Instructions:
Nutrition Facts:
| Calories | 94 kcal |
|---|---|
| Protein | 1.5 g |
| Fat | 3.3 g |
| Carbs | 16 g |
| Fiber | 0.7 g |
| Sugar | 11 g |
| Sodium | 42 mg |
