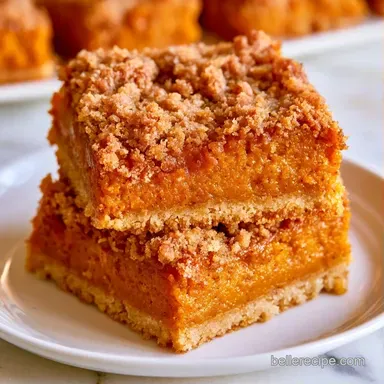
Gluten Free Pumpkin Bars with Shortbread in 80 Minutes
- Time: 20 min active + 60 min baking + 2 hr chilling
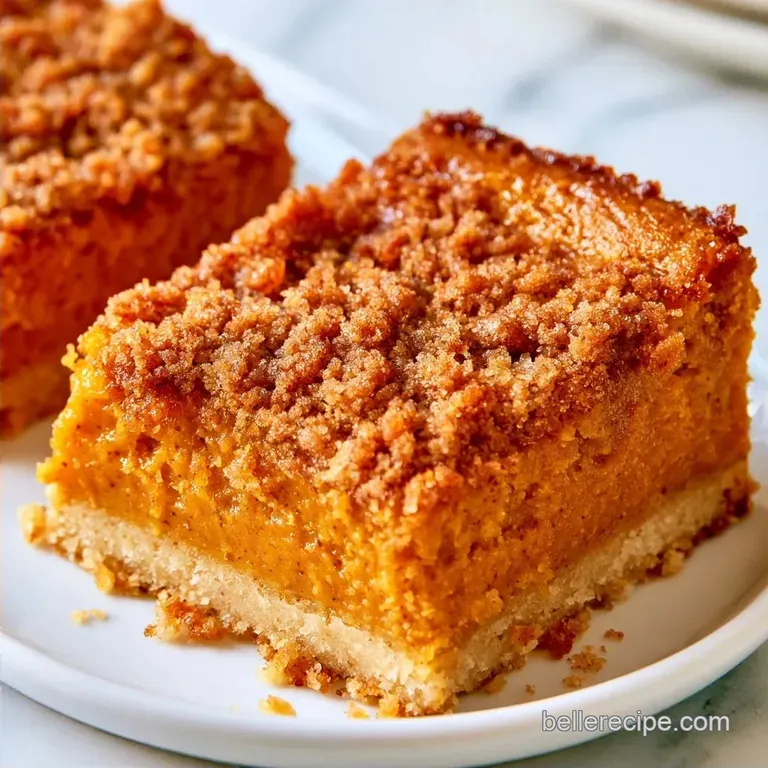
- Flavor/Texture Hook: Buttery, shattering shortbread with a velvety spiced custard
- Perfect for: Autumn potlucks or a mindful holiday treat
GlutenFree Pumpkin Bars With Shortbread
Have you noticed how some pumpkin treats feel overly dense while others are perfectly light? The secret is usually in the crust. Many recipes simply mix everything together, which often results in a soggy base that lacks structure.
I recall sharing a batch of these at a family gathering a while back. My cousin, who typically skips gluten-free options, was surprised after one bite and asked if I had used regular flour. That balance of salty, crunchy shortbread paired with the warm pumpkin filling was exactly the result I wanted.
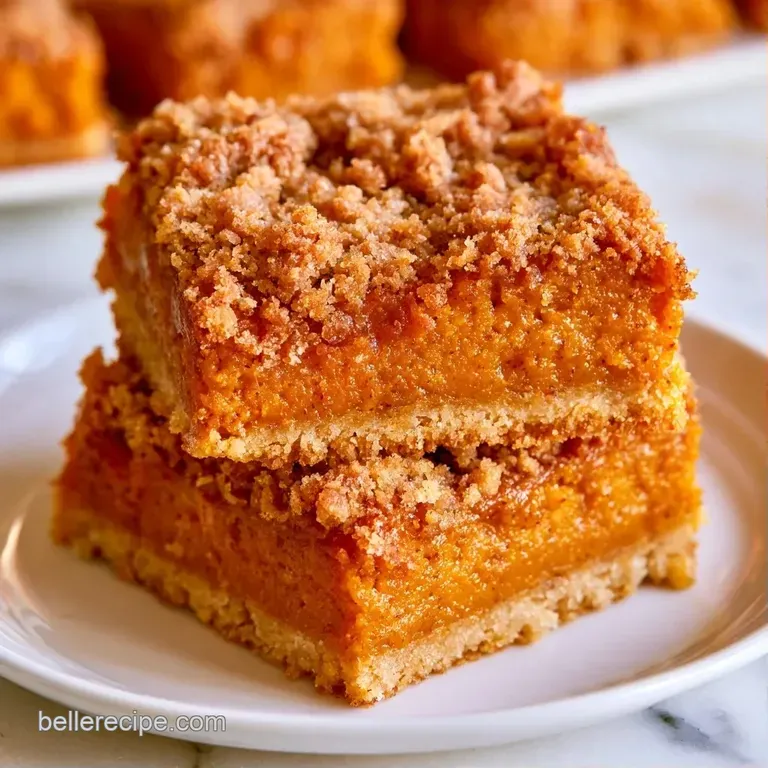
These squares offer all the cozy feelings of a traditional pie but in a much more portable form. You'll enjoy a deep, spiced middle that holds its shape and a crust that provides a satisfying snap.
Quick Recipe Details
Since we're dealing with gluten-free flour, the resting time is non negotiable. If you cut these while they're warm, the filling will ooze, and the crust will feel gummy. Patience is the main ingredient here.
| Goal | What to change |
|---|---|
| More Spice | Add 1/2 tsp cinnamon |
| Richer Taste | Use dark brown sugar |
| Nutty Crunch | Add chopped pecans to base |
The Ingredient List
For the shortbread, use a gluten-free all-purpose flour. I recommend a blend that includes xanthan gum to ensure the crust doesn't crumble. Chilled butter is essential for creating those tiny air pockets, which result in a light and crisp texture.
For the filling, ensure you use plain pumpkin puree rather than the pre-spiced pie mix. Mixing maple syrup with brown sugar creates a depth of flavor that sugar alone cannot achieve. Cornstarch serves as the stabilizer here, making sure the bars set firmly in the refrigerator.
Shortbread Base 1.5 cups gluten-free all purpose flour blend The reason: Provides structure and a neutral taste 0.5 cup unsalted butter, cold and cubed The reason: Gives the crust its characteristic snap 0.25 cup granulated sugar
The reason: Contributes sweetness and crispness 0.25 tsp fine sea salt The reason: Offsets the richness of the butter
- 15 oz pumpkin puree The reason
- The core of the flavor
- 2 large eggs The reason
- Binds the mixture during baking
- 2 tbsp pure maple syrup The reason
- Enhances the autumn scent
- 1 tsp pumpkin pie spice The reason
- Provides a classic warm profile
- 1 tsp vanilla extract The reason
- Complements the spices
- 1 tbsp cornstarch The reason
- Allows for a clean slice
| Original Ingredient | Substitute | Why It Works |
|---|---|---|
| Unsalted Butter (0.5 cup) | Coconut Oil (solid, 0.5 cup) | Comparable fat levels. Note: Introduces a subtle coconut flavor |
| Maple Syrup (2 tbsp) | Honey (2 tbsp) | Similar liquid sweetener. Note: Adds a slightly floral taste |
| Cornstarch (1 tbsp) | Arrowroot Powder (1 tbsp) | Equal thickening ability. Note: Slightly more translucent appearance |
Tools You'll Need
While you can get by with basic gear, a few handy gadgets can simplify the process. A pastry cutter is ideal for working the butter, but your fingers are just as effective if you don't mind a bit of a mess.
An 8x8 inch baking pan is the recommended size. If you use a larger pan, the bars will be thinner and more likely to overbake. I always line my pan with parchment paper and leave a generous overhang, which allows me to lift the entire block out effortlessly.
Step-by-step Baking
Phase 1: Creating the Shortbread Base
- Set your oven to 350°F (175°C). Prepare an 8x8 inch baking pan by lining it with parchment paper, ensuring the edges hang over the sides.
- Combine the gluten-free flour, granulated sugar, and salt in a bowl using a whisk.
- Mix in the chilled, cubed butter. With a pastry blender or your fingertips, cut the butter into the dry ingredients until the mixture resembles coarse crumbs the size of peas. Note: Avoid overmixing to keep the crust from becoming tough.
- Press the dough firmly across the bottom of the pan, making sure to pack the corners well.
- Par bake for 12-15 minutes until the edges turn a light mahogany colored gold. Take it out of the oven and allow it to cool for a few minutes.
Phase 2: Mixing the Pumpkin Layer
- Beat the eggs and brown sugar in a mixing bowl until the mixture is pale and slightly frothy.
- Mix in the pumpkin puree, maple syrup, and vanilla extract, stirring until the batter is perfectly smooth.
- Sift the cornstarch and pumpkin pie spice into the bowl, whisking until all lumps have disappeared.
Phase 3: The Final Bake and Chill
- Gently pour the pumpkin filling over the warm shortbread base and level the top using a spatula.
- Put the pan back in the oven for 35-40 minutes, until the edges are set and puffed but the center has a very slight jelly like jiggle.
- Let the bars cool entirely on a wire rack. Chill in the refrigerator for at least 2 hours before lifting them out to slice.
Fixing Common Issues
One of the biggest hurdles with gluten-free baking is the texture. If your base feels like sand, it's usually a matter of pressure. You have to really push that dough down into the pan to get it to bond.
Another common issue is the "soggy bottom." This happens when the crust isn't par baked long enough. That mahogany color on the edges is your signal that the seal is set.
Fixing a Crumbling Base
If the bars fall apart when you slice them, the butter likely got too warm during mixing. Keep your butter in the fridge until the very second you need it.
Preventing a Soggy Bottom
A wet crust usually means the filling was added to a raw base. Always par bake the shortbread first to create a moisture barrier.
Handling a Cracked Top
Cracks happen when the bars cool too quickly or are overbaked. Let them cool slowly at room temperature before moving them to the fridge.
| Problem | Fix |
|---|---|
| Crumbling Base | Press dough firmer with a flat cup |
| Soggy Bottom | Par bake until edges are mahogany |
| Cracked Top | Cool slowly at room temperature |
Customizing Your Bars
I love these as they are, but you can easily tweak them. For a bit more tang, stir 2 ounces of softened cream cheese into the pumpkin filling before baking. It gives the bars a cheesecake like richness.
If you prefer a softer, more custard like feel, my pumpkin pie bars are another wonderful option. For those who want a bit of a crunch, try adding 1/4 cup of finely chopped pecans or walnuts to the shortbread dough.
You can also swap the pumpkin pie spice for a mix of cinnamon and ginger if you want a sharper, more zingy flavor. Just make sure you don't skip the cornstarch, or the bars won't hold their shape.
Keeping Them Fresh
These treats stay fresh longer than you might expect. Store them in an airtight container in the refrigerator for a maximum of 4 days. To enjoy, leave a piece out at room temperature for 10 minutes so the buttery crust can soften.
If you need to store them longer, freezing is an option. Cut the bars into slices, wrap each piece separately in parchment paper, and then store them in a freezer safe bag. They will remain fresh for roughly 2 months. For the ideal consistency, thaw them in the refrigerator overnight.
To prevent waste, freeze any remaining pumpkin puree from the can in 1/2 cup portions. These frozen cubes are perfect for stirring into morning oatmeal or blending into smoothies to bring some autumn flavor to your January mornings.
Serving and Pairings
Because these bars are so decadent, they work best with bright or acidic accompaniments. A traditional topping would be a spoonful of unsweetened whipped cream dusted with a bit of cinnamon. For a contemporary twist, consider a maple glaze drizzle or a scattering of fresh pomegranate seeds for a burst of color.
To drink, a strong espresso or a hot Earl Grey tea helps balance the rich shortbread base. They are also a wonderful addition to a brunch spread when served with fresh berries. For a lighter breakfast option, try these pumpkin granola clusters.
Why the Texture Works
The magic here is in the temperature and the timing. Using cold butter in the shortbread creates tiny steam vents in the oven, which results in a flaky, crisp base rather than a dense cookie.
The par baking process is the real hero. By baking the crust first, you create a semi permeable seal that prevents the wet pumpkin filling from soaking into the dough.
Cornstarch acts as a stabilizer for the eggs and pumpkin. It helps the filling set into a clean, sliceable square without becoming gummy or remaining too liquid in the center. This combination ensures that every bite has a clear distinction between the crunch of the base and the smoothness of the topping.
Recipe FAQs
Can I use pumpkin pie filling instead of puree?
No, because pie filling has added sugar and spices that throw off the flavor. Stick to 100% pumpkin puree, similar to what we use in our pumpkin pancakes.
Is it true that gluten-free shortbread always turns out gritty?
Actually, no. Working cold cubed butter into the flour until it looks like pea-sized crumbs ensures a tender, smooth texture.
How to prevent the pumpkin filling from becoming watery?
Sift in the cornstarch and pumpkin pie spice thoroughly. This binds the moisture from the puree and eggs to ensure a stable set.
Why did my pumpkin bars not set in the center?
You likely removed them from the oven too early. Bake for 35 40 minutes until the edges are puffed and the center has only a slight jelly like jiggle.
What is the best way to get a clean slice when serving?
Refrigerate the bars for at least 2 hours before lifting them out. This allows the filling to firm up completely for sharp edges.
gluten free Pumpkin Bars