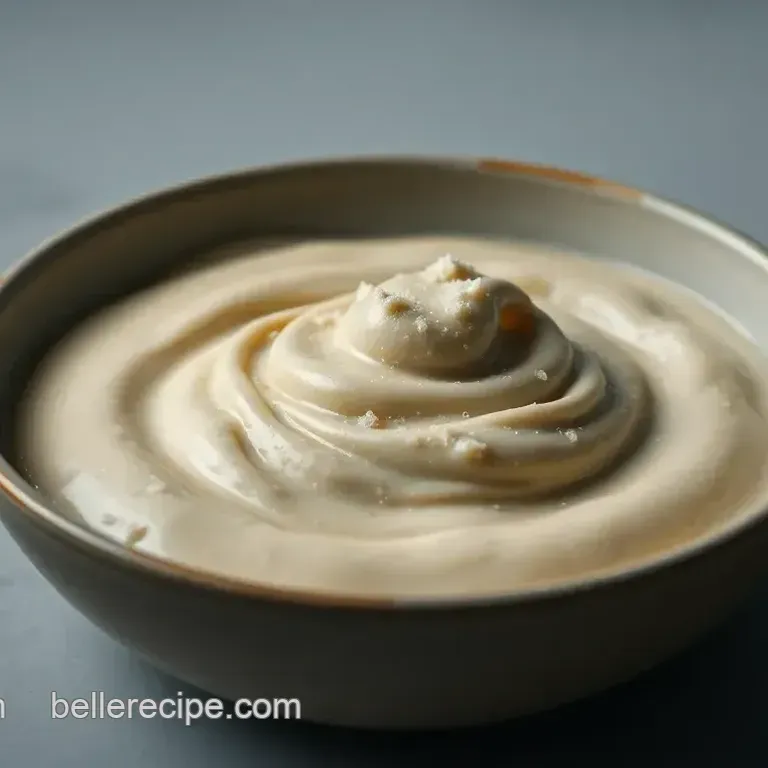
Gluten-Free Roux: the Perfect Thickener for Your Sauces and Stews
- Getting to Know Gluten-Free Roux: A Delicious Journey
- Essential Ingredients Guide: Unlocking the Heart of Your Kitchen
- Mastering the Art of Professional Cooking
- Unlocking the Secrets of a Luxurious Gluten-Free Roux
- Pro Tips & Secrets for Perfecting Your Roux
- Perfect Presentation for a Velvety Roux
- Storing Your Magic Mix
- Creative Variations for Your Roux
- Complete Nutrition Guide
- Time to Get Cooking!
- Frequently Asked Questions
- 📝 Recipe Card
Getting to Know gluten-free Roux: A Delicious Journey
Have you ever taken a bite of something comforting, like creamy mac and cheese, and wondered how it all comes together? honestly, i have! my first experience with making a roux was a total adventure.
I remember the first time i tried it; i was so excited but also kinda terrified. i mean, who knew that a simple mix of fat and flour could create such magic? that's where my love for gluten-free roux began.
But let's get real most traditional roux uses wheat flour, which isn’t an option for a lot of people these days.
So, i took a leap of faith to create a gluten-free version that works like a charm! seriously, if you’re a fan of stews, sauces, or even a smooth vegan gravy, this recipe is your new best friend.
The History Behind Roux
Fun fact time! roux has got roots deep in classic french cuisine, dating back centuries. it’s basically the secret magic wand that makes gumbo, sauces, and gravies rich and thick.
Fast forward to today, and it's no surprise that gluten-free diets have changed the game a bit. now, gluten-free roux is the trendy twist that everyone is talking about! and here's the kicker it’s super easy to whip up.
You need about 15- 20 minutes and just a handful of ingredients. talk about a win-win!
When it comes to difficulty, i’d rate it as easy peasy. if i can make it, i bet you can too.
The cost is also super friendly especially if you already have some of the ingredients at home. you'll yield enough for 4-6 servings , which is perfect for batch cooking or impressing friends at dinner parties!
Why You’ll Love This Roux
Now, let’s chat benefits. first off, this gluten-free roux is packed with flavor. using this instead of traditional flour opens up a whole new world of possibilities for those of us who are gluten intolerant or just love experimenting with alternatives.
Plus, since you can use vegan butter or oils, it’s perfect for those diving into vegan sauce recipes !
Nutrition wise, this roux is comparably lighter than some cream sauces, offering a unique flavor boost without the heavy calories that come from dairy.
I whip it up for special occasions like holiday dinners or cozy family gatherings. it pairs perfectly with other plant based whole foods , making it versatile enough for any meal.
You can use it in a classic dish like vegetable pot pie or dress up your rockstar vegan sauces for pasta night!
One reason i adore this recipe is that it's forgiving. you can tweak it according to your needs. different oils? go for it! try infusing it with herbs or spices to make it really pop.
While lots of vegan gravy recipes can be hit or miss, this roux is a staple that won’t let you down.
Ready to Get Cooking?
So, are you intrigued yet? if you're eager to dive into creating your own gluten-free roux , you’re just a few steps away! trust me; once you’ve mastered this simple technique, the culinary world is your oyster.
You’ll want to drizzle it over everything soups, stews, casseroles you name it!
Next, let's gather our ingredients and get started on this delicious adventure. You won't want to miss out on the magic of creating your own thickening base that's not only friendly for gluten-free and vegan choices but is dang delicious too! Grab your whisk, and let’s bring this roux to life!
Essential Ingredients Guide: Unlocking the Heart of Your Kitchen
When diving into the culinary world, it’s all about having the right premium core components on hand. think of your kitchen as a treasure chest.
The more goodies you stock up on, the grander your meals will be! trust me, from someone who had to make a last minute grocery run at 10 pm just for garlic (we’ve all been there), knowing your essential ingredients can save you from those frantic moments.
Premium Core Components
Detailed measurements: let’s get the basics down. for the most part, recipes need a bit of precision. so whether you’re measuring in 1/4 cup or 60 ml , know these measurements are key.
Don’t get lost in converting everything; stick to one system you trust!
Quality indicators: always look for freshness and color . for herbs, vibrant greens mean fresh , while flour should be light without any funky smells.
A tip? get to know your local markets. sometimes they have fresher options right at your fingertips!
Storage guidelines: keep in mind that some ingredients thrive in the pantry, while others prefer the fridge. for example, spices can last for ages if kept in a cool, dark place.
But veggies? you want them crisp and lively in the crisper drawer!
Freshness tips: always check the expiration dates. you don’t want to end up with stale items that mash your cooking vibes! a good rule? if it smells funky, it’s probably past its prime.
Signature Seasoning Blend
Creating a signature seasoning blend is like finding your culinary voice. It’s where you can express yourself!
Essential Spice Combinations: Start with the classics; think garlic powder, onion powder, and a hint of paprika. These spices can elevate simple dishes to another level!
Herb Selections: Using fresh herbs is a game changer. Pair basil with tomatoes, and see the magic unfold! Get the freshest stuff; it makes a huge difference.
Flavor Enhancers: Ever added a splash of soy sauce or Worcestershire to kick things up? Those little things can turn your vegan sauces or gravies into flavor bombs!
Regional Variations: Don’t shy away from trying spices from different cultures. A bit of cumin or coriander can take you from the American kitchen to Indian flavor town in no time!
Smart Substitutions
Sometimes you just gotta roll with what you’ve got, right? Here come the smart substitutions .
Common Alternatives: Got a recipe calling for heavy cream? Swap it out for coconut milk for that creamy texture without the dairy!
Dietary Modifications: If you’re vegan, the world is your oyster well, not literally! Use nut-based milks or avocado for creaminess.
Emergency Replacements: Running low on gluten-free flour? Cornstarch could save your day, but remember to adjust the amount.
Seasonal Options: Keep it fresh with seasonal ingredients. They taste better and are often cheaper. Think pumpkin in fall or asparagus in spring get ready for deliciousness!
Kitchen Equipment Essentials
Your kitchen tools are like your trusty sidekicks. You know, the ones who never let you down!
Must Have Tools: A sturdy whisk, good knives, and a solid cutting board should be at the top of your list. Trust me, those little things can make cooking a breeze.
Alternative Equipment Options: Don’t have a mandoline? No problem! A good knife can do the trick. Learn to work with what you’ve got.
Preparation Tips: Always prep your ingredients before diving into cooking. You’ll feel like a pro, and everything will come together smoothly.
Storage Solutions: Keep your kitchen organized. Use clear containers for easy viewing, and label everything. Trust me; you’ll save time and avoid those panic moments!
The Transition to the Instructions Section
With a strong foundation of core ingredients and essential tools, you're ready to rock the gluten-free roux ! whether you're whipping up a creamy vegan sauce , making a rich vegan gravy , or trying to craft the perfect gumbo, this guide will help you navigate your culinary journey like a pro.
Now, let’s dive into the delicious recipe that’s about to become a staple in your kitchen! let's get cooking!
Mastering the Art of Professional Cooking
Let’s chat about something that can make your home cooking shine like a michelin star meal professional cooking methods! we’re diving in, friends, into essential preparation steps, a step-by-step process that’ll feel like second nature, expert techniques, and success strategies that help you avoid rookie mistakes.
Grab a snack, and let’s get started!
Essential Preparation Steps
Mise en place is your best friend. seriously, it means “everything in its place.” before you even think about cooking, gather all your ingredients, tools, and equipment.
This simple step will save you from the frantic “oh my gosh, where’s the salt?” moments. just trust me, it is everything .
Next, let’s talk time management . set a timer for each component it transforms chaos into blissful order. whether it’s stirring up a gluten-free roux or letting your vegan gravy simmer, timing is key.
Aim for 15- 20 minutes for our gluten-free roux to be just right.
Don’t forget about organization strategies . keep your workspace clean and clutter free. no one wants to go on a treasure hunt for a spatula while something is burning! lastly, always think about safety considerations .
Keep a fire extinguisher nearby. really, you’ll thank me later.
Step-by-step Process
Alright, let’s break it down with some straightforward instructions, shall we?
Melt the Fat : Toss ¼ cup unsalted butter (or a vegan alternative) into a medium saucepan over medium heat. You want it melted, not browned. That’s a biggie.
Add the gluten-free Flour : Slowly sprinkle in ¼ cup gluten-free all-purpose flour while whisking like your life depends on it. You’ve got this!
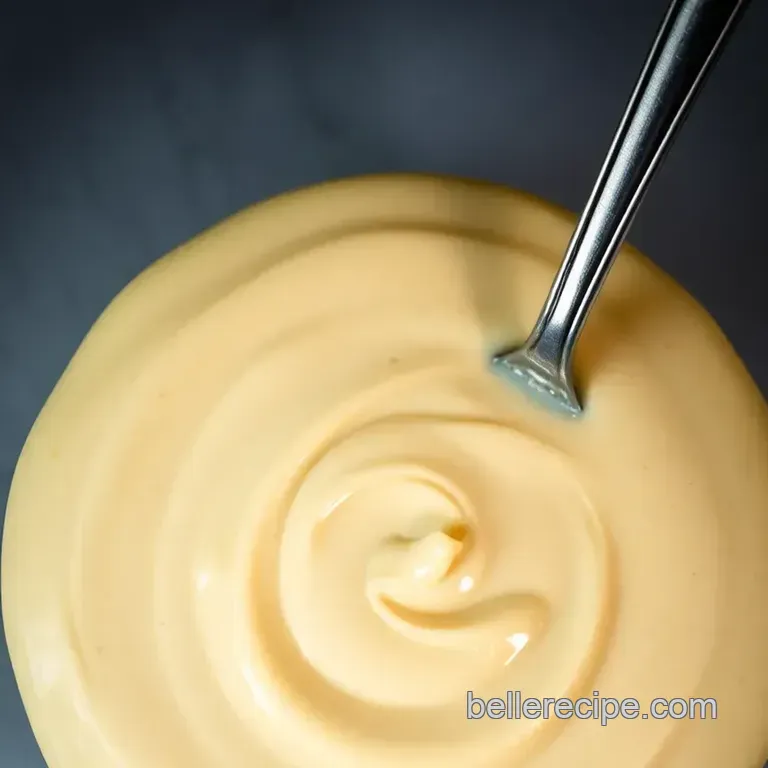
Cook the roux : stir frequently for 10- 15 minutes , watching for it to turn a lovely light golden color.
The longer you cook it, the darker and richer it gets. think gumbo vibes!
Use the Roux : Gradually whisk in your liquid (broth, milk, whatever tickles your taste buds) to avoid those nasty lumps.
Timing and temperature feel like the big deal here aim to have your roux at that golden level before adding any liquids. That’s when magic happens!
Expert Techniques
This is where it gets juicy! Use those professional methods . For instance, whisk constantly to prevent burning; nothing worse than a bitter roux.
Keep an eye on your quality checkpoints . does the roux smell heavenly? is it silky and smooth? those are good signs! if your sauce doesn’t thicken as expected, don’t panic.
Just bring it back to a simmer and let it work its magic a little longer patience, my friends!
Success Strategies
We all mess up sometimes, right? here are some common mistakes to avoid . first, don’t rush your roux; it can lead to lumps that can ruin a perfectly good vegan sauce.
Nobody wants that.
Try to ensure you’re using a good quality gluten-free flour, preferably one that has xanthan gum mixed in. It makes all the difference!
Quality assurance tips ? taste as you go! you want that perfect result , and you can only get there by checking in with your dish.
If something feels off, tweak it before serving.
And for those nights when you’re busy, think about make-ahead options . you can whip up the roux in advance and store it in your fridge for up to a week.
Just give it a quick reheat before using!
Wrapping It Up
With these tips and tricks, you’re now ready to tackle professional cooking methods like a pro. incorporating a gluten-free roux into your sauces and stews not only enhances flavors but opens doors for a whole range of delicious vegan sauces and plant based whole foods .
As they say, the proof's in the tasting!
Now that you’ve got your hands on these essential techniques, stay tuned for the last section where I'll share more additional information to ensure your kitchen journeys are flavorful and fun! Let’s keep cooking!
Unlocking the Secrets of a Luxurious gluten-free Roux
Oh my goodness! if you’re like me, you probably grew up thinking a good roux was reserved for fancy restaurants or grandma’s sunday best casserole.
But let me tell you making a gluten-free roux at home is as easy as pie, or should i say, pie crust (but less crumbly).
You can whip up this magic thickener in under 20 minutes , and trust me, it’ll change the game for sauces, soups, and gravies.
Grab your whisk, and let’s dive into some pro tips and secrets!
Pro Tips & Secrets for Perfecting Your Roux
Chef’s Insights
From my own experience, one thing that stands out is the importance of quality ingredients . use a gluten-free flour with xanthan gum for that silky finish.
Brands like bob’s red mill or king arthur flour are usually my go-tos.
Time Saving Techniques
Listen up! if you prepare your ingredients ahead of time like measuring out your butter and flour you'll save yourself a frantic rush.
And hey! don’t forget to keep your whisk in hand because a good roux requires constant attention.
Flavor Enhancement Tips
If you really want to knock people’s socks off, think about adding some spices right into your roux! a pinch of smoked paprika or maybe some black pepper can amp up the flavor.
You’ll actually start to see the roux work its magic as the aromas fill your kitchen.
Presentation Advice
You know what they say "we eat with our eyes first." pour your sauce over some stunning pasta or a colorful veggie medley, and you’re already halfway to insta worthy meals! just a sprinkle of fresh herbs on top will make it pop.
Perfect Presentation for a Velvety Roux
Plating Techniques
When serving your dish, consider using a shallow bowl to create a nice canvas for your sauce.
Garnish Ideas
A tiny sprig of parsley or a swirl of olive oil adds a touch of elegance and makes your dish look professional.
Color Combinations
Pair your gluten-free roux sauce with vibrant veggies think greens, reds, or yellows. Gone are the days of dull looking meals!
Visual Appeal Tips
Use contrasting colors to create a feast for the eyes. Bright tomatoes next to creamy white sauces? Yes, please!
Storing Your Magic Mix
Storage Guidelines
Made too much roux? No biggie! Store it in an airtight container in the fridge for up to one week. You’ll be all set for quick meals during the week.
Preservation Methods
You could even freeze it in ice cube trays! Just pop out a cube when needed. Talk about meal prep efficiency!
Reheating Instructions
When you’re ready to use that chilled roux, gently warm it on the stovetop. Add a splash of broth or liquid to loosen it up, and it’ll come back to life!
Freshness Duration
Generally, it’ll hold up well for about a week in the fridge, but make sure to sniff it before using!
Creative Variations for Your Roux
Flavor Adaptations
Love coconut? Try coconut oil instead of butter for a twist. You’ll be surprised at the layer of flavor it adds.
Dietary Modifications
Need a vegan sauce? Use a dairy-free butter or oil, and you have yourself a stellar vegan gravy that even meat lovers will crave.
Seasonal Twists
Use seasonal herbs or spices to make it work for different times of year. Pumpkin spice roux for fall, anyone?
Regional Variations
Mix things up with a Cajun flair by adding some Cajun seasoning for a kick, perfect for gumbo.
Complete Nutrition Guide
Calories? We're looking at about 190 calories for the roux itself. When you add it to a dish, the keeping brain of lean protein like chicken or plant based proteins will make it even healthier.
Health Benefits
Gluten-free doesn’t mean taste free! The right ingredients mean you’re enjoying flavors without the gluten hangover.
Dietary Considerations
If you have friends joining for dinner on a specific diet, this roux works beautifully across the board just pair it with your favorite plant based whole foods !
Portion Guidance
A good rule of thumb is to use a couple of tablespoons per serving. It really depends on how creamy and thick you want things.
Time to Get Cooking!
With your newfound knowledge of a gluten-free roux , your cooking game is about to elevate. so why not give it a whirl? remember, cooking should be fun! don’t stress over being perfect.
Make a mess, enjoy the process, and share some laughs along the way.
Go on, get thickening! Your taste buds will be forever grateful!
Frequently Asked Questions
What is gluten-free roux made of?
Gluten-free roux is primarily made from a combination of fat, like butter or oil, and gluten-free flour. For the best results, choose a gluten-free all-purpose flour that contains xanthan gum, which helps mimic the texture of traditional flour.
Can I use any gluten-free flour for my roux?
While you can use various gluten-free flours, it's best to use a blend specifically designed for baking that includes xanthan gum. This will ensure you achieve the right consistency and flavor in your roux.
How do I store leftover gluten-free roux?
To store any leftover gluten-free roux, let it cool completely and then transfer it to an airtight container. Keep it in the fridge for up to a week, or you can freeze it for longer storage; just be sure to label it with the date!
What are some variations I can try with gluten-free roux?
You can experiment by using different fats, such as coconut oil or ghee, for a nutty flavor. Additionally, consider infusing your roux with fresh herbs like thyme or rosemary as it cooks to add an aromatic twist!
Can I make a darker roux for Cajun or Creole dishes?
Absolutely! To make a darker roux, simply cook it longer, stirring continuously until it reaches a rich brown color. This type of roux is perfect for dishes like gumbo or jambalaya, giving them that distinct depth of flavor.
What nutritional considerations should I keep in mind with gluten-free roux?
Gluten-free roux can be a bit calorie dense due to the fats used and the gluten-free flour. If you're watching your fat intake, consider using olive oil instead of butter, and remember that moderation is key when using it to thicken your dishes!
gluten free Roux The Perfect Thickener For Your