Homemade Pita Bread
- Perfectly Pillowy Homemade Pita Bread: Your New Obsession
- The Crucial Bits: Ingredients & Gear
- Perfectly Pillowy Homemade Pita Bread
- Prep Like a Pro
- Pita Perfection: Step-by-Step
- Pro Tips and Tricks
- What About Sourdough?
- Recipe Notes: Little Things That Make a Big Difference
- Frequently Asked Questions
- 📝 Recipe Card
Perfectly Pillowy Homemade Pita Bread: Your New Obsession
Fancy making pita? Honestly, who doesn't love a good pita bread recipe ? This one's a winner. It gives you that perfect pocket every time, so you can stuff it silly.
What’s the Big Deal About This Pita?
This pita bread recipe brings the mediterranean kitchen right to your table. it's all about simple ingredients and good technique.
Think warm pita, bursting with flavor. it takes a bit of effort, but the reward is massive. it makes 8-10 pitas.
Why You Need This Recipe
This isn't just bread. this recipe is a blank canvas. the best simple sourdough bread recipe with starter can be a bit of a faff.
This is super easy and super quick. it also uses your simple sourdough discard recipe too. serve warm with hummus.
Or go crazy with fillings. this recipe is special because of the light, airy, texture.
Now, let's get into what you'll need to make this pita bread recipe .
The Humble Heroes: What You'll Need
Here's the kit:
- 1 ½ cups (360 ml) warm water (105- 115° F / 40- 46° C)
- 2 ¼ teaspoons (7g) active dry yeast
- 1 teaspoon (6g) granulated sugar
- 3 ½ - 4 cups (420-480g) all-purpose flour
- 2 teaspoons (12g) kosher salt
- 2 tablespoons (30ml) olive oil
Easy Rustic Sourdough Bread For You
Why not try this easy rustic sourdough bread twist? a sourdough pita bread recipe adds that unique tang! plus, you can use a recipe using sourdough starter instead of yeast.
Don’t be scared of the super easy sourdough bread .
From Dough to Delicious
This pan pita adventure is all about getting those warm, fluffy pockets. You'll feel like a pro. Let's get baking. You know?
Right, let's get this show on the road! a good pita bread recipe is a staple, almost like a good cuppa, wouldn't you say? here's what you need to know about getting started.
This recipe is totally unique!
The Crucial Bits: Ingredients & Gear
Listen, before we even think about baking, let's gather our troops. It's all about prep, innit?
Main Ingredients: The Dream Team
Alright, for this pita bread recipe , precision is your mate. We're going for consistent results. You know how it is.
- Warm Water: 1 ½ cups (360 ml). It should feel like a baby's bath. 105- 115° F ( 40- 46° C ).
- Active Dry Yeast: 2 ¼ teaspoons ( 7g ). One standard packet, mate.
- Granulated Sugar: 1 teaspoon ( 6g ). Just a pinch for the yeasties to munch on.
- All-Purpose Flour: 3 ½ - 4 cups ( 420-480g ). Start with 3 ½, add more if needed.
- Kosher Salt: 2 teaspoons ( 12g ). Gotta have that flavour!
- Olive Oil: 2 tablespoons ( 30ml ). Plus extra for the bowl.
Honestly, with the simple sourdough bread recipe with starter , you can make a starter. then create sourdough pita bread recipe .
You should try that! with super easy sourdough bread , you can create wonderful things.
Quality Check: For flour, avoid anything that smells musty. Fresh is best, you know? The ingredients are vital for the Easy Rustic Sourdough Bread .
Seasoning Notes: A Little Extra Zing
Don't just wing it, know your flavours!
- Essential: Salt, always! It balances the dough.
- Enhancers: Garlic powder or onion powder (a pinch each).
- Aromatics: Dried oregano or thyme (a pinch each). Adds a Mediterranean vibe.
- Substitutions: Fancy smoked paprika? Go for it. Recipe Using Sourdough Starter ? Experiment!
Equipment Needed: The Bare Necessities
Keep it simple!
- Large Bowl: For mixing.
- Mixing Spoon or Stand Mixer: Either works a treat.
- Clean Kitchen Towel: For covering the dough.
- Rolling Pin: To flatten the pitas.
- Baking Sheet: A must have.
- Oven: Obvious, but needs to be blazing hot !
- Oven Thermometer: Make sure your oven is at 475° F (245° C ). It makes or breaks the Pan Pita .
Household alternatives: no rolling pin? a wine bottle works in a pinch! no stand mixer? get those arms working! no matter what, you will be able to recreate this simple sourdough discard recipe for a perfect easy beginner sourdough bread .
Right, let's get this show on the road! A good pita bread recipe is a staple, almost like a good cuppa, wouldn't you say? Here's a peek into how to make it!
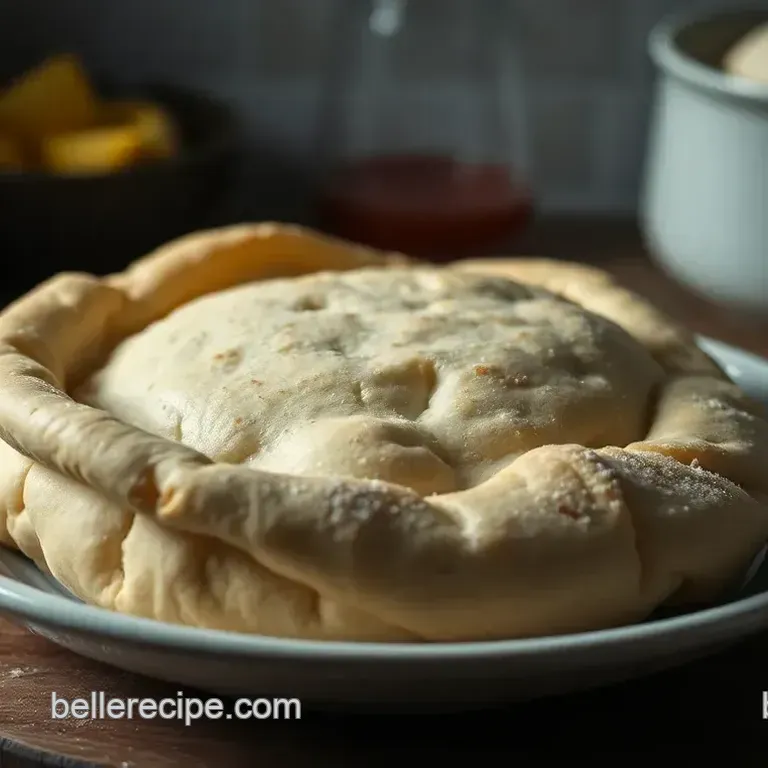
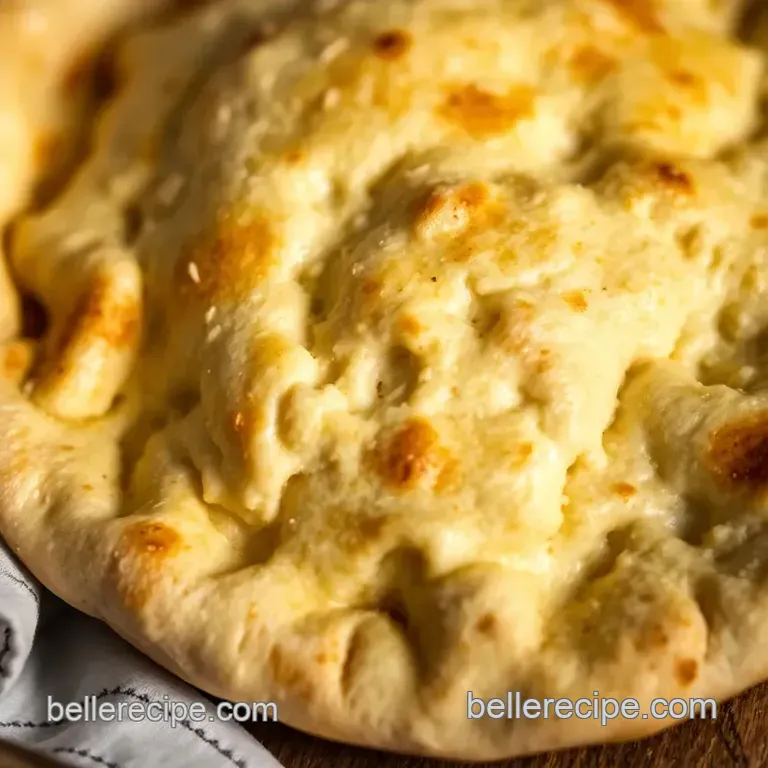
Perfectly Pillowy Homemade Pita Bread
Ever dreamed of fluffy, pocket perfect pita bread straight from your own oven? honestly, it's easier than you think! this pita bread recipe delivers just that.
Inspired by mediterranean baking, it uses simple ingredients and techniques. imagine stuffing these beauties with falafel, dipping in hummus, or enjoying them warm with olive oil.
Oh my gosh, it’s delish! it's like a holiday in every bite!
Prep Like a Pro
Essential Mise en Place: Get Your Ducks in a Row!
First things first, let's get organised. you'll need warm water at 105- 115° f (40- 46° c) feel it with your finger to test, yeast, sugar, flour, salt, and olive oil.
Weigh or measure all ingredients. it helps avoid any mid-recipe dramas, you know?
Time Saving Organization Tips
I always pre-measure my flour because, well, flour explosions are a real thing! Keep your workspace tidy, and have a bowl ready for rising. Trust me, it’s a game changer.
Pita Perfection: step-by-step
1. Wake Up the Yeast:
Combine 1 ½ cups of warm water, 2 ¼ teaspoons of yeast, and 1 teaspoon of sugar. Let it sit for 5- 10 minutes until it looks foamy.
2. Mix the Dough:
Add the yeast mix to a mixer or bowl. Stir in 3 ½ cups of flour, 2 teaspoons of salt, and 2 tablespoons of olive oil. Mix until it's a shaggy mess.
3. Knead Baby, Knead!
Knead for 8- 10 minutes until smooth and elastic. It should be slightly tacky, not sticky. Add flour if needed.
4. Rise and Shine:
Place the dough in an oiled bowl, cover it, and let it rise for 1- 2 hours or until doubled.
5. Shape the Dream:
Punch down the dough gently and divide into 8-10 pieces . Roll each into a ball.
6. Rest Time:
Cover the balls and let them rest for 30 minutes .
7. Roll 'Em Out:
Roll each ball into a 6-8 inch circle about ¼ inch thick.
8. Bake Like a Boss:
Preheat your oven to 475° F ( 245° C) with a baking sheet inside. Bake the pitas for 3- 5 minutes until puffed up and golden brown.
Pro Tips and Tricks
Get That Oven HOT!
Your oven needs to be really hot for the pitas to puff up. Use a thermometer!
Avoid Overworking!
Don’t over knead the dough. Stop when it’s smooth and elastic. Simple Sourdough Bread Recipe With Starter also relies on patience, you know?
The Secret to Pockets
I found that a hot baking sheet makes all the difference. It’s all about that instant heat!
What About Sourdough?
Fancy a sourdough pita bread recipe ? you can adapt this by replacing some of the flour with a sourdough starter .
It'll add a tangy kick! some like to use a simple sourdough discard recipe , it saves waste.
Honestly, mastering pita bread opens up a whole new world of deliciousness. and who knows? you might even start experimenting with an easy beginner sourdough bread , it’s all connected.
Good luck, mate, and happy baking!
Alright, let's talk about this amazing pita bread recipe ! Honestly, mastering this unlocks a whole new world of deliciousness. Forget the store-bought stuff, this is the real deal.
Recipe Notes: Little Things That Make a Big Difference
Serving Suggestions: Pita Perfection!
Presentation matters, you know? plating your pitas with a drizzle of olive oil and za'atar? chef's kiss! for sides, think fresh.
A simple cucumber and tomato salad is brilliant. a refreshing drink? iced tea or a crisp white wine, perfect for a summer's day in the garden.
The pan pita is so versatile.
Storage Tips: Keeping the Dream Alive
Once they're cooled, pop those beauties into an airtight container. they'll keep in the fridge for 3-4 days. want them for longer? freeze them! just make sure they are properly wrapped.
To reheat, a quick zap in the microwave or a few minutes in a warm oven will do the trick.
Honestly, sometimes i even toast them!
Variations: Spice It Up (or Down)!
Fancy a simple sourdough bread recipe with starter ? you could try incorporating some sourdough discard . use a simple sourdough discard recipe .
And what about dietary needs? using wholemeal flour is a good shout. or a sourdough pita bread recipe , because why not? for a gluten-free version, try a gluten-free flour blend.
Honestly, be prepared for a slightly different texture. for a super easy sourdough bread just change ingredients based on the basic bread recipe, and use 1/2 to 1 cup of the starter.
Nutrition Basics: Goodness in Every Bite!
Each pita bread is roughly 180-220 calories. you know, give or take. they're a decent source of carbs and some protein.
Plus, they're lower in fat than some other bread options. fibre will depend on what flour you use. but remember, this isn't medical advice!
This recipe is one for the books. don't worry if your first batch isn't perfect; keep practicing, and you'll get there.
A recipe using sourdough starter is a great way to get delicious pita bread. now go on, get baking. you've got this! plus, a easy beginner sourdough bread is such a confidence booster in the kitchen.
Frequently Asked Questions
Why didn't my pita bread puff up in the oven? That's a right kerfuffle!
Aha, this is a common one! The most likely culprit is oven temperature. Your oven needs to be properly preheated to a blazing 475°F (245°C) use an oven thermometer to double check. Also, make sure you're placing the pita dough on a hot baking sheet for that initial burst of heat that helps them puff up.
Think of it like trying to brew a cuppa with lukewarm water - it just won't work!
My pita bread turned out tough. What did I do wrong, guv'nor?
Tough pita bread often means the dough was either over kneaded or there was too much flour in the mix. Aim for a smooth and elastic dough but stop kneading once it reaches that stage. Be careful not to add too much flour during kneading; the dough should be slightly tacky but not sticky.
Also, letting the dough rest properly during both rises is crucial for a tender crumb, so don't rush the proofing process!
Can I make this pita bread recipe ahead of time?
Absolutely! You can prepare the dough ahead of time. After the first rise, punch down the dough, wrap it tightly in plastic wrap, and store it in the refrigerator for up to 24 hours. When ready to bake, let the dough come to room temperature for about 30 minutes before shaping and continuing with the recipe.
You can also bake the pitas and freeze them for up to 2 months. Just make sure to wrap them well to prevent freezer burn; pop them in the toaster to refresh before serving.
I'm a bit of a health nut. What are some healthier variations for this pita bread recipe?
Good on ya for thinking about the healthy stuff! For a fiber boost, substitute up to half of the all-purpose flour with whole wheat flour. You can also reduce the amount of salt slightly or use honey instead of sugar.
To watch the calories, you could make thinner pitas, just roll the dough out a bit thinner before baking! Remember, portion control is always key, even with homemade goodies.
How should I store leftover pita bread to keep it from going stale?
Proper storage is key to keeping your pita bread fresh and lovely! Once cooled completely, store the pita bread in an airtight container or a zip-top bag at room temperature. For longer storage, freeze them in a freezer safe bag for up to 2 months. Make sure to squeeze out as much air as possible before sealing.
A quick zap in the microwave or a toast in the toaster will bring them back to life wonderfully. Nobody wants a stale sarnie!
Can I use bread flour for this pita bread recipe, and will it affect the outcome?
Yes, you certainly can use bread flour! Bread flour has a higher protein content than all-purpose flour, which will result in a chewier pita bread with a slightly more robust flavor. Some people prefer it this way. You might need to add a little more water to the dough as bread flour absorbs more liquid.
Keep an eye on the dough consistency, you want it to be slightly tacky and elastic!
Homemade Pita Bread