John Wayne Casserole with Bisquick: Cheesy and Baked
- Time: Active 20 minutes, Passive 35 minutes, Total 55 minutes
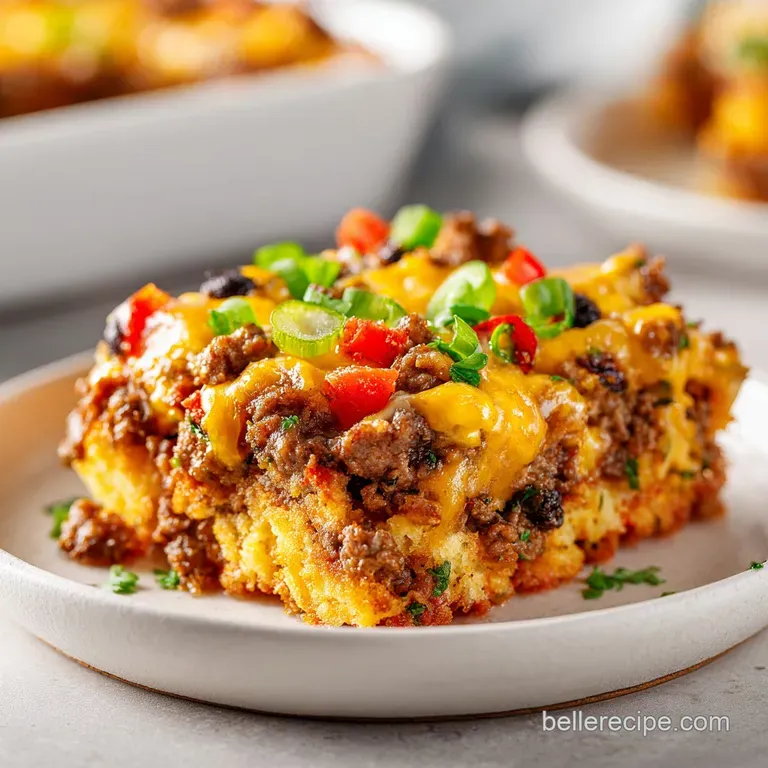
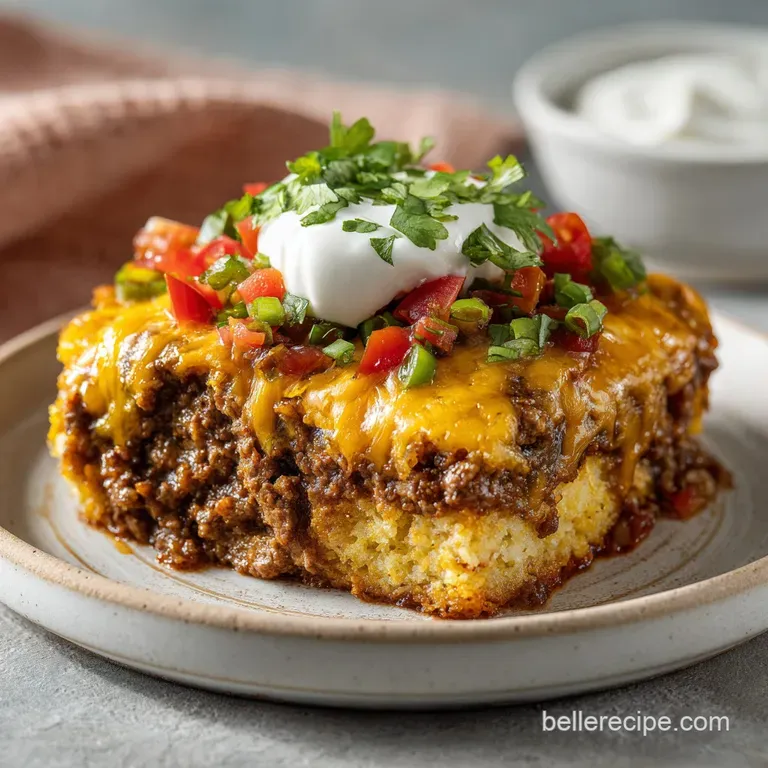
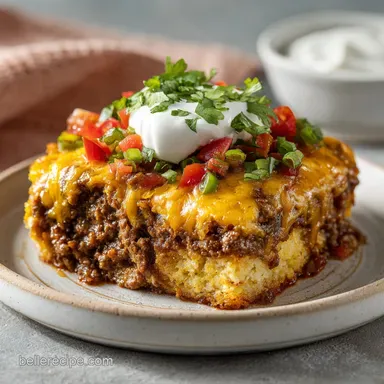
- Flavor/Texture Hook: Flaky biscuit foundation topped with zesty beef and a molten cheese crust.
- Perfect for: Potlucks, cozy family Sunday dinners, or satisfying a crowd of hungry cowboys.
- Mastering the Classic Cheesy John Wayne Casserole
- Why This Layered Dish Works
- Essential Component Analysis Deep Dive
- Ingredients and Smart Substitutes
- Tools for Casserole Success
- Detailed Cooking Process Guide
- Solving Common Cooking Issues
- Flavor Variations and Adaptations
- Scaling Your Casserole
- Kitchen Myths Debunked
- Safe Storage and Reheating
- Perfect Side Dish Pairings
- Very High in Sodium ⚠️
- Recipe FAQs
- 📝 Recipe Card
Mastering the Classic Cheesy John Wayne Casserole
The first time I pulled this dish out of the oven, the kitchen filled with that unmistakable scent of toasted cumin and sizzling peppers. It reminded me of those late summer evenings when the air is finally cooling down, and you just want something that feels like a warm hug on a plate.
The cheese bubbled over the edges of the Roma tomatoes, creating these little charred, golden brown pockets of joy that I couldn't wait to dig into.
We've all had those bakes where the bottom turns into a mushy mess, but this recipe changed everything for me. By focusing on the biscuit base first, you create a sturdy, golden floor that supports the weight of the juicy beef and the creamy green chile layer.
It’s mindful cooking at its best, taking simple staples like Bisquick and turning them into a meal that people will actually ask for seconds and thirds of. Trust me, the way the cool sour cream mixture hits that spicy taco seasoning is a total game changer for your weeknight rotation.
Why This Layered Dish Works
Cooking is often about managing moisture, and this John Wayne Casserole is a masterclass in exactly that. When we layer wet ingredients like sautéed peppers and a yogurt sour cream mixture over a starch, we have to be smart about how we build the foundation.
This version uses a specific sequence that protects the integrity of each layer, ensuring you get a distinct "shatter" from the crust and a velvety mouthfeel from the topping.
- Starch Pre Gelatinization: By blind baking the Bisquick dough for 8–10 minutes, we set the gluten structure and dry out the surface. This creates a barrier that prevents the juices from the beef and vegetables from soaking in and creating a gummy texture.
- Fat Emulsification Stability: The combination of Greek yogurt, sour cream, and light mayonnaise creates a stable emulsion. Because these fats have different melting points, the topping stays creamy and thick during the 35 minute bake instead of breaking into an oily puddle.
- Aromatic Concentration: Sautéing the onions and bell peppers before adding them to the casserole does more than just soften them. It triggers the release of essential oils and reduces their water content, which intensifies the flavor and keeps the middle of the casserole from becoming watery.
- Thermal Carryover Management: Using 93% lean ground beef ensures we have enough fat for flavor without the excess grease that would otherwise pool at the bottom of your 9x13 dish.
| Thickness of Beef Layer | Internal Temp (Final) | Rest Time | Visual Cue |
|---|---|---|---|
| 0.75 inch | 165°F | 5 minutes | Bubbling edges and golden crust |
| 1 inch | 165°F | 8 minutes | Steam rises steadily from center |
| 0.5 inch (Spread) | 160°F | 3 minutes | Cheese is fully molten and bronzed |
The rest time is actually one of the most important parts of the process. When you pull the Wayne Casserole with Bisquick out of the oven, the liquids are still quite fluid. Letting it sit for just five to ten minutes allows the starches in the crust to firm up slightly and the cheese to set, making it much easier to slice into clean, beautiful squares.
Essential Component Analysis Deep Dive
Every ingredient in this casserole with bisquick serves a functional purpose beyond just flavor. Understanding what happens inside that 350°F oven helps you appreciate why we don't skip the small details, like draining the green chiles or seeding the tomatoes.
| Ingredient | Science Role | Pro Secret |
|---|---|---|
| Bisquick Mix | Structural Foundation | Keep the water cold to prevent the fats in the mix from melting too early. |
| Greek Yogurt | Acidic Brightness | The high protein content keeps the creamy layer stable at high heat. |
| Green Bell Peppers | Texture & Bulk | Slice them into uniform strips to ensure they soften at the same rate. |
| Roma Tomatoes | Moisture Control | Always remove the watery seeds to prevent a "soggy top" syndrome. |
Using Roma tomatoes specifically is a mindful choice. They have a higher ratio of flesh to juice compared to beefsteak or heirloom varieties, which means they hold their shape beautifully even after 35 minutes of intense heat.
It’s these little decisions that transform a simple pantry meal into something spectacular.
Ingredients and Smart Substitutes
Gathering your elements for the John Wayne Casserole is the first step in our mindful cooking flow. I always recommend having everything measured out and ready (the classic "mise en place") because once the beef starts browning, things move quickly.
- 2 cups Bisquick Original Mix: The heart of the base. Why this? Provides a consistent, fluffy rise that mimics homemade buttermilk biscuits effortlessly.
- Substitute: 2 cups All purpose flour + 3 tsp baking powder + 1/2 tsp salt + 3 tbsp cold butter.
- 1 cup Cold water: To hydrate the mix.
- Substitute: Cold whole milk for a richer, more tender biscuit texture.
- 2 lbs 93% Lean Ground Beef: Our primary protein. Why this? Lean beef prevents the casserole from becoming overly greasy during the bake.
- Substitute: Ground turkey or chicken (add 1 tbsp oil to prevent dryness).
- 1 oz Low sodium Taco Seasoning: For that signature punch.
- Substitute: A blend of chili powder, cumin, garlic powder, and onion powder.
- 3/4 cup Water: To create the taco sauce.
- 1 Large yellow onion: Thinly sliced for sweetness.
- Substitute: White onion for a sharper, more pungent flavor profile.
- 1 Green bell pepper & 1 Red bell pepper: For color and crunch.
- 1 tbsp Olive oil: For sautéing.
- 1/2 cup Plain Non fat Greek Yogurt: Adds tang and structure.
- Substitute: Extra sour cream (though it will be slightly less firm).
- 1/2 cup low-fat Sour Cream: For the velvety topping.
- 1/4 cup Light Mayonnaise: Acts as a binder for the creamy layer.
- 4 oz Canned diced green chiles: Drained well. Why this? Adds a mild, smoky heat that defines the "Cowboy" flavor profile.
- 1 cup Reduced fat Sharp Cheddar & 1 cup Monterey Jack: The melting duo.
- Substitute: Pepper Jack for an extra kick of heat.
- 2 Roma tomatoes: Seeded and diced for a fresh finish.
Tools for Casserole Success
You don't need a professional kitchen to make a stunning john wayne casserole with bisquick, but a few specific tools will make your life much easier. I always reach for my heavy bottomed skillet something like a 12 inch Lodge cast iron or a sturdy stainless steel pan to get that beautiful char on the peppers.
The baking dish is equally important. A standard 9x13 inch glass or ceramic dish is ideal because it allows you to see the layers and check if the crust is turning golden. If you're using a dark metal pan, keep an eye on the bottom as it may brown faster than glass.
I also suggest using a sharp chef's knife for the peppers and onions; thin, uniform slices are the secret to a professional looking bake. Finally,, a sturdy spatula is your best friend when it comes to spreading that thick Bisquick dough evenly across the bottom and slightly up the sides of the dish.
Detailed Cooking Process Guide
Let’s walk through the creation of this masterpiece. Remember to breathe and enjoy the process; the sizzle of the beef and the vibrant colors of the peppers are all part of the reward.
1. Setting the Foundation
Preheat your oven to 350°F (175°C). In a medium bowl, combine the 2 cups of Bisquick mix with 1 cup of cold water. Stir just until a soft, slightly sticky dough forms don't overwork it! Grease your 9x13 inch dish generously.
Spread the dough across the bottom and about 1/2 inch up the sides. Bake the crust alone for 8–10 minutes until it feels set to the touch. This step is non negotiable for a crisp base.
2. Sautéing the Aromatics and Beef
While the crust is in the oven, heat 1 tbsp of olive oil in your large skillet over medium high heat. Toss in the sliced onion and the red and green bell pepper strips. Sauté for 5–7 minutes. You’re looking for them to soften and get those little charred "freckles" that mean flavor.
Once done, move them to a plate. In that same hot skillet, add the 2 lbs of ground beef. Brown it thoroughly, breaking it up with your spoon, until no pink remains. Drain off any fat.
3. Layering for Maximum Impact
With the beef browned, stir in the taco seasoning and 3/4 cup of water. Let it simmer for 2-3 minutes; the liquid should thicken into a glossy sauce. Now, let's build! Spread the beef mixture evenly over your pre baked crust. Follow this with a layer of your beautiful sautéed onions and peppers.
This creates a barrier of flavor between the meat and the creamy topping.
4. Making the Creamy Topping
In a separate bowl, whisk together the Greek yogurt, sour cream, mayonnaise, and those well drained green chiles. This mixture should be thick and pale green. Spread it gently over the vegetables using the back of a spoon. Be mindful not to disturb the layers beneath.
5. Final Assembly and Bake
Sprinkle the shredded cheddar and Monterey Jack cheeses over the top in an even blanket. Finally, scatter your diced Roma tomatoes over the cheese. Slide the dish back into the oven and bake for 30–35 minutes.
You’ll know it’s ready when the cheese is bubbling energetically and the edges of the biscuit crust are a deep, inviting golden brown.
Solving Common Cooking Issues
Even the best of us run into hiccups now and then. If your casserole isn't looking quite right, don't panic! Most issues are easily fixed with a few mindful adjustments. One thing I've learned is that moisture is usually the culprit when things go south.
Why Your Crust is Doughy
This usually happens for one of two reasons: either the crust wasn't blind baked long enough, or the beef wasn't drained properly. If you notice the bottom is soft, make sure next time to let that crust get "matte" and firm in the oven before adding any toppings.
Also, using a leaner meat like the 93% lean beef we recommended helps tremendously.
Why Your Topping Separated
If the creamy layer looks curdled or oily, it might be because the sour cream or yogurt was low-fat and hit too high a temperature too quickly. While we use low-fat versions in this recipe, the mayonnaise acts as a stabilizer.
If you're still having trouble, try using full fat versions, as the higher fat content is more resistant to "breaking" under heat.
| Problem | Root Cause | Solution |
|---|---|---|
| Excess liquid in dish | Tomatoes or chiles weren't drained | Seed tomatoes and press chiles in a sieve before adding. |
| Cheese isn't browning | Oven temperature is uneven | Move the rack to the top third of the oven for the last 5 minutes. |
| Biscuit base is too thin | Dough wasn't spread to edges | Use damp fingers to press dough evenly into all corners. |
Common Mistakes Checklist
- ✓ Pat your peppers dry after washing to ensure they sauté rather than steam in the pan.
- ✓ Don't skip the water in the taco seasoning step; it creates the "glue" that keeps the beef layer together.
- ✓ Drain the green chiles thoroughly; even a tablespoon of extra liquid can migrate down to the crust.
- ✓ Let the casserole rest for at least 5 minutes before slicing to allow the layers to "set" into place.
Flavor Variations and Adaptations
One of the reasons I love this Wayne Casserole is how adaptable it is. If you're feeling adventurous or just need to use up what's in the pantry, there are plenty of ways to put a personal spin on it. For a different take on the "cowboy" theme, you might even consider trying a Cowboy Cornbread Casserole recipe if you prefer a sweeter, grainier base.
Dialing Up the Heat
If your family loves a spicy kick, swap the Monterey Jack for Habanero Jack and add a few sliced jalapeños on top along with the tomatoes. You can also mix a teaspoon of chipotle powder into the beef while it simmers for a smoky, lingering heat.
Swapping Proteins for Leaner Gains
While beef is traditional, ground bison is a spectacular alternative that is incredibly lean and rich in iron. If you go the poultry route with ground turkey, just be sure to add a little extra cumin and perhaps a dash of Worcestershire sauce to mimic the depth of beef.
Creating a Vegetarian Version
You can absolutely make a mindful vegetarian version of this dish by replacing the beef with two cans of black beans (rinsed and drained) and a cup of frozen corn. Sauté the corn with the peppers to get that charred flavor, and proceed with the taco seasoning and water as usual.
The texture will be different, but the flavor profile remains wonderfully "cowboy."
| Servings | Ingredient Adjustments | Pan Size | Cook Time |
|---|---|---|---|
| 4 People | Half all ingredients (1 egg + half water for crust) | 8x8 inch square | 25–30 minutes |
| 8 People | Standard recipe as written | 9x13 inch | 35 minutes |
| 12 People | Increase ingredients by 50% | Two 9x9 inch pans | 35 minutes |
Scaling Your Casserole
When you're cooking for a larger crowd, scaling this recipe is quite straightforward. If you want to double it for a big party, I recommend using two separate 9x13 dishes rather than one giant pan. This ensures the heat can penetrate the center of the bake evenly, preventing a cold middle and burnt edges.
For smaller households, you can easily halve the recipe. When halving the Bisquick base, simply use 1 cup of mix and 1/2 cup of water. Since we aren't using eggs in the crust, it's one of the easiest recipes to scale down without worrying about awkward measurements.
Just remember to reduce the cook time by about 5-10 minutes if you're using a smaller 8x8 pan.
Kitchen Myths Debunked
There’s a lot of "old wives' tales" floating around about casseroles, especially those using pre made mixes. Let's clear up a few things so you can cook with confidence.
Myth: You must use whole milk for the Bisquick base to be flavorful. Actually, cold water works perfectly because the Bisquick mix already contains shortening and leavening agents. Using water keeps the crust light and slightly crisp, whereas milk makes it more like a dense pancake.
Both are good, but water is actually the "secret" to that signature John Wayne texture.
Myth: Searing the beef "seals in the juices." Searing is about flavor, not moisture retention. Browning the beef creates the Maillard reaction, which gives the meat its savory, deep "umami" profile.
The moisture stays in because we add water and seasoning to create a sauce, not because the meat is "sealed."
Myth: You can't make this ahead because the crust will get soggy. While the fully assembled casserole shouldn't sit for hours before baking, you can absolutely prep the components separately. In fact, prepping the beef and peppers a day early can actually improve the flavor as the spices have more time to meld. If you need a breakfast version that's designed for make-ahead ease, you might like this Cheesy Breakfast Casserole recipe instead.
Safe Storage and Reheating
This casserole is just as good the next day, if not better. The flavors have a chance to settle, and the spices become more pronounced.
- Storage: Store any leftovers in an airtight container in the fridge for up to 3 4 days.
- Freezing: You can freeze the baked casserole for up to 2 months. Slice it into individual portions and wrap them tightly in foil and then a freezer bag.
- Reheating: For the best results, reheat in a 350°F oven for 10-15 minutes until warmed through. This helps the crust regain its texture. If you're in a hurry, the microwave works, but the biscuit base will be softer.
- Zero Waste Tip: If you have leftover sautéed peppers and onions that didn't fit in the dish, don't throw them out! They are fantastic scrambled into eggs the next morning or folded into a quick quesadilla for lunch. Even the beef fat you drained (if you used a higher fat meat) can be chilled and used later to sauté potatoes for a smoky, savory side dish.
Perfect Side Dish Pairings
While this is a complete meal on its own, I love serving it with something fresh and bright to cut through the richness of the cheese and cream. A simple slaw made with shredded cabbage, lime juice, and cilantro is my go to. The crunch and acidity provide a beautiful contrast to the soft, savory layers of the bake.
If you're looking for something more substantial, a side of Mexican street corn (elote) or a simple dish of black beans and rice would round out the "cowboy" theme perfectly. And of course, you can't go wrong with a big bowl of tortilla chips and some fresh guacamole on the table.
It turns a simple dinner into a festive spread that feels special without requiring hours of extra work.

Very High in Sodium ⚠️
965 mg 965 mg (42% 42%)
The American Heart Association recommends a limit of about 2,300mg per day, with an ideal limit of 1,500mg for most adults.
Tips to Reduce Sodium
-
Opt for Low-Sodium Taco Seasoning-25%
This recipe uses 1 oz of low-sodium taco seasoning. Look for taco seasonings specifically labeled 'low-sodium' or 'no salt added'. Alternatively, consider making your own blend from scratch using individual spices.
-
Choose Reduced Fat Cheeses Wisely-15%
You're using 2 cups of reduced fat cheddar and Monterey Jack cheeses. While reduced fat, cheese can still be a significant sodium source. Consider using half the amount or opting for naturally lower sodium cheeses if available.
-
Rinse Canned Chiles-10%
The recipe includes 4 oz of canned diced green chiles. Rinsing canned vegetables, including chiles, can help remove a significant amount of added sodium.
-
Review Dairy Components-5%
While Greek yogurt and sour cream are generally lower in sodium, their sodium content can vary by brand. Check labels and select brands with the lowest sodium content available.
-
Season with Herbs and Spices
Boost flavor without salt by using fresh or dried herbs and spices like cumin, chili powder, paprika, garlic powder, and onion powder. This will not add to the sodium content.
Recipe FAQs
What is John Wayne casserole?
It is a hearty, vintage style layered dish consisting of a Bisquick base, seasoned ground beef, sautéed bell peppers and onions, and a creamy topping made from Greek yogurt, sour cream, and green chiles.
What is Jackie Kennedy's casserole?
This is a common misconception. There is no specific, widely recognized recipe by that name; people often confuse legendary American figures with various vintage comfort food recipes.
What exactly is cowboy casserole?
It is another name for John Wayne casserole. It shares the same distinct layers of beef, peppers, and a cheesy, creamy topping that you might recognize if you have ever prepared Creamed Cabbage Beef Casserole.
Do you cover John Wayne casserole when baking?
No, leave it uncovered. Baking it uncovered is essential to ensure the cheese melts, bubbles properly, and the crust edges turn a perfect golden brown.
How to prevent a soggy crust?
Blind bake the dough for 8 10 minutes before adding any toppings. This initial bake sets the Bisquick base so it remains firm once the beef and vegetable layers are added.
How to get the perfect texture in the beef layer?
Simmer the beef with taco seasoning and 3/4 cup water for 2-3 minutes until thickened. This liquid reduction creates a cohesive binder that keeps the meat from crumbling apart when sliced.
How to achieve clean slices after baking?
Let the casserole rest for at least 5 minutes after pulling it from the oven. This allows the creamy topping and meat layers to settle, ensuring your portions hold their shape on the plate.
John Wayne Casserole With Bisquick
Ingredients:
Instructions:
Nutrition Facts:
| Calories | 458 kcal |
|---|---|
| Protein | 36g |
| Fat | 21g |
| Carbs | 31g |
| Fiber | 2g |
| Sugar | 5g |
| Sodium | 965mg |
