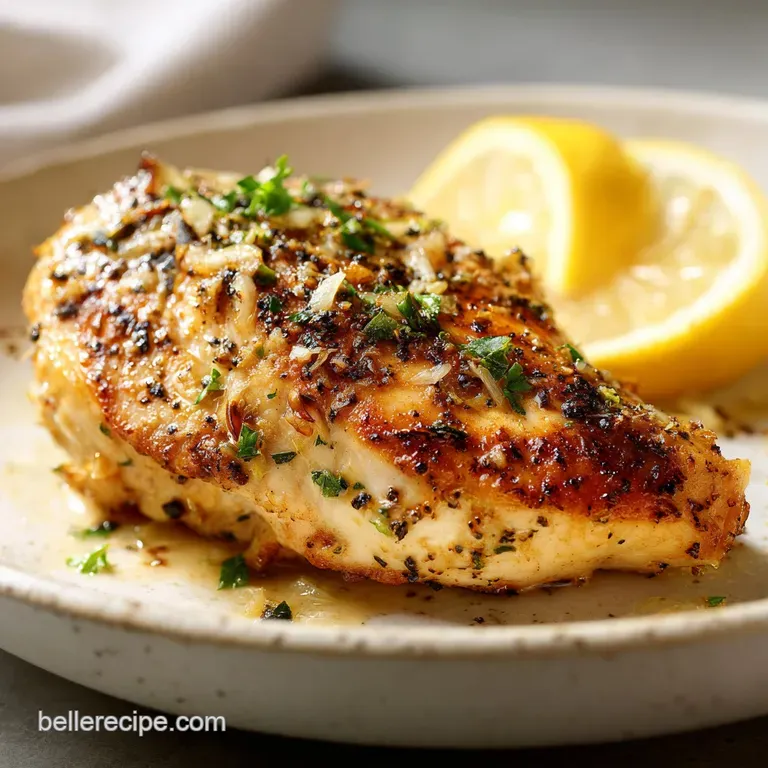
Boneless Skinless Chicken Breast Recipe with Lemon and Garlic
- Time: Active 10 minutes, Passive 10 minutes, Total 20 minutes
- Flavor/Texture Hook: Zesty lemon garlic sauce with a velvety butter finish
- Perfect for: Busy weeknights where you want a restaurant quality meal without the fuss
- Making This Boneless Skinless Chicken Breast Recipe with Lemon and Garlic
- Physics of the Golden Pan Sear
- Analyzing the Pantry Elements
- Essential Components and Smart Swaps
- Tools for Kitchen Success
- Mastering the Cooking Timeline
- Fixing Common Searing Mistakes
- Flexible Diet Adjustments
- Scaling the Recipe
- Searing Meat Does Not Seal Juices
- Freshness and Storage Methods
- Completing the Meal Plate
- Recipe FAQs
- 📝 Recipe Card
Making This Boneless Skinless Chicken Breast Recipe with Lemon and Garlic
You know those nights when you're staring at a pack of chicken in the fridge and honestly, it just looks... uninspiring? I used to dread cooking chicken breasts because they’d always end up either bone dry or completely bland.
I remember one specific Tuesday where I was so frustrated with a rubbery dinner that I almost gave up on poultry altogether. But then, I started playing with the timing of the garlic and the way lemon interacts with the pan drippings.
This boneless skinless chicken breast recipe with lemon and garlic delivers a flavorful, easy dinner that actually makes you feel like a pro. We aren't just tossing meat in a pan; we're using a few clever tricks to ensure every bite is bursting with bright citrus and savory garlic notes.
The secret is all in the light dusting of flour and that final swirl of butter that creates a silky sauce right in the skillet.
We’ve all made the mistake of overcooking the meat while waiting for the sauce to thicken, but we’re skipping that trap today. You’re going to love how the kitchen smells when that garlic hits the oil it's warm, inviting, and totally comforting.
By the time you sit down, you’ll have a plate that looks like it came from a bistro, but it only took us 20 minutes to pull together. Trust me, once you master this rhythm, you'll never go back to plain baked chicken again.
Physics of the Golden Pan Sear
Conductive Heat Transfer: Pounding the chicken to an even thickness ensures that heat travels through the protein at a uniform rate, preventing the thin edges from overcooking before the center reaches safety.
The Maillard Reaction: A light coating of all purpose flour provides the necessary sugars and proteins to create a deeply browned, savory crust at a lower temperature than bare skin would require.
| Thickness | Internal Temp | Rest Time | Visual Cue |
|---|---|---|---|
| 1.5 cm | 74°C (165°F) | 3 mins | Juices run clear when pierced |
| 2 cm | 74°C (165°F) | 5 mins | Meat feels firm to the touch |
| 2.5 cm | 74°C (165°F) | 5 mins | Opaque center with no pink |
Chef Tip: Freeze your unsalted butter for 10 minutes before adding it to the pan at the very end. The cold fat emulsifies much more slowly into the lemon juice and broth, resulting in a sauce that is significantly more velvety and less likely to "break" or become oily.
Analyzing the Pantry Elements
| Ingredient | Science Role | Pro Secret |
|---|---|---|
| Lemon Juice | Denatures proteins & balances fat | Freshly squeezed juice has higher acidity than bottled, providing a sharper "pop" |
| All Purpose Flour | Creates a starch barrier | Only dust the chicken right before it hits the pan to prevent the flour from getting gummy |
| Garlic Cloves | High sugar aromatic | Mince your garlic and let it sit for 5 minutes before cooking to activate the alliinase for better flavor |
Understanding why we use these specific items helps us cook with more intention. For instance, the acidity in the lemon doesn't just add flavor; it actually helps tenderize the surface of the meat. If you find yourself wanting to experiment with other pan seared dishes, applying these same principles to something like my Juicy Airline Chicken Recipe will give you that same professional edge.
Essential Components and Smart Swaps
- 4 (170g) boneless skinless chicken breasts: The star of the show. Why this? They cook quickly and absorb the lemon garlic flavors beautifully. (Swap: Chicken thighs, though they need 4-5 mins more cook time).
- 1 tsp Kosher salt: Essential for seasoning. Why this? Larger grains make it easier to control the seasoning level. (Swap: Sea salt).
- 0.5 tsp cracked black pepper: Adds a subtle heat. Why this? Freshly cracked pepper has more volatile oils than pre ground. (Swap: White pepper for a milder bite).
- 2 tbsp (30g) all purpose flour: For that golden crust. Why this? It creates a slight barrier to keep juices inside. (Swap: Cornstarch for a gluten-free option).
- 3 tbsp (45ml) extra virgin olive oil: Our high-quality cooking fat. Why this? Adds a fruity depth to the base of the sauce. (Swap: Avocado oil).
- 4 cloves garlic, minced: The aromatic backbone. Why this? Fresh garlic provides a pungent, sweet complexity. (Swap: 1 tsp garlic powder in a pinch).
- 1 large lemon, zested and juiced: For brightness. Why this? The zest contains the oils for aroma, while juice provides acidity. (Swap: Lime juice for a tropical twist).
- 2 tbsp (30g) unsalted butter: To finish the sauce. Why this? Adds richness and helps the sauce cling to the meat. (Swap: Ghee).
- 1 tsp dried oregano: For an earthy note. Why this? It stands up well to the high heat of pan searing. (Swap: Fresh thyme).
- 0.25 cup (60ml) low sodium chicken broth: To deglaze the pan. Why this? It lifts the browned bits (fond) into the sauce. (Swap: Dry white wine like Sauvignon Blanc).
Dusting the chicken is a step I used to skip because I thought it was "extra work," but honestly, it’s the difference between a soggy dinner and a crispy one. Just a light shake is all you need don't go overboard or it'll turn into a heavy batter.
Tools for Kitchen Success
You don't need a professional kitchen, but a heavy bottomed skillet is your best friend here. A cast iron pan or a heavy stainless steel skillet (like an All Clad) distributes heat more evenly than thin aluminum. This prevents "hot spots" where your garlic might burn while the rest of the pan is still cold.
You'll also want a meat mallet or even a heavy rolling pin to pound that chicken out. It’s actually quite therapeutic after a long day! Having a digital meat thermometer is the final piece of the puzzle.
It takes the guesswork out of the equation so you don't have to cut into the meat and let all those precious juices escape just to see if it's done.
Mastering the Cooking Timeline

- Prep the chicken. Place the 4 chicken breasts between two sheets of plastic wrap and pound them to an even 1.5 cm thickness. Note: This ensures the meat cooks at the same speed throughout.
- Season and coat. Sprinkle both sides with 1 tsp salt and 0.5 tsp pepper, then dredge lightly in 2 tbsp flour. The coating should be translucent, not thick.
- Heat the skillet. Add 3 tbsp olive oil to your pan over medium high heat. Note: Wait for the oil to shimmer before adding the meat.
- Sear the poultry. Place the chicken in the pan and cook for 3-4 minutes per side until a deep mahogany crust forms.
- Remove and rest. Transfer the chicken to a warm plate. Do not skip the 5 minute rest period as this allows juices to redistribute.
- Sauté the aromatics. Lower the heat to medium and add 4 minced garlic cloves to the residual oil. Cook for only 30-45 seconds until fragrant and pale gold.
- Deglaze the pan. Pour in 60ml chicken broth and the juice from your lemon. Scrape the bottom of the pan with a wooden spoon to loosen all the flavorful browned bits.
- Finish the sauce. Stir in the lemon zest and 1 tsp dried oregano. Simmer for 1-2 minutes until slightly reduced.
- Emulsify with butter. Turn the heat to low and whisk in 2 tbsp cold unsalted butter until the sauce looks glossy and thick.
- Combine and serve. Return the chicken to the pan for 30 seconds to coat in the sauce, then serve immediately.
| Fresh Ingredient | Shortcut Alternative | Flavor Impact |
|---|---|---|
| Fresh Garlic | Jarred Minced Garlic | Less pungent, slightly more acidic/metallic |
| Fresh Lemon | Bottled Lemon Juice | Lacks the floral aroma of zest; much flatter taste |
| Homemade Broth | Bouillon Cube | Saltier; may need to reduce added salt in recipe |
Right then, notice how we didn't add the garlic at the start? That's a mistake I once made far too often. Garlic has a high sugar content and burns at lightning speed. By adding it after the chicken is out, you get all that sweet, roasted flavor without any of the bitter char.
Fixing Common Searing Mistakes
Tough Meat Texture Fixes
If your chicken feels like you're chewing on a garden hose, it's almost always a heat or timing issue. High heat causes protein fibers to contract violently, squeezing out moisture. If you don't pound the chicken thin, the outside has to sit in the heat for twice as long while the inside catches up. Always use a How To Cook recipe guide if you're unsure about timing for different thicknesses.
| Problem | Root Cause | Solution |
|---|---|---|
| Rubbery texture | Overcooking past 74°C (165°F) | Use a meat thermometer and pull at 72°C; carryover heat will finish it |
| Bitter aftertaste | Garlic burned in the oil | Sauté garlic for less than 60 seconds on lower heat |
| Soggy coating | Flour was applied too early | Only dredge the meat immediately before placing it in the hot oil |
Avoiding Bitter Garlic Flavor
Burnt garlic is the enemy of this dish. If you see the garlic turning dark brown or black, stop! Wipe the pan out and start the sauce over. It’s worth the two minute delay to avoid ruining the whole meal. The goal is a light straw color that smells nutty and sweet.
Achieving a Better Sear
If your chicken looks grey instead of golden, your pan wasn't hot enough, or you overcrowded it. When you put too much cold meat into a pan at once, the temperature drops and the chicken starts to steam in its own juices rather than searing.
- ✓ Pat the chicken completely dry with paper towels before seasoning.
- ✓ Ensure the oil is shimmering and almost smoking before adding the meat.
- ✓ Leave at least 2 cm of space between each breast in the skillet.
- ✓ Do not move the chicken for the first 3 minutes to allow the crust to set.
- ✓ Use a heavy duty pan that retains heat well, like cast iron.
Flexible Diet Adjustments
If you are looking for a way to make this Keto or Paleo friendly, simply swap the all purpose flour for almond flour or just omit it entirely. The sauce will be slightly thinner, but the flavors of the lemon and garlic will still be incredible.
For a dairy-free version, replace the butter with a high-quality vegan butter or an extra tablespoon of olive oil, though you won't get that same "velvety" finish.
If you enjoy the flavor profile of this dish but want something a bit more elaborate, you might love the Chicken Bryan Recipe which incorporates sun dried tomatoes and goat cheese. It uses very similar searing techniques but builds a more complex flavor bridge for special occasions.
Scaling the Recipe
Cooking for Two: You can easily halve this recipe. Use a smaller 8 inch skillet so the sauce doesn't evaporate too quickly when you deglaze the pan. You'll still want to use the full amount of zest from one lemon because that's where the best aroma lives!
Cooking for a Crowd: If you're doubling this for 8 people, do not try to fit all the chicken in one pan. Work in two batches to maintain the sear. You can keep the first batch of chicken warm in a 90°C (200°F) oven while you finish the second batch and the sauce.
When doubling the sauce, reduce the chicken broth by about 10% to ensure it still thickens up properly without over reducing.
| Servings | Chicken Amount | Pan Size | Total Cook Time |
|---|---|---|---|
| 2 people | 2 breasts | 20 cm | 15 minutes |
| 4 people | 4 breasts | 30 cm | 20 minutes |
| 8 people | 8 breasts | 2 pans | 35 minutes |
Searing Meat Does Not Seal Juices
A very common myth is that searing meat "locks in" the juices. In reality, the high heat actually causes the meat to lose moisture. The reason we sear is purely for flavor and texture the Maillard reaction creates hundreds of different flavor compounds that you simply cannot get from boiling or light baking.
The "juiciness" actually comes from not overcooking the internal temperature and letting the meat rest.
Another misconception is that you must use expensive wine for the sauce. While you shouldn't use something you wouldn't drink, a simple low sodium chicken broth actually provides a more consistent, savory base for the lemon to shine through. The lemon is the star here, not the vintage of the grapes!
Freshness and Storage Methods
- Fridge: Store leftovers in an airtight container for up to 3 days. To keep the chicken from drying out, store it with the extra sauce poured over the top.
- Freezer: You can freeze the cooked chicken in the sauce for up to 2 months. Thaw overnight in the fridge before reheating.
- Reheating: Avoid the microwave if possible, as it makes the chicken rubbery. Instead, place the chicken and sauce in a small skillet over low heat with a splash of water or broth. Cover with a lid and steam gently until warmed through.
- Zero Waste: Don't toss those lemon halves after squeezing! Throw the spent rinds into a pot of simmering water with some cinnamon sticks to make your house smell like a spa, or use them to scrub your wooden cutting board with a bit of coarse salt to sanitize it naturally.
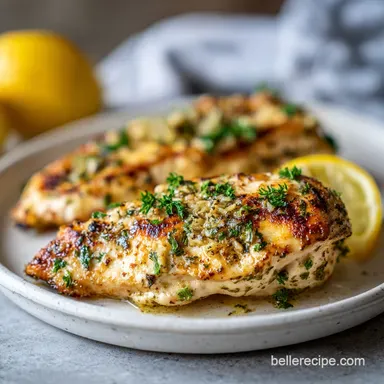
Completing the Meal Plate
This chicken is quite zesty, so it loves to sit next to something that can soak up that liquid gold sauce. A pile of fluffy jasmine rice or some buttery mashed potatoes is the classic choice. If you want to keep it light, a simple arugula salad with a quick vinaigrette works wonders.
For a veggie side, try roasting some asparagus or broccoli with a little bit of the leftover lemon zest and olive oil. The charred bits of the vegetables pair beautifully with the mahogany crust of the chicken.
Honestly, even a crusty piece of sourdough bread is enough to make this feel like a feast just use it to swipe up every last drop of that garlic butter sauce from your plate!

Recipe FAQs
Is pounding the chicken breast necessary for this recipe?
Yes, pounding is essential for even cooking. Pounding ensures a uniform thickness, which prevents the thinner edges from drying out while you wait for the thicker center to reach safe temperature.
How to prevent the garlic from burning when making the sauce?
Add the minced garlic after the chicken is removed and the heat is reduced to medium. Cook it only until fragrant, about 30 to 45 seconds, before immediately deglazing the pan with broth or lemon juice.
Why do I need to rest the chicken after searing?
No, searing does not lock in juices, but resting does redistribute them. High heat causes muscle fibers to contract, squeezing moisture to the center; resting allows these juices to flow back throughout the meat.
What is the best way to achieve a creamy pan sauce without separating the butter?
Whisk in very cold butter off the heat at the very end of the cooking process. This technique is called mounting with butter and creates a stable, velvety emulsion that coats the chicken beautifully; if you enjoyed mastering this specific emulsification principle, see how we adapt it for our Cozy Chicken Pot Pie recipe.
Can I substitute the all-purpose flour coating?
Yes, you can substitute with cornstarch or omit it entirely. Omitting the flour requires a slightly longer reduction time for the sauce, but if you are looking for a different type of crispy texture, you might prefer the results from our Fried Chicken Recipe.
What internal temperature should the chicken reach before resting?
Pull the chicken from the heat at 72°C (162°F). Carryover cooking, which happens during the rest period, will safely bring the temperature up to the required 74°C (165°F) while keeping the meat tender.
How should I store leftovers to maintain moisture?
Store leftovers submerged in the leftover pan sauce. This helps the meat reabsorb some moisture during refrigeration and keeps it significantly more tender when reheating gently on the stovetop later.
Lemon Garlic Chicken Breast Recipe
Ingredients:
Instructions:
Nutrition Facts:
| Calories | 374 kcal |
|---|---|
| Protein | 39.8 g |
| Fat | 21.2 g |
| Carbs | 5.4 g |
| Fiber | 0.6 g |
| Sugar | 0.8 g |
| Sodium | 624 mg |
