Perfect Chocolate Covered Strawberries Recipe Details: Glossy Finish
- Time: Active 20 minutes, Passive 30 minutes, Total 50 minutes
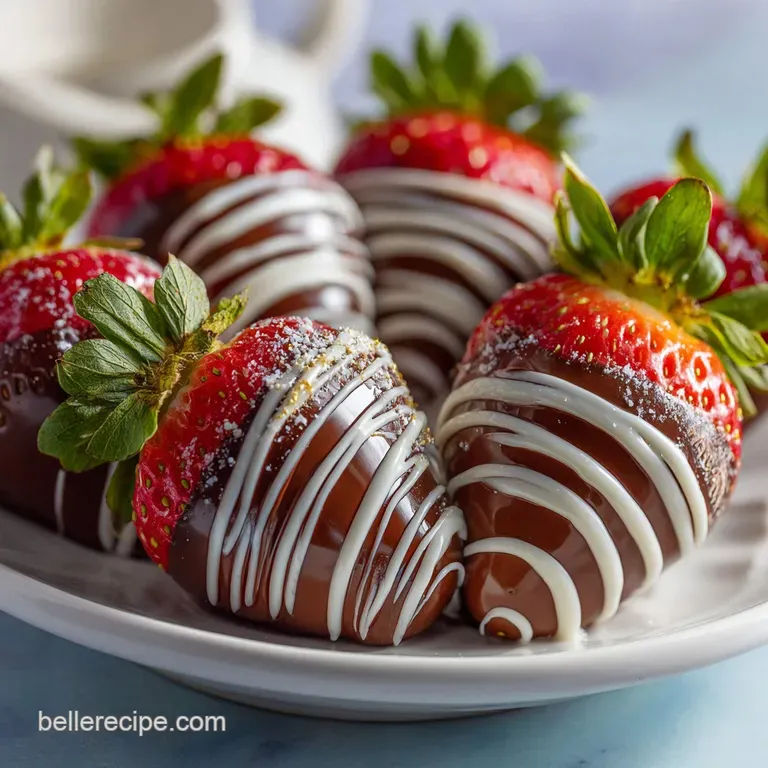
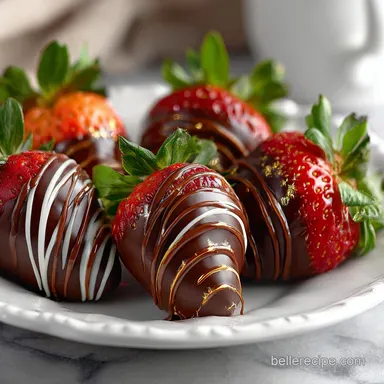
- Flavor/Texture Hook: A velvety dark chocolate shell that shatters to reveal a bright, tart berry.
- Perfect for: Meaningful anniversary celebrations, mindful gifting, or a quiet weekend indulgence.
- Mastering the Perfect Chocolate Covered Strawberries Recipe Details
- Creating Meaningful Memories with Every Sweet Dip
- Essential Metrics for Success in the Kitchen
- Selecting Mindful Elements for Your Berry Canvas
- Vital Tools for a Seamless Dipping Experience
- Transforming Simple Fruit into a Velvety Indulgence
- Navigating Common Pitfalls and Achieving Smooth Results
- Tailoring the Flavor to Suit Your Occasion
- Preservation Strategies to Keep Your Berries Fresh
- Thoughtful Pairings for Your Chocolate Dipped Treats
- Recipe FAQs
- 📝 Recipe Card
Mastering the Perfect Chocolate Covered Strawberries Recipe Details
I still remember the first time I tried to make these for a friend's baby shower. I was so rushed that I didn't let the berries dry properly after washing them. It was a disaster, honestly. The chocolate "seized" immediately, turning into a grainy, clumpy mess that looked more like wet cement than a dessert.
I sat on my kitchen floor nearly in tears, realizing that even the simplest treats require a bit of mindful respect for the ingredients. It was a humbling lesson in patience and the science of surface tension.
Since that day, I've spent years refining the process to ensure every berry looks like it belongs in a high end boutique window. We aren't just dipping fruit in sugar here, we're creating a contrast of textures.
The cold, yielding flesh of the strawberry against the firm, brittle embrace of tempered chocolate is a sensory experience that never gets old. When you get it right, that first bite offers a clean shatter that gives way to a burst of summer sweetness.
It is a quiet, comforting ritual that turns a stressful afternoon into a moment of pure culinary mindfulness.
Creating Meaningful Memories with Every Sweet Dip
The magic of this recipe lies in the contrast between the rich, bitter notes of the cacao and the vibrant acidity of the fruit. We've all seen those grocery store versions that look beautiful but taste like waxy plastic. By choosing 60% cacao or higher, we ensure a deep flavor profile that lingers on the palate.
It's about taking the time to source berries that are actually ripe, not just red, so that the fragrance hits you the moment you open the container.
The Physics of the Snap
Crystalline Alignment: Adding refined coconut oil lowers the melting point of the chocolate while helping the sugar crystals align for a matte, professional finish. This ensures the coating stays firm at room temperature but melts instantly the moment it touches your tongue.
| Dipping Depth | Visual Outcome | Best For |
|---|---|---|
| Full Submerge | Uniform, heavy shell | Long term storage |
| Three Quarters | Shows off the red "shoulder" | High end presentation |
| Half Dip | Casual, rustic look | Quick family snacking |
When you choose to leave that little peek of red at the top of the berry, you're signaling to your guests that the fruit is the star of the show. It creates a beautiful visual bridge between the dark shell and the green leafy crown. If you find yourself craving even more berry centric treats, you might also enjoy my Decadent Strawberry Fudge Delights recipe, which offers a completely different, creamy texture profile.
Essential Metrics for Success in the Kitchen
Accuracy is your best friend when working with chocolate. Unlike a rustic stew where you can eyeball the salt, chocolate is temperamental. It demands specific temperatures and ratios to behave correctly.
We are aiming for a coating that is thick enough to hold its shape but thin enough to not overwhelm the berry's natural flavor.
| Ingredient | Science Role | Pro Secret |
|---|---|---|
| Dark Chocolate | Structural base | Use bars, not chips, for a smoother melt |
| Coconut Oil | Viscosity agent | Refined oil prevents a tropical aftertaste |
| Strawberries | Moisture source | Room temp berries prevent chocolate "shock" |
By keeping your berries at room temperature, you prevent the chocolate from setting too quickly. If the berry is too cold, the chocolate hardens before it can level out, leaving you with ugly lumps and ridges instead of a velvety smooth surface.
Selecting Mindful Elements for Your Berry Canvas
Choosing your ingredients is an act of love. Look for berries that are firm to the touch; if they feel soft or "squishy," they will release too much juice once dipped, causing the chocolate to slide right off.
- 1 lb fresh strawberries: Select medium sized fruit with vibrant green hulls. Why this? Smaller berries offer a better chocolate to fruit ratio in every single bite.
- Substitute: Large blackberries or thick slices of firm kiwi.
- 10 oz high-quality dark chocolate: Look for 60% cacao or higher. Why this? High cacao butter content ensures a fluid melt and a sophisticated, less sugary finish.
- Substitute: Semi sweet chocolate chips (note: will be much sweeter and softer).
- 2 tsp refined coconut oil: This is the secret to that glossy finish. Why this? It thins the chocolate just enough to create a delicate, professional grade shell.
- Substitute: Unsalted butter, though it makes the shell slightly softer.
- 2 oz white chocolate: Used purely for the aesthetic drizzle. Why this? The color contrast creates a striking, "bakery style" appearance that impresses everyone.
- Substitute: Crushed nuts or a sprinkle of flaky sea salt.
Vital Tools for a Seamless Dipping Experience

You don't need a professional kitchen, but a few specific items make the "Perfect Chocolate Covered Strawberries Recipe Details" much easier to manage. I always reach for a small, deep microwave safe bowl. A wide, shallow bowl makes it hard to submerge the berries fully without using an excessive amount of chocolate.
You'll also want a sheet of parchment paper or a silicone baking mat. Never use foil; the chocolate will stick to it like glue, and you'll end up breaking your beautiful shells trying to pry them off.
A simple toothpick can also be a lifesaver for cleaning up the "tails" of chocolate that sometimes form at the base of the berry.
Transforming Simple Fruit into a Velvety Indulgence
- Wash the berries gently. Rinse them under cold water, being careful not to bruise the delicate skin.
- Dry completely. Pat each berry with a paper towel and let them air dry for at least 15 minutes. Note: Any lingering water will cause the chocolate to seize.
- Prep your station. Line a baking sheet with parchment paper so you can move quickly once the dipping begins.
- Chop the chocolate. Even if using chips, a rough chop helps the 10 oz dark chocolate melt more evenly without burning.
- Melt with oil. Combine the chocolate and 2 tsp coconut oil in a bowl, heating in 30 second bursts.
- Stir until silky. Stop heating when a few small lumps remain; the residual heat will finish the job.
- Dip and twirl. Hold the berry by the green leaves, dip into the chocolate, and twirl it as you lift. Stop when the chocolate stops dripping.
- Place on parchment. Lay the berry down gently, slightly moving it forward to prevent a large "pool" from forming.
- Drizzle for flair. Melt the 2 oz white chocolate and use a fork to flick thin lines across the set dark chocolate.
- Set the finish. Let the berries sit at room temperature for 30 minutes until the chocolate is matte and firm.
Navigating Common Pitfalls and Achieving Smooth Results
The most frequent heartbreak in this process is "weeping." This happens when the sugar in the berry draws out moisture, creating a puddle of syrup under the chocolate. To avoid this, never dip berries that are even slightly damp.
I’ve learned that a hair dryer on the "cool" setting can be a quick fix if you're in a humid kitchen and the berries just won't dry.
Why Your Chocolate Seized
If a single drop of water enters your melting bowl, the chocolate will transform from a silky liquid into a gritty paste. This is because the water hitches onto the sugar particles, pulling them out of the fat suspension.
If this happens, you can sometimes save it by stirring in a teaspoon of boiling water, but it will never be thin enough for dipping again it's better used as a fruit dip or frosting.
| Problem | Root Cause | Solution |
|---|---|---|
| Streaky Chocolate | Overheating the fat | Melt in shorter intervals; stir more |
| Chocolate Slides Off | Berries were too cold | Let fruit sit at room temp for 20 mins |
| Large Feet/Pools | Excess chocolate on berry | Twirl berry longer before placing on paper |
Common Mistakes Checklist
- ✓ Never use a lid when melting chocolate; condensation will drip back in.
- ✓ Avoid using "cold" berries straight from the fridge to prevent condensation.
- ✓ Don't skip the coconut oil; it provides the "slip" needed for a thin coating.
- ✓ Ensure your bowl and spoon are bone dry before you start.
- ✓ Don't refrigerate immediately; let them set at room temp to avoid dulling the shine.
Tailoring the Flavor to Suit Your Occasion
Scaling this recipe is quite simple because the ratios stay consistent. If you are making a massive batch for a wedding or a large party, remember that chocolate holds heat well. You may need to take "stirring breaks" to keep the temperature even throughout the bowl.
For a smaller batch (half recipe), use a very narrow cup or a ramekin for the chocolate. This keeps the depth high enough for dipping even with less volume. If you're looking for a romantic variation on this theme, my Chocolate Dipped Strawberry Hearts recipe is a wonderful way to play with shapes and presentation.
Decision Shortcut
- If you want a super crunchy shell, omit the coconut oil and temper the chocolate traditionally.
- If you want a matte, soft bite finish, increase the coconut oil by an extra teaspoon.
- If you want maximum flavor contrast, sprinkle a tiny pinch of espresso powder into the melted dark chocolate.
Preservation Strategies to Keep Your Berries Fresh
These are best enjoyed the day they are made. Because strawberries are mostly water, they begin to break down the moment they are picked. Store them in a cool, dry place. If you must refrigerate them, place them in a single layer in a container lined with paper towels to absorb any moisture.
They will stay fresh for about 24 hours in the fridge, but the chocolate may lose its brilliant shine.
Don't let any "ugly" berries go to waste! If a berry breaks or the chocolate looks messy, chop them up and fold them into vanilla ice cream or use them as a topping for waffles. You can also take any leftover melted chocolate and stir in some crushed pretzels or nuts to make a quick "bark" on the remaining parchment paper.
Thoughtful Pairings for Your Chocolate Dipped Treats
These berries are a standout on their own, but they play incredibly well with others. I love serving them alongside a glass of cold milk or a dry sparkling wine. The bubbles in the wine help cleanse the palate between the rich hits of cacao.
If you're hosting a dessert spread, these provide a fresh, lighter alternative to heavier cakes.
For a truly indulgent afternoon, try serving these alongside a glass of Creamy Homemade Chocolate Milk recipe. The double dose of chocolate is surprisingly comforting and feels like a real celebration of the ingredient. Whether you're sharing these with a partner or enjoying them as a mindful solo treat, the effort you put into the details will be evident in every velvety, shatteringly crisp bite. Keep practicing the "dip and twirl" it's a skill that pays off in beautiful, edible memories.

Recipe FAQs
How do I get chocolate to stick to my strawberries?
Ensure the strawberries are completely dry and at room temperature. Moisture is the enemy; any residual water will prevent the melted chocolate from adhering properly and can cause it to seize.
What should I do to prepare the surface for chocolate adhesion?
Pat them very dry, then let them air dry for at least 15 minutes. Any dew or wash water must evaporate completely so the chocolate can bond directly to the berry's surface, which improves the final snap.
What not to do when making chocolate covered strawberries?
Do not dip cold berries directly from the refrigerator into the melted chocolate. Cold fruit shocks the coating, causing it to set too quickly and unevenly, resulting in a thick, bumpy shell.
Should strawberries be room temperature before dipping in chocolate?
Yes, room temperature is crucial for the best finish. Warm or room temperature berries allow the chocolate coating to level out beautifully before it sets, giving you a smooth, professional look.
Should you soak strawberries before dipping in chocolate?
No, you should only rinse them briefly under cold water. Never soak them, as they absorb water quickly, which then sweats out under the chocolate later, causing the coating to slide off.
How do I ensure my chocolate coating is glossy and hard?
Add a small amount of refined coconut oil (about 2 tsp per 10 oz) to your melted chocolate. This thins the viscosity perfectly and encourages a professional, high shine finish that sets firmly at room temperature.
How to make the coating thin enough without it being runny?
Dip, twirl gently, and lift slowly, allowing excess chocolate to drip back into the bowl. If you master this technique here, you'll find the same principles of controlled viscosity are key when making my [Classic Soft Sugar recipe] to prevent spreading.
Perfect Chocolate Strawberries Recipe
Ingredients:
Instructions:
Nutrition Facts:
| Calories | 109 kcal |
|---|---|
| Protein | 1.2 g |
| Fat | 6.8 g |
| Carbs | 10.8 g |
| Fiber | 1.6 g |
| Sugar | 7.3 g |
| Sodium | 4 mg |
