Pineapple Dump Cake: Golden and Buttery
- Time: Active 5 minutes, Passive 45 minutes, Total 50 minutes
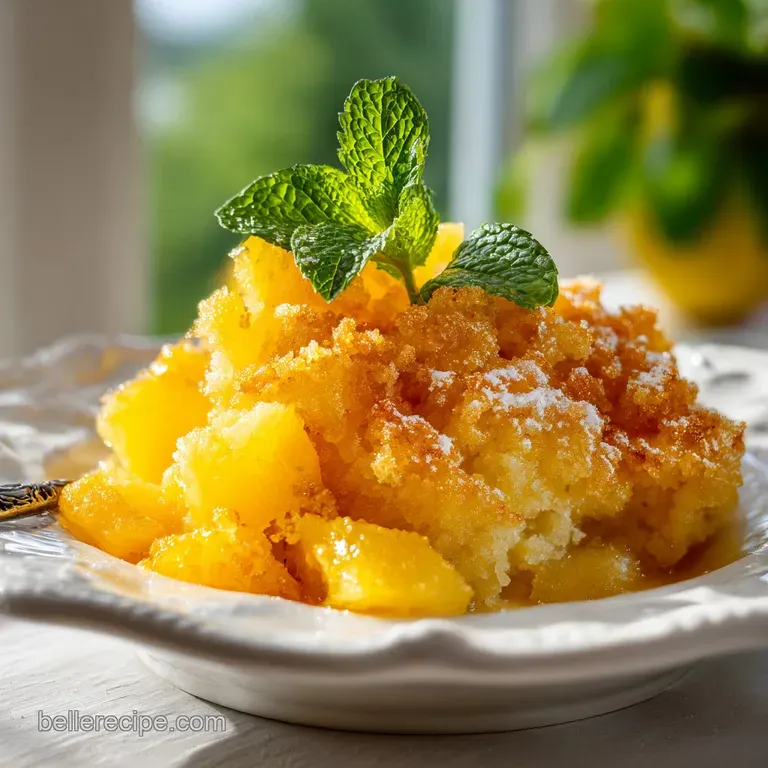
- Flavor/Texture Hook: A buttery, coconut flecked crust that shatters to reveal velvety, caramelized pineapple.
- Perfect for: Last minute neighborhood potlucks, comforting Sunday family dinners, or budget-friendly entertaining.
- Why This Simple Pineapple Dump Cake Cobbler Rules the Potluck
- Key Stats for Your Golden Pineapple Dump Cake Cobbler
- Component Analysis: The Elements of the Bake
- The Budget Friendly Elements for a Better Pineapple Cobbler
- Tools You Will Need for a Perfect Cobbler Topping
- Mastering the Layers of Your Pineapple Dump Cake Cobbler
- How to Avoid Common Mistakes with This Simple Dessert
- Smart Substitutions and Flavor Twists for Your Dump Cake
- Scaling This Recipe for Larger or Smaller Crowds
- Keeping Your Leftover Pineapple Cobbler Fresh and Tasty
- Debunking Common Kitchen Myths
- The Most Mindful Ways to Serve This Tropical Treat
- Recipe FAQs
- 📝 Recipe Card
Why This Simple Pineapple Dump Cake Cobbler Rules the Potluck
There is a specific sound that happens when you press a heavy silver spoon into a freshly baked pineapple dump cake cobbler. It is a sharp, musical crack of a buttery crust giving way to a steaming, golden center. I remember the first time I saw my Aunt Martha make this for a neighborhood block party.
I was a kid, watching her literally "dump" things into a pan without a mixing bowl in sight, and I thought she had finally lost her mind. But when that pan came out of the oven, smelling like a tropical vacation and caramelized sugar, every other dessert on the table was suddenly forgotten.
It was the first dish to be scraped clean, leaving behind only a few stray toasted coconut shreds.
This dish is the ultimate "emergency" dessert because it relies on the magic of simple ingredients working together in a hot oven. It’s comforting, it’s inclusive, and it feels like a warm hug from a grandmother who knows exactly how to make you feel special without spending hours in the kitchen.
Whether you are hosting a big family gathering or just need a little sunshine on a rainy Tuesday, this recipe is your secret weapon. It’s about more than just convenience, it is about the mindful transformation of basic items into something that feels truly celebratory.
We often think that great baking requires scales, sifters, and high stress timing, but this cobbler proves otherwise. It’s a lesson in trust, specifically trusting that the juices from the fruit will bubble up and "cook" the cake mix into a texture that sits somewhere between a soft cookie and a traditional cobbler topping.
The addition of the brown sugar and coconut adds a depth of flavor that makes people ask, "Wait, what is in this?" even though the answer is delightfully simple.
Key Stats for Your Golden Pineapple Dump Cake Cobbler
Before we start layering, let's look at why this specific method produces such a consistent result every single time. It’s not just about luck, it’s about how the heat interacts with the different moisture levels in the pan.
- Liquid Lift: The syrup from the crushed pineapple provides the primary hydration for the cake mix, ensuring the bottom layer is moist and tender.
- Fat Distribution: By grating the butter while it is frozen, we create tiny "shavings" that melt evenly across the surface, preventing those dreaded dry flour spots.
- Sugar Caramelization: The light brown sugar acts as a bridge between the tart pineapple and the sweet cake mix, creating a rich, toffee like middle layer.
- Aeration: Whisking the dry cake mix before sprinkling it ensures the topping is light and airy rather than a dense, leaden block.
| Method | Time | Texture | Best For |
|---|---|---|---|
| Standard Oven | 45 minutes | Crispy, shattered crust | Classic potluck results |
| Slow Cooker | 4 hours (High) | Soft, pudding like | Hands off party prep |
| Air Fryer (Half Batch) | 25 minutes | Extra crunchy top | Quick solo cravings |
Choosing the right method depends on your day. If you want that iconic "snap" of the crust, the oven is your best friend. The dry heat allows the moisture to evaporate from the top, leaving behind a golden, buttery finish.
If you prefer a texture that is more like a warm pineapple pudding, the slow cooker works wonders by trapping the steam, though you'll miss out on that specific "crunch."
Component Analysis: The Elements of the Bake
| Ingredient | Science Role | Pro Secret |
|---|---|---|
| Crushed Pineapple | Provides the "jammy" base and essential hydration. | Don't drain the crushed can; the syrup is the "liquid" for the cake. |
| Frozen Unsalted Butter | Creates a flaky, shortbread like texture through steam. | Grate it with a box grater for 100% coverage without dry spots. |
| Yellow Cake Mix | Acts as the structural flour and leavening agent. | Whisk the dry mix first to remove lumps for an even rise. |
Many people make the mistake of using cold or room temperature butter and just slicing it into pats. While that works in a pinch, it often leaves large areas of the cake mix dry and powdery. Grating the frozen butter is the single biggest "pro" move you can make.
It turns the butter into a snow like topping that melts into every single crevice of the dry mix, guaranteeing a uniform, velvety crumb that feels much more expensive than a boxed mix usually allows.
The Budget Friendly Elements for a Better Pineapple Cobbler
You don't need a pantry full of gourmet items to make this shine. In fact, sticking to these specific staples is what gives the dish its "old-fashioned" charm. Here is what you need to gather:
- 20 oz crushed pineapple in heavy syrup: This is the "glue" of the recipe. The heavy syrup provides the necessary sugar and liquid to cook the cake mix from below.
- 20 oz pineapple tidbits in juice, drained: We use these for texture. While the crushed pineapple creates a sauce, the tidbits give you those juicy, sun soaked bites of actual fruit.
- 1/2 cup light brown sugar, packed: This adds a hint of molasses flavor and helps the fruit layer become thick and syrupy.
- 15.25 oz standard yellow cake mix: A simple, budget friendly brand works perfectly here. It’s the backbone of the topping.
- 3/4 cup unsalted butter, frozen: Using unsalted butter allows the natural sweetness of the pineapple to take center stage.
- 1/2 tsp ground cinnamon: Just a touch to add warmth and a comforting aroma.
- 1/2 cup sweetened shredded coconut: This toasts up in the oven, adding a nutty crunch and a tropical flair.
| Original Ingredient | Substitute | Why It Works |
|---|---|---|
| Yellow Cake Mix | White or Spice Cake Mix | Yellow is classic, but Spice adds a lovely autumn warmth. |
| Light Brown Sugar | Coconut Sugar | Similar caramel notes with a slightly lower glycemic index. |
| Shredded Coconut | Chopped Pecans | Provides the necessary crunch with a more earthy flavor. |
If you are looking for a savory sweet variation that uses similar tropical vibes, you might enjoy reading about a Pineapple Stuffing recipe which uses bread cubes instead of cake mix. It is a fantastic side dish for holiday hams!
Tools You Will Need for a Perfect Cobbler Topping
The beauty of a pineapple dump cake cobbler is that it requires very little equipment. You won't even need to plug in a mixer.
- 9x13 inch Baking Dish: A glass or ceramic dish is ideal for even heat distribution.
- Box Grater: This is essential for the butter technique. If you don't have one, you can use a food processor with the grating attachment, but a manual grater gives you the most control.
- Small Whisk: Used to fluff up the dry cake mix before you layer it.
- Offset Spatula: Perfect for leveling the cake mix without disturbing the fruit layer beneath.
Chef's Tip: If you find your butter is melting too quickly in your hands while grating, wrap the end of the butter stick in a piece of parchment paper or the butter wrapper itself. It provides insulation and a better grip!
Mastering the Layers of Your Pineapple Dump Cake Cobbler
Now, let's get into the actual process. The key here is to resist the urge to stir. "Dumping" isn't just a funny name; it’s a functional part of the layering science that keeps the fruit on the bottom and the crust on the top.
- Preheat your oven to 350°F (175°C). Ensure your oven rack is in the center position for even browning.
- Pour the 20 oz can of crushed pineapple (with syrup) into the bottom of your 9x13 inch baking dish. Spread it evenly with a spoon to cover the entire base.
- Layer the 20 oz of drained pineapple tidbits over the crushed layer. Sprinkle the 1/2 cup of light brown sugar evenly across the fruit. Note: This creates a concentrated "jam" layer that won't get watered down.
- In a separate bowl, whisk the 15.25 oz of dry yellow cake mix to remove any large clumps. Sprinkle this mix evenly over the pineapple.
- Use an offset spatula to gently level the surface of the dry mix. Do not stir the cake mix into the fruit.
- Evenly sprinkle the 1/2 tsp of ground cinnamon and the 1/2 cup of shredded coconut over the dry cake mix layer.
- Take your 3/4 cup of frozen butter and, using the large holes of a box grater, grate it directly over the top of the cake. Aim for total coverage.
- Bake for 45 minutes until the topping is a deep golden brown and the fruit is bubbling at the edges.
- Remove from the oven and let it sit for at least 10 minutes. This is the hardest part, but it allows the juices to thicken so it isn't "soupy" when served.
Precision Checkpoints for Success
- Weight: Your baking dish should feel heavy and substantial; if it feels light, you may have used too little fruit.
- Temperature: The internal temperature of the bubbling fruit should reach about 200°F (93°C) to ensure the sugar has fully dissolved into a syrup.
- Time: Do not pull it out before 45 minutes. The cake mix needs that full time to hydrate and the coconut needs it to toast to a perfect amber.
How to Avoid Common Mistakes with This Simple Dessert
Even though this is an "easy" recipe, there are a few places where things can go sideways. The most common complaint is finding dry, floury patches in the finished bake. This happens when the fat (butter) or the liquid (pineapple juice) doesn't reach the dry mix.
Why Your Cobbler Has Dry Flour Spots
This usually happens if the butter was sliced too thick or if the cake mix was "packed" down rather than sprinkled. When you pack the mix, it becomes too dense for the moisture to penetrate. Always whisk the mix first and use the grating method for the butter.
| Problem | Root Cause | Solution |
|---|---|---|
| Soggy/Mushy Crust | Too much liquid or fruit not drained. | Ensure tidbits are fully drained; only use the syrup from the crushed can. |
| Burning Coconut | Oven is too hot or rack is too high. | Move to middle rack and tent with foil if browning too fast. |
| Dry Powder Spots | Uneven butter distribution. | Grate the butter while frozen for 100% surface coverage. |
Common Mistakes Checklist
- ✓ Never stir the layers together; the separation is what creates the cobbler texture.
- ✓ Ensure the butter is truly frozen (at least 2 hours in the freezer) before grating.
- ✓ Drain the pineapple tidbits thoroughly to prevent a "watery" base.
- ✓ Use the full 45 minutes of baking time; a pale crust is often a doughy crust.
- ✓ Let the dish rest for 10-15 minutes after baking to set the juices.
Smart Substitutions and Flavor Twists for Your Dump Cake
The "classic" pineapple version is beloved for a reason, but this method is incredibly flexible. You can adapt it based on what you have in your pantry or the season you are in.
- Tropical Sunset Version: Add a small jar of drained maraschino cherries to the fruit layer for pops of bright red color and extra sweetness.
- Pineapple Dump Cake with Pie Filling: Replace the tidbits with a can of cherry or peach pie filling for a "best of both worlds" fruit experience.
- Budget Shortcut: If you don't have butter, you can use a neutral oil spray, though the flavor won't be as rich and the crust won't "shatter" in the same way.
If you find yourself with leftover pineapple skins or cores from fresh fruit, don't throw them away! You can make a refreshing Tepache Recipe using the scraps. It’s a mindful way to reduce waste while your cake is in the oven.
If you want X, do Y
- If you want a crunchier top, increase the shredded coconut to 3/4 cup and add 1/4 cup of chopped macadamia nuts.
- If you want a more "cake like" bottom, don't drain the pineapple tidbits; the extra juice will make the whole dish softer and more moist.
- If you want a deeper caramel flavor, use dark brown sugar instead of light and add a pinch of sea salt to the top of the butter layer.
Scaling This Recipe for Larger or Smaller Crowds
Because this is a layered dish, scaling requires a little thought about the surface area.
- Scaling Down (Half Batch): Use an 8x8 inch square pan. Reduce the baking time to about 30-35 minutes. Since you can't easily use half a box of cake mix, you can store the other half in a sealed bag for your next bake.
- Scaling Up (Double Batch): Do not simply stack the layers higher in the same pan. Use two separate 9x13 dishes. If you try to double the recipe in one deep dish, the middle will stay raw and doughy while the edges burn.
- Baking for Two: Use large ramekins or small oven safe crocks. This creates "individual" cobblers that feel very fancy. Reduce baking time to 20-25 minutes.
Keeping Your Leftover Pineapple Cobbler Fresh and Tasty
If you have leftovers (which is rare!), they actually keep quite well. The flavors often deepen as the pineapple juices continue to soak into the crust.
Storage: Fridge: Cover the baking dish tightly with foil or plastic wrap and store for up to 4 days. Freezer: You can freeze individual portions in airtight containers for up to 3 months. The crust will lose its "shatter," but the flavor will remain excellent.
Zero Waste Tip: If you have a small amount of cobbler left not quite enough for a full serving stir it into your morning oatmeal or swirl it into some plain Greek yogurt. It’s a fantastic way to brighten up a simple breakfast.
Reheating: To bring back some of that original crunch, avoid the microwave. Instead, place a serving in a toaster oven at 350°F (175°C) for 5-8 minutes. This will re crisp the butter and coconut topping while warming the fruit through.
Debunking Common Kitchen Myths
There are a few misconceptions about dump cakes that often stop people from trying them.
- Myth: "You have to use fresh pineapple for the best flavor."
- Truth: Actually, canned pineapple works better here because the canning process softens the fruit and creates a consistent syrup that is necessary for the cake mix to hydrate. Fresh pineapple can sometimes be too acidic or too fibrous, leading to an uneven bake.
- Myth: "The butter has to be melted and poured over."
- Truth: Pouring melted butter often leads to "channels" where the butter runs to the bottom, leaving dry spots on top. The grating method is vastly superior for a consistent, flaky crust.
- Myth: "A dump cake is just a messy cake."
- Truth: When done correctly, the layers remain distinct. The bottom is a fruit preserve, and the top is a buttery shortbread. It’s a sophisticated play on textures, not just a "mess."
The Most Mindful Ways to Serve This Tropical Treat
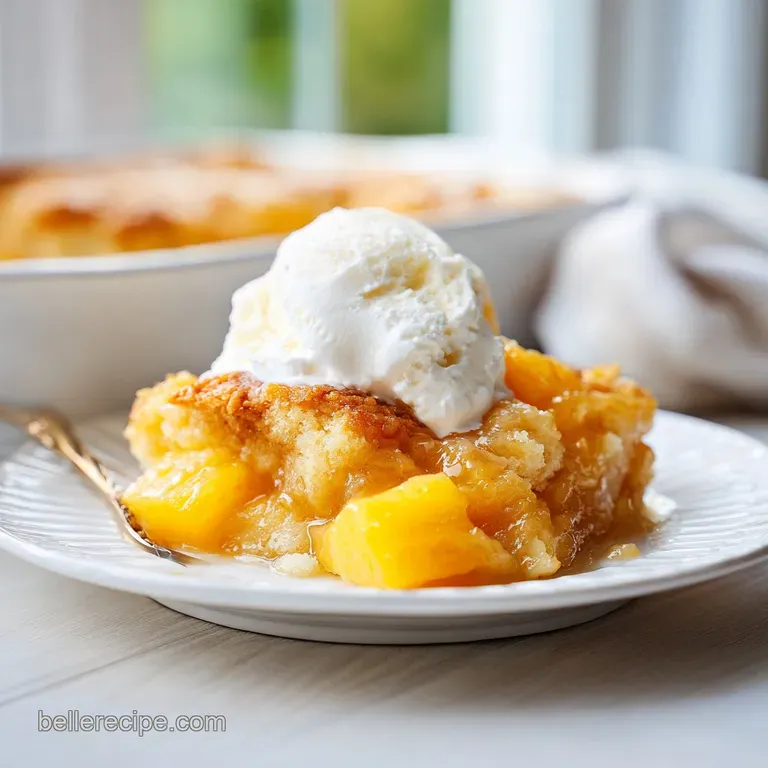
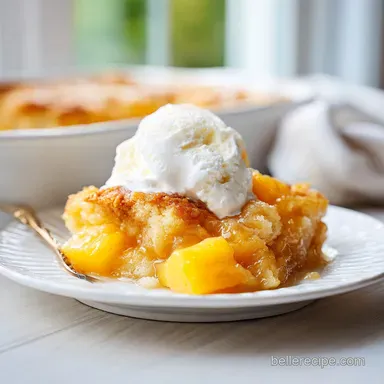
Serving this cobbler is all about the contrast of temperatures. There is something deeply satisfying about the "velvety" feel of cold cream against the "sizzling" hot pineapple.
The Classic Pairing
A scoop of high-quality vanilla bean ice cream is the gold standard. As the ice cream melts, it creates a "creme anglaise" effect that mingles with the pineapple syrup. If you are feeling adventurous, a scoop of coconut milk ice cream doubles down on the tropical vibes.
The Pro Garnish
For a special occasion, finish the dish with a few fresh mint leaves and a light dusting of powdered sugar. The green of the mint against the golden crust makes the whole dish pop. If you want to cut through the sweetness, a dollop of unsweetened softly whipped cream with a bit of lime zest is a game changer.
It provides a bright, citrusy lift that balances the rich butter and sugar.
Enjoy the process of making this. It’s a reminder that cooking doesn't always have to be complicated to be meaningful. Sometimes, the most mindful thing you can do is "dump" some ingredients in a pan, let the oven do the work, and spend that extra 45 minutes connecting with the people you love while the house fills with the scent of toasted coconut and warm pineapple.

Recipe FAQs
What is the biggest mistake to avoid when making a dump cake?
Stirring the layers is the biggest mistake. You must keep the fruit, dry cake mix, and butter in distinct layers to ensure the characteristic cobbler like topping forms correctly during the 45 minutes of baking.
Do you drain the crushed pineapple for dump cake?
No, keep the syrup in the crushed pineapple. That liquid is essential for hydrating the cake mix, though you should drain the pineapple tidbits to keep the consistency from becoming too thin.
Is dump cake similar to cobbler?
Yes, the final result shares the same fruit forward profile and golden, crumbly crust. If you enjoyed mastering this simple one-pan layering technique, you can apply the same principle of fruit and-crust balancing to our spiced applesauce cake for another rustic dessert success.
Can I add a can of crushed pineapple to a box cake mix?
Yes, this is exactly how the dish is constructed. Simply spread the 20 oz of crushed pineapple in the bottom of your 9x13 dish, then sprinkle the dry yellow cake mix directly on top without stirring.
How to get a crispy, golden brown top?
Grate the frozen butter using a box grater. Grating ensures the butter is distributed in small, uniform flakes across the entire surface of the cake mix, which results in a consistent, crispy crust rather than random pools of grease.
How to tell if the dump cake is finished baking?
Look for a deep golden brown crust and bubbling fruit edges. Always bake for the full 45 minutes at 350°F, then allow the dish to rest for 10 to 15 minutes to let the juices set before serving.
Is it true I can use room temperature butter instead of frozen?
No, this is a common misconception. Using room temperature butter makes it impossible to achieve the fine, even coverage needed for a perfect crust; you must freeze the butter for at least 2 hours prior to grating.
Pineapple Dump Cake Cobbler
Ingredients:
Instructions:
Nutrition Facts:
| Calories | 342 kcal |
|---|---|
| Protein | 1.3 g |
| Fat | 14.8 g |
| Carbs | 52.1 g |
| Fiber | 1.4 g |
| Sugar | 41.5 g |
| Sodium | 235 mg |
