Chewy Golden Perfection Authentic Brazilian Pão De Queijo
- Unlocking the Secret to Brazil’s Favorite Street Snack
- Why This Gluten-Free Pão de Queijo Recipe Stands Above the Rest
- Gathering the Building Blocks for Perfect Brazilian Cheese Bread
- Selecting the Right Cheese Fusion for Maximum Flavor
- The Step-by-Step Alchemy: Creating the Pão de Queijo Dough
- Baking to Golden Perfection: Temperature and Timing Secrets
- Troubleshooting Common Pão de Queijo Pitfalls
- Serving Suggestions and Storage Mastery for Your Baked Goods
- Creative Twists on the Classic Brazilian Recipe
- Recipe FAQs
- 📝 Recipe Card
Unlocking the Secret to Brazil’s Favorite Street Snack
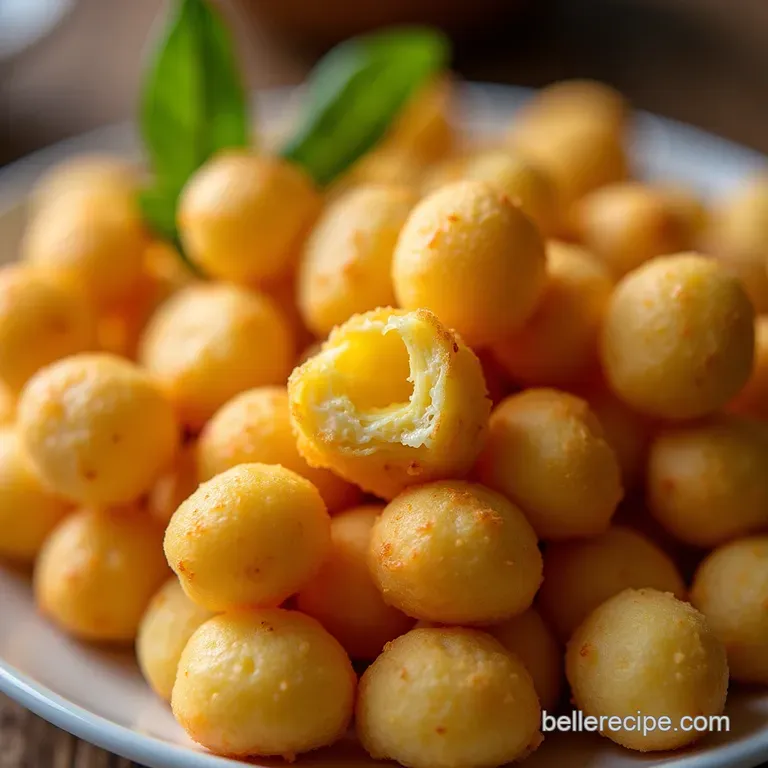
Transport your taste buds straight to Brazil with these delightfully chewy, naturally gluten-free cheese puffs. Pão de Queijo , which translates simply to "cheese bread," is far more than just a simple baked good; it’s a cultural icon, the ultimate savory snack enjoyed from bustling city streets to quiet family kitchens across the nation.
Forget the dry, pre-packaged imitations you might have tried; we are crafting the authentic version the one that shatters satisfyingly on the outside while revealing a wonderfully elastic, airy interior.
This classic recipe requires precision, but the process is surprisingly approachable, making it an excellent project for any home baker looking to master something truly unique.
Why This gluten-free Pão de Queijo Recipe Stands Above the Rest
The true magic of this Pao de Queijo recipe lies in its foundation: tapioca starch. This ingredient inherently makes this an Easy Pao de Queijo endeavor, particularly because it skips all yeast and wheat flour, resulting in a naturally gluten-free Pao de Queijo treat ready in under an hour total time.
Unlike many complicated bread recipes, the challenge here isn't waiting for dough to rise, but mastering the technique of scalding the starch, which gives these puffs their signature chew.
A Taste of Minas Gerais: The Origin Story
The history of Pao de Queijo is deeply rooted in the state of Minas Gerais, a region historically known for its dairy farming. When wheat flour was scarce or prohibitively expensive centuries ago, resourceful cooks turned to the native manioc (cassava) root.
They utilized its extracted starch tapioca to create a bread substitute. Over time, as dairy became more abundant, local cheeses were incorporated, transforming this humble root snack into the beloved, cheesy indulgence we know today.
The Essential Elasticity: Understanding Tapioca Starch
The difference between good and truly exceptional Pao de Queijo hinges entirely on the starch used. We are aiming for that signature stretch, and that requires tapioca starch , sometimes called cassava starch.
Specifically, we highly recommend using Polvilho Azedo , or sour starch. This variety has undergone a fermentation process, lending a slightly tangy flavour note to the finished bread and encouraging greater air pockets during baking, resulting in a superior chew.
Why You Should Ditch store-bought Puffs Forever
While convenient, commercially produced puffs often rely on additives to maintain shelf life and texture. By making your Brazilian cheese bread recipe from scratch, you control the quality of the cheese, the freshness of the eggs, and crucially, the starch-to-liquid ratio.
This control ensures every bite delivers that fresh from-the-oven warmth and unparalleled stretchiness that defines the real deal.
Gathering the Building Blocks for Perfect Brazilian Cheese Bread
To achieve the perfect consistency for this Pao de Queijo receita , gathering the correct components is vital. You will need approximately 20 minutes of active prep time, yielding about 20 to 24 small, satisfying puffs, perfect for sharing (or not!).
The total time from start to enjoying your warm snack is typically around 45 minutes.
Selecting the Right Cheese Fusion for Maximum Flavor
Cheese is where personalization meets tradition. While specific Brazilian cheeses like Minas or Canastra are traditional, a high-quality, flavorful blend works beautifully for the home cook. We rely on a fusion approach here to guarantee both structure and taste.
Must Have Starches: Sourcing Quality Tapioca Flour
As mentioned, the starch is paramount. You will need about 2 cups (250g) of tapioca starch. If you are specifically looking for that classic, slightly tart flavour, seek out sour tapioca starch ( Polvilho Azedo ) .
If you can only find sweet tapioca starch ( Polvilho Doce ), the bread will still work, but it will be slightly denser and lack the characteristic tang.
Dairy Decisions: Milk, Oil, and the Perfect Bind
The liquid component sets the stage for the dough’s texture. Combine 1 cup (240 ml) of whole milk with ½ cup (120 ml) of a neutral vegetable or canola oil, along with 1 teaspoon of fine grain salt. These liquids must be brought to a vigorous, rolling boil before they meet the starch.
The eggs, two large ones lightly beaten, act as the final binder, adding richness and structure once the starch has been pre-cooked.
Essential Kitchen Gear for Successful Batch Prep
You don't need specialized machinery, but a few standard items are non-negotiable. A heavy bottomed saucepan is essential for bringing the liquids to the proper boil without scorching.
A large, heatproof mixing bowl and a sturdy wooden spoon or rubber spatula are necessary for the initial vigorous mixing step the "scalding." Finally, having parchment paper or silicone mats for your baking sheets ensures easy cleanup.
The step-by-step Alchemy: Creating the Pão de Queijo Dough
The process of creating this dough is more akin to making a very thick paste initially, which then transforms into a pliable dough. This method is what ensures that light, airy center often sought after when making Pao de Queijo .
Scalding the Starch: The Critical First Mix
Begin by preheating your oven to 375° F ( 190° C) and lining your baking sheets. Next, pour your 2 cups of tapioca starch into your large mixing bowl. In the saucepan, combine the milk, oil, and salt, and bring this mixture to a full, rolling boil.
Immediately pour this entire hot liquid over the starch. Mix rapidly and forcefully with your wooden spoon until all the flour is hydrated and you have a shaggy, thick, glue like mass. This high heat cooks the starch molecules, beginning the gelatinization necessary for the chew.
Let this mass cool for about 10 to 15 minutes; it should be just warm enough to handle comfortably, but not hot enough to scramble the eggs.
Kneading the Magic: Achieving the Correct Dough Consistency
Once cooled slightly, it’s time to incorporate the wet ingredients. Add your two lightly beaten eggs, mixing thoroughly after each addition until the mixture starts to smooth out.
Finally, fold in 1 ½ cups (150g) of freshly grated cheese a blend of Parmesan for sharp flavour and mild mozzarella for stretch works wonderfully. You may need to switch to using your hands here. The goal is a cohesive, slightly tacky dough that is elastic when pulled.
Portioning and Shaping Your Pão de Queijo Balls
Lightly grease your palms with oil to prevent sticking. Scoop manageable portions of dough, roughly one tablespoon each, and quickly roll them between your hands into smooth, uniform balls, about 1.5 inches in diameter.
Place these uniform balls onto your prepared baking sheets, ensuring they have about an inch of space between them to allow for maximum puffing.
Baking to Golden Perfection: Temperature and Timing Secrets
Baking these cheese puffs requires a steady, moderately high heat to achieve the desired contrast between the crisp exterior and the hollow, chewy interior.
Oven Settings That Guarantee a Hollow, Chewy Center
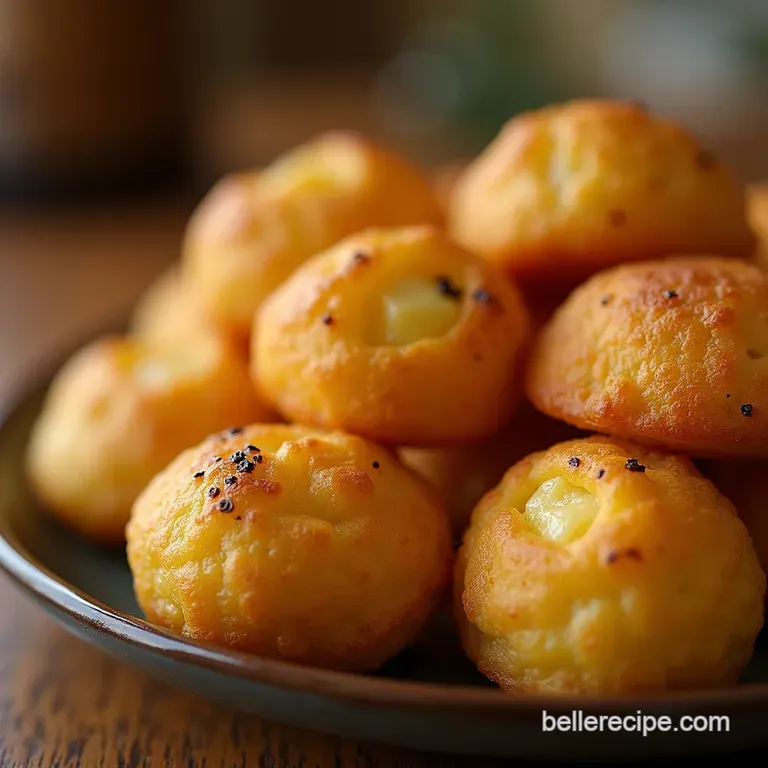
Bake your Pao de Queijo at 375° F ( 190° C) for 20 to 25 minutes. You are looking for them to dramatically inflate, develop a deep golden hue on the exposed edges, and feel relatively light when gently tapped.
Because they lack yeast, they won't rise like traditional bread, but they should gain significant volume. If you are looking for a convenient way to bake them quickly without compromising texture, baking your Pao de Queijo na air fryer is an excellent alternative; aim for about 12– 15 minutes at 350° F ( 175° C), working in batches.
Troubleshooting Common Pão de Queijo Pitfalls
Even with a great Pao de Queijo recipe , hiccups can occur. Knowing how to adjust ensures you always get a fantastic result.
Why Are My Cheese Breads Flat? Fixing Common Dough Issues
Flat puffs usually stem from two primary issues. First, if the dough was too hot when the eggs were added, they can cook slightly, weakening the structure. Second, using too much liquid or not enough starch will result in a runny dough that collapses in the oven.
If your dough feels excessively wet before baking, try incorporating one extra tablespoon of starch to firm it up before rolling.
Best Practices for Freezing Unbaked Pão de Queijo Dough
One of the best features of this recipe is its excellent freezing capability. After rolling the balls, arrange them on a cookie sheet and place them in the freezer until completely solid. Once frozen, transfer them to an airtight freezer bag.
When you crave that warm snack, bake them directly from frozen, remembering to add an extra 5 to 7 minutes to the standard baking time.
Serving Suggestions and Storage Mastery for Your Baked Goods
These cheesy bites are at their absolute peak texture immediately out of the oven, when the interior is still wonderfully elastic.
Pairing Perfection: What Drinks Go Best with These Cheesy Bites?
For an authentic experience, pair your hot Pao de Queijo with a strong, black coffee ( cafezinho ). The robust bitterness cuts through the richness of the cheese beautifully.
For a snack presentation, a simple bowl of fresh tropical fruit like sliced pineapple or passion fruit offers a lovely counterpoint.
Creative Twists on the Classic Brazilian Recipe
While the standard recipe is magnificent, feel free to experiment once you’ve mastered the base technique.
Exploring Cheese Substitutions for Dietary Needs
If you are managing dairy intake, you might wonder about substitutions. Achieving the exact texture without cheese is challenging, but you can enhance the flavour using alternatives. Adding 2 tablespoons of nutritional yeast alongside a small amount of smoked paprika can mimic some of the savoury depth.
Keep in mind that the final Pao de Queijo calories count will shift slightly based on the fat content of your chosen cheese blend.
Pairing Perfection: What Drinks Go Best with These Cheesy Bites?
For an authentic experience, pair your hot Pao de Queijo with a strong, black coffee ( cafezinho ). The robust bitterness cuts through the richness of the cheese beautifully.
For a snack presentation, a simple bowl of fresh tropical fruit like sliced pineapple or passion fruit offers a lovely counterpoint.
Recipe FAQs
Why are my Pão de Queijo flat and not puffed up like they should be?
Usually, this comes down to the scalding process or the starch type. Make absolutely sure you are using sour tapioca starch (polvilho azedo) for that signature elasticity, and ensure the liquid you pour over it is genuinely boiling hot.
If the mixture cools too much before the eggs go in, the starch won't properly gelatinize, leading to squat little cheese hockey pucks instead of airy delights.
Can I make the Pão de Queijo dough ahead of time and bake it later?
Yes, absolutely! These freeze brilliantly, which is handy when you fancy a batch but don't want the fuss right now. Roll the dough into balls, place them on a tray until rock hard, and then transfer them to a freezer bag.
When you’re ready to bake, put them straight onto the baking sheet from frozen just add about 5 to 7 minutes extra to the cooking time.
What's the deal with the tapioca starch? Can I just use regular flour?
Oh no, you mustn't swap it out for plain old all-purpose flour; that would be like putting lukewarm tea in a proper British cuppa a total betrayal! Pão de Queijo relies entirely on tapioca starch (cassava starch) to achieve that wonderfully chewy, stretchy, gluten-free texture.
Regular flour will just make dense, bready rolls.
My dough is too sticky to roll into balls; what am I doing wrong?
Don't panic; this sticky texture is perfectly normal for authentic Pão de Queijo dough! To handle it, you need to lightly grease your hands with a bit of vegetable oil before scooping and rolling.
The stickiness means the ratio is spot on, so fight the urge to add more flour, or you’ll lose that glorious chewiness.
What's the best cheese combination for the most flavourful Pão de Queijo?
While classic recipes often use Minas cheese, a good substitute is a 50/50 mix. Try combining sharp Parmesan for that salty bite with a good melting cheese like low-moisture Mozzarella or even some Monterey Jack. Freshly grated cheese makes a real difference compared to pre-shredded stuff, as it melts better.
Are these cheesy delights high in calories, and are they suitable for vegetarians?
They are a treat, so they have a moderate fat and calorie content due to the cheese and oil think of them as a richer cousin to a scone! As they contain milk and eggs, they are generally vegetarian friendly, but always double check your cheese label to ensure no animal rennet was used if you are strict about vegetarian sourcing.
Easy Pao De Queijo Recipe