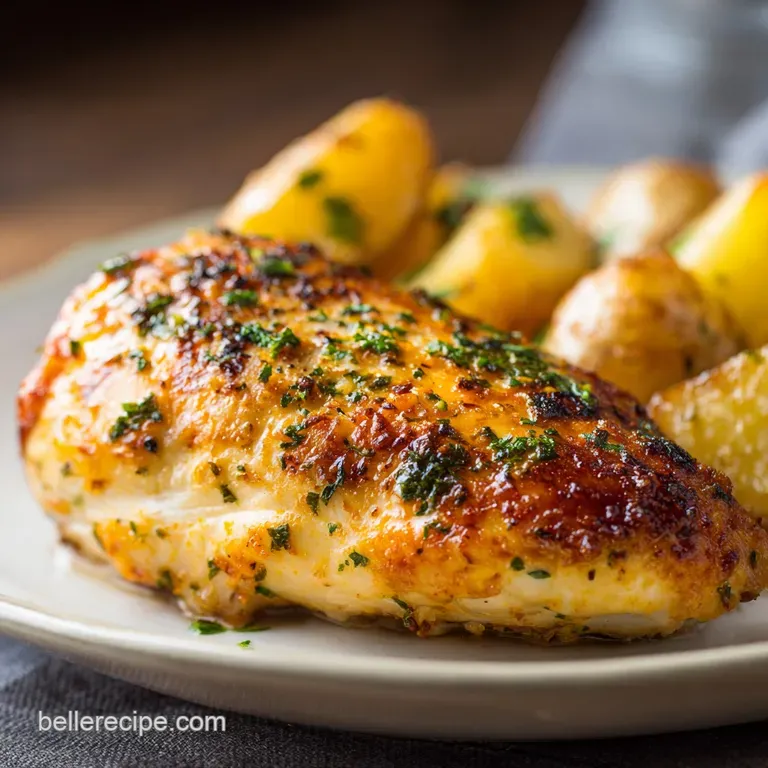
Flavorful Baked Chicken Breast
- Time: Active 10 minutes, Passive 15 minutes, Total 25 minutes
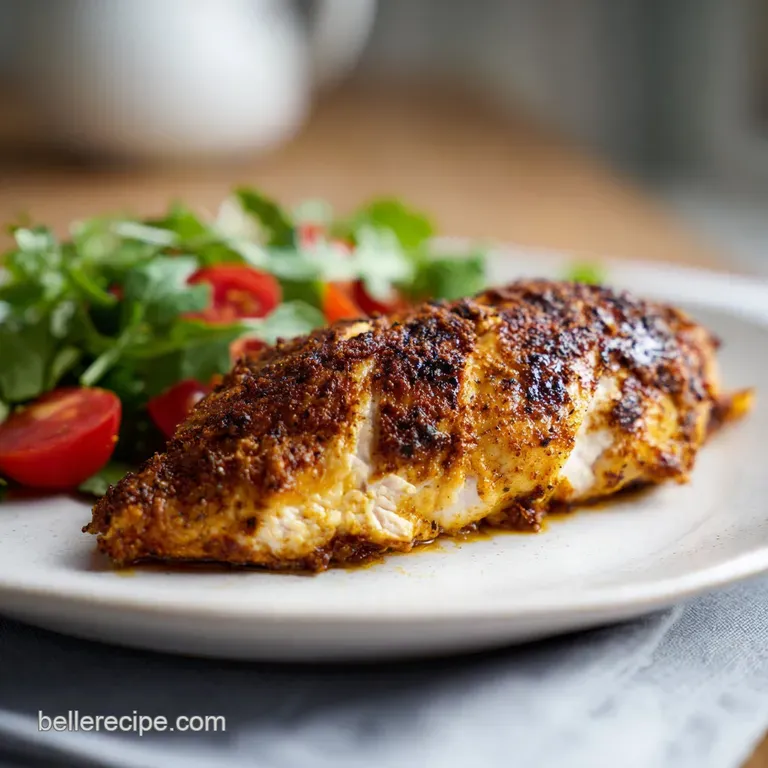
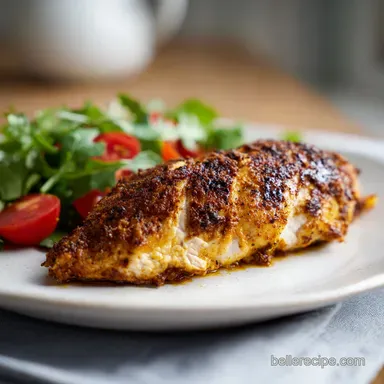
- Flavor/Texture Hook: Zesty, smoky spice crust with a tender, glistening interior
- Perfect for: Busy weeknights, healthy meal prep, or beginner friendly Sunday dinners
- The Physics Of The High Heat Roast
- Vital Timing And Temperature For Succulent Poultry
- Component Analysis Of The Perfect Rub
- Essential Elements For A Flavorful Spice Rub
- Simple Kitchen Tools For Stress Free Cooking
- Step By Step Guide To Oven Roasting Success
- Solving Common Texture Issues With Baked Poultry
- Flexible Variations To Suit Every Family Table
- Debunking Common Kitchen Myths
- Smart Storage Solutions And Leftover Ideas
- Perfect Side Dishes To Complete Your Meal
- Recipe FAQs
- 📝 Recipe Card
There is a specific sound that tells me a kitchen is happy. It is that soft, rhythmic thumping of a meat mallet against a cutting board, followed by the gentle hiss as a tray slides into a hot oven.
For years, I avoided making a simple chicken breast in oven because I was terrified of serving something that looked like a piece of parched driftwood. We have all been there, haven't we? You sit down to a lovely dinner, take a bite, and immediately start looking for a glass of water just to get it down.
It is discouraging and, honestly, a waste of good meat.
But then I learned the trick that changed everything for me. I remember standing in my kitchen on a rainy Tuesday, frustrated with another "health meal" that tasted like cardboard. I decided to stop treating chicken like a delicate flower and started treating it like a steak.
I cranked the heat, balanced the seasoning with a pinch of sugar for browning, and most importantly, I finally used my meat thermometer correctly. The aroma that filled the house was not just "cooked meat," it was smoky, sweet, and deeply savory.
When I pulled that tray out and let it sit for a few minutes, the juices stayed exactly where they belonged. I sliced into it and saw that beautiful, glistening texture we usually only see in restaurants. It was a total lightbulb moment.
Now, I share this Baked Chicken Breast method with everyone who thinks they "can't cook chicken." It is not about luck, it's about a few simple physics rules that anyone can master. Let's get into how we make this happen in your kitchen.
The Physics Of The High Heat Roast
Thermal Momentum: High heat (425°F/220°C) causes the exterior proteins to contract quickly, creating a surface tension that helps hold internal juices in place.
The Maillard Boost: Adding a tiny amount of sugar lowers the temperature needed for browning, allowing the chicken to look golden before the inside becomes overcooked.
| Breast Thickness | Internal Temp | Rest Time | Visual Cue |
|---|---|---|---|
| 1/2 inch | 165°F | 5 minutes | Juices run clear when pierced |
| 3/4 inch | 165°F | 5 minutes | Surface is opaque and firm |
| 1 inch | 165°F | 8 minutes | Spice rub is darkened and set |
This table helps you stay mindful of the most important variable: thickness. If one side of your chicken is twice as thick as the other, the thin side will be dry before the thick side is safe to eat. That is why we use a little bit of physical force to even things out before we ever turn on the stove.
It makes the cooking process predictable and stress free, which is exactly how home cooking should feel.
Vital Timing And Temperature For Succulent Poultry
The biggest mistake I ever made was following those old recipes that told me to bake chicken at 350°F for 45 minutes. By the time the middle is safe, the outside has turned into leather. We want to move fast. Think of it as a sprint, not a marathon. By using a higher temperature, we get that beautiful color on the outside while the inside stays velvety. It is a bit like the technique used in my Boursin Chicken Recipe, where we prioritize keeping that center moist while building flavor on the exterior.
Leveling The Playing Field
Before you even touch the spices, you need a heavy skillet or a rolling pin. Place your chicken between two sheets of plastic wrap. Give the thickest part a few firm whacks. We are not trying to turn it into a pancake, just aiming for a uniform thickness of about 3/4 of an inch.
This ensures every bite of the Baked Chicken Breast cooks at the exact same rate. It is a simple step, but it is the difference between "okay" and "extraordinary."
Securing The Moisture
Once the chicken hits 165°F, it needs to leave the oven immediately. But do not slice it yet. If you cut into it right away, all those precious juices will spill out onto the cutting board. Give it five minutes. This allows the proteins to relax and reabsorb the moisture.
It is the hardest part of the recipe because it smells so good, but trust me, your patience will be rewarded with the most tender meat you have ever tasted.
Component Analysis Of The Perfect Rub
| Ingredient | Science Role | Pro Secret |
|---|---|---|
| Fine Sea Salt | Moisture Retention | Salt denatures proteins, allowing them to hold onto more water during the heat of the oven. |
| Smoked Paprika | Color & Flavor | Provides a deep, earthy red hue that makes the chicken look professionally roasted. |
| Light Brown Sugar | Caramelization | The sugar reacts with the chicken proteins to create a golden crust without adding actual sweetness. |
Chef's Tip: If you have an extra ten minutes, apply the salt and spices to the chicken and let it sit on the counter. This "dry brine" allows the salt to penetrate deeper into the muscle fibers, seasoning the meat from the inside out.
Essential Elements For A Flavorful Spice Rub
We are using simple ingredients that you likely already have in your pantry. The magic isn't in expensive spices; it's in the balance of salt, heat, and sweetness. This specific blend is designed to work with the high heat of the oven to create a crust that has a satisfying snap.
- 4 boneless, skinless chicken breasts (7 oz each): Look for "air chilled" if you can find them. Why this? They don't have added water, so they sear better instead of steaming.
- 1 tbsp extra virgin olive oil: This acts as the glue for our spices. Why this? It has a high enough smoke point for a 15 minute roast.
- 1 tsp fine sea salt: Essential for bringing out the natural flavors.
- 1/2 tsp freshly cracked black pepper: Adds a subtle, woody heat.
- 1 tsp smoked paprika: This provides that "straight from the grill" aroma.
- 1 tsp garlic powder: Adds a savory, umami depth that fresh garlic can't achieve at high heat.
- 1/2 tsp dried oregano: Gives a lovely herbal note that cuts through the richness.
- 1/2 tsp light brown sugar: The secret weapon for that golden brown finish.
| Original Ingredient | Substitute | Why It Works |
|---|---|---|
| Extra Virgin Olive Oil | Avocado Oil | Has a higher smoke point. Note: Very neutral flavor profile. |
| Smoked Paprika | Chili Powder | Adds heat and color. Note: Will be spicier and less smoky. |
| Light Brown Sugar | Honey | Similar caramelization. Note: Can burn easier, so watch closely. |
| Dried Oregano | Dried Thyme | Earthy and floral. Note: Changes the profile to a more French style herb. |
If you find yourself out of brown sugar, don't panic. You can skip it, but your chicken might look a bit paler. It will still taste wonderful, though! The goal is to make a comforting meal with what you have. This flexibility is why I love this version of Baked Chicken Breast.
It is a forgiving recipe that welcomes your personal touch.
Simple Kitchen Tools For Stress Free Cooking
You don't need a professional kitchen to make this work. In fact, a simple rimmed baking sheet is my favorite tool for this. It allows air to circulate around the meat better than a deep casserole dish would.
If you use a deep dish, the sides trap steam, and you'll end up with "boiled" chicken rather than "roasted" chicken.
- Large Rimmed Baking Sheet: Provides enough space so the breasts aren't touching.
- Meat Mallet or Heavy Rolling Pin: To even out the thickness for consistent cooking.
- Instant Read Digital Thermometer: This is the only way to be 100% sure your chicken is done.
- Parchment Paper or Foil: For an easy cleanup (because nobody wants to scrub pans on a Tuesday).
Right then, once you have your tools ready, the process is very fast. I usually preheat the oven as soon as I walk into the kitchen. By the time I've changed out of my work clothes and pounded the chicken, the oven is screaming hot and ready to go.
step-by-step Guide To Oven Roasting Success
- Preheat the oven. Set it to 425°F (220°C). Note: A hot oven is non negotiable for a good sear.
- Level the chicken. Use a mallet to pound the 4 chicken breasts to a uniform 3/4 inch thickness.
- Pat the meat dry. Use paper towels to remove all surface moisture from the breasts. Do this until the surface feels tacky, not slippery.
- Oil the surface. Drizzle 1 tbsp olive oil over the chicken and rub it in with your hands.
- Mix the rub. In a small bowl, combine the salt, pepper, smoked paprika, garlic powder, oregano, and brown sugar.
- Season generously. Sprinkle the spice mix over both sides of the chicken. Make sure every inch is covered in red spices.
- Arrange on the tray. Place the chicken on a parchment lined baking sheet, leaving at least 2 inches between each piece.
- Roast the chicken. Place in the center of the oven and bake for 15 minutes. Wait until the edges are sizzling and the tops are golden.
- Check for doneness. Insert a thermometer into the thickest part. It should read 165°F (74°C).
- Rest before serving. Transfer to a clean plate and tent loosely with foil for 5 minutes. This ensures the juices stay locked inside.
Solving Common Texture Issues With Baked Poultry
Even the best of us run into trouble sometimes. Maybe your oven runs a little hot, or perhaps the chicken breasts were a bit smaller than expected. If things don't go perfectly the first time, don't worry. Most issues with breast in oven can be fixed with a few small adjustments to your technique next time.
Why Your Chicken Is Rubbery
If the meat feels bouncy or rubbery, it usually means it was cooked too slowly at a lower temperature, or it was overcooked past 170°F. When chicken gets too hot, the protein fibers squeeze together like a wrung out sponge, pushing all the water out. The result is a tough, unappealing texture.
Stick to the 425°F temperature and use that thermometer!
Solving Uneven Browning
If one side of your chicken is dark and the other is pale, your oven might have hot spots. To fix this, rotate your baking sheet halfway through the 15 minutes. Also, make sure you didn't skip the brown sugar or the oil.
The oil helps conduct the heat, and the sugar provides the fuel for the browning reaction.
| Problem | Root Cause | Solution |
|---|---|---|
| Dry Texture | Internal temp exceeded 165°F | Pull the chicken at 160°F; carryover heat will finish it. |
| Pale Color | Oven not preheated enough | Use an oven thermometer to verify it actually reached 425°F. |
| Bland Flavor | Spices didn't stick | Pat the chicken drier before adding oil and spices. |
Common Mistakes Checklist
- ✓ Skipping the pounding step (leads to raw centers and dry edges).
- ✓ Using "wet" chicken straight from the package without drying it.
- ✓ Taking the chicken out based on time alone rather than internal temperature.
- ✓ Cutting into the meat the second it comes out of the oven.
- ✓ Overcrowding the pan, which causes the chicken to steam in its own juices.
Flexible Variations To Suit Every Family Table
One of the things I love most about this Baked Chicken Breast is how easy it is to scale up. If you are hosting a larger group or doing meal prep for the week, you can easily double the recipe. Just be mindful that you might need two baking sheets to ensure the chicken isn't crowded.
- Scaling Down (1-2 servings): Use a smaller toaster oven pan. Reduce the bake time by about 2 minutes since smaller pans heat up faster.
- Scaling Up (8+ servings): Use two large sheets. You may need to add 3-5 minutes to the total time if your oven temperature drops from opening the door twice. Keep the spices at a 1.5x ratio for the salt to avoid over seasoning.
- The Spicy Kick: Add 1/4 tsp of cayenne pepper or red chili flakes to the spice rub for a zesty finish.
- Keto/sugar-free: Simply omit the brown sugar. The chicken will still be moist, though it won't brown as deeply.
If you are looking for a more "set it and forget it" style of comfort, you might enjoy learning How to Make recipe which uses a slower cooking method for a completely different texture. But for a fast, punchy protein, this oven baked method is my absolute favorite.
Debunking Common Kitchen Myths
Myth: Searing meat "seals in the juices." This is a very old kitchen tale. Searing actually creates flavor through the Maillard reaction, but it doesn't create an impermeable barrier. Moisture is still lost during cooking.
The reason our chicken stays juicy is because we cook it to the correct internal temperature and let it rest, not because we "sealed" it.
Myth: You must bring chicken to room temperature before baking. For a thin piece like a chicken breast, this actually doesn't make a huge difference in the final result, and it can be a food safety risk if left out too long.
You can take it straight from the fridge to the oven, provided you have pounded it to a uniform thickness.
Myth: Washing chicken makes it safer. Please, don't do this! Washing chicken in the sink actually spreads bacteria around your kitchen through water droplets. The heat of the oven is what makes the chicken safe to eat. Just pat it dry with paper towels and discard them immediately.
Smart Storage Solutions And Leftover Ideas
If you have leftovers, you are in luck. This chicken stays remarkably tender even after a day or two in the fridge. I love slicing it thin for salads or dicing it up for a quick pasta dish the next day. It is a fantastic way to reduce food waste while keeping your mid week lunches exciting.
- Fridge Storage: Place in an airtight container for up to 4 days.
- Freezer Storage: Wrap tightly in plastic wrap and then foil. It will stay good for up to 3 months. Thaw in the fridge overnight before reheating.
- Reheating: Avoid the microwave if possible, as it can make the chicken rubbery. Instead, place it in a 350°F oven with a splash of water or chicken broth covered with foil for about 10 minutes.
- Zero Waste Tip: If you have any spices left over on the baking sheet, toss some halved cherry tomatoes or sliced zucchini in those juices and roast them for a quick side dish while the chicken rests!
Perfect Side Dishes To Complete Your Meal
Because this chicken has those smoky, savory notes from the paprika and garlic, it pairs beautifully with almost anything. I personally love serving it alongside a bright, crisp green salad or some roasted root vegetables.
The simplicity of the chicken allows the side dishes to shine, making it the perfect anchor for a balanced plate.
If you want something heartier, it goes wonderfully with a creamy starch. I often serve this with a side of garlic mashed potatoes or even a simple lemon risotto. If you are in the mood for a classic casserole vibe, you could even slice this up and serve it alongside my Cozy Chicken Pot Pie recipe for a real feast.
Cooking shouldn't be about perfection; it should be about sharing something mindful and comforting with the people you love. Whether you are making this for a quick Tuesday night dinner or prepping for a busy week ahead, I hope this method brings as much joy (and as much juice!) to your table as it does to mine.
Trust your thermometer, don't forget to rest the meat, and enjoy every single bite. Happy cooking!

Recipe FAQs
How long does it take to bake a chicken breast at 400 in the oven?
It is generally too hot; aim for 425°F for faster, juicier results. At 400°F, a 3/4 inch breast will take about 18 22 minutes, but you risk drying the edges before the center is done.
Is it better to bake a chicken at 350 or 400?
Neither; 425°F is better for a juicy finish. Higher heat seals the exterior proteins faster, preventing excessive moisture loss during the cook time. Lower temperatures run the risk of drying out the meat.
How long does it take to cook a chicken breast on 350?
Expect 20 to 30 minutes, but always trust your thermometer. At 350°F, the cook time is highly variable based on thickness, usually requiring patience to reach the safe 165°F internal temperature without drying out.
Is 30 minutes at 400 enough for chicken breast?
Possibly, if the breasts are very thin (1/2 inch or less). For standard 1 inch breasts, 30 minutes at 400°F will likely result in an internal temperature over 170°F, leading to tough meat.
What is the secret to keeping baked chicken breast juicy?
The secrets are uniform thickness and immediate resting time. Pounding the chicken evenly ensures zero variation in cooking time, and resting for 5 8 minutes allows the muscle fibers to reabsorb internal juices.
Should I pound chicken breasts before baking?
Yes, pounding is essential for consistent heat penetration. This technique prevents the thinner end from becoming dry while the thickest part reaches a safe temperature; mastering this skill applies directly to techniques in our Easy & Juicy Baked recipe.
What is the safe internal temperature for baked chicken breast?
The required minimum is 165°F (74°C) in the thickest part. Remove the chicken from the oven when it reads 160°F; the temperature will safely climb to 165°F during the resting period.
Baked Chicken Breast Quick Roast
Ingredients:
Instructions:
Nutrition Facts:
| Calories | 278 kcal |
|---|---|
| Protein | 46 g |
| Fat | 8.8 g |
| Carbs | 1.2 g |
| Fiber | 0.3 g |
| Sugar | 0.6 g |
| Sodium | 675 mg |
