No Bake Cookies: the Chewy, Fudgy Classic Chocolate Peanut Butter Recipe
- The Definitive Guide to Flawless No Bake Cookies
- The Science Behind the Fudgy, Chewy Texture
- Essential Ingredients for Classic No Bake Cookies and Key Substitutions
- Method: From Stove Top to Sheet Pan in 10 Minutes
- Troubleshooting Your No Bake Cookies: Why They Won't Set (Or Are Too Dry)
- Longevity and Shelf Life: Storing Your Peanut Butter Treats
- Recipe FAQs
- 📝 Recipe Card
The Definitive Guide to Flawless No Bake Cookies
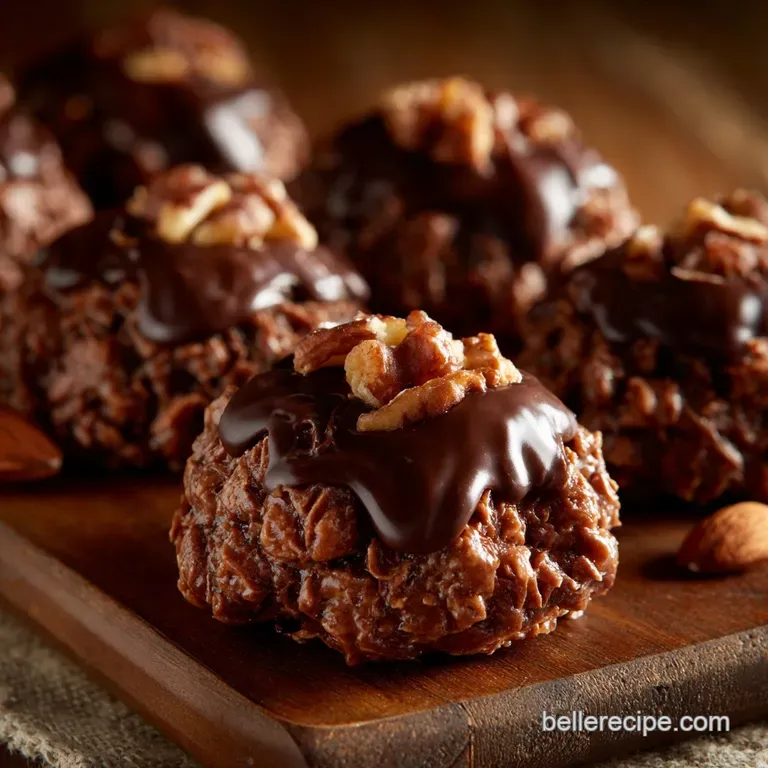
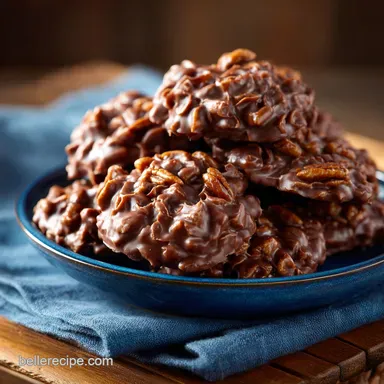
That incredible aroma of melting butter and cocoa filling the entire kitchen it’s pure childhood joy, isn't it? These cookies are intensely chewy and have the perfect fudgy texture, totally unlike any regular baked drop cookie. Trust me, when they set correctly, the texture is absolutely everything here.
Who needs an oven when the intense sugar craving hits hard? This classic no-bake cookie recipe is a serious lifesaver, ready in under an hour from start to set. It’s remarkably cheap, incredibly fast, and requires zero fancy baking techniques, which is why I’ve personally made thousands of batches over the years.
But here is the absolute truth: while they don't go in the oven, they do require precision on the stovetop. Forget the myth that these are easy to perfect every time success is entirely dependent on nailing that exact 60 second boil. Let's crack on and master this definitive method, because even if you love making something like my Ultimate Edible NoBake Cookie Dough Safe Buttery and Ready in Minutes , sometimes you just need that crunchy oat factor.
The Science Behind the Fudgy, Chewy Texture
The Magic of the "60 Second Set" (Timing is Everything)
This specific timing is the non-negotiable step that determines everything, folks. We are aiming for a precise sugar concentration level by allowing enough water to evaporate from the syrup base. This crucial minute ensures the sugar crystals form a stable structure when the mixture cools.
If you mess up the mark, you end up with either cookies that crumble into dry powder or cookies that stay gloopy and never set.
Dispelling the Myth: No-Bake Cookies Require Precision
People assume the name "no-bake" also means "no-rules," but that is exactly where failure lurks. This is not a casual stir and dump situation; it's practically a condensed candy making process. The speed at which you mix and drop the finished mixture is just as critical as the exact boil time itself.
A Brief History of the Classic Chocolate Peanut Butter Treat
These wonderful cookies really took off in popularity around the mid-20th century, largely as a quick answer to summer heat. Back then, running the oven was a nightmare in July. They are a true classic example of ingenuity, stretching inexpensive pantry staples like quick oats and sugar into a deeply satisfying dessert.
They are pure, sweet nostalgia served on parchment paper.
Crystallization Control: Mastering the Sugar Boil
When the sugar mixture hits the boil, we are purposefully triggering crystallization. Boiling the mix for too long creates too many tiny sugar crystals, which results in a brittle, dry, and grainy cookie.
Boiling for too little time means the necessary crystals never fully form, and you end up with a sticky, floppy mess. Sixty seconds is the non-negotiable sweet spot for achieving that perfect, chewy fudge texture.
The Role of Peanut Butter and Oats in Binding (Fats and Fiber)
The fat content locked up in the peanut butter and the fiber found in the oats act as our essential binding agents. Peanut butter provides that necessary fudgy creaminess and richness, interrupting the sugar crystallization just enough to keep things beautifully soft.
Meanwhile, the oats are the structural framework, soaking up all that hot sugar syrup and giving the finished cookie its recognizable shape.
Achieving the Perfect Soft Ball Stage Consistency (Without a Thermometer)
We truly don't need a clunky candy thermometer here, thankfully. The combined 60 second rule and the visual cue of a rolling boil effectively simulate reaching the soft ball stage. That temperature ensures the mixture is stable and sets up without making the final product hard like rock candy.
Essential Ingredients for Classic No Bake Cookies and Key Substitutions

Selecting the Right Oats: Quick vs. Rolled Varieties
You absolutely must use quick cooking rolled oats, which are the thinner, chopped variety. Old-fashioned rolled oats are far too thick and chewy; they won't absorb the syrup fast enough to bind correctly before it cools.
I’m serious: Do not, under any circumstances, use steel cut or instant flavored oats.
Understanding Fat Content: Butter vs. Margarine Breakdown
Real unsalted butter is always king here for both flavor and setting quality. If you are forced to use margarine, choose a high-quality stick variety with minimal water content. Avoid the tub spreads entirely their water content will ruin your set every single time.
Dairy Details: Milk Fat Percentage and Setting Time
Whole milk works best because its higher fat content contributes dramatically to the final fudgy mouthfeel. If you are using lower fat milk, you might need to compensate by adding just a tiny tablespoon more oats, or slightly extending the boil to 70 seconds.
Cocoa Powder Choice: Natural vs. Dutch Process Considerations
I usually grab natural cocoa powder for this specific recipe; it tends to have a slightly sharper, more complex chocolate flavor that cuts beautifully through the extreme sweetness. Dutch process cocoa is definitely fine if that's all you have, but it tends to produce a deeper, milder chocolate note.
| Ingredient | Substitute | Note |
|---|---|---|
| Whole Milk | Oat milk or Almond Milk | Use full fat varieties for best texture results. |
| Peanut Butter | Sunflower Seed Butter | The standard creaming style works perfectly for allergy friendly swaps. |
| Quick Oats | Certified GF Quick Oats | Double check the label if serving someone gluten sensitive. |
| Unsalted Butter | high-quality Vegan Stick Butter | Avoid soft, water heavy margarines in tubs. |
Method: From Stove Top to Sheet Pan in 10 Minutes
Stage One: Melting and Mixing the Liquid Components
In your heavy bottomed pot, combine the granulated sugar, milk, cubed butter, cocoa powder, and salt. Place this over medium heat and stir constantly. You need to ensure every bit of sugar is fully dissolved before the mixture ever comes to a boil this is the secret to preventing a terrible grainy cookie later on.
The Critical 60 Second Full Boil Timer
Once the mixture hits that aggressive, rolling boil that doesn't stop bubbling even when you stir, immediately hit your timer. Set the clock for exactly 60 seconds and keep stirring vigorously the entire time.
I once pulled the pan off at 45 seconds, thinking it was enough, and ended up with a giant chocolate puddle I had to scoop into a bowl. Learn from my mistake, friend.
Folding in the Peanut Butter and Dry Ingredients Gently
As soon as the timer sings its sweet 60 second song, yank that entire pot off the heat source! Quickly stir in the vanilla extract and the creamy peanut butter until the mixture is perfectly smooth and glossy.
Then, dump in the oats all at once and mix rapidly using a spatula until every single oat is coated in the chocolate syrup.
Spoon Dropping and Speed: Setting Up for Success
Speed is your enemy’s enemy right now; you must work quickly. This delicious mixture starts setting up almost immediately in the pot, so you must drop those mounds fast onto the parchment paper. If the batter cools too much on the stove, it becomes impossibly stiff and unmanageable.
Chef's Note: If your batter suddenly gets too stiff to drop properly, you can try adding one tablespoon of hot milk and stirring it vigorously to loosen the mixture up slightly. This might marginally soften the final set, but it absolutely saves the entire batch.
Troubleshooting Your No Bake Cookies: Why They Won't Set (Or Are Too Dry)
The Humidity Hurdle: Adjusting Boil Time for High Moisture Days
High humidity is the silent killer when making no-bake cookies. Water vapor in the air prevents the necessary moisture evaporation from your hot syrup mixture. If you are attempting this recipe on a rainy or super humid day, increase the boil time from 60 seconds to a safer 75 seconds to compensate.
Fixing a Batch That Refuses to Harden
If your cookies are still soft, mushy, and squishy after sitting out for a full hour, they were definitely under boiled. There is only one rescue attempt I trust: Scrape them all back into the saucepan, add 2 extra tablespoons of granulated sugar, and bring the mixture back to a very fast, 30 second boil .
Immediately remove it, re-mix the oats quickly, and drop them again.
Preventing the Grainy, Sugary Texture
Graininess happens when the sugar crystallized too early or way too much during the process. The fix is two-fold: First, ensure you dissolved the sugar fully before the boil phase. Second, don't stir the mixture too aggressively or for too long while it’s cooling before you add the oats.
This minimizes premature crystal formation.
Longevity and Shelf Life: Storing Your Peanut Butter Treats
Ideal Airtight Conditions for Short Term Storage
Store completely cooled and fully set cookies in an airtight container at room temperature for up to 3 days. If your kitchen happens to be very warm or if you live in a perpetually humid climate, move them to the fridge to prevent them from softening prematurely.
Freezing Instructions for Long Term Enjoyment
But does it freeze well? You bet your sweet oats it does! Place fully set cookies in a single layer on a sheet pan and freeze them until they are completely solid. Then, transfer them into a freezer safe zip-top bag, layered between sheets of wax paper. They stay perfectly delicious for up to 3 months. For another great freezer friendly treat, check out my recipe for Truly Reliable Rolled Sugar Cookies Recipe No Spread .
Perfect Pairing: Beverages That Complement the Rich Chocolate
Milk is the obvious and essential choice, naturally. But if you want to get a little fancy, a cold brew coffee or even a light, tart homemade lemonade cuts through the extreme richness beautifully. For a total, delicious comfort food moment, you can make a batch of these right after you finish your Easy Baked Chili Cheese Dog Sliders Recipe Comfort Food Fix — it’s the perfect sweet chaser.

Recipe FAQs
Why are my No-Bake Cookies dry, crumbly, and won't hold their shape?
This is the most common issue and usually means you boiled the sugar mixture too long or at too high a temperature. Over boiling evaporates too much moisture, causing the sugar to crystallize rapidly when cooled, resulting in a sandy texture.
To fix this, ensure the mixture only reaches a full rolling boil for exactly 60 seconds, no more.
My cookies are too sticky and wet; they haven't set up even after several hours. What went wrong?
The mixture was likely under boiled, meaning the sugar did not reach the high temperature needed for the chemical setting reaction to occur properly. High ambient humidity can also drastically slow down setting time, making the cookies seem perpetually soft.
If the batch is completely unsalvageable, return the mixture to the stove, bring it back to a rolling boil, and boil for an additional 30 seconds before immediately re-scooping.
Can I successfully make No-Bake Cookies vegan or dairy-free?
Absolutely, this recipe adapts very well to dietary substitutions, requiring only two key ingredient swaps. Replace the dairy milk with equal parts non-dairy milk (oat or soy work best for their higher fat content), and substitute the butter with high-quality vegan butter sticks or refined coconut oil.
Ensure your granulated sugar is certified vegan if necessary.
How should I store these cookies, and how long do they stay fresh?
Store No-Bake Cookies in an airtight container at room temperature for up to 3 days, or refrigerate them for up to one week for optimum freshness. Keeping them cool in the refrigerator helps maintain their structure and chewy texture, which is especially important during warmer weather.
Always separate layers with parchment paper to prevent sticking.
Should I use quick oats or old-fashioned rolled oats for the best texture?
Old-fashioned rolled oats are highly recommended because their thicker structure provides the necessary chew and body to the final cookie. While quick oats can be used in a pinch, their smaller size causes them to absorb the hot liquid too rapidly, often resulting in a mushy or excessively crumbly end product.
Always stick to the older style for a definitive texture.
Can I substitute a different nut butter for peanut butter, such as almond or sunflower seed butter?
Yes, you can substitute other nut or seed butters, but pay close attention to the texture and sweetness. If using a natural, drippy butter, you might need to slightly increase the oats by a tablespoon or two to compensate for the higher oil content.
Alternatively, a thicker butter might require a splash more milk to ensure the final mixture is pliable for scooping.
Is it safe to eat the oats without them being baked in an oven?
Yes, the oats are completely safe because they are technically “cooked” by the high temperature of the boiling sugar, butter, and milk mixture. The residual heat from the molten fudge base is sufficient to soften and pasteurize the rolled oats, making them ready for consumption without needing an oven.
This process ensures both safety and a pleasing, softened texture.
Classic Peanut Butter No Bake Cookies
Ingredients:
Instructions:
Nutrition Facts:
| Calories | 180 kcal |
|---|---|
| Protein | 3.0 g |
| Fat | 12.0 g |
| Carbs | 16.0 g |
