Classic Tamagoyaki: a Delightful Japanese Rolled Omelette

A Taste of Japan: Classic Tamagoyaki
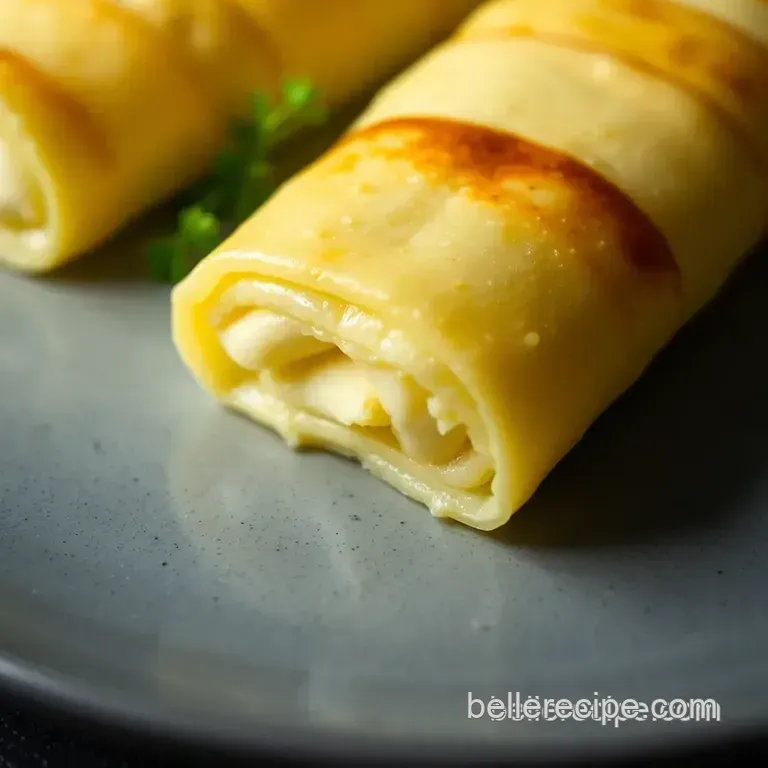
Oh my gosh, if you haven't tried tamagoyaki recipes yet, you’re missing out! this classic japanese rolled omelette is like a little flavor party in your mouth, with its slightly sweet and savory taste.
Honestly, it's a showstopper, both for breakfast and dinner parties. plus, once you nail that rolling technique, you’ll feel like a culinary ninja!
What’s the Buzz?
Tamagoyaki is more than just a breakfast dish; it's a beloved staple in japanese food culture. traditionally served at breakfast or in a bento box, this dish has layers of history and flavor.
This ain't no plain old omelet, folks! the delicate layering and unique flavor from the dashi stock make it special.
Worried about skill level? don’t be! the difficulty is marked as medium. sure, it may take a few tries to get those rolls just right, but i promise it’s totally worth it!
You'll put together this dish in about 25 minutes and voilà, you’ve got yourself a dazzling entrée for about four servings .
Why You’ll Love It
Let’s talk health for a second. tamagoyaki is packed with protein from those eggs, making it a nutritious option to fuel your day! you can serve it for breakfast or as a side dish, and it’s fancy enough to impress your dinner guests without being a total kitchen nightmare.
Trust me, bringing this jewel of japanese food recipes into your kitchen is a game changer. what makes tamagoyaki so special is its versatility.
You can enjoy it warm, room temperature, or even cold! it just fits in anywhere from a cozy morning meal to that elegant dinner party you’ve been planning!
Let’s Get Cooking!
Ready to crack those eggs? good news: the ingredients are super simple and likely already in your kitchen. get prepped, roll up your sleeves, and let’s dive into this delectable dish.
I can’t wait for you to try it!
Remember, practice makes perfect, and soon enough, you’ll be serving up those beautiful layers of tamagoyaki like a pro. So grab your pan, and let’s get started!
Ingredients & Equipment for Classic Tamagoyaki
Making tamagoyaki is an adventure, and the right ingredients and tools are like having a trusty sidekick in the kitchen.
If you're diving into this delicate japanese rolled omelette, let's make sure you're fully equipped. here’s the scoop!
Main Ingredients for Tamagoyaki
To get started, here’s what you’ll need:
- 4 large eggs (around 200g ), preferably organic. Freshness makes a difference!
- 2 tbsp (30ml) dashi (Japanese soup stock) or plain water. Dashi gives that umami flavor that’s hard to beat!
- 1 tbsp (15ml) soy sauce. A splash of this adds depth.
- 1 tbsp (12g) sugar. Just a pinch of sweetness to balance everything out.
- 1/2 tsp (2g) salt. Seasoning is key, folks!
- 1 tsp (5ml) vegetable oil for cooking. This helps with that non-stick magic.
It’s super important you grab high-quality eggs . you want them to be fresh and flavorful. look for organic or free range eggs if possible.
And for that dashi, if you can snag some authentic japanese stuff, do it! if not, use water as a backup.
Seasoning Notes
Now, for the spices and flavor boosters:
- Essential Spice Combo: Just soy sauce and a hint of sugar work wonders. But feel free to get adventurous!
- Flavor Enhancers: That dashi is the secret weapon. It’s like a flavor hug for your tamagoyaki.
- Quick Substitutions: Don’t have dashi? Chicken or vegetable broth will do in a pinch. And if you’re out of sugar, a dash of honey or agave is a solid swap.
Equipment You’ll Need
Alright, let’s talk tools. Here’s what you’ll ideally want in your pantry:
- Non-stick rectangular tamagoyaki pan: If you can grab one, this is perfect. But hey, a regular non-stick skillet works just fine, too!
- Whisk or fork: For beating those eggs together.
- Spatula: You'll use this to roll your omelette like a pro.
- Heatproof bowl: For that egg mixture.
- Chopsticks or tongs (optional): They can be handy for rolling, but a spatula does the job great!
Honestly, don't stress if you don’t have all the fancy stuff. Most of us have regular kitchen tools that can get the job done.
Final Thoughts
Cooking tamagoyaki is all about embracing the process. you might mess up a roll or two, but that’s how we learn! each layer is a chance to improve.
Just think about the joy of serving your friends a dish that's not just tasty but also super impressive! once you’ve nailed the tamagoyaki recipes , you’ll be whipping it up for breakfast, lunch, or even a fun dinner party.
So gather your ingredients, pull out that skillet, and let’s get cooking!
Cooking Method for Classic Tamagoyaki
Prep Steps
Mise en place is key when making your tamagoyaki recipes . Gather everything: eggs, dashi stock or water, soy sauce, sugar, and salt. Trust me, it saves time and headache later!
Now, for a couple of time saving organization tips crack those eggs in a bowl first and whisk ’em up before anything else.
It gets that process out of the way and ensures a smooth cooking session. plus, oh my gosh, it’s much easier to control the pouring.
And let’s not forget the safety reminders : you’re dealing with a hot pan, so be super careful. I’ve had my fair share of “oops” moments, and trust me, they sting!
Step-by-step Process
Whisk together 4 large eggs with 2 tbsp dashi, 1 tbsp soy sauce, 1 tbsp sugar, and 1/2 tsp salt in a bowl until well combined.
Preheat your pan over medium heat. Add 1 tsp vegetable oil and spread it ’round. It should shimmer this means you’re ready to roll...literally!
Pour a thin layer of the egg mixture (just enough to cover the base) into the pan. cook until the edges set, but the center is still a bit runny .
You’re looking for that perfect balance.
Roll it up! using a spatula or chopsticks (a.k.a. your new best friends), gently roll the cooked egg layer away from you to form a log.
Push it to one side of the pan.
Add more egg to the empty side of the pan. Lift the rolled omelet just enough to let the uncooked egg flow beneath.
Keep on rolling . Repeat the cooking and rolling process until all the egg mixture is used up. Remember: patience is key for a lovely layered look!
Let it rest . Once cooked, place the roll on a cutting board for a couple of minutes. This helps hold its shape when you slice.
Slice and serve ! Cut the tamagoyaki into bite sized pieces. It’s warm, sweet, and oh-so-delicious perfect as part of your Japanese breakfast spread.
Pro Tips
For those looking to step up their game , use fresh, organic eggs for the best taste. Trust me once you’ve tried it, there’s no going back to regular eggs!
Also, control your heat ; if the omelette starts browning too quickly, lower it. You don’t want a burnt taste messing with your beautiful dish!
And if you’re busy, consider make-ahead options ! Tamagoyaki can be enjoyed cold and still taste amazing. Slice and store for a bento box or quick breakfast.
Finally, avoid the common mistake of a too-thick layer of egg. Thin layers ensure that your omelette rolls up beautifully no broken dreams here!
So, ready to impress at your next dinner party with these easy Japanese recipes ? Grab your ingredients, follow these steps, and let’s get rolling!
Recipe Notes for Tamagoyaki Lovers
Serving Suggestions
Alright, so you’ve got your tamagoyaki all rolled up and gorgeous. now, how do you plate it? first off, slicing it into bite sized pieces makes it easy to serve.
Think of a beautiful bento box filled with vibrant colors: maybe some grilled veggies alongside or a scoop of fluffy steamed rice.
And don't forget the pickled ginger! it adds a nice zing. if you’re feeling fancy, a splash of green tea or even some chilled sake can elevate the mood perfect for a cozy dinner party.
Storage Tips
Okay, question time: what do you do with those perfectly cooked leftovers? put that masterpiece in an airtight container and pop it in the fridge.
It’ll keep for about 3 days . wanna stretch it longer? you can freeze slices for up to a month, just make sure to wrap them tightly! when you’re ready to chow down, just reheat in a non-stick pan for a few minutes, and voilà your tamagoyaki is good as new!
Variations
Now, for the fun part! tamagoyaki recipes can totally change with the seasons. try adding in some sautéed greens in the spring or sweet corn in the summer for that fresh feel.
Or if you’re vegan, don’t sweat it! swap out traditional eggs for a chickpea flour mix, and you've got a bomb vegan tamagoyaki.
Seriously, you can’t go wrong with switching things up!
Nutrition Basics
Let’s talk nutrition because, hey, the biggest reason we love this dish is its deliciousness and benefits! for about 130 calories per serving, you’re scoring 10g of protein with those eggs while enjoying those cozy umami notes from the dashi.
They say eggs can help boost your mood, plus they provide the good fats your body needs. when you're diving into these japanese food recipes , remember you're not just eating; you're nourishing your body too!
Wrapping It Up
So there you have it! with these tips sprinkled throughout your cooking journey, you’re sure to impress with your tamagoyaki game.
Whether it's a quick breakfast or a notable dish for a dinner party, this recipe is a classic that’ll have everyone coming back for seconds.
Don't stress about perfection; just enjoy the process of creating! remember, cooking is all about love and fun, so roll away, my friend!
Frequently Asked Questions
What are some common tamagoyaki recipes and variations?
Tamagoyaki can be made in various styles! Some popular variations include adding chopped scallions, shrimp, or even a drizzle of mirin for extra sweetness. You can also try a vegan version using chickpea flour to achieve a similar texture.
The beauty of tamagoyaki recipes is how adaptable they are to your taste preferences!
How do I prevent my tamagoyaki from sticking to the pan?
Using a non-stick pan is key! Make sure to heat the pan properly and add a small amount of vegetable oil before pouring in the egg mixture. If you find it sticking, you might not have oiled it enough or may need to adjust the heat for better cooking control.
Can I store leftover tamagoyaki, and if so, how?
Absolutely! You can store leftover tamagoyaki in an airtight container in the fridge for up to 2 days. Just reheat in a non-stick pan over low heat to avoid drying it out. For best results, slice it only when you're ready to enjoy it to keep it fresh!
What is the best way to achieve the perfect texture for tamagoyaki?
The key is in the cooking technique! Ensure you whisk the eggs thoroughly to incorporate air, and cook each layer just until set but still slightly runny before rolling. Patience is crucial; take your time with each layer and control the heat to avoid browning too quickly.
Are there any nutritional considerations I should keep in mind with tamagoyaki?
Tamagoyaki is relatively nutritious, providing a good source of protein and healthy fats, especially if you use organic eggs. However, bear in mind the sodium content from soy sauce; you can always opt for low-sodium versions or tamari to reduce it.
It's a lovely treat but enjoy in moderation, especially if you're watching your salt intake!
What equipment do I need to make tamagoyaki?
A non-stick rectangular tamagoyaki pan is ideal, but you can also use a regular non-stick skillet. You’ll need a whisk or fork for mixing, a spatula for rolling, and possibly cooking chopsticks if you prefer a more traditional handling method. All in all, it's quite straightforward!
Classic Tamagoyaki A Delightful Japanese Rolled