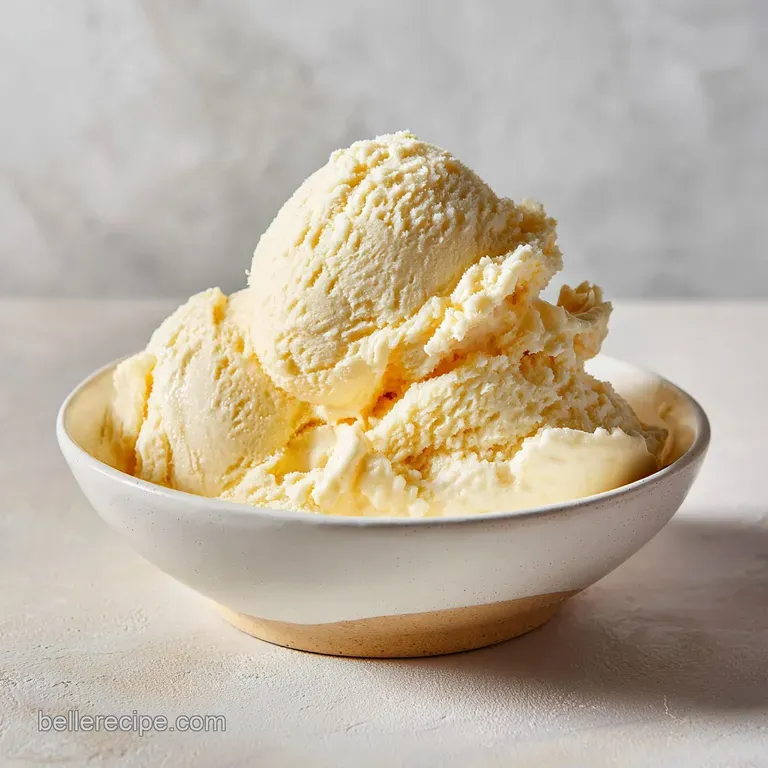
Homemade Ice Cream: Velvety Vanilla Finish
- Time: Active 5 minutes, Passive 4 hours 20 mins, Total 4 hours 25 mins
- Flavor/Texture Hook: Buttery vanilla with a velvety finish
- Perfect for: Family celebrations and warm summer evenings
- Creating the Most Velvety Homemade Ice Cream
- Why This Simple Method Succeeds
- Crucial Specs for Churning Success
- Selecting the Best Quality Ingredients
- Essential Tools for Better Scooping
- Step-by-Step Guide to Churning
- Fixing Common Frozen Dessert Issues
- Easy Ingredient Swaps and Additions
- Storing Cold Homemade Treats
- Ideal Pairings for Every Scoop
- Myths About Churning at Home
- Recipe FAQs
- 📝 Recipe Card
Creating the Most Velvety Homemade Ice Cream
Remember that soft, muffled "shush" sound a wooden churn makes? I grew up with that sound every Sunday afternoon. We would gather on the back porch, taking turns cranking until our arms felt like jelly.
There is something deeply grounding about watching liquid cream transform into a thick, frosty cloud right before your eyes. It isn’t just about the sugar, though that helps, it’s about the quiet patience and the shared anticipation of that first cold bite.
I have had my share of icy disasters and batches that tasted more like frozen butter than a treat. But after years of trial and error, I finally found the sweet spot. You don't need a fancy lab or a culinary degree to learn how to make cream ice that rivals the high end shops.
In fact, keeping things simple is usually the secret. I'll show you exactly how to make cream ice that stays soft enough to scoop but rich enough to feel like a real indulgence.
Why This Simple Method Succeeds
It’s easier than you think to make cream ice at home once you understand what is happening inside the bowl. When you make cream ice from scratch, you are essentially managing three things: fat, sugar, and air.
- Fat Stabilization: The high ratio of heavy cream to milk ensures that fat globules coat the air bubbles, creating a structure that feels rich on the tongue.
- Crystal Inhibition: Using sugar and salt lowers the freezing point, which prevents the water in the milk from turning into large, crunchy ice shards.
- Aeration Control: Constant churning incorporates "overrun," which is just a fancy way of saying air, giving the final product its light and scoopable nature.
| Feature | Fast Method | Classic Method | Visual Cue |
|---|---|---|---|
| Texture | Soft serve style | Firm and dense | Holds shape on a spoon |
| Prep Time | 5 minutes | 30 minutes | Liquid vs thickened base |
| Richness | Clean and light | Deep and buttery | Coats the back of a spoon |
Crucial Specs for Churning Success
The science behind the scoop is all about temperature control. If your base is too warm, the air won't stay trapped. If your bowl isn't cold enough, you'll end up with a slushy mess instead of a firm dessert. When you make cream ice at home, focus on these three numeric checkpoints to ensure success every time.
The Physics of the Freeze
The magic happens when the liquid base hits the freezing walls of the canister. This process must happen quickly to keep ice crystals small. Small crystals equal a smooth texture, while large crystals feel like sand.
Component Analysis
| Ingredient | Science Role | Pro Secret |
|---|---|---|
| Heavy Cream | Provides fat structure | Use at least 36% milkfat for best results |
| Whole Milk | Thins the fat for flow | Never use skim; it creates icy shards |
| Vanilla Bean Paste | Flavor and texture | The tiny seeds add a visual gourmet touch |
Many people ask if they can use different sweeteners or dairy types. While you can swap things around, keep in mind that the fat content is what prevents that "icy" feeling. If you are looking for a similar flavor profile for a filling instead of a frozen treat, you might enjoy my My GoTo Cream recipe which uses similar ingredients in a cooked form.
Selecting the Best Quality Ingredients
To make cream ice that truly stands out, you need to start with the freshest dairy you can find. Since there are so few ingredients, there is nowhere for low quality flavors to hide.
- 2 cups heavy whipping cream: This is your primary fat source. Why this? Provides the "mouthfeel" and prevents the mixture from freezing into a solid block.
- 1 cup whole milk: This balances the richness. Why this? Adds enough water content to allow for proper air incorporation during churning.
- 3/4 cup granulated sugar: Your primary sweetener. Why this? Beyond sweetness, it acts as an antifreeze to keep the scoop soft.
- 1 tbsp pure vanilla bean paste: For that deep flavor. Why this? Paste offers a stronger punch and pretty flecks compared to standard extract.
- 1/4 tsp fine sea salt: The flavor enhancer. Why this? Just a pinch makes the vanilla taste more like itself and balances the sugar.
| Original Ingredient | Substitute | Why It Works |
|---|---|---|
| Heavy Cream | Coconut Cream | High fat content. Note: Will add a distinct coconut flavor. |
| Whole Milk | Half and Half | Increases richness. Note: May require 5 minutes less churning time. |
| Vanilla Paste | Vanilla Extract | Same flavor profile. Note: You will miss the visual bean flecks. |
Essential Tools for Better Scooping
You don't need a professional kitchen, but a few specific items make the process much smoother. I personally use a canister style maker, but the principles remain the same regardless of your gear.
- Electric Ice Cream Maker: This handles the churning so you don't have to crank by hand.
- Large Mixing Bowl: Use glass or stainless steel to keep the ingredients cold while mixing.
- Whisk: A sturdy whisk helps dissolve the sugar completely before the freezing begins.
- Airtight Storage Container: A shallow, long container works best for even freezing and easier scooping later.
Chef's Tip: Put your storage container in the freezer about 20 minutes before you start churning. Transferring finished ice cream into a warm container causes immediate melting, which leads to ice crystals later.
step-by-step Guide to Churning

- Whisk the liquids. Combine the whole milk, granulated sugar, and sea salt in a large bowl. Whisk until you no longer feel the grit of the sugar at the bottom.
- Add the richness. Pour in the heavy whipping cream and the vanilla bean paste. Note: Adding the cream last prevents you from accidentally whipping it into butter while dissolving the sugar.
- Chill the base. Place the mixture in the fridge for at least 30 minutes. Wait until the liquid is cold to the touch.
- Prepare the machine. Set up your maker and turn it on before pouring in the liquid. Note: This prevents the base from freezing instantly to the sides and stalling the motor.
- Start the churn. Slowly pour the chilled mixture into the moving canister.
- Monitor the texture. Churn for about 20 to 25 minutes until it reaches the consistency of thick soft serve.
- Check the volume. The mixture should have expanded and look fluffy. Stop when the paddle starts to struggle or reverse.
- Transfer quickly. Use a rubber spatula to move the mixture into your pre chilled container.
- Press and seal. Place a piece of plastic wrap directly on the surface of the cream before closing the lid. Note: This stops a skin from forming and prevents freezer burn.
- Final harden. Freeze for at least 4 hours until firm enough to hold a deep scoop.
Fixing Common Frozen Dessert Issues
Even with the best intentions, things can go a bit sideways in the freezer. Don't worry, most issues are easily fixed or prevented for the next batch.
Avoiding a Gritty Texture
If your treat feels sandy, it’s usually because the sugar didn't dissolve or the mixture froze too slowly. Make sure you whisk that milk and sugar thoroughly at the start. If you use a very cold base and a frozen canister, the quick freeze will keep the texture like silk.
Preventing Rock Hard Freezing
Homemade versions lack the stabilizers used in commercial tubs. If it’s too hard to scoop, let it sit on the counter for 5 to 10 minutes. The high fat content in this recipe helps, but even the best homemade batch needs a moment to breathe.
| Problem | Root Cause | Solution |
|---|---|---|
| Greasy film on tongue | Churned too long | Stop churning as soon as it looks like soft serve. |
| Large ice crystals | Warm base or slow freeze | Chill the base to 40°F before starting the machine. |
| Won't thicken | Warm canister | Ensure your freezer bowl is at 0°F for at least 24 hours. |
Common Mistakes Checklist
- ✓ Freeze your churning bowl for a full 24 hours (not just overnight).
- ✓ Ensure the sugar is 100% dissolved before adding the heavy cream.
- ✓ Never overfill the canister; the mixture needs room to expand with air.
- ✓ Use the highest fat dairy available for the smoothest result.
- ✓ Store in the back of the freezer where the temperature is most stable.
Easy Ingredient Swaps and Additions
If you want to move beyond plain vanilla, this base is the perfect canvas. It is robust enough to handle various mix ins without breaking. For a classic layered look, you might want to try an adapted Spumoni Ice Cream recipe which uses different flavors in one beautiful mold.
Creating a Chocolate Ribbon
To add a fudge ripple, melt 1/2 cup of chocolate chips with a tablespoon of heavy cream. Let it cool to room temperature, then drizzle it into the container as you are transferring the finished churned cream. Use a knife to swirl it gently.
Swapping for dairy-free Needs
You can replace the milk and cream with full fat coconut milk and coconut cream. The texture will be slightly different, and the fat will set harder in the fridge, so you may need to let it thaw a bit longer before serving.
Scaling for Groups:To double the batch: Do not just pour more into one machine. Work in batches to ensure the canister can freeze the liquid fast enough. Keep the second half of the liquid in the fridge while the first half churns.
To halve the batch: Reduce all ingredients by half. The churning time will likely decrease by about 5 to 8 minutes, so watch the consistency closely.
Storing Cold Homemade Treats
Proper storage is the difference between a fresh tasting scoop and something that tastes like the back of your freezer. I always recommend using a shallow container. This allows the center to freeze at nearly the same rate as the edges, which prevents large crystals from forming in the middle.
Your homemade creation will stay fresh for about two weeks. After that, it won't necessarily go bad, but the texture will start to degrade. To prevent waste, if you find yourself with just a little bit left that's getting too hard, toss it into a blender with a splash of milk for the best milkshake of your life. You can also use leftover vanilla scoops to top off Homemade Boston Cream recipe for a decadent "a la mode" experience.
Ideal Pairings for Every Scoop
The beauty of a clean vanilla base is that it goes with almost anything. I love serving this in a warm waffle cone, but if you want to get fancy, try these combinations:
- Warm Cold Contrast: Serve a scoop over a warm fruit crumble or a fresh brownie. The way the cold cream melts into the nooks and crannies is heaven.
- The Ultimate Crunch: Top with toasted pecans or crushed pretzels. The salt in the pretzels pulls out the floral notes of the vanilla bean paste.
- Morning Treat: I know it sounds wild, but a small scoop inside a warm crepe or alongside some fresh waffles is a wonderful holiday breakfast.
Balancing the Butterfat
While it is tempting to use even more cream, balance is key. If the fat is too high, it can coat the palate too heavily, masking the delicate vanilla flavor. Stick to the 2:1 ratio of cream to milk for that perfect clean finish.
Arresting Ice Crystal Growth
If you find your freezer is a bit inconsistent, try adding a tablespoon of light corn syrup or a splash of vodka to the base. Neither will affect the flavor much, but they significantly lower the freezing point, ensuring a softer scoop every single time.
It's a little trick I learned after one too many batches turned into vanilla flavored ice cubes!
Myths About Churning at Home
One common misconception is that you need to add rock salt to your ice cream base. Please don't do that! The salt goes on the outside of the canister (in old-fashioned models) to lower the temperature of the ice, not inside the dessert.
Adding too much salt to the base will just make it salty and prevent it from freezing properly.
Another myth is that "no churn" recipes are exactly the same as churned ones. While no churn versions are convenient, they usually rely on sweetened condensed milk, which can be cloyingly sweet. The churned method we used here allows for a much more sophisticated, dairy forward flavor that isn't masked by heavy syrups.
Trust me, once you taste the difference that air and proper churning make, you'll never go back to the shortcut versions.

Recipe FAQs
How do you make ice cream at home?
Combine, chill, and churn the base. Whisk together your cream, milk, sugar, and vanilla until the sugar dissolves completely, then chill the mixture thoroughly for at least 30 minutes.
Pour the cold liquid into a running ice cream machine and churn for 20-25 minutes until it reaches a thick soft serve consistency.
What are the steps of making ice cream step-by-step?
Whisk, chill, churn, transfer, and harden. First, dissolve the sugar completely into the milk mixture, then add the cream and chill everything down to near 40°F.
Next, pour the base into a moving churner, process until thick, quickly transfer to a pre-chilled container, and freeze for 4+ hours to firm up.
How to ice cream at home without a machine?
Use the bag method or freeze and whisk vigorously every 30 minutes. For the bag method, place the base in a small, sealed bag, place that bag inside a large bag layered with ice and rock salt, and shake hard for 10 minutes. If you enjoyed mastering temperature control in this process, see how the same principle of rapid cooling works when setting dough in our Edible NoBake Cookie recipe.
How to make ice cream at home in 2 minutes?
No, this is physically impossible for a true scoopable product. Making ice cream requires a significant freezing and aeration time, typically needing at least 20 minutes of active churning.
You can, however, prepare the base liquid in under two minutes, but the freezing process cannot be rushed without resulting in liquid or slush.
Why does my homemade ice cream freeze rock hard?
It likely lacks enough sugar or stabilizer to lower the freezing point. Sugar acts as an antifreeze; without enough of it relative to the water content, the mixture freezes into one solid block.
If you want a smoother texture with less reliance on refined sugar, you could try making a rich custard base where egg yolks act as a natural emulsifier and softener.
Is it true I must use heavy cream for the best texture?
Yes, heavy cream is essential for proper texture and mouthfeel. The high milkfat content traps the air incorporated during churning, preventing large ice crystals from forming. Lower fat dairy releases more water during the freeze, which results in a hard, icy scoop rather than a velvety one.
What is the secret to making a smooth ripple or swirl?
Add the ripple just before the final hardening stage and ensure it has a different viscosity. Melt chocolate chips with a tablespoon of cream and let it cool until it's thick but still pourable like warm syrup.
Drizzle it into the soft churned cream as you transfer it to the storage container and gently swirl once with a knife.
Creamy Homemade Ice Cream
Ingredients:
Instructions:
Nutrition Facts:
| Calories | 199 kcal |
|---|---|
| Protein | 1.5 g |
| Fat | 15.3 g |
| Carbs | 15.6 g |
| Fiber | 0 g |
| Sugar | 15.1 g |
| Sodium | 49 mg |
