Fried Mac and Cheese Bites Crispy Panko Croquettes That Wont Explode

Unlocking the Secret to Perfect, Molten Centers
Listen, I've had some truly tragic experiences trying to fry leftover mac and cheese. It’s a great idea in theory. You toss some cold, day and old pasta into oil, and bam, pub snack bliss, right? Wrong. Every time I tried that, I ended up with greasy, exploded little volcanoes leaking molten cheddar everywhere.
It’s tragic. I’m talking about a kitchen catastrophe that resulted in cheese lava. That’s why, if you want proper, shatteringly crisp fried mac and cheese bites, you can't just rely on scraps. You have to design the mac and cheese specifically for the fryer.
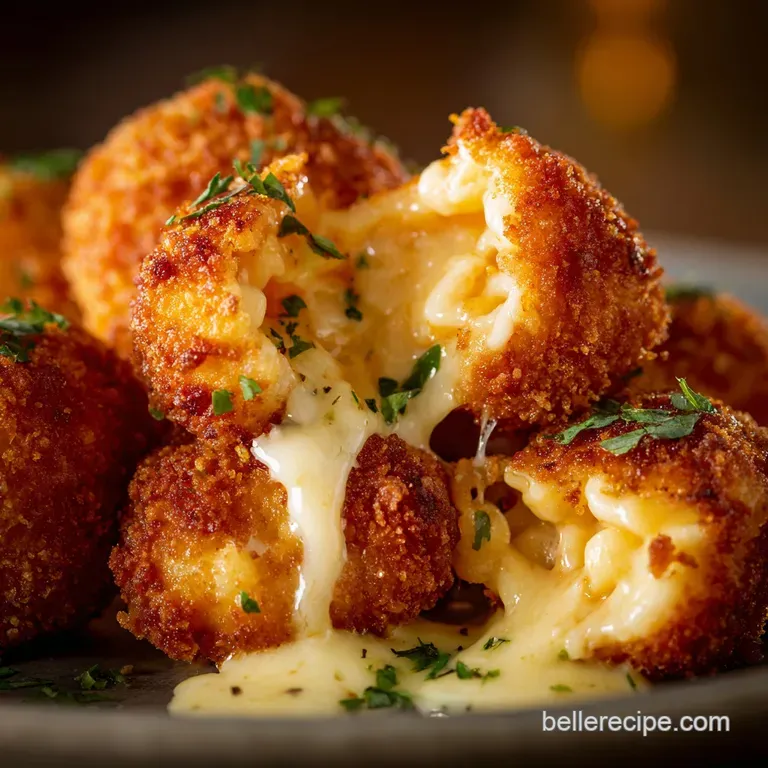
The key is structural integrity and contrast: a deep golden shell and an interior that is so rich and soft it practically collapses when you cut into it.
The Crucial First Step: Achieving the Stable Base
The entire foundation of a successful fried mac and cheese croquette depends on how stiff your initial mac and cheese mixture is. You cannot use a recipe designed for the dinner table. Standard mac and cheese is gooey and saucy (as it should be). Our mac base needs to be practically solid.
This means we are seriously restricting the liquid and increasing the cheese and flour content in the roux. I remember once thinking, "Oh, it looks a bit dry, I’ll just add a splash more milk." Big mistake.
That extra moisture turned to steam, and the steam had nowhere to go but out , taking the breading with it. Make it thick. Make it stiff. It should be difficult to stir, honestly. That's how you know you got it right.
Why Freezing is the Key to Structural Integrity
Chilling isn't optional; it's the entire secret. When you first combine the super and stiff pasta mix and press it into that shallow pan, you are creating a slab that must become rigid. It needs time for the fat in the cheese to re and solidify and bind the starch (the pasta) together. I typically leave mine overnight.
Three hours is the absolute minimum, but why rush genius? Once those fried mac and cheese balls are cut, they are solid little bricks of potential flavor, capable of withstanding the shock of hot oil.
Beyond Leftovers: Elevating the Classic
While using Thanksgiving leftovers sounds convenient, the fat content and consistency are usually too unpredictable. We are making Crispy Mac & Cheese Croquettes from scratch because we need control.
We need less cream, more binding power, and a blend of cheeses that melt beautifully but set firmly. We are designing a masterpiece here, not repurposing dinner. When you aim for the Cheesecake Factory and style fried mac and cheese, you need that professional and level foundation.
Provisions and Prep: Securing Your Golden Shell
Right then, let's talk ingredients and tools. This isn't just about throwing things into a pot. Every choice here serves a specific purpose, primarily focused on texture.
The Golden Ratio: Selecting the Perfect Cheese Blend
You need two things from your cheese: sharp flavor and exceptional meltability. Sharp cheddar is non and negotiable for that deep, comforting fried mac and cheese taste. But cheddar tends to get a little grainy or oily when it cools and reheats quickly.
To counteract that, you need a great melting cheese. I swear by Gruyère. It adds a beautiful nuttiness and keeps the internal texture silken and molten. Monterey Jack works too if Gruyère feels too fancy, but honestly, don’t even bother with low and fat versions here. It’s just not the same.
Necessary Equipment for Deep and Frying Success
Forget the big, expensive deep fryer unit unless you make donuts every weekend. A heavy and bottomed Dutch oven or a deep pot works perfectly fine. The single most important piece of equipment you need isn't fancy, though. It’s a thermometer.
Crucial Warning: If you aren't using an instant and read thermometer to regulate the oil temperature, you are guessing, and you will end up with greasy mac and cheese or burnt breading. The margin for error is small: 350°F (175°C) is the magic spot.
The Power of Panko: Building the Shattering Crust
Standard breadcrumbs are fine for meatballs. They are terrible for this job. You want Panko. Panko breadcrumbs are flakier, lighter, and jagged, which means they absorb less oil and give you that intense, loud CRUNCH that separates amateur fried mac and cheese patties from the absolute best.
You want the outside to practically explode when you bite it. That only happens with Panko. Trust me on this one.
Related Recipes Worth Trying
- Sandwich Recipe The Ultimate Gourmet Steak Horseradish Feast — This ultimate Bistro Steak Sandwich is elevated to fine dining standards Discover gourmet sandwich recipes for a spectacular weeknight dinner Ready in 45...
- Porterhouse Steak Perfect CastIron Sear and Herb Butter Baste — Master the ultimate restaurantstyle Porterhouse Steak with our castiron sear technique This porterhouse steak recipe uses dry brining and a herb butter...
- Classic Sun Tea Recipe Mellow Smooth and Safe Summer Brewing — This easy sun tea recipe delivers the smoothest most refreshing iced tea imaginable We cover safe sun tea brewing techniques for that nostalgic mellow...
Shaping, Breading, and Frying: The Step and by-Step Blueprint
This is where all the planning comes together. We’re moving from rigid slab to perfect golden croquettes.
Precision Shaping: Uniformity for Even Cooking
Once that slab of mac and cheese is perfectly chilled, lift it out by the parchment paper. Decide on your shape. Are you making small, round fried mac and cheese balls ? Use a small scoop. Are you making neat, blocky croquettes? Use a sharp knife. The critical point is uniformity.
If one piece is twice as thick as another, it won't cook at the same rate. You'll pull the small one out perfect, and the large one will still be cold inside. Keep them roughly the same size (about 1.5 inches square or a 2 inch log).
Preparing the Triple and Dredge Station
This is classic frying technique, and it works because it creates a robust bond. You need three separate, shallow dishes set up side and by-side:
- Dish 1: Flour. Dust thoroughly, then tap off all the excess. This provides a dry surface for the egg to grab onto.
- Dish 2: Egg. Beat the eggs with a splash of water. Dip the floured mac quickly.
- Dish 3: Panko. Press the mac firmly into the Panko. Make sure every single side is absolutely covered.
I always recommend doing the "double dredge" (repeating the egg and Panko step) for added security against blowouts. It’s an extra step, but it guarantees the crispest, most robust shell possible for your homemade fried mac and cheese . Then, chill them again!
That 30 minute second chill locks everything in place.
Mastering the Hot Oil: Temperature Control for the Perfect Fry
Remember that thermometer we talked about? Set the heat to bring your oil up to 350°F (175°C). Use the thermometer to monitor it. When you drop the mac into the oil, the temperature will drop. This is why you must fry in small batches (4 to 5 pieces max).
If the temperature dips below 330°F, the breading starts absorbing the oil instead of cooking, resulting in a soggy, oily texture. Yuck. Fry them until they are a gorgeous, deep mahogany gold, about three to four minutes.
Immediate Draining and Serving Protocol
When they come out of the oil, do not put them on a paper towel. Paper towels cause the bottom side to steam, instantly turning that beautiful Panko crust mushy. Instead, place them on a wire rack situated over a sheet pan. This allows air to circulate underneath, maintaining the crunch.
Sprinkle them immediately with a pinch of fine sea salt while they are dripping wet from the oil. Serve these instantly. They are meant to be eaten piping hot.
Troubleshooting Common Mistakes When Making Fried Mac and Cheese
Flavor Upgrades: Bacon, Heat, and Herbs
If you want to move beyond the basic cheddar, try these simple mix and ins (add them when you stir the pasta into the cheese sauce, before chilling):
- A tablespoon of finely chopped chives and a dash of white truffle oil (a luxury bite).
- Crispy bacon bits about half a cup mixed straight into the base. Bacon is always a good idea.
- For heat, mix in a teaspoon of sriracha and two finely minced pickled jalapeños. We are talking high and impact flavor.
Air Fryer and Baking Alternatives (For the Health and Conscious)
Look, are these alternatives as good as submerging the mac in 350 degree oil? No. They are good, though! If you are avoiding deep and frying, here’s how the alternatives stack up:
| Method | Prep Requirements | Resulting Texture |
|---|---|---|
| Air Fryer | Generously spray breaded bites with oil. | Good exterior crispness, less even browning. |
| Baking | Bake at 425°F (220°C) for 15 20 min. | Crunchy top, softer bottom; risk of drying out. |
For air frying your fried mac and cheese balls cheesecake factory style, preheat the air fryer to 400°F (200°C), spray those puppies down, and cook for 10 to 12 minutes, shaking halfway through.
Preventing Blowouts: Why Your Croquettes Might Explode
If you’ve got a blowout, nine times out of ten it’s one of two things:
- Moisture: The original mac and cheese base was too wet, or you didn't chill it long enough. Liquid turning to steam creates internal pressure.
- Bread Barrier Failure: The breading was thin, uneven, or you skipped the crucial second chill after breading. The Panko didn't have time to bond fully to the egg. When the cheese melted, it found a weak spot and leaked out. Next time, double and dredge!
Optimal Storage and Reheating Methods
You can absolutely make the breaded croquettes ahead of time. After the second chill, you can freeze them solid on a sheet tray, then transfer them to a freezer bag. They will keep for up to three months. When you are ready to fry, do not thaw them!
Fry them straight from frozen, but drop your oil temperature slightly (to 325°F or 160°C) and increase the frying time by about two minutes. This allows the center to thaw and heat up without the exterior burning.
Once they are cooked, they are tricky to reheat perfectly. They lose that incredible, fresh crunch. If you must reheat, use the air fryer again (350°F for 3 minutes) or a very hot oven (400°F for 5 minutes). Skip the microwave unless you enjoy sad, soggy food.

Recipe FAQs
My Mac and Cheese keeps falling apart in the oil. What's gone wrong?
This usually happens if the mac base was too wet or you skipped the crucial second chill after breading. You must ensure the mac filling is incredibly stiff before cutting, and always chill the fully breaded croquettes for at least 30 minutes to properly bind the protective Panko crust.
I don't fancy deep frying the Fried Mac and Cheese can I bake them instead?
Absolutely, mate! To air fry or bake, spray the breaded croquettes generously with high heat oil, then bake at 200°C (400°F) for 10 12 minutes until deeply golden, flipping halfway through to ensure even colour and crispness.
Can I make these ahead for a party, and how should I store them?
Yes, they are spot-on for prep! You can freeze the fully breaded, uncooked croquettes on a sheet pan, then transfer them to an airtight container; when ready to cook, fry them straight from frozen, adding just 2 3 minutes to the frying time.
Is Panko really necessary for that cracking crunch, or can I use normal breadcrumbs?
Panko is highly recommended because its jagged, airy structure ensures a much lighter, more durable, and shatteringly crisp coating. Standard breadcrumbs will absorb more oil and can result in a heavier, softer coating that is more likely to burst.
I only have standard Cheddar; will that still work, or should I stick to the recipe's cheese list?
While using only Cheddar is possible, the Gruyère is essential as it provides the smooth melt and structural integrity needed to keep the centre molten but contained. If you can't source Gruyère, substitute it with another great melting cheese like Fontina or Monterey Jack for best results.
Crispy Fried Mac And Cheese Croquettes

Ingredients:
Instructions:
Nutrition Facts:
| Calories | 500 kcal |
|---|---|
| Fat | 35 g |
| Fiber | 2 g |
