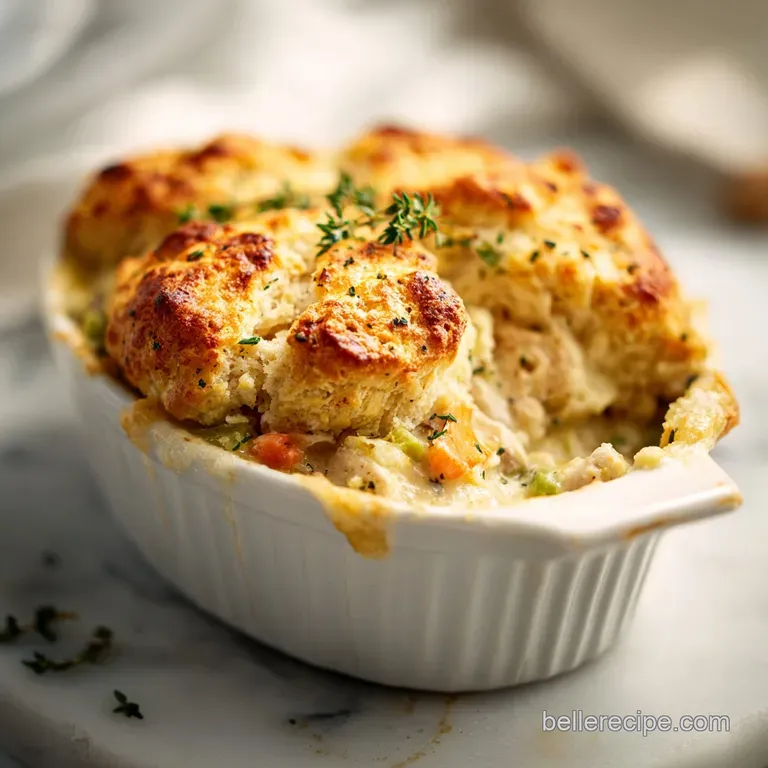
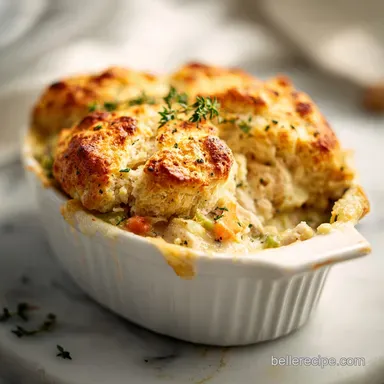
Chicken Cobbler: Crispy and Golden

- Time: Active 15 minutes, Passive 45 minutes, Total 60 minutes
- Flavor/Texture Hook: Savory, buttery, and golden shatter topping
- Perfect for: Busy weeknight dinners or cozy Sunday family gatherings
- Creating the Ultimate Golden Topped Chicken Cobbler
- Planning Your Comfort Food Timeline
- Selecting Quality Elements for Success
- Tools for Stress Free Casserole Baking
- Step by Step Layered Baking
- Fixing Common Texture and Bake Issues
- Clever Swaps and Recipe Twists
- Storing and Reheating Your Cobbler
- Styling Your Hearty Family Table
- Recipe FAQs
- 📝 Recipe Card
Creating the Ultimate Golden Topped Chicken Cobbler
Have you ever pulled a casserole out of the oven, stomach growling, only to find a pool of liquid at the bottom and a biscuit topping that’s still raw and doughy in the middle? It’s heartbreaking.
I remember the first time I tried a version of this; the aroma of the thyme was gorgeous, but the texture was a total disaster. The top looked done, but beneath that golden crust lay a swampy mess of undercooked flour that ruined the whole evening.
We’ve all been there with "easy" bakes that end up being more trouble than they’re worth. But this Chicken Cobbler is the targeted fix for every soggy pot pie you’ve ever endured. The secret isn't in a fancy technique or a hidden ingredient; it’s in the physics of the pour.
By resisting the urge to stir, we allow the layers to interact through steam and gravity rather than forced mixing, which is exactly how we get that velvety sauce to form right under a perfectly baked topping.
The magic happens in that quiet 45 minutes while the dish is in the oven. You’ll hear the butter sizzle against the ceramic dish and smell the garlic powder blooming in the heat. It's a mindful way to cook, trusting the ingredients to do their own work.
When you finally pull it out, the top should have a mahogany colored glow, and the edges should be bubbling with a thickened, savory gravy that’s just waiting for a spoon.
The Moisture Density Principle: Because we don't stir, the heavy chicken and vegetables stay at the bottom while the lighter biscuit batter rises, and the broth filters through to create a self thickening sauce.
Thermal Insulation: The layer of biscuit batter acts as an insulator, allowing the chicken to stay juicy through gentle steaming while the top surface undergoes direct dry heat for a crisp finish.
Starch Suspension: The biscuit mix contains leavening agents that react with the milk to create air pockets, ensuring the topping stays light rather than turning into a dense, leaden block.
Fat Barrier: The melted butter at the very bottom creates a non stick shield that also infuses the chicken with a rich, confit like quality as it bakes.
| Method | Time | Texture | Best For |
|---|---|---|---|
| Traditional Bake | 45 minutes | Crispy top, velvety base | Standard family dinner |
| Convection Bake | 35 minutes | Extra shatter crust | When you’re in a rush |
| Individual Ramekins | 25 minutes | All around crispy edges | Dinner parties or kids |
Planning Your Comfort Food Timeline
Mindful cooking is all about the flow of your kitchen. If you’re rushing, you’re more likely to stir those layers, and we know that’s the one thing we absolutely cannot do here. Start by setting your oven to 400°F (200°C) the moment you walk into the kitchen.
While that’s heating up, you can get your mise en place ready. Shredding the chicken takes just a few minutes, especially if you’re using a pre cooked rotisserie bird, which is my favorite shortcut for a deep, roasted flavor without the effort.
The beauty of this 15 minutes prep is that it’s almost entirely assembly. You’ll want your 9x13 inch dish ready and your butter melted before you even touch the other ingredients.
Think of it as building a house: the butter is the foundation, the chicken is the frame, and the broth is the lifeblood that ties it all together. Once the dish goes into the oven, you have a full 45 minutes to set the table, toss a light salad, or just sit down with a glass of water and breathe.
To ensure your Southern Classic Fried Chicken cravings are satisfied on other nights, keep this recipe in your back pocket for when you want that same comfort but with half the cleanup. The final 5 minutes of resting time are non negotiable; it’s when the starches in the broth finally fully hydrate and "set," turning a runny sauce into a luxurious gravy.
- Prep (0-15 mins): Preheat oven, melt butter, shred chicken, and whisk the biscuit batter.
- Bake (15-60 mins): Layer ingredients without stirring and bake at 400°F (200°C) for 45 minutes.
- Finish (60-65 mins): Let the cobbler rest on the counter to thicken the sauce before serving.
Selecting Quality Elements for Success
| Ingredient | Science Role | Pro Secret |
|---|---|---|
| Biscuit Mix | Provides structure and leavening | Sift it first to avoid any lumps in your batter |
| Low Sodium Broth | Creates the self forming gravy | Use bone broth for extra collagen and body |
| Melted Butter | Prevents sticking and adds richness | Use salted butter if you want a more savory crust |
| Skim Milk | Hydrates the biscuit flour | Ensure it's cold to keep the leavening from acting too fast |
- 1 lb shredded rotisserie chicken: Provides the savory, protein rich base. Why this? Rotisserie chicken has deeper seasoning than home boiled breasts.
- 12 oz frozen mirepoix: A shortcut for onions, carrots, and peas. Why this? Frozen veggies retain more nutrients and add necessary moisture.
- 2 cups low sodium chicken broth: The liquid that turns into sauce. Why this? Allows you to control the final saltiness of the dish.
- 1 tsp garlic powder: Adds an aromatic baseline.
- 1 tsp onion powder: Provides savory depth without the texture of raw onions.
- 0.5 tsp dried thyme: The classic herb for poultry comfort.
- 0.5 tsp freshly cracked black pepper: For a subtle, warming bite.
- 1/4 cup unsalted butter, melted: The foundation for flavor and non stick.
- 2 cups biscuit mix: The "cobbler" topping that rises. Why this? It contains built in leavening for a reliable rise.
- 2 cups skim milk: Liquid for the batter. Why this? Keeps the topping light without adding too much heavy fat.
- 1 tbsp fresh chives, minced: Adds a bright, grassy finish to the crust.
- 0.5 tsp granulated garlic: Specifically for the batter layer.
Tools for Stress Free Casserole Baking
You don't need a professional kitchen to pull this off, but a few specific items make the process much smoother. First and foremost, a high-quality 9x13 inch ceramic or glass baking dish is essential.
I prefer ceramic because it holds heat more evenly, which helps the bottom layer of chicken get that almost caramelized edge while the top stays fluffy. If you use metal, the edges might brown a bit faster, so keep an eye on it around the 35 minute mark.
A large glass mixing bowl and a sturdy balloon whisk are your best friends for the biscuit batter. You want to whisk until the milk and mix are just combined don't overwork it!
If you over whisk, you’ll develop the gluten too much, and your cobbler topping will end up more like bread than a tender biscuit. I also highly recommend using a liquid measuring cup with a good spout for the broth.
Since you’re pouring it gently over the batter without stirring, a controlled pour is much easier than trying to dump it from a wide bowl.
Chef's Tip: If you have an old-fashioned "gravy separator" or a narrow necked pitcher, use that to pour the broth. It allows you to distribute the liquid in a thin, even stream, which protects the integrity of the biscuit layer.
step-by-step Layered Baking
- Preheat and Coat: Set your oven to 400°F (200°C). Pour the 1/4 cup of melted butter into your 9x13 inch dish, tilting it so the butter creeps up the sides slightly.
- Layer the Protein: Scatter the 1 lb of shredded chicken evenly across the buttered bottom. Don't press it down; keep it airy so the heat can circulate.
- Add the Vegetables: Sprinkle the 12 oz of frozen mirepoix over the chicken. It’s okay if they are still a bit icy; that extra moisture helps the steaming process.
- Season the Base: Evenly dust the garlic powder, onion powder, thyme, and black pepper over the chicken and veg. Note: seasoning each layer ensures flavor in every single bite.
- Whisk the Batter: In your large bowl, combine the 2 cups of biscuit mix, 2 cups of skim milk, chives, and granulated garlic. Whisk until mostly smooth a few small lumps are perfectly fine.
- The First Pour: Pour the biscuit batter evenly over the chicken and vegetables. Resist every urge to stir! You want this to sit right on top like a blanket.
- The Liquid Infusion: Gently pour the 2 cups of chicken broth over the batter layer. You’ll see the broth start to submerge the batter, but do not stir.
- The Golden Bake: Slide the dish into the oven for 45 minutes. Watch for the top to turn a deep, rich mahogany and for the filling to start bubbling and crackling at the edges.
- The Essential Rest: Remove the dish from the oven and let it sit on a cooling rack for 5 minutes. This allows the sauce to transition from liquid to a velvety gravy.
Fixing Common Texture and Bake Issues
If your cobbler looks a bit different than the photos, don't panic. Oven temperatures can vary wildly, and even the humidity in your kitchen can change how the biscuit mix reacts. Most issues with this dish come down to one of two things: the pour or the temperature.
If you poured the broth too quickly, it might have displaced the batter too much, leading to an uneven top.
But what about the sogginess? We'll get to that. Usually, a soggy middle means the oven wasn't quite up to temperature when the dish went in, or the broth wasn't distributed evenly.
If you find the top is browning too fast but the middle feels soft, you can loosely tent a piece of foil over the top for the last 10 minutes. This traps the steam to finish the "dumpling" part of the biscuit while stopping the "crust" part from burning.
| Problem | Root Cause | Solution |
|---|---|---|
| Runny Sauce | Broth didn't emulsify | Let it rest for a full 10 mins instead of 5 |
| Doughy Topping | Oven temp too low | Check oven with a thermometer; bake 5-10 mins longer |
| Burnt Edges | Metal pan used | Reduce oven temp to 375°F (190°C) next time |
Common Mistakes Checklist
- ✓ Never stir the layers: This is the number one reason for a failed cobbler. The layers must remain separate to cook correctly.
- ✓ Use cold milk: Warm milk can activate the leavening in the biscuit mix too early, leading to a flat topping.
- ✓ Check your broth temp: Room temperature broth is best. If it’s ice cold from the fridge, it might add 5 minutes to your cook time.
- ✓ Don't overcrowd the chicken: 1 lb is the sweet spot for a 9x13 dish; more chicken can block the liquid from reaching the bottom.
Clever Swaps and Recipe Twists
One of the best things about a Cheesy Chicken Casserole style dish like this is how adaptable it is. If you don't have mirepoix, you can use any frozen veg mix you have on hand corn and green beans work beautifully. For those who love a bit of a kick, adding a pinch of cayenne or some red pepper flakes to the seasonings can transform the whole profile.
If you’re a fan of a specific "Red Lobster" flavor, you can swap the plain biscuit mix for a box of cheddar bay biscuit mix. Just omit the granulated garlic in the batter since those mixes are already heavily seasoned. It adds a wonderful sharp cheddar note that pairs perfectly with the savory chicken.
Just be mindful that pre mixed packs often have more salt, so you might want to stick strictly to low sodium broth to balance it out.
| Original Ingredient | Substitute | Why It Works |
|---|---|---|
| Skim Milk | Heavy Cream | Creates a much richer, more decadent topping. Note: Increases calorie count significantly. |
| Mirepoix | Frozen Broccoli | Adds a different texture and earthier flavor profile. |
| Chicken Broth | Vegetable Broth | Same liquid volume; slightly sweeter and less "meaty" taste. |
- Down (1/2 size)
- Use an 8x8 inch square pan. Reduce the bake time to 35 minutes and check for doneness.
- Up (2x size)
- I recommend using two separate 9x13 dishes rather than one giant one. Large, deep pans can lead to an undercooked center.
- Baking Adjustments
- If you double the recipe in two pans, ensure your oven racks are spaced out so air can circulate around both dishes.
| Premium | Budget | Flavor Impact | Savings |
|---|---|---|---|
| Fresh Chicken Breast | Rotisserie Chicken | Rotisserie is more flavorful/moist | Save $3-5 |
| Organic Bone Broth | Bouillon Cube + Water | Bone broth is thicker/richer | Save $4 |
| Fresh Herbs | Dried Thyme | Fresh is brighter; dried is more earthy | Save $2 |
Storing and Reheating Your Cobbler
Leftovers are arguably the best part of this meal. The flavors have a chance to meld even further overnight, and the biscuit topping stays surprisingly sturdy. Store any remaining portions in an airtight container in the fridge for up to 3 days.
I don't recommend freezing the fully assembled, baked dish, as the biscuit topping can become quite spongy when thawed and reheated.
To reheat, the oven is your best friend. Microwave heating often makes the biscuit layer rubbery. Instead, place a portion in a small oven safe dish, cover it with foil to keep the moisture in, and bake at 350°F (180°C) for about 15 minutes.
In the last 2 minutes, remove the foil to let that top crust crisp up again. It’ll be almost as good as the day you made it.
Zero Waste Tip: Don't throw away the bones from your rotisserie chicken! You can simmer them with some water, celery scraps, and onion skins to make your own "free" broth for the next time you make this recipe.
Myths to Forget"You must brown the chicken first": Not necessary here. The rotisserie chicken is already cooked, and the gentle steaming in the oven keeps it from drying out.
"The broth will make the biscuits soggy": If you don't stir, the broth actually cooks through the batter, acting as the poaching liquid for the "dumpling" base while the top stays dry.
"Skim milk makes it thin": The starch in the biscuit mix is the primary thickener; the milk is just for hydration.
Styling Your Hearty Family Table
Presentation is the final touch that makes a simple casserole feel like a feast. Since this is a rustic, homey dish, I love serving it straight from the ceramic baking dish. It feels communal and warm.
To break up the "beige" color of the crust, a generous sprinkle of fresh parsley or extra chives right before serving adds a pop of vibrant green that makes the mahogany crust look even more appetizing.
When you go to scoop it out, try to use a large, flat spatula or a deep spoon to get all the way to the bottom. You want to make sure every plate gets a portion of that golden crust, the fluffy biscuit middle, and the saucy chicken base.
I usually serve this in shallow bowls rather than flat plates to catch every drop of the savory gravy. Pair it with a simple side of roasted asparagus or a crisp arugula salad with a lemon vinaigrette to cut through the richness of the butter and biscuit.
Chef's Note: For a truly "professional" look, let the dish rest for those 5 minutes, then use a knife to gently score the top into 8 even squares before scooping. This prevents the crust from shattering haphazardly and keeps the layers looking beautiful on the plate.

Recipe FAQs
What is a chicken cobbler?
A savory layered casserole. It combines shredded chicken, mirepoix, and a biscuit style crust that bakes into a golden, bubbly dish.
What is the most delicious chicken dish in the world?
Flavor is subjective, but this cobbler is a top contender for comfort. If you enjoy this layering method, you might also like the technique used in our classic pasta comfort dish for balancing hearty ingredients.
What is a million dollar chicken casserole?
This is a common term for rich, multi layered chicken bakes. While recipes vary, our chicken cobbler fits the profile by delivering a decadent, thickened sauce and a golden biscuit topping.
Where did chicken cobbler originate?
It is a modern adaptation of traditional Southern American fruit cobblers. Cooks swapped the sweet filling for savory poultry and vegetables to create a one-dish weeknight meal.
How to prevent the biscuit topping from getting soggy?
Avoid stirring the layers completely. The biscuit mix must float on top of the chicken and vegetable base to crisp up properly during the 45-minute bake at 400°F.
How to tell when the chicken cobbler is fully baked?
Look for a mahogany colored crust and bubbling, thickened sauce. Once you hit the 45-minute mark, ensure the filling is bubbling through the biscuit layer before removing it from the oven.
Is it true I can stir the ingredients together for better flavor?
No, this is a common misconception. Stirring destroys the structural integrity of the cobbler, preventing the biscuit layer from rising and setting correctly against the sauce.
Easy Chicken Cobbler
Ingredients:
Instructions:
Nutrition Facts:
| Calories | 341 kcal |
|---|---|
| Protein | 19.7 g |
| Fat | 15.2 g |
| Carbs | 29.1 g |
| Fiber | 1.5 g |
| Sugar | 3.8 g |
| Sodium | 485 mg |
