Snow Ice Cream: Cloud Like & Frosty
- Time: Active 5 minutes, Passive 0 minutes, Total 5 minutes
- Flavor/Texture Hook: Cloud like, frosty, and gently sweet
- Perfect for: Snow days with kids or quick winter cravings
- Catching Clouds to Make Snow Ice Cream
- The Secret to Success
- Essential Recipe Specifications
- Ingredient Component Analysis
- Items for the Frozen Pantry
- Minimal Tools for Winter Cooking
- Bringing the Winter Magic Together
- Pro Tips and Pitfalls
- Flavor Variations to Try
- Scaling for a Crowd
- Debunking Winter Kitchen Myths
- Storage and Zero Waste
- What to Serve This With
- Recipe FAQs
- 📝 Recipe Card
Catching Clouds to Make Snow Ice Cream
There is a specific kind of quiet that only happens when the big, heavy flakes start falling. You know that hush? I remember standing on my porch with a giant stainless steel mixing bowl, waiting for the ground to turn into a pristine white sheet.
My grandmother used to say that the best snow for this wasn't the first dusting, but the thick "packing snow" that falls mid storm. It’s light, airy, and behaves exactly like a shaved ice machine from the heavens.
Making this treat is less about cooking and more about capturing a moment. Last winter, I tried to get fancy with an espresso reduction, but honestly, nothing beats the classic vanilla version.
It’s simple, comforting, and brings everyone into the kitchen with spoons in hand before the first bowl even hits the table. We don’t overthink it; we just mix and eat while the world outside stays frozen and still.
You have to move fast, though. The second that cold powder hits the room temperature condensed milk, the clock starts ticking. If you wait too long, you’re left with a milky slush instead of that iconic, scoopable texture.
But that’s the beauty of it it’s a fleeting dessert that only exists because of the weather outside your window.
The Secret to Success
Natural Aeration: Freshly fallen flakes are mostly air, which mimics the overrun created by expensive commercial ice cream churners.
Freezing Point Depression: The sugar in the condensed milk lowers the freezing point, keeping the mixture soft enough to scoop even when it’s biting cold.
Fat Saturation: Sweetened condensed milk provides a high fat to water ratio, which coats the ice crystals and prevents them from feeling gritty on your tongue.
Thermal Inertia: Using a pre chilled metal bowl prevents the snow from melting the moment it touches the sides, preserving that delicate structure.
| Texture Type | Snow Density | Best For | Finish |
|---|---|---|---|
| Fluffy Powder | Very Low | Light snow cream | Melt in-mouth |
| Heavy Wet Snow | Medium | Thick, scoopable cream | Traditional scoop |
| Crusty/Icy Snow | High | Granita style | Crunchy/Grainy |
Every batch is a little different depending on the moisture content of your local weather. If the snow is very dry and light, you might find you need a little less liquid to keep it from becoming too runny. This is very similar to the technique used in our Silky Alfredo Sauce recipe, where we balance fat and liquid to get that perfect cling.
Essential Recipe Specifications
For a successful batch, keep these three numeric checkpoints in mind. First, ensure your mixing bowl has been in the freezer for at least 30 minutes. Second, only collect snow that is below 32°F (0°C) to ensure it hasn't started the internal melting process.
Finally, your total mixing time should never exceed 2 minutes to prevent the warmth of your kitchen from turning your dessert into a puddle.
Ingredient Component Analysis
| Ingredient | Science Role | Pro Secret |
|---|---|---|
| Fresh Snow | Structural Base | Collect from the middle layer for the cleanest, fluffiest texture. |
| Condensed Milk | Sweetener & Binder | Keep this in the fridge so it doesn't shock the snow with heat. |
| Pure Vanilla | Flavor Catalyst | Use a high-quality extract; the alcohol prevents rock hard freezing. |
Items for the Frozen Pantry
- 10 cups fresh, clean snow (approx. 200g): This is your foundation. Why this? It provides the light, porous structure that traps the creamy binder.
- Substitute: Shaved ice (results will be much denser and crunchier).
- 14 oz sweetened condensed milk: This provides the sugar and fat in one go. Why this? Its thick consistency prevents the snow from dissolving instantly.
- Substitute: 1 cup heavy cream mixed with 1/2 cup sugar (less stable).
- 1 tbsp pure vanilla extract: For that nostalgic, bakery style aroma. Why this? It masks the "flat" taste of frozen water with warmth.
- Substitute: Vanilla bean paste for beautiful black speckles throughout.
- 1 pinch fine sea salt: To brighten the sweetness. Why this? Salt lowers the freezing point and enhances the dairy notes.
- Substitute: Standard table salt (use slightly less as it’s finer).
Minimal Tools for Winter Cooking
You don't need a churner or a fancy stand mixer for this. In fact, a simple large metal mixing bowl is your best friend here because it holds the cold much better than plastic or glass. You'll also want a sturdy silicone spatula or a large wooden spoon.
I prefer the spatula because it lets you fold the mixture gently, preserving as much air as possible so the final result stays light instead of becoming a solid block of ice.
Bringing the Winter Magic Together
- Place your large metal mixing bowl in the freezer 30 minutes before the snow starts to accumulate. Note: A cold bowl is the difference between ice cream and soup.
- Go outside and collect 10 cups fresh, clean snow, avoiding the bottom layer touching the ground. Wait until the snow is falling steadily for the cleanest powder.
- Bring the snow inside and immediately place it into your chilled bowl.
- Pour the 14 oz sweetened condensed milk over the center of the snow mound.
- Add the 1 tbsp pure vanilla extract and the pinch of sea salt directly onto the milk.
- Use a large spatula to gently fold the snow into the milk from the bottom up. Stop mixing once no dry snow remains to keep the volume high.
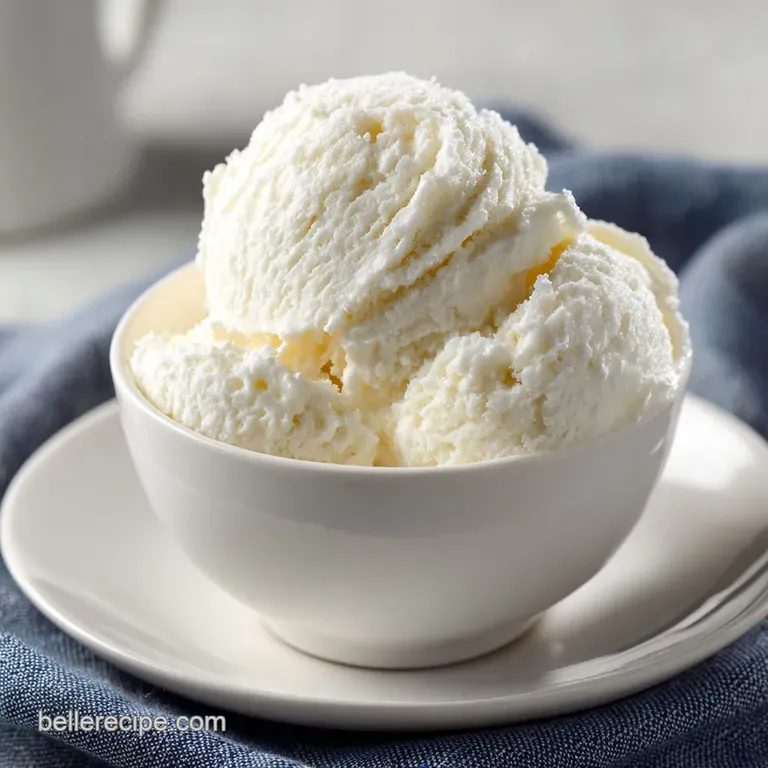
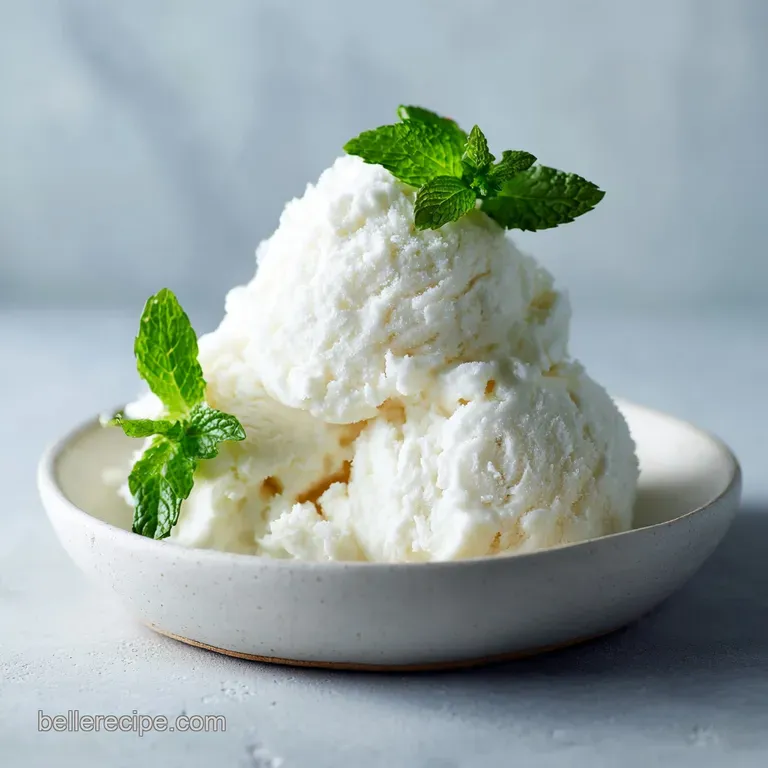
- Check the consistency; it should look like thick, soft serve ice cream.
- Scoop immediately into chilled bowls. Serve before the edges begin to weep or lose their shape.
Pro Tips and Pitfalls
Managing the Melting Point
The biggest enemy of this recipe is ambient heat. I've learned the hard way that you shouldn't set your bowl down on a granite countertop, which acts as a heat sink. Place a kitchen towel under the bowl while you mix to insulate it from the warmth of your kitchen surfaces.
Correcting the Consistency
If your mixture looks too dry or crumbly, add an extra tablespoon of milk (any kind) to help it bind. If it looks too wet, quickly fold in another cup of snow. It’s a very forgiving process as long as you work quickly and keep everything as cold as humanly possible.
Troubleshooting the Snow Cream
Why Your Snow Cream Dissolved
If you pour the milk too fast or use a bowl that hasn't been chilled, the snow will vanish into a liquid state almost instantly. This happens because the structural integrity of a snowflake is incredibly fragile. Always drizzle the liquid slowly and work in a cold environment.
| Problem | Root Cause | Solution |
|---|---|---|
| Grainy texture | Snow was icy or old | Only use freshly fallen, powdery snow. |
| Too sweet | Too much condensed milk | Fold in more snow or a splash of whole milk. |
| Melted instantly | Warm equipment | Freeze bowl and spoon for 30 minutes first. |
Common Mistakes Checklist
- ✓ Using "old" snow that has sat for hours (it becomes dense and loses air).
- ✓ Mixing too vigorously (this collapses the air pockets and creates a dense slush).
- ✓ Forgetting the salt (it tastes flat without that tiny flavor bridge).
- ✓ Collecting snow from the very top layer where debris might land.
- ✓ Leaving the condensed milk at room temperature before mixing.
Flavor Variations to Try
Crafting a Southern Snow Cream Recipe
If you find yourself without condensed milk, you can use a mixture of whole milk, sugar, and a splash of heavy cream. This version is a bit more icy and less velvety, but it’s how many families in the South have made it for generations.
Just whisk 1 cup of milk with 1/2 cup sugar until dissolved before adding it to your 10 cups of snow.
Whipping Up a Chocolate Drift
For the chocolate lovers, whisk 2 tablespoons of cocoa powder into your condensed milk before folding it into the snow. It turns the mixture into something resembling a frozen hot chocolate. For more inspiration on layered flavors, you might enjoy checking out this Spumoni Ice Cream recipe for a traditional Italian twist.
Scaling for a Crowd
Scaling Down (1-2 servings): Use 5 cups of snow and exactly half a tin of condensed milk. Keep the vanilla at 2 teaspoons to ensure the flavor still pops in the smaller batch.
Scaling Up (8+ servings): Work in batches. Don't try to mix 20 cups of snow at once, or the bottom will melt before you finish folding the top. Use multiple chilled bowls and have a partner help you scoop and serve.
For the spices and salt, only increase to 1.5x the original amount to avoid overpowering the delicate snow.
Debunking Winter Kitchen Myths
A common misconception is that you can "save" snow in the freezer to make this later. In reality, once snow is moved and packed into a container, it loses the crystalline structure that makes snow cream so airy. It will turn into a hard block of ice that doesn't absorb the milk properly.
Another myth is that you need "clean" snow from high altitudes. While you definitely want to avoid the road side slush, standard backyard snow from a clean table or a pre placed bowl is perfectly safe and delicious. Just avoid the "yellow snow" that one's not a myth!
Storage and Zero Waste
This is a "make and eat" dessert. It does not store well in the freezer because the home freezer is significantly colder than the snow was when you mixed it, causing the mixture to turn into a solid, un scoopable brick.
If you have leftovers, your best bet is to turn them into a milkshake by blending them with a little extra milk.
To minimize waste, don't over collect snow. Start with the 10 cups measured loosely. If you have extra condensed milk left in the tin, it keeps in a sealed jar in the fridge for up to two weeks perfect for your morning coffee or drizzling over oatmeal.
What to Serve This With
Since this is such a light and frosty treat, it pairs beautifully with something warm and contrasting. A plate of warm chocolate chip cookies or a piece of toasted pound cake provides a lovely temperature play. If you're looking for something more substantial to serve before dessert, a cozy Homemade Boston Cream recipe in cupcake form offers that same vanilla rich profile that everyone loves. It’s all about creating a comforting indoor atmosphere while the winter weather does its thing outside.

Recipe FAQs
What do you need for snow ice cream?
Fresh, clean snow, sweetened condensed milk, and pure vanilla extract. You must use a pre-chilled metal bowl to prevent immediate melting. The key is the high sugar content in the condensed milk to bind the airy snow structure.
What is snow freeze ice cream made of?
It is made of fresh snow acting as the airy base, bound by sweetened condensed milk and vanilla. The snow provides the aeration usually achieved by churning, while the high sugar and fat in the condensed milk create a smooth, soft serve-like texture.
Is snow ice cream a southern thing?
Yes, but it is enjoyed widely wherever snow falls heavily. While many southern families have traditional versions often using milk and sugar instead of condensed milk, the practice of making quick winter treats from snow is common across many regions.
Should you eat snow ice cream?
Yes, provided the snow is clean, fresh, and gathered hygienically. Only use the uppermost, powdery layer that has just fallen, avoiding any snow touching the ground or exposed to contaminants.
How do I prevent my snow ice cream from becoming soupy?
Work quickly and ensure all equipment is pre-chilled for at least 30 minutes. The ambient heat of your kitchen is the enemy; use a towel under your mixing bowl for insulation. If you enjoyed controlling texture here, see how the same principle of thermal management applies to ensuring a perfectly stable emulsion in our Silky Homemade Caramel recipe.
Can I make snow ice cream using dairy-free alternatives?
No, most common dairy-free milks are too watery for the best texture. Sweetened condensed milk is crucial because its high viscosity creates the necessary binding agent. You could attempt to use coconut condensed milk, but if you are interested in adapting recipes for dairy substitutes, you should review our notes on fat ratios in the Edible NoBake Cookie recipe.
What is the secret to getting the light, non-gritty texture?
Use only the fluffiest, freshly fallen powder and fold gently. You want to preserve the air trapped within the snowflakes; avoid stirring vigorously, which collapses the structure. This gentle incorporation is similar to how careful folding is required when working with high hydration doughs, such as in our NY Pizza Dough recipe.
Easy Snow Ice Cream Recipe

Ingredients:
Instructions:
Nutrition Facts:
| Calories | 328 kcal |
|---|---|
| Protein | 7.9 g |
| Fat | 8.6 g |
| Carbs | 54.4 g |
| Fiber | 0 g |
| Sugar | 54.4 g |
| Sodium | 174 mg |
