Pickled Radish Recipe
- Time: Active 15 minutes, Passive 30 minutes, Total 45 minutes
- Flavor/Texture Hook: A shattering, vinegary crunch with a sweet tart finish.
- Perfect for: Tacos, grain bowls, and brightening up heavy winter stews.
- Transform Your Toasts With This Pickled Radish Recipe
- The Science of Why it Works
- Bright Flavors and Satisfying Crunch
- Fast Preparation and Exact Timing
- Essential Elements for Vibrant Pickles
- Basic Tools for Successful Brining
- Simple Methods for Quick Pickling
- Fixing Texture and Flavor Issues
- Versatile Variations for Every Palate
- Preservation and Sustainability Tips
- Pairing Pickles With Favorite Meals
- Common Concerns About Radish Pickling
- Pickled Radish Recipe FAQs
- 📝 Recipe Card
Transform Your Toasts With This Pickled Radish Recipe
Have you ever looked at a dull bowl of rice or a plain piece of avocado toast and felt like it was just missing... something? I used to feel that way all the time until I started keeping a jar of these in my fridge.
There is something about that first bite, where the vinegar hits your tongue followed by a satisfying snap, that makes everything feel complete. I remember the first time I tried a quick pickled radish recipe; I was so surprised that fifteen minutes of work could yield such a vibrant result.
We aren't just making a side dish here; we are building a tool for your kitchen. These radishes bring a pop of neon pink to your plate that looks like it came straight out of a professional kitchen, but it’s really just the magic of simple chemistry.
If you have a bunch of radishes sitting in your crisper drawer that are starting to look a little sad, this is the way to give them a second life.
Right then, let's get into how we can turn these humble roots into the star of your next meal. We’ve all had those soggy, limp pickles from a jar at the back of the pantry, but we are going for something much better here. We want that fresh, garden grown feeling in every single slice.
The Science of Why it Works
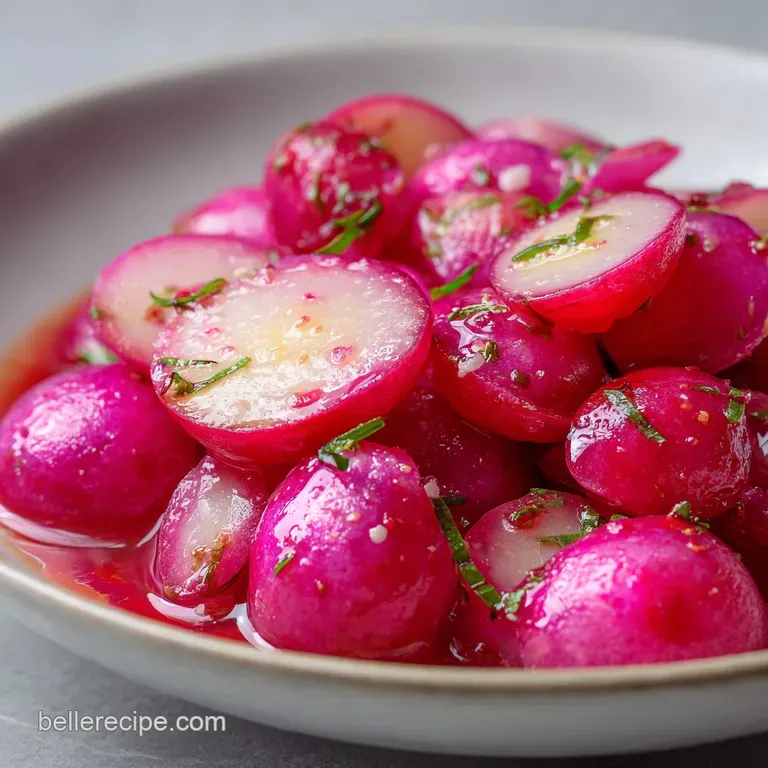
Anthocyanin Activation: The acetic acid in the vinegar reacts with the natural pigments in the radish skin, turning the entire slice a vibrant, uniform pink.
Osmotic Pressure: Salt and sugar draw moisture out of the radish cell walls, which allows the flavorful brine to move in and replace the water.
Bright Flavors and Satisfying Crunch
When we talk about pickles, we usually think of heavy dill or sugary bread and butter chips. This recipe is different because it focuses on the contrast between the earthy radish and the light, floral notes of rice vinegar.
It is a mindful way to appreciate the seasons, especially when the first spring radishes start appearing at the market. I love how the peppercorns add a slow burning heat that sits in the background without overwhelming the vegetable.
This recipe is all about finding that balance between the sweet and the savory. The cane sugar doesn't make it a "dessert" pickle; rather, it acts as a buffer for the sharpness of the vinegar.
It’s similar to how I balance the sweetness in my Orange Marmalade recipe it's all about the interplay of flavors.
Flavor Map
- Acid: Rice vinegar provides a soft, approachable tartness.
- Sweet: Cane sugar rounds out the sharp edges.
- Salt: Sea salt enhances the natural peppery notes.
- Spice: Mustard seeds and peppercorns add depth and a hint of warmth.
Fast Preparation and Exact Timing
One thing I’ve learned from years of making mistakes in the kitchen is that precision matters, even for something as simple as a pickle. If you slice your radishes too thick, the brine won't penetrate the center, and you'll end up with a raw middle.
Too thin, and they lose that shattering texture we are looking for. I always aim for 1/8 inch slices.
| Checkpoint | Target | Visual/Sensory Cue |
|---|---|---|
| Slice Thickness | 1/8 inch | Transparent enough to see light, but holds its shape |
| Brine Temperature | Simmering | Small bubbles breaking the surface, not a rolling boil |
| Cooling Period | 30 minutes | Jar is cool to the touch and the liquid has turned pink |
Using a stovetop to heat your brine is the traditional way to ensure the sugar and salt dissolve completely. However, some people wonder if they can use an oven for larger batches of pickled vegetables.
| Method | Best For | Result |
|---|---|---|
| Stovetop | Quick brine dissolving | Instant integration of spices and clear liquid |
| Oven (Roasted/Pickled) | Batch processing | Denser texture, sweeter flavor, less "snap" |
Essential Elements for Vibrant Pickles
I always say that a recipe is only as good as its components. For this pickled radish recipe, the star is obviously the radish. I prefer the standard red globe radishes because of that iconic pink color they give the brine.
If you can find French Breakfast radishes, they work beautifully too, though they are a bit more delicate.
Component Analysis
| Ingredient | Science Role | Pro Secret |
|---|---|---|
| Rice Vinegar | Acid Source | Use unseasoned vinegar to control the salt and sugar levels yourself |
| Cane Sugar | Texture Stabilizer | Helps maintain the crispness of the vegetable cell walls over time |
| Sea Salt | Moisture Extraction | Avoid iodized salt to prevent the brine from turning cloudy or metallic |
The Produce
- 1 bunch (approx. 9 oz) fresh radishes: Look for ones that feel heavy for their size and have firm skins. Avoid anything that feels "squishy." Why this? Firmer radishes have higher water content and better structural integrity.
The Brine Base
- 3/4 cup rice vinegar: This is softer than white vinegar and won't overpower the radish. Why this? Its lower acidity allows the vegetable's flavor to shine through.
- 3/4 cup water: This dilutes the acid just enough to make the pickles snackable.
- 2 tbsp cane sugar: Provides the necessary contrast to the vinegar.
- 1 1/2 tsp sea salt: Draws out the moisture for a better crunch.
The Aromatics
- 1/2 tsp whole black peppercorns: These add a velvety, woody heat.
- 1/2 tsp mustard seeds: Adds a tiny bit of "pop" and a savory, pungent undertone.
Basic Tools for Successful Brining
You don't need a lot of fancy gear for this, but a few specific tools make the process much smoother. I once tried to slice these with a dull chef's knife and ended up with chunks that were way too thick. It was a mess.
Chef's Note: If you have a mandoline, now is the time to use it. Just please, for the love of your fingertips, use the guard. It ensures every slice is exactly the same thickness, which means they will all pickle at the same rate.
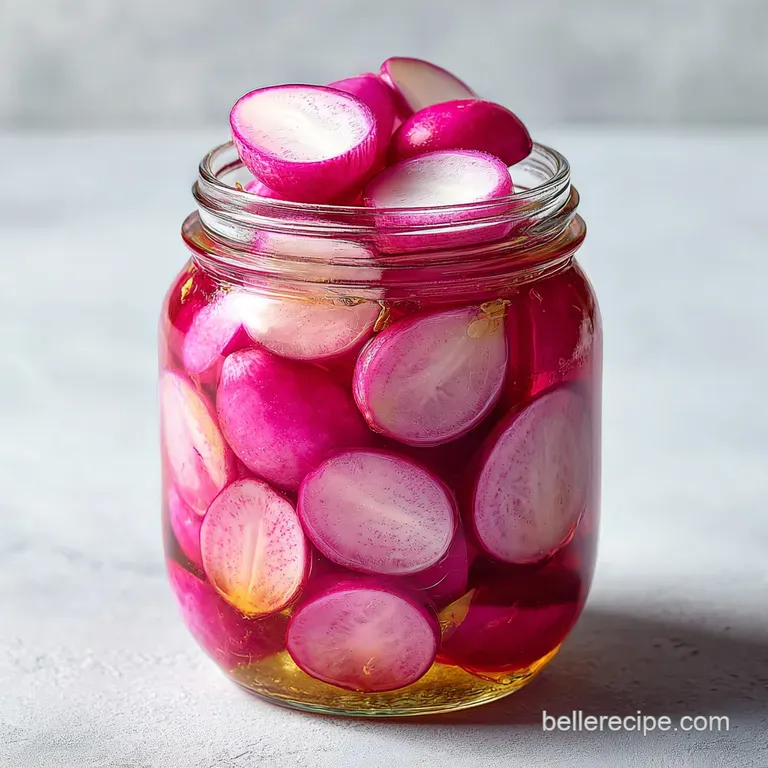
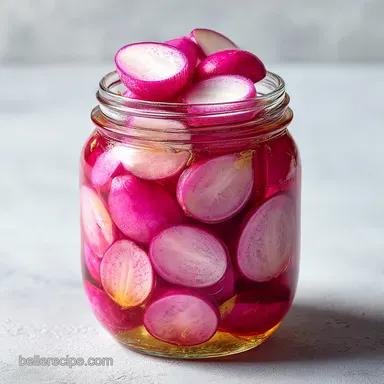
A small stainless steel saucepan is best for the brine. Avoid aluminum pans, as the acid in the vinegar can react with the metal and give your pickles a weird, tinny taste. You'll also need a clean wide mouth glass jar.
Mason jars are the gold standard here because they can handle the heat of the hot brine without cracking.
Simple Methods for Quick Pickling
Let's crack on with the actual making. It’s a very meditative process if you take your time with the slicing. I find it quite comforting to watch the brine transform from clear to a soft rose petal pink.
- Trim the radishes. Remove the greens and the root ends. Save those greens for a pesto!
- Slice thinly. Use a mandoline or a sharp knife to create 1/8 inch rounds until you have a pile of uniform discs.
- Pack the jar. Place the sliced radishes into your clean glass jar, leaving about an inch of space at the top.
- Prepare the brine. In your saucepan, combine the 3/4 cup rice vinegar, 3/4 cup water, 2 tbsp cane sugar, and 1 1/2 tsp sea salt.
- Add aromatics. Drop in the 1/2 tsp peppercorns and 1/2 tsp mustard seeds.
- Dissolve and simmer. Heat the mixture over medium heat until the sugar and salt have completely vanished.
- Pour the brine. Carefully pour the hot liquid over the radishes until they are fully submerged.
- Wait and cool. Let the jar sit on the counter uncovered until the liquid reaches room temperature.
- Seal and chill. Tighten the lid and move them to the fridge. They’ll be ready to eat in about an hour!
Fixing Texture and Flavor Issues
Even with a simple pickled radish recipe, things can go a bit sideways. I've had batches that turned out way too salty because I used the wrong kind of salt, and it’s a total heartbreak when you’ve been looking forward to that crunch.
Why Your Radishes Turned Mushy
If your radishes lack that "shatter" when you bite them, it's usually because the brine was boiling for too long or the radishes were old to begin with. High heat can start to "cook" the radish rather than just pickling it. Next time, pull the brine off the heat the second the sugar dissolves.
Troubleshooting Table
| Problem | Root Cause | Solution |
|---|---|---|
| Brine is cloudy | Use of iodized salt or tap water with high mineral content | Use distilled water and pure sea salt or kosher salt |
| Too sharp/acidic | Not enough water or sugar to balance the vinegar | Add a teaspoon of warm water and a pinch of sugar to the jar |
| Weird smell | Sulfur compounds naturally occurring in radishes | This is normal; let the jar vent for a minute after opening |
A great way to fix a batch that feels "off" is to think about what you're pairing it with. If they are too salty, they might actually be perfect inside a sandwich with plenty of creamy mayo, similar to how you'd balance flavors in Classic Tamagoyaki Recipes.
Versatile Variations for Every Palate
Once you master the base pickled radish recipe, you can start playing with the "vibe" of the jar. I love to change the spices depending on what I’m cooking for dinner that week. It's an easy way to transform the dish without buying new ingredients.
- For "Chicken Mu" (Korean Style): Omit the peppercorns and mustard seeds. Increase the sugar slightly and cut the radishes into small 1/2 inch cubes instead of slices. This is the classic accompaniment to fried chicken.
- The Mediterranean Transformation: Add a clove of smashed garlic and a sprig of fresh oregano to the jar before pouring the brine. This version is fantastic on top of hummus or inside a pita wrap.
- Spicy Kick: Toss in a few red pepper flakes or a sliced jalapeño. The heat will infuse into the radish over 24 hours.
| Original Ingredient | Substitute | Why It Works |
|---|---|---|
| Rice Vinegar | Apple Cider Vinegar | Adds a fruitier, more robust tang. Note: Will make the brine slightly more amber colored |
| Cane Sugar | Honey | Provides a floral sweetness. Note: Make sure to whisk thoroughly into the warm brine |
| Sea Salt | Kosher Salt | Similar clean taste. Note: Use a bit more (approx 2 tsp) as the grains are larger |
If you find yourself enjoying the process of making these small batch preserves, you might also enjoy the technique used in our Homemade Pickled Radishes recipe which explores more long term storage options.
Preservation and Sustainability Tips
Storing these is straightforward, but there are a few tricks to keep them at their peak. Keep them in the back of the fridge where it’s coldest. They will stay crunchy for about two weeks, though they are safest to eat for up to a month. After that, they start to lose their texture and become a bit "rubbery."
Don't throw away that brine when the radishes are gone! It's essentially a pre seasoned vinaigrette base. I love whisking a spoonful of the pink brine with some olive oil and a bit of Dijon mustard for an instant salad dressing. You can also use it to quick pickle some thinly sliced red onions or cucumbers.
Zero Waste Tip: The radish greens are completely edible and highly nutritious. They have a peppery flavor similar to arugula. You can sauté them with a bit of garlic and olive oil, or finely chop them to stir into a grain bowl along with your new pickles.
Pairing Pickles With Favorite Meals
Now for the best part eating them! These little pink gems are incredibly versatile. I love them on a "deconstructed" taco bowl with black beans, avocado, and plenty of cilantro. The acidity cuts right through the richness of the avocado in a way that is just so satisfying.
They also work brilliantly as a palate cleanser. If you are serving something heavy, like a braised beef or a creamy pasta, a few slices of pickled radish on the side can reset your taste buds between bites. It’s that contrast of bright and rich that makes a meal feel balanced.
- Taco Topping: Use them instead of raw onions for a more complex flavor.
- Charcuterie Board: They provide a beautiful pop of color next to salty cheeses and cured meats.
- Sandwiches: Slip a few slices into a turkey club or a banh mi for an extra layer of crunch.
Common Concerns About Radish Pickling
Myths to ForgetMyth: You must use a pressure canner for all pickles. Truth: Quick pickles (or "refrigerator pickles") rely on the acidity of the brine and cold storage, so no canning equipment is needed.
Myth: Radishes must be peeled before pickling. Truth: Leaving the skin on is essential! That is where the color comes from, and it provides a much better texture.
Decision Shortcut If you want them extra crunchy, soak the sliced radishes in ice water for 10 minutes before pickling. If you want a softer flavor, let the brine cool completely before pouring it over the vegetables.
If you want a spicy finish, add a half teaspoon of red chili flakes to the saucepan.
Pickling is a journey of discovery in your own kitchen. You start with a simple jar and a few vegetables, and suddenly you’re looking at every ingredient in your fridge wondering if it would taste better in a vinegar bath. Trust me, once you start making your own, you'll never go back to the store-bought stuff.
It's a mindful, comforting practice that yields results you can truly be proud of. Happy pickling!

Pickled Radish Recipe FAQs
What are the common mistakes when pickling radishes?
Avoid overcooking the brine or using old radishes. Overcooking can turn the radishes mushy instead of crunchy, and old radishes lack the crispness needed. Also, be sure to use sea salt or kosher salt, as iodized salt can make the brine cloudy.
How do you make pickled radishes?
Thinly slice radishes, pack them into a jar, and cover with a hot brine of rice vinegar, water, sugar, and salt. Add aromatics like peppercorns and mustard seeds to the brine. Let them cool on the counter, then refrigerate for at least an hour before eating.
How long does it take to pickle radishes?
They are ready to eat in about 1 hour, but are best after 24 hours. For optimal texture and flavor absorption, let them chill in the refrigerator for at least an hour. They will remain crisp for up to two weeks.
Is eating pickled radishes good for you?
Yes, in moderation, they can be a healthy addition. Radishes are a good source of vitamins and fiber, and the pickling process can introduce beneficial probiotics. The vinegar base also adds acidity which aids digestion.
Can I use a different type of vinegar?
Yes, apple cider vinegar is a good substitute for rice vinegar. It will provide a fruitier, more robust tang and may make the brine slightly more amber colored, similar to how acidity balances flavors in Orange Marmalade: Traditional Hand Cut Recipe for Perfect Set.
Why did my pickled radishes turn mushy?
This is likely due to the brine being boiled for too long or using old radishes. High heat can cook the radishes, losing their crispness. Ensure you remove the brine from heat as soon as the sugar and salt dissolve, and use fresh, firm radishes for the best texture.
How long do pickled radishes last?
They will stay crisp in the refrigerator for about two weeks. While they are safe to eat for up to a month, their texture may start to degrade after the first two weeks, becoming less crunchy.
Pickled Radish Recipe
Ingredients:
Instructions:
Nutrition Facts:
| Calories | 11 kcal |
|---|---|
| Protein | 0.1 g |
| Fat | 0 g |
| Carbs | 2.1 g |
| Fiber | 0.3 g |
| Sugar | 1.9 g |
| Sodium | 224 mg |
