Cheese Quesadilla Recipe: Shatter Crisp Exterior
- Time: Active 5 mins, Passive 5 mins, Total 10 mins
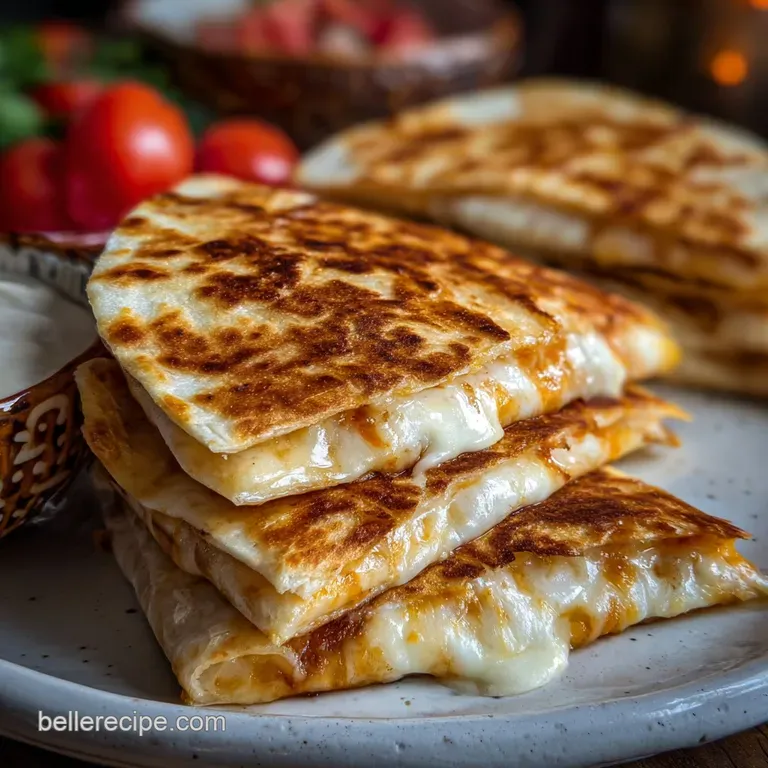
- Flavor/Texture Hook: Shatter crisp exterior with a molten, stretchy cheese core
- Perfect for: Quick weeknight comfort or a mindful solo lunch
- Why This Flavor Layering Works
- Essential Recipe Specs and Data
- Selecting Your Primary Ingredients
- Essential Gear for Perfect Melts
- The Detailed Step-by-Step Method
- Avoiding Common Kitchen Disasters
- Creative Flavor Variations to Try
- Smart Storage and Reheating Guide
- Best Ways to Serve Quesadillas
- Very High in Sodium
- Recipe FAQs
- 📝 Recipe Card
There is a specific sound that defines a successful lunch in my kitchen. It is not the timer going off, but rather the distinct, glass like crackle when a knife first slices through a toasted tortilla. I remember the rainy Tuesday when I finally stopped rushing this process.
I used to just throw a tortilla in a dry pan, wait for it to get some black spots, and call it a day. But the result was always a bit chewy, a bit sad, and honestly, forgettable.
Everything changed when I started treating this cheese quesadilla recipe like a tiny piece of architecture. I began thinking about how the fat in the cheese interacts with the flour in the tortilla, and how a tiny splash of oil can turn a dull surface into something that resembles a pastry shell.
It is about the mindfulness of the sizzle. When you hear that gentle hiss as the tortilla hits the pan, you know you are building something substantial.
We are going to walk through how to make a quesadilla that actually feels like a meal, not an afterthought. We've all made the mistake of overstuffing them or using the wrong heat, but today we’re focusing on the balance of texture and the quiet joy of a perfectly melted center.
Trust me, once you see how the layers of Monterey Jack and sharp cheddar work together, you'll never go back to the pre shredded bags again.
Why This Flavor Layering Works
Building a great quesadilla isn't just about heat; it's about managing moisture and fat. We want the inside to stay humid enough to melt the cheese, while the outside stays dry enough to fry. It's a delicate dance of thermodynamics that happens in less than ten minutes.
- Thermal Conductivity: Using a small amount of neutral oil acts as a heat bridge, ensuring every millimeter of the tortilla surface reaches the temperature needed for browning.
- Protein Matrix: The combination of Monterey Jack and cheddar provides both the long strand protein chains for "the pull" and the sharp fats for flavor.
- Starch Gelatinization: High heat briefly softens the starches in the flour tortilla before the oil "locks" them into a crispy state.
- Maillard Reaction: The proteins in the flour and the milk solids in the cheese residue on the edges brown at 140°C, creating that savory, toasted aroma.
The Physics of the Cheese Pull
The secret to the stretch is the high moisture content in young cheeses like Monterey Jack. When heated, the casein proteins relax and glide past each other without breaking, creating those long, silky threads we crave.
Engineering the Perfect Crunch
To get that "shatter" effect, we need to drive off the surface moisture of the tortilla quickly. If the pan isn't hot enough, the tortilla just steams and becomes rubbery, but the oil helps create a waterproof barrier that keeps things crisp.
| Cook Method | Time | Texture | Best For |
|---|---|---|---|
| Stovetop Skillet | 5 mins | Shatter crisp and oily | Ultimate flavor and texture |
| Air Fryer | 6 mins | Evenly toasted but drier | Hands off quick snacks |
| Oven (Sheet Pan) | 12 mins | Flaky and consistent | Feeding a large crowd |
Choosing your method depends on how much you value that golden crust. While the air fryer is convenient, the stovetop method allows you to feel the weight of the flip and hear the transition from soft to crispy. This tactile feedback is part of the mindful cooking process that turns a simple snack into a ritual.
Essential Recipe Specs and Data
When you are following this cheese quesadilla recipe, precision matters more than you might think for such a simple dish. We are aiming for a specific ratio of cheese to tortilla so that the filling doesn't spill out and burn, but you still get a substantial bite.
The weight of the cheese is the most common pitfall. If you use too much, the center stays cold while the outside burns. If you use too little, you're basically eating toasted bread. We have found that 90 grams of cheese (about 3/4 cup total) is the sweet spot for a 10 inch tortilla.
It creates a layer about 3 millimeters thick, which is enough to insulate the heat and melt evenly.
This recipe is designed for a single serving, but the techniques remain the same if you’re scaling up. The key is to keep your pan temperature consistent. If you are making several in a row, you'll need to wipe the pan between batches to prevent any stray bits of cheese from burning and creating bitter smoke. This is much like the technique used in our Nacho Cheese Sauce recipe, where temperature control is the difference between a silky finish and a grainy mess.
| Ingredient | Science Role | Pro Secret |
|---|---|---|
| Flour Tortilla | Starch Structure | Use room temperature wraps to prevent cracking during the fold. |
| Monterey Jack | Moisture/Fat Ratio | Shred it fresh from a block for a much smoother, more velvety melt. |
| Sharp Cheddar | Flavor Concentration | Use an aged white cheddar to add a complex, tangy bite to the fat. |
| Neutral Oil | Heat Transfer | A tiny amount creates an even golden brown across the entire surface. |
One thing I've learned through many failed attempts is that the tortilla's age matters. A fresh, pliable tortilla has enough internal moisture to puff up slightly when it hits the heat. This creates little air pockets that become extra crispy.
If your tortillas are a bit older, you can lightly mist them with water before putting them in the pan to revive that steam driven lift.
Selecting Your Primary Ingredients
The soul of this dish lies in the quality of your elements. Since there are so few ingredients, there is nowhere for mediocre ones to hide. I always tell my friends to skip the pre shredded cheese.
Those bags are coated in potato starch or cellulose to keep the shreds from clumping, but that same coating prevents the cheese from becoming a truly cohesive, molten mass.
- 2 large (10 inch) flour tortillas: Look for "burrito size" and check the ingredients for real fats. Why this? Flour provides the best crispy to chewy contrast compared to corn for this specific style.
- 1/2 cup (60g) shredded Monterey Jack cheese: This is your "melt" cheese. Why this? Its high moisture content ensures a consistent, silky stretch every single time.
- 1/4 cup (30g) shredded sharp white cheddar cheese: This is your "flavor" cheese. Why this? It provides the necessary acidic punch to cut through the richness of the Jack.
- 1 tsp neutral oil: Canola or vegetable oil works best here. Why this? It has a high smoke point, allowing for a deep sear without burning or tasting like olives.
- 1/8 tsp smoked paprika: Just a hint. Why this? It adds a subtle "charred" flavor even if you're cooking on an electric stove.
- 1 tbsp fresh cilantro, chopped: For brightness. Why this? The grassy notes wake up the heavy fats of the melted cheese.
- 1/2 fresh lime, cut into wedges: Essential for serving. Why this? Acid is the "secret" ingredient that makes the cheese flavors pop.
- 1 pinch flaky sea salt: To finish. Why this? It adds a final crunch and draws out the savory notes of the cheddar.
Substitution Table
| Original Ingredient | Substitute | Why It Works |
|---|---|---|
| Monterey Jack | Low moisture Mozzarella | Similar melting point and stretch. Note: Flavor is much milder. |
| Sharp White Cheddar | Pepper Jack | Adds a spicy kick. Note: Will be softer and less sharp than cheddar. |
| Neutral Oil | Unsalted Butter | Adds a nutty, toasted flavor. Note: Browns much faster; lower the heat. |
If you find yourself out of white cheddar, a good Gruyère is a fantastic, if slightly more expensive, alternative. It brings a nutty sophistication that reminds me of a Cracking Cheese Fondue Recipe. The key is always to balance one high melt cheese with one high flavor cheese to get the best of both worlds.
Essential Gear for Perfect Melts
You don't need a high tech kitchen to master this, but a few specific tools make the process much more intuitive. A heavy bottomed skillet is non negotiable. Whether it's cast iron or a heavy stainless steel pan, you need something that can hold heat steadily.
Thin aluminum pans often have "hot spots" that will burn one side of your tortilla while the other side is still pale and soft.
I also swear by a large, flat spatula. You want something thin enough to slide under the tortilla without tearing it, but wide enough to support the weight of the cheese when you flip.
A "fish spatula" is actually my favorite tool for this task because the slots allow any excess oil to drain away, ensuring the bottom stays crisp.
Finally, consider a lid that is slightly smaller than your pan. While we want a crispy exterior, a brief 30 second "steam" under a lid helps the cheese in the very center melt completely before the outside gets too dark.
This is a trick I learned from making grilled cheese, and it works perfectly here to ensure structural integrity.
The Detailed step-by-step Method

1. Tempering the Tortilla and Cheese
Start by taking your cheese and tortillas out of the fridge about 15 minutes before you plan to cook. Cold cheese takes much longer to melt, which often leads to the tortilla burning before the center is gooey.
Grate your Monterey Jack and Cheddar and mix them together in a small bowl with the smoked paprika.
2. Preparing the Pan
Place your skillet over medium heat and add the 1 tsp of neutral oil. Use a paper towel or a brush to spread the oil thinly across the entire surface. We aren't deep frying here; we just want a shimmering, thin film. Heat the pan for 3 minutes until the oil barely begins to ripple.
3. The Foundation Layer
Place one 10 inch tortilla into the pan. You should hear a gentle sizzle. Immediately sprinkle your cheese mixture evenly over the entire surface of the tortilla, going all the way to about half an inch from the edge.
Note: Leaving a small margin prevents cheese from leaking out and sticking to the pan.
4. Engineering the Layered Melt
Place the second tortilla on top, pressing down firmly with your hand or a spatula to create contact. Cover the pan with a lid for about 45 seconds. This traps the rising heat and ensures the cheese begins to slump and bond the two tortillas together.
5. Mastering the Golden Flip
Remove the lid. Once the bottom tortilla is golden brown and feels rigid when lifted at the edge (usually after about 2 minutes), it is time to flip. Slide your wide spatula all the way under the center and flip in one swift motion.
6. The Final Sear
Cook the second side for another 2 to 3 minutes. At this stage, you are looking for the cheese at the edges to just start peeking out and bubbling. The aroma should be toasted and nutty. Cook until both sides are shatter crisp.
7. Utilizing Residual Pan Heat
Turn off the burner but leave the quesadilla in the pan for 30 more seconds. This "resting" period allows the internal temperature to equalize, ensuring every bit of cheese is molten without the risk of burning the crust.
8. Resting for Structural Strength
Slide the quesadilla onto a cutting board. Wait 2 full minutes before slicing. This is the hardest part, but it’s crucial. If you cut it immediately, the molten cheese will spill out like lava. Waiting lets the cheese set just enough to stay inside the triangles.
9. Bright Finishing Touches
Top the hot quesadilla with a pinch of flaky sea salt and the fresh chopped cilantro. Serve immediately with the lime wedges on the side. Squeezing the lime over the top right before you bite in provides a sharp contrast to the rich, salty cheddar.
Chef's Tip: If you want an extra crunchy "cheese crust" (frico), sprinkle a tiny bit of the cheddar directly onto the hot pan right before you flip the quesadilla. The cheese will fry into a lacy, salty wafer that sticks to the outside of the tortilla.
Avoiding Common Kitchen Disasters
Even a simple dish can go wrong if you're not paying attention to the signals the food is giving you. The most common mistake is using heat that is too high. You want the tortilla to brown at the same rate the cheese melts. If you see smoke, your pan is too hot.
If the tortilla is still soft after 3 minutes, your heat is too low.
Why Your Quesadilla is Soggy
If your tortilla comes out limp and greasy instead of crispy, it's usually because the pan wasn't hot enough when you started, or you used too much oil. The oil should be a thin film, not a pool.
Also, avoid adding "wet" ingredients like salsa or un drained beans directly inside the quesadilla; they will release steam that softens the flour.
Managing Intense Heat Spikes
If you’re using a cast iron skillet, remember that it holds onto heat for a long time. If the first side browned in 60 seconds, turn the heat down significantly before flipping. The pan will continue to get hotter even if the dial stays the same.
| Problem | Root Cause | Solution |
|---|---|---|
| Tortilla is burnt, cheese is cold | Heat was too high | Use medium low heat and a lid to trap steam early on. |
| Cheese is oily and separated | Overheated the cheese | Use a mix of high melt cheese and avoid high oil varieties. |
| Tortilla is tough and rubbery | Too little fat or old tortilla | Add a tiny bit more oil and ensure pan is fully preheated. |
Common Mistakes Checklist
- ✓ Shred your own cheese to avoid the grainy texture of anti clumping starches.
- ✓ Preheat your skillet for at least 3 minutes before the tortilla touches it.
- ✓ Don't overstuff the edges leave a small border to prevent a messy cleanup.
- ✓ Use a neutral oil rather than butter for a higher heat, crispier sear.
- ✓ Always let the quesadilla rest for 2 minutes before cutting to keep the filling intact.
Creative Flavor Variations to Try
Once you have mastered the basic cheese quesadilla recipe, you can start treating the tortilla like a blank canvas. The beauty of this dish is how easily it adapts to what you have in the fridge. The key is to keep the "filling to cheese" ratio in check so the structural integrity remains.
The Protein Boost Options
If you want to make this a more substantial meal, adding a protein layer is easy. Shredded rotisserie chicken, sautéed black beans, or even thin slices of steak work beautifully. Just make sure the protein is already cooked and warm before it goes into the tortilla.
I personally love adding a layer of black beans that have been smashed with a fork it acts as a "glue" for the cheese.
The Air Fryer Shortcut
For those days when you don't want to stand over a stove, the air fryer is a lifesaver. Lightly spray both sides of the assembled quesadilla with oil. Cook at 190°C (375°F) for 6 to 8 minutes, flipping halfway through.
It results in a very even, cracker like crunch that is less oily than the stovetop version.
The Oven Baked Batch Method
If you are feeding a family, making them one-by-one is a nightmare. Instead, lay four tortillas on a large baking sheet, fill them, and fold them in half. Brush the tops with oil and place another baking sheet on top to "press" them.
Bake at 200°C (400°F) for 10-12 minutes. You’ll get perfectly crispy quesadillas all at once.
| Servings | Tortillas | Total Cheese | Cook Time |
|---|---|---|---|
| 1 Person | 2 (10 inch) | 90g (3/4 cup) | 5-7 mins |
| 2 People | 4 (10 inch) | 180g (1.5 cups) | 10-12 mins |
| 4 People | 8 (10 inch) | 360g (3 cups) | 15 mins (Oven) |
When serving a crowd, I often set out bowls of different toppings. A Blue Cheese Dressing Dip recipe might seem unconventional, but the tang of the blue cheese is incredible with a buffalo chicken quesadilla variation. It’s all about layering those flavors to keep things interesting.
Smart Storage and Reheating Guide
Quesadillas are best eaten immediately, but they do store surprisingly well if you handle them correctly. The biggest enemy of a leftover quesadilla is the microwave. Microwaving a tortilla turns it into a rubbery, damp mess that loses all its charm.
Storage: You can keep cooked quesadillas in an airtight container in the fridge for up to 3 days. To prevent them from sticking together, place a piece of parchment paper between each one.
Freezing: These are fantastic for meal prep. Assemble the quesadilla but do not cook it. Wrap it tightly in plastic wrap and then foil. It will stay fresh in the freezer for up to 2 months.
You can cook them directly from frozen by adding 2-3 minutes to the cook time on each side over low heat.
Reheating: To bring back that "shatter crisp" texture, use a dry skillet over medium heat. It takes about 2 minutes per side to melt the cheese and re crisp the exterior.
If you’re in a hurry, an air fryer at 180°C for 3 minutes also works wonders.
Zero Waste Tip: If you have leftover scraps of tortillas that didn't make it into the quesadilla, don't toss them. Cut them into triangles and fry them in the remaining oil in the pan for 60 seconds to make quick homemade chips.
Even the cilantro stems can be finely minced and added to a salsa they have even more flavor than the leaves!
Best Ways to Serve Quesadillas
The way you present this cheese quesadilla recipe can turn a simple snack into a festive meal. I love to cut mine into six even triangles using a pizza cutter it gives much cleaner lines than a chef's knife. Arrange them in a circle on a wooden board with a small bowl of dip in the center.
Speaking of dips, don't feel limited to just salsa and sour cream. A spoonful of Greek yogurt mixed with lime zest is a lighter, tangier alternative to sour cream. If you're feeling adventurous, try dipping your quesadilla in a warm honey chili oil.
The sweetness of the honey against the sharp cheddar is a total discovery for the palate.
If you’re looking for a side dish to make this a full dinner, a simple slaw of shredded cabbage, lime, and vinegar provides the perfect crunch and acidity to balance the heavy cheese. It’s mindful eating at its best balancing the rich, comforting fats with bright, fresh vegetables.
Debunking Kitchen Myths
- Myth: You must use butter for the best flavor.
- Truth: Butter contains water and milk solids that can make the tortilla soft or burn too quickly. A neutral oil provides a much crispier, more consistent "fry" for a quesadilla.
- Myth: Pre shredded cheese is "just as good."
- Truth: The starch coating on bagged cheese prevents it from melting into a unified, silky layer. Always grate from a block for the best results.
- Myth: You need a special "quesadilla maker."
- Truth: A simple heavy bottomed skillet gives you much more control over the heat and the level of crispiness than a dedicated appliance ever could.
This dish is a reminder that some of the most comforting meals come from just a few ingredients handled with care. Whether you’re making this for your kids after school or for yourself after a long day, take a second to appreciate the sizzle. It's the sound of something good being made.
Enjoy every molten, crispy bite!

Very High in Sodium
1540 mg mg of sodium per serving (67% % of daily value)
The American Heart Association recommends limiting sodium intake to about 2,300mg per day for most adults.
Tips to Reduce Sodium in Your Quesadilla:
-
Low-Sodium Cheese-15%
Choose low-sodium or reduced sodium Monterey Jack and cheddar cheese. This simple swap can significantly reduce the sodium content without drastically changing the flavor. Look for labels indicating lower sodium content.
-
Omit Added Salt-10%
Eliminate the flaky sea salt entirely. The cheeses already contain sodium, and the other flavors will still be present without adding more salt. Consider using a salt substitute.
-
Spice It Up-5%
Enhance the flavor with additional spices like garlic powder, onion powder, or cumin instead of relying on salt. These can provide a savory taste without adding sodium. Use a variety of spices.
-
Tortilla Choice-5%
Consider using a low-sodium tortilla. Some brands offer lower sodium options that can help reduce the overall sodium content of the quesadilla. Compare labels to find the lowest sodium option.
-
Herb Power
Experiment with fresh herbs like more cilantro, chives, or parsley to boost the flavor profile naturally. Herbs add complexity and freshness without adding any sodium. Consider adding different types of herbs.
Recipe FAQs
What to put in a cheese quesadilla?
A blend of high moisture and high flavor cheeses. For the best melt and taste, combine shredded Monterey Jack (for stretch) with a sharp cheese like aged white Cheddar or Colby Jack (for flavor). Always grate fresh cheese from a block to avoid anti caking agents.
How to make a Mexican restaurant cheese quesadilla?
Heat a skillet over medium heat with a thin layer of neutral oil. Place one tortilla down, immediately top with cheese leaving a half inch border, cover with the second tortilla, and cook for 2-3 minutes until golden. Flip and cook the second side until evenly browned and fully molten inside.
What are traditional quesadilla fillings?
The most traditional filling is simply cheese, often Oaxacan or Chihuahua cheese. Beyond that, common additions include shredded cooked chicken (tinga style), mild sautéed poblano peppers, or seasoned refried beans. Keep fillings warm before adding them to prevent cooling the cheese.
What to put in a quesadilla to make it better?
Add texture and bright acid upon serving. A sprinkle of flaky sea salt and fresh cilantro elevates the flavor profile significantly. Squeeze fresh lime juice over the top just before eating; this cuts through the richness of the fat, similar to how acid brightens a rich dressing in a Caesar Salad Recipe.
How do I ensure the cheese melts completely before the tortilla burns?
Cover the pan briefly immediately after the flip. After placing the top tortilla on, cook covered for about 45 seconds to trap steam, ensuring the center heats up fast. Also, grate your cheese fresh; starches on pre-shredded cheese inhibit a smooth melt.
Is it true that you should never use butter in the pan for a cheese quesadilla?
No, this is partially true depending on your goal. Butter adds great flavor but has a lower smoke point and milk solids can burn quickly, resulting in patchy browning. A neutral oil provides a higher, more even heat transfer necessary for that shatter crisp crust.
Can I use homemade mozzarella in my cheese quesadilla?
Yes, fresh cheese works well, but you must reduce its moisture content first. If you just pulled fresh cheese from the whey, it will steam the tortilla instead of crisping it. Pat it very dry or let it air dry on paper towels for an hour, similar to how we manage excess liquid when learning How to Make Mozzarella recipe.
Quick Cheese Quesadilla Recipe

Ingredients:
Instructions:
Nutrition Facts:
| Calories | 810 calories |
|---|---|
| Protein | 33 g |
| Fat | 44 g |
| Carbs | 73 g |
| Fiber | 3 g |
| Sugar | 2 g |
| Sodium | 1540 mg |
