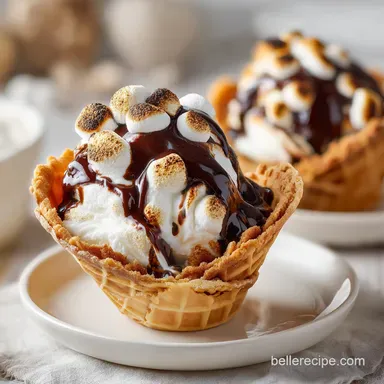
S'mores Campfire Cones: Gooey and Crispy
- Time: 5 min active + 5 min cooking = Total 15 minutes
- Flavor/Texture Hook: Shattering waffle cone with velvety, molten chocolate
- Perfect for: Family camping trips or backyard fire pits
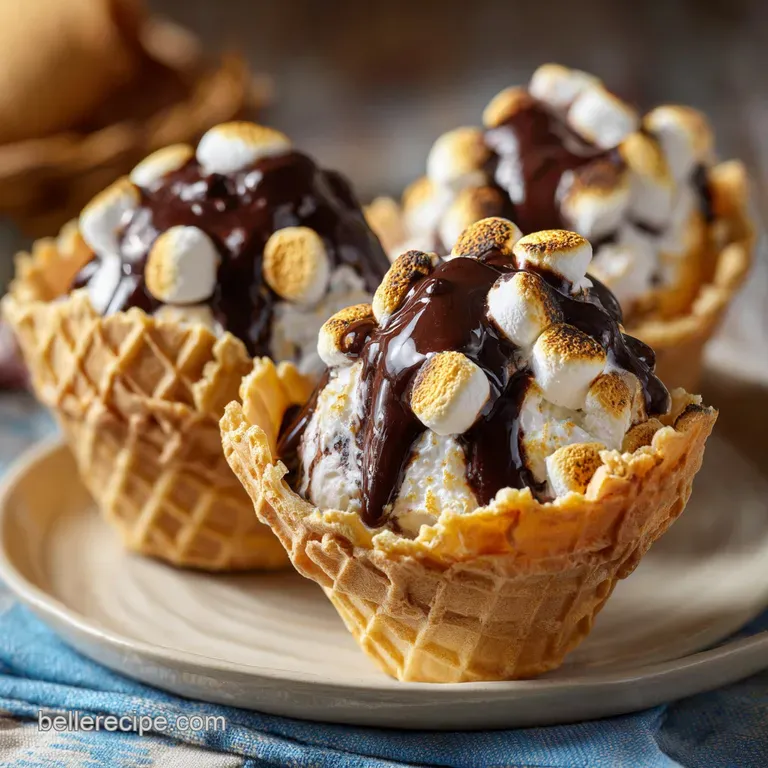
S'mores Campfire Cones
I still remember a trip to the Ozarks a few years back. The air smelled like damp pine needles and cedar smoke, and we were all huddled around a crackling fire. My nephew was struggling with the traditional s'mores, constantly dropping his graham crackers into the dirt or letting the marshmallow slide off the roast.
It was a sticky, sandy disaster.
That's when we tried the cone trick. I remember the first time we pulled one out of the foil; the smell of toasted sugar was intoxicating. When I took that first bite, the waffle cone shattered, giving way to a velvety flow of chocolate and melted marshmallow. It was a total win for everyone, especially the kids.
You're going to love these S'mores Campfire Cones because they solve the "soggy cracker" problem. Instead of balancing ingredients on a stick, you've got a contained vessel that turns the chocolate into a rich sauce.
It's a shared experience that feels nostalgic but tastes way more indulgent than the standard campfire fare.
Reasoning Behind the Melt
The magic here is all about heat conduction. The aluminum foil creates a small oven around the cone, trapping the steam and heat. This ensures the chocolate reaches its melting point without burning the outer shell of the cone. According to Serious Eats, controlling the temperature of chocolate is key to avoiding graininess, and the foil wrap provides that gentle, indirect heat.
- Thermal Mass
- The chocolate chips at the bottom act as a heat sink, melting slowly and creating a molten base.
- Steam Trapping
- Marshmallows release moisture as they heat, which steams the interior of the cone for a slightly chewy texture.
- Caramelization
- The sugars in the waffle cone react to the heat, intensifying the toasted flavor.
- Direct Insulation
- The foil prevents the direct flame from charring the cone before the center is gooey.
| Method | Time | Texture | Best For |
|---|---|---|---|
| Foil Wrap | 5 mins | Velvety/Gooey | Campfires |
| Open Flame | 2 mins | Charred/Crispy | Quick snacks |
| Oven Bake | 8 mins | Consistent Melt | Indoor parties |
This method is far superior to the open flame approach because you don't have to worry about the marshmallow catching fire before the chocolate even softens.
Component Analysis
Understanding how these ingredients interact helps you customize the result.
| Ingredient | Science Role | Pro Secret |
|---|---|---|
| Waffle Cone | Structural Vessel | Freeze for 10 mins before filling |
| Mini Marshmallows | Aerated Sweetener | Press down to remove air gaps |
| Semi Sweet Chips | Fat Based Binder | Add a pinch of salt to cut sugar |
Required Ingredients
Keep it simple. You don't need a pantry full of stuff, just these basics.
- 12 standard sized waffle cones Why this? Sturdier than sugar cones for heat
- 3 cups mini marshmallows Why this? Melt more evenly than jumbo ones
- 2 cups semi sweet chocolate chips Why this? Balanced sweetness and melt point
| Original Ingredient | Substitute | Why It Works |
|---|---|---|
| Semi Sweet Chips | Dark Chocolate Chips | More bitter, less sweet. Note: May require 1 extra minute to melt |
| Mini Marshmallows | Large Marshmallows | Cut into quarters. Note: Takes longer to melt evenly |
| Waffle Cone | Sugar Cone | More brittle. Note: Shorter shelf life before softening |
I've tried using low-fat chocolate, but honestly, don't even bother. You need the cocoa butter to get that velvety texture that defines a great s'more.
Putting it Together

Let's crack on with the assembly. This part is quick, but the seal is everything.
- Drop 2 tablespoons of chocolate chips into the bottom of each waffle cone. Note: This creates the molten base
- Top the chocolate chips with a handful of mini marshmallows, pressing them down slightly to fill any gaps.
- Place each filled cone in the center of a 12 inch square of heavy duty aluminum foil.
- Twist the foil tightly around the top and bottom, ensuring the bottom is completely sealed. Note: This prevents the chocolate from leaking into the fire
- Place the wrapped cones on the edge of a campfire grate, away from the hottest coals.
- Roast for 5 minutes, rotating occasionally, until the foil is hot to the touch.
- Remove from heat and let them sit for 2 minutes. Note: This lets the chocolate settle
- Carefully unwrap and serve.
Chef's Note: To add a professional touch, add a tiny pinch of flaky sea salt on top of the marshmallows before sealing. It makes the chocolate pop.
Troubleshooting Guide
Even the easiest recipes can go sideways if the fire is too hot or the foil is loose.
Leaky Cone Fixes
If chocolate leaks out the bottom, your foil seal wasn't tight enough. Always twist the bottom into a "candy wrapper" shape to lock in the goo.
Burnt Base Fixes
If the cone tastes charred, you're too close to the coals. Move the cones to the outer edge of the grate where the heat is more indirect.
Avoiding Gummy Marshmallows
If the marshmallows aren't melting, they might have been too cold. Let your ingredients sit at room temperature for 20 minutes before filling.
| Problem | Root Cause | Solution |
|---|---|---|
| Cone collapsed | Foil too loose | Tighten twist at the top |
| Cold center | Too short roasting | Extend by 2 mins, rotate more |
| Burnt outer shell | Direct flame contact | Move to the grate edge |
Common Mistakes Checklist
- ✓ Used heavy duty foil (thin foil tears)
- ✓ Sealed the bottom tight
- ✓ Kept cones away from direct flames
- ✓ Rotated every 2 minutes
Adjusting the Batch
If you're feeding a crowd or just yourself, you can easily scale this.
Scaling Down (6 cones): Simply halve the ingredients. Use a smaller area of the grill to keep the heat concentrated.
Scaling Up (24 cones): Double the ingredients, but work in batches. If you crowd the grate, the heat won't circulate, and your S'mores Campfire Cones will take longer to melt. Only increase the salt/spices by 1.5x to avoid overpowering the chocolate.
If you're not at a campsite, you can recreate the vibe with my easy s'mores dip in the oven.
Decision Shortcut:
- If you want extra crunch, roast for only 4 minutes.
- If you want a nutty twist, add crushed peanuts over the chocolate.
- If you want more fruit, slide a thin strawberry slice between the chocolate and marshmallow.
S'mores Misconceptions
There are a few myths about campfire cooking that I've seen. First, some people think you need to toast the marshmallows on a stick before putting them in the cone. Trust me, don't do that. They melt better and stay moister when they're steamed inside the foil.
Another myth is that you need a professional grill. You don't. As long as you have hot coals and a flat surface (even a clean rock if you're desperate), you can get the job done.
Storage and Waste
Since these are best enjoyed the moment they're hot, storage is tricky. Once the cone cools, it can become chewy or soggy. I recommend eating them immediately.
If you have leftover marshmallows or chocolate, don't toss them. You can melt them together to make a dip or use them in my Rice Krispie treats for a sweet snack the next morning.
Storage Tips:
- Fridge: Not recommended (cones lose crunch).
- Freezer: Not recommended.
- Zero Waste: Use leftover waffle cone shards as a topping for ice cream.
Serving Your Treats
The best way to serve these is straight out of the foil. It's a comforting, messy experience that's part of the fun. If you're feeling fancy, you can place the cones in a muffin tin to keep them upright while you eat.
For a sunny afternoon treat, pair these with a cold glass of milk or a tart berry smoothie to balance the richness of the semi sweet chocolate. It's all about sharing the moment together around the fire. Enjoy your S'mores Campfire Cones!
Recipe FAQs
How to wrap the cones for campfire roasting?
Place each filled cone in a 12 inch square of heavy duty aluminum foil. Twist the foil tightly around the top and bottom to ensure the base is completely sealed.
Should I place the cones directly over the hottest coals?
No, place them on the edge of the grate. Keeping the cones away from the direct heat prevents the chocolate from burning and the waffle cone from scorching.
Can I use large marshmallows instead of mini ones?
No, stick with mini marshmallows. They fill the gaps more effectively and melt more evenly inside the narrow cone.
How to tell when the cones are finished roasting?
Roast for 5 minutes while rotating occasionally. They are ready once the foil is hot to the touch and the marshmallows have fully expanded.
Can I make these ahead of time and store them in the fridge?
No, eat them immediately. Once the cones cool or are refrigerated, they lose their crunch and become chewy or soggy.
Is it true that I need to pre-melt the chocolate chips before adding them to the cones?
No, this is a common misconception. The heat from the campfire melts the semi sweet chocolate chips perfectly during the roasting process.
What can I do with leftover chocolate and marshmallows?
Melt them together to create a sweet treat. If you enjoyed the combination of melted sweets here, see how similar flavors work in a creamy dessert dip.
S Mores Campfire Cones