Chicken Enchilada Casserole: Layered Perfection
- Time: Active 15 minutes, Passive 25 minutes, Total 40 minutes
- Flavor/Texture Hook: Velvety cheese blankets and nutty, toasted corn
- Perfect for: Stress free family Sunday or a mindful meal prep session
- The Science of the Perfect Layered Casserole
- Vital Recipe Specifications for Home Cooks
- Quality Ingredients for Mindful Flavor
- Essential Kitchen Tools for Success
- Bringing the Dish Together
- Fixes for Common Issues
- Flavorful Swaps and Changes
- Guide to Freezer Success
- Serving with Visual Flair
- Kitchen Myths and Realities
- Storage Guidelines and Zero Waste
- High in Sodium
- Recipe FAQs
- 📝 Recipe Card
Close your eyes and imagine the kitchen filled with the scent of toasted corn and warm, earthy cumin. There is something so incredibly mindful about the rhythm of layering a Chicken Enchilada Casserole - it feels like building a little house of comfort.
I remember the first time I tried making this; I just threw the tortillas in dry and ended up with a mushy mess that looked more like porridge than a casserole. It was a disaster, but it taught me the most important lesson in Tex Mex cooking: the tortilla needs respect.
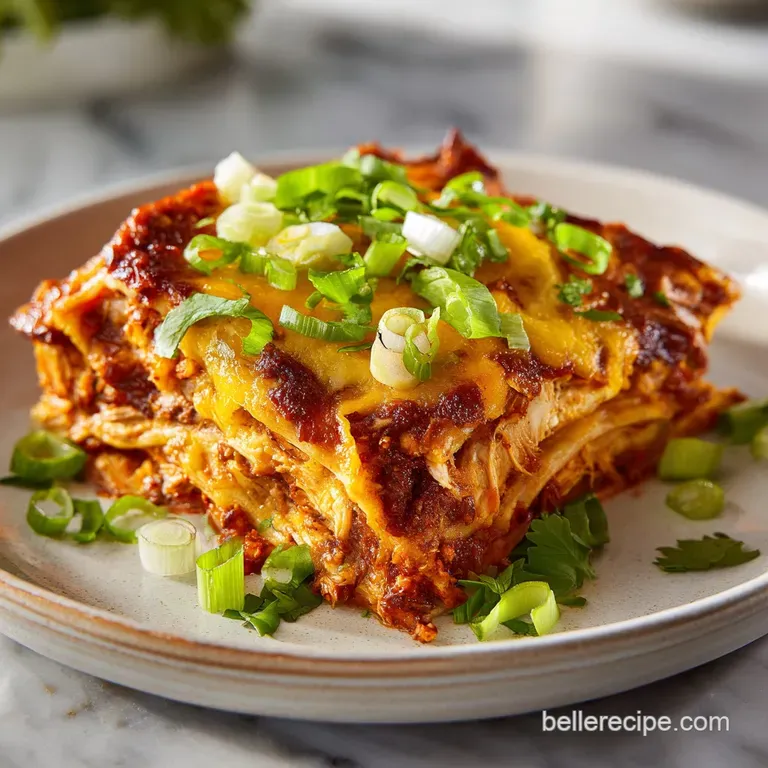
Now, whenever I pull this bubbly, golden brown tray out of the oven, I think about how those simple ingredients - just chicken, cheese, and sauce - can become something so much greater than their parts.
This isn't just about feeding people; it's about that inclusive feeling of everyone gathered around the table, waiting for that first "sizzle" as the spatula cuts through the melted cheese. We've all had those long days where we need a win, and trust me, this dish is the warmest hug you can put on a plate.
We are going to skip the fussy rolling and go straight for the layered approach, which I find much more rewarding. It allows the sauce to seep into every nook and cranny without compromising the bite of the tortilla.
You'll get those crispy, slightly charred edges on the top layer that shatter just perfectly under your fork, followed by the silky, tender center. It’s a texture journey that never gets old, and I can't wait for you to experience it in your own kitchen.
The Science of the Perfect Layered Casserole
The Maillard Shield: Dipping tortillas in 1 tbsp neutral oil over medium heat creates a hydrophobic barrier of polymerized fats. This thin coating prevents the starch in the corn from absorbing too much liquid, which is why this Chicken Enchilada Casserole stays structural rather than turning into mush.
Emulsion Stability: Using 3 cups shredded Monterey Jack cheese works because of its high moisture to protein ratio. When heated, the fat stays suspended in the protein matrix longer than aged cheddars, resulting in a velvety "cheese pull" that doesn't break into oil puddles.
| Cook Method | Prep Time | Texture Result | Best For |
|---|---|---|---|
| Standard Oven | 15 minutes | Crispy edges, soft center | Traditional family dinner |
| Air Fryer (Batch) | 10 minutes | Maximum crunch on top | Small portions or singles |
| Slow Cooker | 5 minutes | Completely soft and tender | Set and forget busy days |
When you are looking for that deep, comforting flavor, the choice of sauce is everything. I often think back to the comfort of my How to Make recipe when I'm in the mood for a simple bake. Both dishes rely on the harmony of protein and starch, but here, the acidity of the enchilada sauce cuts through the richness of the 3 cups shredded Monterey Jack cheese. It is a mindful balance that keeps you coming back for a second helping without feeling weighed down.
Vital Recipe Specifications for Home Cooks
| Ingredient | Science Role | Pro Secret |
|---|---|---|
| 15 Corn Tortillas | Structural Base | Use yellow corn for a sturdier, nuttier backbone than white corn. |
| 2 Cups Sauce | Hydration Agent | Warm the sauce first to ensure even heat distribution during the bake. |
| 4 oz Green Chiles | Acid & Heat | Use undrained chiles; the canning liquid contains concentrated flavor and vinegar. |
| 1.5 lbs Chicken | Protein Bulk | Use room temperature chicken to prevent cooling down the oven mid bake. |
To get the best results, we need to focus on the moisture levels. If the chicken is too wet, the whole dish loses its integrity. I always pat the 1.5 lbs cooked chicken breast dry before shredding it.
This simple, mindful step ensures that the 1 tsp ground cumin and 0.5 tsp smoked paprika actually stick to the meat rather than washing off into the bottom of the pan.
Quality Ingredients for Mindful Flavor
- 1.5 lbs cooked chicken breast, shredded: This is the heart of our dish. Why this? Shredded texture allows the sauce to cling to every single fiber of the meat. (Substitute: Shredded rotisserie chicken for a time saving shortcut).
- 4 oz canned diced green chiles, undrained: These add a gentle, inclusive hum of heat. Why this? The vinegar in the canning liquid brightens the heavy cheese and starch. (Substitute: Diced fresh poblano peppers, sautéed until soft).
- 1 tsp ground cumin: The quintessential earthy note of the Southwest. Why this? It provides the aromatic "base note" that makes the house smell wonderful. (Substitute: Ground coriander for a more citrusy, floral vibe).
- 0.5 tsp smoked paprika: For a whisper of campfire flavor. Why this? It mimics the flavor of traditional dried peppers without the intense heat. (Substitute: Chili powder for a more complex, blended spice profile).
- 0.5 tsp sea salt: To wake up all the other flavors. Why this? Sea salt has a cleaner finish than standard table salt. (Substitute: Kosher salt, but use 1 tsp as it is less dense).
- 2 cups red or green enchilada sauce: Our liquid gold. Why this? This provides the necessary moisture to soften the tortillas just enough. (Substitute: Tomato sauce mixed with taco seasoning in a pinch).
- 15 corn tortillas: The "bread" of our casserole. Why this? Corn has a distinct toasted flavor that flour tortillas simply cannot match. (Substitute: Flour tortillas, but expect a much softer, more doughy texture).
- 3 cups shredded Monterey Jack cheese: For that classic, inclusive melt. Why this? It has the perfect melting point for a smooth, velvety finish. (Substitute: Mild white cheddar or a Mexican blend).
- 0.25 cup fresh cilantro, chopped: The final pop of color and freshness. Why this? It cuts through the richness of the cheese and chicken. (Substitute: Fresh flat leaf parsley or sliced green onions).
- 1 tbsp neutral oil: For treating our tortillas. Why this? High smoke point oil like avocado or canola won't smoke during the quick sear. (Substitute: Light olive oil).
Chef's Tip: If you find yourself with extra chicken, I highly recommend looking at my Fried Chicken Recipe for a completely different texture profile. While this casserole is all about the velvety melt, that fried version is about the ultimate crunch. It's lovely to see how one protein can be transformed in so many ways.
Essential Kitchen Tools for Success
You don't need a professional kitchen to make a stunning Chicken Enchilada Casserole. Honestly, a simple 9x13 inch ceramic or glass baking dish is your best friend here. Glass is great because you can actually see the layers bubbling on the side, which helps you judge the doneness.
You'll also want a wide skillet (like a Lodge cast iron) for that quick tortilla dip.
A good box grater is also non negotiable. I know those bags of pre shredded cheese are tempting, but they are coated in potato starch to prevent clumping in the bag. That starch prevents the cheese from melting into that gorgeous, unified blanket we want.
Grating your own Monterey Jack takes three minutes but changes the entire experience.
Bringing the Dish Together
Phase 1: The Three Step Timeline
- Prep (0-15 mins): Shred the chicken, grate the cheese, and whisk the spices together.
- Assembly (15-25 mins): Flash sear the tortillas and build your layers like a lasagna.
- The Bake (25-40 mins): Into the oven until the edges are brown and the middle is a molten sea of cheese.
Phase 2: Execution Steps
- Preheat your oven to 375°F (190°C). Note: This higher temp ensures the edges get crispy before the middle overcooks.
- In a large bowl, toss the 1.5 lbs shredded chicken with 4 oz green chiles, 1 tsp cumin, 0.5 tsp smoked paprika, and 0.5 tsp salt. Mix until the chicken is evenly coated in spices.
- Heat 1 tbsp neutral oil in a skillet over medium high heat. Pass each of the 15 corn tortillas through the oil for 5 seconds per side. Note: You aren't frying them hard, just "sealing" them.
- Spread a thin layer (about 1/4 cup) of the enchilada sauce on the bottom of your baking dish. This prevents the bottom layer from sticking.
- Place 5 tortillas on the bottom, overlapping them to cover the surface. They should feel supple and warm.
- Top the tortillas with 1/3 of the chicken mixture and 1 cup of the shredded cheese. Drizzle with 1/2 cup of sauce.
- Repeat the layering two more times: tortillas, chicken, cheese, and sauce. Press down firmly on each layer to remove air pockets.
- Finish with a final layer of cheese on top. Bake for 25 minutes until the cheese is bubbly and the edges are starting to turn deep golden brown.
- Remove from the oven and let it rest for 10 minutes. This is crucial for the layers to set so it doesn't fall apart when sliced.
- Garnish with the 0.25 cup cilantro and serve immediately.
Fixes for Common Issues

Why Your Casserole Might Be Soggy
If you skip the oil dip step, the corn tortillas act like sponges. They soak up every drop of the 2 cups of sauce, losing their structure and turning into a soft paste. Another culprit is using "wet" chicken; if you poach your chicken breast, make sure it is thoroughly drained and patted dry.
Achieving the Perfect Golden Crust
Sometimes the cheese melts but doesn't brown. If your oven has a "cool" spot, the top might look pale. Don't be afraid to flick the broiler on for the last 60 seconds. Stay right there, though! The difference between golden brown and charred black is a matter of seconds.
| Problem | Root Cause | Solution |
|---|---|---|
| Dry Chicken | Overcooked breast meat | Stir 2 tbsp of the sauce directly into the chicken filling before layering. |
| Tortillas Breaking | Stale or cold tortillas | Ensure you do the quick oil dip; the heat makes the corn fibers flexible. |
| Separated Sauce | Sauce was too cold | Room temperature sauce integrates better with the fat from the cheese. |
Common Mistakes Checklist
- ✓ Never use flour tortillas unless you want a very soft, gummy texture.
- ✓ Don't use pre shredded cheese; the anti clumping agents ruin the melt.
- ✓ Always let the dish rest for 10 minutes before slicing to ensure clean cuts.
- ✓ Pat your chicken dry excess water is the enemy of a structural casserole.
- ✓ Don't skip the oil dip; it’s the only way to prevent the "mush" factor.
Flavorful Swaps and Changes
For the Chicken Base
If you aren't in the mood for chicken, this recipe is incredibly inclusive of other proteins. Ground turkey sautéed with the same spice blend works beautifully. For a vegetarian version, replace the 1.5 lbs chicken with two cans of black beans (rinsed and dried) and a cup of roasted corn kernels.
The texture remains chunky and satisfying.
Adding Rice to Layers
If you want a "Chicken Enchilada Casserole with rice" version, simply cook 1 cup of long grain rice separately. Mix the cooked rice with a little lime juice and extra cilantro, then add a thin layer of rice between the chicken and the cheese.
This makes the dish much heartier and is a great way to stretch the 6 servings to 8 or 10.
| Original Ingredient | Substitute | Why It Works |
|---|---|---|
| Monterey Jack | Pepper Jack | Same melting point but adds a spicy kick. |
| Red Enchilada Sauce | Green Chile Sauce | Provides a tangier, more acidic profile. |
| Corn Tortillas | Flour Tortillas | Note: Will result in a much softer, more lasagna like texture. |
Guide to Freezer Success
This is a legendary "freezer friendly chicken enchilada casserole." To freeze it properly, assemble the entire dish in a foil pan but do not bake it. Wrap it tightly in a double layer of plastic wrap, followed by a layer of heavy duty aluminum foil. It will stay fresh in the freezer for up to 3 months.
When you're ready to eat, thaw it overnight in the fridge. Bake it at 375°F (180°C) as directed, but you may need to add 10-15 minutes to the total time since it will be starting from a colder temperature.
For reheating single leftovers, the microwave works, but the oven or a toaster oven is better for maintaining that "shatter" on the top edges.
Serving with Visual Flair
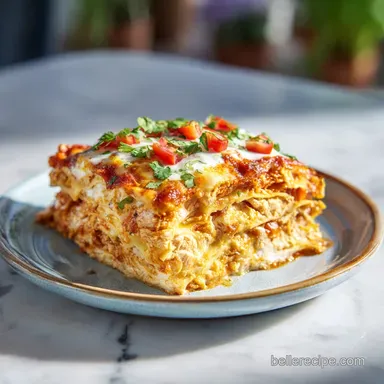
To make this look restaurant quality, it’s all about the contrast. The deep red of the sauce and the golden cheese look stunning against the bright green of the 0.25 cup fresh cilantro.
I love serving this with a big dollop of cold sour cream right in the center and some thinly sliced radishes for a crunch that mirrors the toasted tortillas.
If you are hosting a dinner, serve this alongside a simple slaw made with lime juice and honey. The acidity of the slaw resets your palate between bites of the rich, cheesy casserole. It turns a simple weeknight meal into a mindful, shared experience that feels special.
Kitchen Myths and Realities
Myth: You must roll the enchiladas for them to be "authentic." Reality: While traditional enchiladas are rolled, the "Enchiladas Montadas" (stacked enchiladas) style is a legitimate and historical variation from New Mexico.
Layering as a casserole provides the same flavor profile with much better structural consistency for home cooks.
Myth: Searing the tortillas makes the dish greasy. Reality: The 1 tbsp neutral oil used is barely enough to coat the 15 corn tortillas. Most of the oil stays in the pan or is absorbed into the surface of the corn, creating a barrier.
It actually results in a less greasy feeling dish because the tortillas don't disintegrate into the sauce.
Myth: You can't use green sauce in a red sauce recipe. Reality: This is a "Green Chicken Enchilada Casserole" just by swapping the sauce! The physics of the bake remain identical. Green sauce (tomatillo based) is often a bit more acidic, which pairs beautifully with the Monterey Jack cheese.
Storage Guidelines and Zero Waste
Storage: Keep leftovers in an airtight container in the fridge for up to 4 days. The flavors actually deepen on the second day as the spices meld.
Zero Waste Tip: If you have leftover tortillas that are starting to get dry, don't toss them! Cut them into triangles and fry them in a little oil to make homemade chips for the side.
Any leftover cilantro stems can be finely minced and added to the chicken filling; they hold even more flavor than the leaves! If you have half a jar of salsa sitting in the fridge, stir it into your enchilada sauce to add extra texture and chunks of tomato to the layers.

High in Sodium
1017 mg of sodium per serving (44% of daily value)
The American Heart Association recommends limiting sodium intake to about 2,300mg per day for overall health.
Tips to Reduce Sodium in Your Enchiladas
-
Low-Sodium Cheese-15%
Swap regular Monterey Jack cheese with a low-sodium version. This simple change can significantly reduce the overall sodium content.
-
Fresh Over Canned-15%
Use fresh, diced green chiles instead of canned. Canned chiles often contain added salt. If using canned, rinse them thoroughly before adding.
-
Low-Sodium Sauce-20%
Opt for a low-sodium enchilada sauce or make your own using tomato paste, chili powder, and other spices to control the sodium levels.
-
Reduce Added Salt-25%
Omit the added sea salt (0.5 tsp). The other ingredients already contribute sodium to the dish. Taste and adjust seasoning after cooking.
-
Sodium Aware Chicken-10%
Ensure the cooked chicken breast wasn't prepared with excessive salt. If possible, cook the chicken yourself without adding any salt during the cooking process.
-
Flavor with Herbs
Enhance the flavor of your enchiladas with fresh herbs and spices like oregano, garlic powder, onion powder, and black pepper to reduce the need for salt.
Recipe FAQs
What are some common mistakes when making enchilada casserole?
Not oiling the tortillas. Skipping the quick oil dip prevents the corn tortillas from becoming mushy sponges, ensuring structural integrity when the sauce is added.
What are the 4 ingredients in chicken casserole?
Chicken, tortillas, sauce, and cheese. These four components form the essential structural and flavor base of the dish.
Why are they called divorced enchiladas?
No, casserole versions are typically not called divorced enchiladas. "Divorced" refers to classic rolled enchiladas separated onto the plate, half covered in red sauce and half in green sauce, not the layered casserole format.
What goes in an enchilada casserole?
Shredded chicken, corn tortillas, enchilada sauce, and Monterey Jack cheese. You also need basic spices like cumin and paprika, plus a finishing acid from canned green chiles.
Is it true I must use pre-shredded cheese for convenience?
No, avoid pre-shredded cheese if possible. Pre-shredded cheese contains anti caking agents like potato starch which prevent it from melting into that smooth, velvety blanket we want.
How to prevent the chicken filling from being dry in the casserole?
Mix 2 tbsp of warm enchilada sauce directly into the shredded chicken before layering. This adds back the moisture lost during cooking and ensures the protein is seasoned throughout; if you enjoy similar comfort meals, see how that same principle of moisture retention is vital in the Cozy Chicken Pot Pie recipe.
How to achieve structural integrity so the casserole slices cleanly?
Quickly sear each corn tortilla in 1 tbsp of neutral oil for 5 seconds per side before layering. This flash searing creates a slightly hydrophobic barrier that prevents the corn from fully absorbing the sauce and turning mushy during the bake.
Chicken Enchilada Casserole
Ingredients:
Instructions:
Nutrition Facts:
| Calories | 605 kcal |
|---|---|
| Protein | 53.6g |
| Fat | 26.8g |
| Carbs | 36.3g |
| Fiber | 4.2g |
| Sugar | 3.8g |
| Sodium | 1017mg |
