Creamy Dreamy Homemade Yogurt: a No-Fuss Guide

Alright, let's have a chinwag about yogurt, shall we? ever wondered how to whip up that creamy goodness yourself? this homemade yogurt recipe is easier than you think.
Honestly, once you taste the difference, you'll be a convert.
The Magic of Homemade Yogurt
Making your own yogurt is like a little bit of kitchen alchemy. yogurt has been around for centuries. it's a staple in many cultures.
This recipe is beginner friendly. it needs minimal effort, so it's fab for busy bees. this recipe yields about 4 cups.
That's enough to keep you going for a bit.
Why Bother Making Your Own Yogurt?
Why should you give a toss about a homemade yogurt recipe ? well, for starters, it's packed with probiotics. they're brilliant for your gut.
It's also fab if you're watching your sugar intake. loads of shop bought yogurts are rammed with the sweet stuff. plus, it's just a satisfying thing to do, innit? it feels proper old-school.
Now, let's talk ingredients.
Oh my gosh! and if you have a little one, you can even use this recipe to make homemade yogurt melts baby loves.
Just blend the yogurt with some fruit and freeze in small drops. perfect healthy snack!
Making yogurt without Starter
Don't have any yogurt with live cultures? no worries. a lot of people love making yogurt from scratch. you can also find freeze dried yogurt starter cultures online.
You see? you have a lot of options when making yogurt in instant pot .
What Makes This Recipe Stand Out?
This isn't just any homemade yogurt recipe . we're going to focus on a luxuriously creamy texture. this is something you just can't get in the shops.
I'll share my tips for keeping the temperature spot on, which is the key to successful fermentation. are you ready to ditch the processed stuff? lets dive in.
Alright, let's get down to the nitty gritty. Time to talk ingredients and kit for the best homemade yogurt recipe ever! Honestly, it's easier than you think.
Ingredients & Equipment
Main Ingredients
- 8 cups ( 1.9 liters ) milk. I use whole milk. It gives that super creamy texture. Cow's milk, goat's milk, even some plant based milks work. Just avoid the ultra pasteurized stuff. It can be a right pain.
- 2 tablespoons ( 30 ml ) plain yogurt with live cultures. From your last batch, or shop bought. Just make sure those cultures are alive and kicking.
For the milk? full fat is your best bet for creaminess. but honestly , quality is key. you want proper, good milk.
For the yogurt starter? check the label. "live and active cultures" must be there!
Seasoning Notes
Homemade yogurt recipe is pretty simple. It does not normally use seasoning. It gets its flavour from the process.
- Essential spice combinations? Not needed for the base recipe.
- Flavor enhancers and aromatics? Vanilla extract is great. Honey too. Add them after chilling.
- Quick substitution options? A pinch of salt to enhance the flavour, although it is not needed.
Seriously, the best thing about making yogurt is you can add whatever you fancy! Oh my gosh, have you tried adding passion fruit after? Divine .
Equipment Needed
Right, what bits and bobs do you actually need?
- Large saucepan. Big enough to hold all that milk!
- Candy thermometer. Or any thermometer. You need to be spot on with temps.
- Whisk. For stirring.
- Clean glass jar or container. About 4 cups size. A Kilner jar is spot on.
- Insulated cooler or oven. For keeping it warm.
- Optional: Yogurt maker. If you're feeling fancy.
No fancy gadgets? no worries. a big pan, a thermometer, and a jar are all you really need. you can use an instant pot yogurt recipe easy , crock pot yogurt or use a regular oven instead.
For example, a thermos flask can be used for incubation.
Honestly, a saucepan and a jam jar will do the trick!
So there you have it! everything you need to get going with my homemade yogurt recipe . trust me, once you’ve tried make your own yogurt , you won’t go back.
Ready to try homemade yogurt without starter with previous batches? it's like magic, i tell you! don't let anything hold you back from learning how to make yogurt .
This low carb dessert will be a game changer! you can even create homemade vegan yogurt or homemade yogurt melts baby depending on the milk you use and how do you prepare it.
Right, let's get down to brass tacks and talk cooking methods , shall we?
Creamy Dreamy Homemade Yogurt Recipe : A No-Fuss Guide
Honestly, who needs shop bought yogurt full of who-knows what when you can whip up a batch of luxuriously smooth and tangy yogurt right in your own kitchen? it’s easier than you think.
Forget all that fancy stuff. this recipe shows you how to make the simplest homemade yogurt recipe .
Prep Like a Pro: Your Mise en Place
First things first, let's get organized! you'll need 8 cups (1.9 liters) of milk. whole milk works best. grab 2 tablespoons (30 ml) of plain yogurt with live cultures.
Check the date! you need a big pan, a thermometer, a whisk, and a clean jar. that's it. honestly!
Want to save time? Measure everything out beforehand. Keep your milk ready. Have your yogurt starter to hand. Safety first, though! Be careful with hot milk. That stuff burns like nobody's business.
Get Cooking: The step-by-step Dance
Right, here we go! This is how to turn your milk into yogurt.
- Heat the Milk: Gently heat the milk in your pan. Stir it often. Don't let it stick! Get it to 180° F ( 82° C) . Don't boil it!
- Cool It Down: Take the milk off the heat. Let it cool to 110- 115° F (43- 46° C) . This is really important.
- Add the Good Stuff: Whisk in your yogurt starter. Gently.
- Incubate: Pour the mixture into your clean jar. Now, keep it warm. Aim for 100- 110° F (38- 43° C) . This can take 8- 24 hours. Check it!
- Chill Out: Once it's thick enough, put it in the fridge. Chill for at least 2 hours.
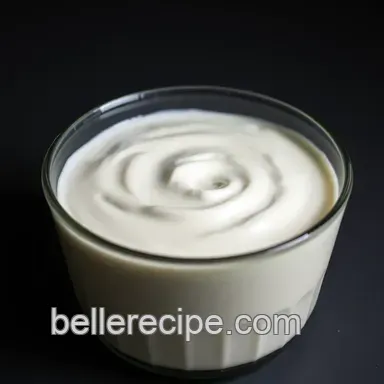
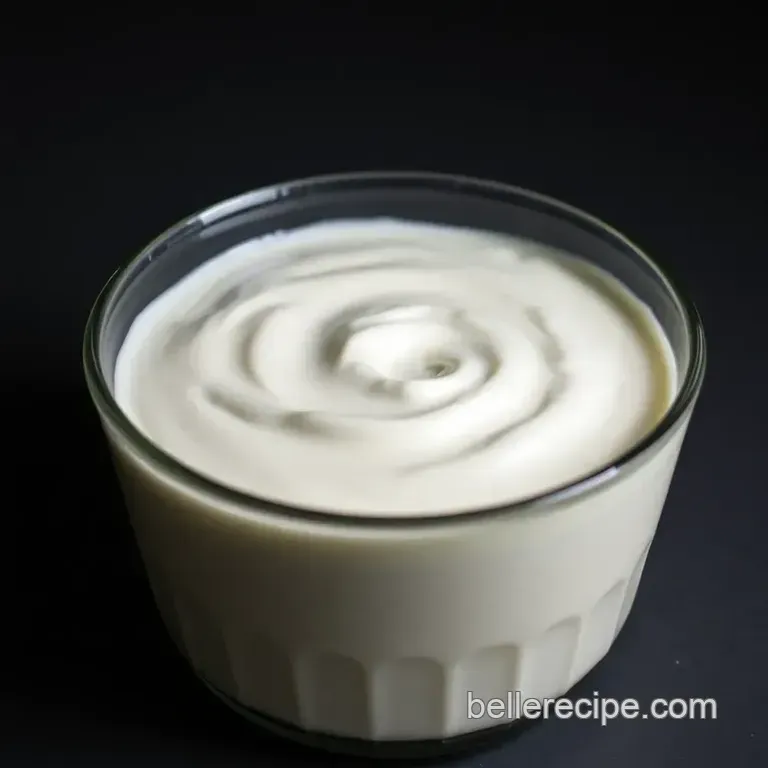
- Enjoy your delicious Low Carb Dessert!
Pro Tips : Yogurt Secrets Revealed
Okay, so here's the gossip. consistent temp is key. i use an insulated cooler with warm water. check the temp.
An oven with the light on works too. avoid that ultra pasteurized milk. it just doesn't thicken as well. it's just the worst.
Homemade yogurt recipes need specific milk!
Made a mistake? don't panic! just try again. yogurt making is forgiving. making yogurt is actually fun! to make make greek yogurt , line a colander with cheesecloth.
Strain for a few hours. voila ! you can then use your homemade yogurt melts baby or store them in the freezer.
My granny always use to tell "cleanliness is next to godliness". therefore, make sure all your kit is spotless. you can even create homemade vegan yogurt using soy milk.
Honestly, making your own yogurt is dead easy once you get the hang of it. plus, you know exactly what's going in it.
Give it a go! what have you got to lose? and you end up with creamy, dreamy homemade yogurt . there are even instant pot yogurt recipe easy to find.
You can also use crock pot yogurt . who knows, maybe you'll even become a make your own yogurt guru!
Right then, let's chat homemade yogurt recipe notes, shall we? it's not just chucking stuff together! there's a bit of finesse to getting it just right.
Honestly, i've had my fair share of yogurt making fails, so let me share what i've learned.
Recipe Notes for Your Best Batch
Serving Like a Pro
Right, let's talk presentation. Don't just dollop it in a bowl! A little bit of effort goes a long way.
Think layers. A bed of granola, a generous spoonful of your glorious homemade yogurt , topped with berries? Chef's kiss . And don't forget the sides!
A nice glass of iced tea goes down a treat with yogurt, or even a cheeky little low carb dessert wine if you're feeling fancy.
Storage Savvy
Now, this is important. Don't leave it languishing on the side!
Pop your homemade yogurt recipe straight into the fridge once it's thickened up. it'll keep happily for about a week, which is great for meal planning.
If you fancy making a homemade vegan yogurt then it can also stay up to a week.
Freezing isn't ideal, as it can change the texture. You can use the insta pot yogurt recipe easy to make smaller batches!
Reheating? Never! Yogurt is best enjoyed cold.
Remix Time! Variations Galore
Want to spice things up? I do!
For a diy vegan yogurt , almond or coconut milk work a treat, but you must use a vegan starter culture.
Seasonal fruit swaps? oh my gosh, yes! rhubarb in spring, berries in summer, apple and cinnamon in autumn... the possibilities are endless!.
Some folks like to add vanilla or honey, too. homemade yogurt melts baby can also be done by adding fruits and blending into a fine liquid mixture for babies.
Nutrition Nutshell
Let's keep it simple. yogurt is packed with protein and probiotics, the good bacteria that are great for your gut.
You know? calcium for strong bones too! you can even try to make greek yogurt for more protein.
It's a wholesome snack that keeps you feeling full. However, sugar levels can sneak in so make sure you are adding less.
Okay, that's it for the notes! Don't be intimidated by making yogurt . It's easier than you think. Get stuck in, experiment, and have fun!
Frequently Asked Questions
Why isn't my homemade yogurt recipe thickening up properly?
Several factors can affect yogurt thickness. Firstly, ensure your milk isn't ultra pasteurized, as this process can denature proteins crucial for thickening. Secondly, maintaining a consistent incubation temperature (around 100-110°F/38-43°C) is vital; too cold, and the cultures won't thrive; too hot, and they'll die off.
Finally, the quality and freshness of your starter yogurt play a role, so try a different brand if problems persist. You might also try adding a tablespoon or two of powdered milk to the milk before heating to increase the solids content.
Can I use different types of milk for this homemade yogurt recipe?
Absolutely! Whole milk yields the creamiest yogurt, but you can use low-fat or skim milk for a lighter version. Goat's milk works well too, imparting a slightly different flavour. For dairy-free options, soy or almond milk can be used, though you might need to experiment with different starter cultures designed explicitly for plant based milks to achieve the desired consistency.
Keep in mind that the taste and texture will vary depending on the type of milk you choose.
How long does homemade yogurt last in the fridge?
Homemade yogurt typically lasts for 1-2 weeks in the refrigerator, stored in an airtight container. The longer it sits, the tangier it will become, similar to how a good cheddar matures. Always give it a sniff and a look before consuming; if it smells off or shows signs of mold, it's best to discard it.
Just like that pint of milk at the back of the fridge, you know the drill!
I'm not a fan of tangy yogurt. How can I make my homemade yogurt recipe less sour?
The tanginess of yogurt is directly related to the incubation time. The longer it incubates, the tangier it becomes. Try reducing the incubation time by a few hours. Also, ensuring your incubation temperature doesn't exceed 110°F (43°C) can help, as higher temperatures promote faster fermentation and more acid production.
You can also add a teaspoon of vanilla extract to the milk before incubation, or stir in a little honey after chilling, to mellow the flavour. Think of it like adding a spoonful of sugar to your tea it sweetens the deal!
Can I use my homemade yogurt as a starter for my next batch?
Yes, indeed! You can use your homemade yogurt as a starter for subsequent batches for up to a week. Ensure you reserve the starter from a batch that tastes and thickens well. After that, the cultures may weaken over time.
Using your own yogurt as a starter is a great way to ensure you're getting consistent results and to save on buying more store-bought yogurt. Remember to keep it in the fridge and only use 2 tablespoons per batch!
Creamy Dreamy Homemade Yogurt A No Fuss Guide