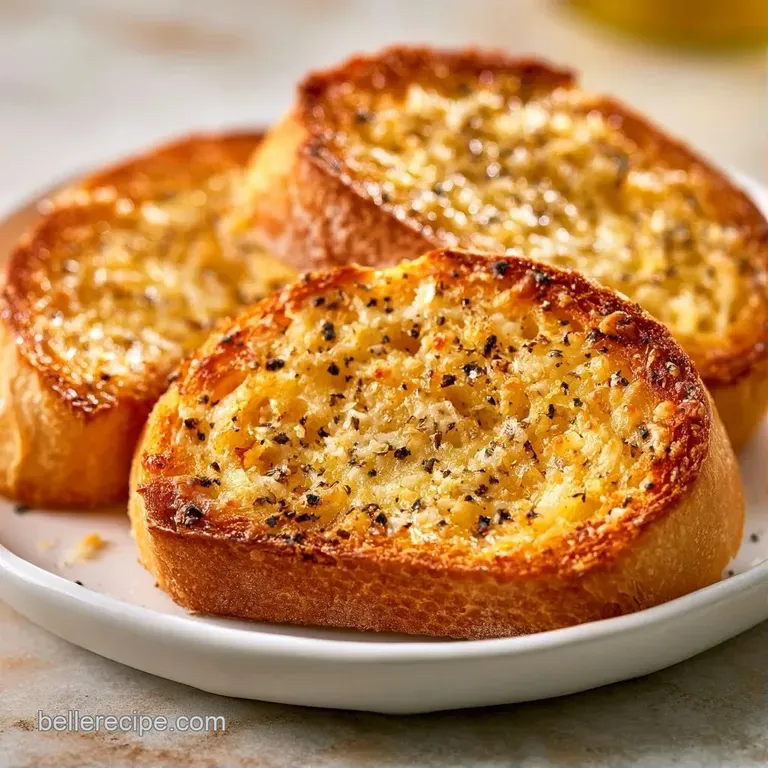
Crispy Garlic Crostini with Parmesan

- Time: 5 min active + 10 min cooking
- Flavor/Texture Hook: Mahogany brown crunch with a punchy garlic finish
- Perfect for: Party appetizers or a side for soup
Ever pulled a tray of garlic toast out of the oven only to find the centers are still chewy and the garlic tastes like charcoal? It's a common letdown. You want that sharp, aromatic bite, but the oven often burns the minced garlic before the bread actually crisps up.
I used to just mix garlic into the oil, but that leads to uneven spotting and burnt bits. The fix is way simpler. By toasting the bread first and rubbing the garlic on at the end, you get the aromatic punch without the bitterness.
This approach gives you a consistent, golden crunch. You'll get a thin, crisp shell and a firm center that can hold up to heavy toppings. We're making a Crispy Garlic Crostini that actually tastes like fresh garlic, not a campfire.
Making The Best Crispy Garlic Crostini
The goal here is a balance of textures. We want the edges to be dark gold, almost mahogany, while the middle stays firm. This requires a high heat of 400°F, which dries out the surface of the baguette quickly.
Most people leave the slices too thick, which results in a "rubbery" middle. Cutting them to exactly 1/3 inch allows the heat to penetrate the core in about 10 minutes. This ensures the bread is stable enough for a slice of brie or a dollop of bruschetta.
For those in a rush, an air fryer is a great alternative. It circulates the heat faster, cutting the cook time down to about 5 minutes. Either way, the key is the post bake garlic rub.
| Method | Time | Texture | Best For |
|---|---|---|---|
| Oven | 10 mins | Even, golden crunch | Large batches |
| Air Fryer | 5 mins | Extra crisp edges | Quick snacks |
Why The Rub Works
Heat Activation: Toasting the bread opens the pores and creates a rough surface that acts like a grater for the garlic clove.
Flavor Preservation: Rubbing raw garlic onto hot bread releases the oils without scorching the garlic, keeping the taste vibrant.
What Each Ingredient Does
The combination of fats and salts is what creates that savory, aromatic profile. Using a high-quality extra virgin olive oil provides a fruity base that complements the sharpness of the garlic.
| Ingredient | What It Does | Best Swap |
|---|---|---|
| Extra Virgin Olive Oil | Carries flavor and browns the bread | Melted butter (richer, but burns faster) |
| Baguette | Provides the structure and crunch | Ciabatta (wider, more holes) |
| Fresh Garlic | Adds the primary aromatic punch | Garlic powder (less punchy, use 1/4 tsp) |
| Parmesan | Adds a salty, nutty crust | Pecorino Romano (saltier) |
The Gear You Need
You don't need a professional kitchen for this, but a few basics help. A serrated knife is non negotiable for the baguette. A smooth knife will squash the bread, making the slices uneven and causing some to burn while others stay soft.
A large rimmed baking sheet is best so the slices can lay flat without touching. If they overlap, you'll get steamed, soggy edges instead of a crisp finish. A silicone pastry brush makes it easier to get a thin, even layer of oil.
Chef's Note: If you don't have a brush, just use the back of a spoon to press the oil into the bread. It's a bit messier but works just as well.
Step by step Guide
- Slice the 12 oz baguette diagonally into rounds about 1/3 inch thick. Note: Diagonal cuts increase the surface area for more garlic and oil.
- Arrange the slices in a single layer on a baking sheet. Make sure they don't overlap to avoid steaming.
- Brush each slice with a thin layer of extra virgin olive oil.
- Sprinkle 1/2 tsp kosher salt evenly across all slices.
- Sprinkle 2 tbsp finely grated Parmesan on top of each slice for a savory crust.
- Bake at 400°F for 8-10 minutes until the edges are mahogany colored and the centers feel firm.
- Remove the tray from the oven immediately.
- Halve 3 cloves of peeled garlic.
- Rub the cut side of the garlic firmly across the surface of each hot toast. Note: The heat of the bread melts the garlic into the crust.
- Finish with a pinch of cracked black pepper.
Fixing Common Texture Issues
If your toast comes out too hard, it's usually because the oven was too hot or the slices were too thin. You want a "snap," not a "crack." If the bread feels like a roof shingle, reduce the bake time by 2 minutes next time.
Soggy bottoms happen when the oil pools on the pan. Using a parchment lined sheet helps, but the real fix is using a thin layer of oil. Too much oil soaks into the crumb and prevents the bread from drying out.
Why Your Toast Is Rubbery
This happens when the bread is too thick or the temperature is too low. The outside browns, but the inside stays moist.
| Problem | Root Cause | Solution |
|---|---|---|
| Rubbery center | Slices too thick | Cut to exactly 1/3 inch |
| Burnt edges | Oven too hot | Lower to 375°F or check 2 mins early |
| Bland flavor | Garlic rub too light | Press firmly and use a fresh clove |
Swaps And New Flavors
You can easily turn this into a Vegan Garlic Crostini by skipping the Parmesan. To keep that salty, nutty hit, try a sprinkle of nutritional yeast instead. It browns well and mimics the cheese flavor without the dairy.
For a spicy version, mix a pinch of cayenne or red pepper flakes into the olive oil before brushing. This creates a slow heat that balances the sharp garlic. These slices are a great side for a homemade white pasta sauce to add some texture to the meal.
If you have a different bread on hand, ciabatta works well, though it's airier. Sourdough is also a great choice for those who like a tangier profile. Just be aware that sourdough is denser, so it might need an extra 2 minutes in the oven.
Decision Shortcut
- Want more salt? Use Pecorino instead of Parmesan.
- Want more heat? Add red pepper flakes to the oil.
- Want a vegan version? Swap cheese for nutritional yeast.
Storing Your Toast
Once these cool down, they stay crisp for about 2 days if kept in an airtight container at room temperature. Avoid the fridge, as the humidity will turn them soft and rubbery.
If you're making a huge batch, you can freeze them for up to 2 months. Store them in a freezer bag with a paper towel to absorb any stray moisture. When you're ready to eat, just pop them in a 350°F oven for 3 minutes to revive the crunch.
To avoid waste, use stale baguettes for this recipe. In fact, slightly stale bread is better because it has less moisture, which means it crisps up faster and stays crunchy longer. This is the best way to use up a loaf that's a day or two old.
Great Topping Pairings
The beauty of this recipe is the contrast. The sharp, aromatic garlic base works with almost anything. For a rich contrast, top with a slice of creamy brie and a drizzle of honey. The sweetness of the honey cuts through the garlic punch.
For something bright and fresh, try a classic tomato and basil bruschetta. The acidity of the tomatoes wakes up the rich olive oil. If you're serving these as part of a larger spread, they pair excellently with Garlic Dill Spears for a themed garlic platter.
You can also go the savory route with a dollop of goat cheese and a thin slice of fig. The earthiness of the cheese and the jammy sweetness of the fig create a complex bite. Just make sure to add the toppings right before serving so the Crispy Garlic Crostini doesn't lose its crunch.
Recipe FAQs
What is a garlic crostini?
Small toasted baguette rounds rubbed with fresh garlic. It is a crunchy Italian style appetizer used as a base for various toppings or enjoyed on its own.
What is the difference between bruschetta and crostini?
The size and texture of the bread. Crostini are smaller, sliced rounds toasted until firm, while bruschetta typically uses larger grilled slices of rustic bread.
How to keep crostini crispy?
Store them in an airtight container at room temperature. Avoid the refrigerator, as humidity will turn the bread soft and rubbery.
What do you eat garlic crostini with?
Pair them with savory toppings or creamy dips. They are excellent with fresh diced tomatoes or a silky hummus for a complete appetizer spread.
Is it true that the best party appetizers must be deep fried?
No, this is a common misconception. Simple oven baked snacks like these garlic crostini provide a satisfying crunch and sophisticated flavor without the mess of frying.
What are the best homemade salty snacks for a crowd?
Toasted baguette slices with Parmesan. They are highly efficient to make in large batches and offer a balanced, savory profile that appeals to most guests.
How to revive crostini from the freezer?
Bake them at 350°F for 3 minutes. This quickly evaporates surface moisture and restores the original crisp texture.
Crispy Garlic Crostini