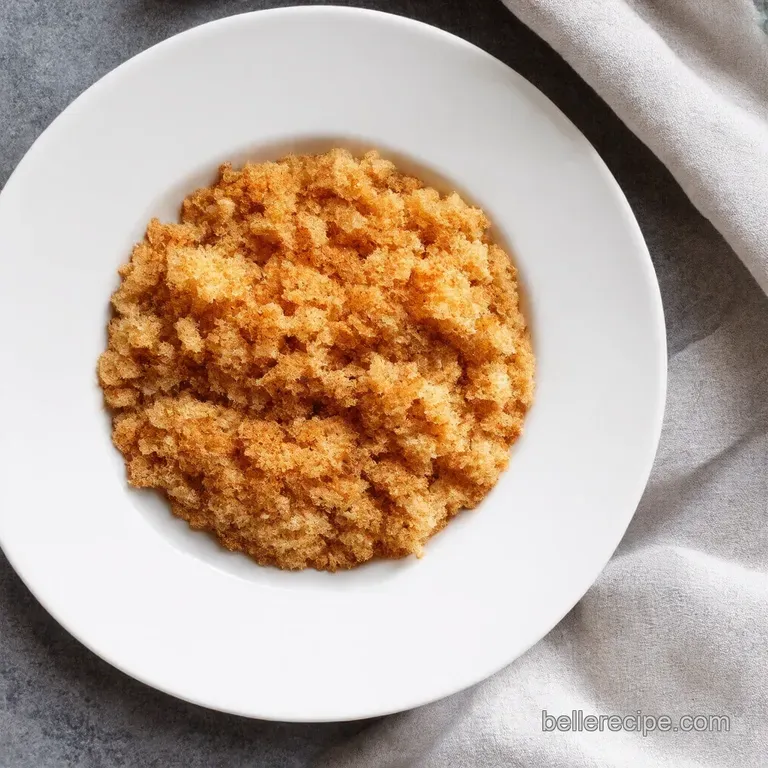
Turning Trash to Treasure: Ultimate Homemade Breadcrumbs
- Recipe Introduction
- Turning Trash to Treasure: Ultimate Homemade Breadcrumbs
- What you'll need
- Let's Get Started: Making Homemade Bread Crumbs
- Tips for Making Awesome Homemade Seasoned Breadcrumbs
- Ingredients & Equipment
- Turning Trash to Treasure: Ultimate Homemade Bread Crumbs
- Recipe Notes for Your Homemade Bread Crumbs Adventure
- Frequently Asked Questions
- 📝 Recipe Card
Recipe Introduction
Quick Hook: Ever wondered what to do with that stale bread?
Honestly, making homemade bread crumbs is a total game changer. This recipe transforms old, unwanted slices into something amazing. Plus, the flavour blows away anything you'd get from the supermarket.
Brief Overview: From Humble Origins to Kitchen Staple
Bread crumbs have been around for ages. it's a classic way to use leftover bread. making your own is super easy.
It will only take you around 35- 65 minutes to make approximately 2 cups.
Main Benefits: Reduce Food Waste, Boost Flavor!
The best part is that you're reducing food waste. you know, that's a real win! plus, these diy bread crumbs are so much tastier.
They're perfect for topping mac and cheese or coating chicken.
Turning Trash to Treasure: Ultimate Homemade Breadcrumbs
Ever throw away that stale loaf of bread? stop right there! this recipe transforms those forgotten slices into perfectly golden, crispy breadcrumbs.
Far superior to anything you'll find in a supermarket shaker. from classic italian seasoning to spicy cajun blends, you'll be amazed at the flavour explosion you can create with just a little effort.
This is true make-do-and-mend cooking at its finest!
What you'll need
- 4-6 slices of stale bread
- 2 tablespoons olive oil (optional, for pan-frying)
- 1 teaspoon dried Italian herbs
- ½ teaspoon garlic powder
- ½ teaspoon onion powder
- ¼ teaspoon salt
- ¼ teaspoon black pepper
- Pinch of red pepper flakes (optional, for heat)
Let's Get Started: Making Homemade Bread Crumbs
First, tear your stale bread into pieces. If you're using the oven, preheat it to 200° F ( 95° C) . If you are pan-frying, get your olive oil ready.
Spread the bread on a baking sheet or in a pan. oven method: bake for 30- 60 minutes , flipping halfway.
Pan-frying method: fry bread on medium heat until golden brown. once dry, let them cool.
Next, whizz them in a food processor. if you don't have one, use a rolling pin. add your seasonings like italian herbs.
Store them in an airtight container. you can even freeze them to extend their shelf life.
Tips for Making Awesome Homemade Seasoned Breadcrumbs
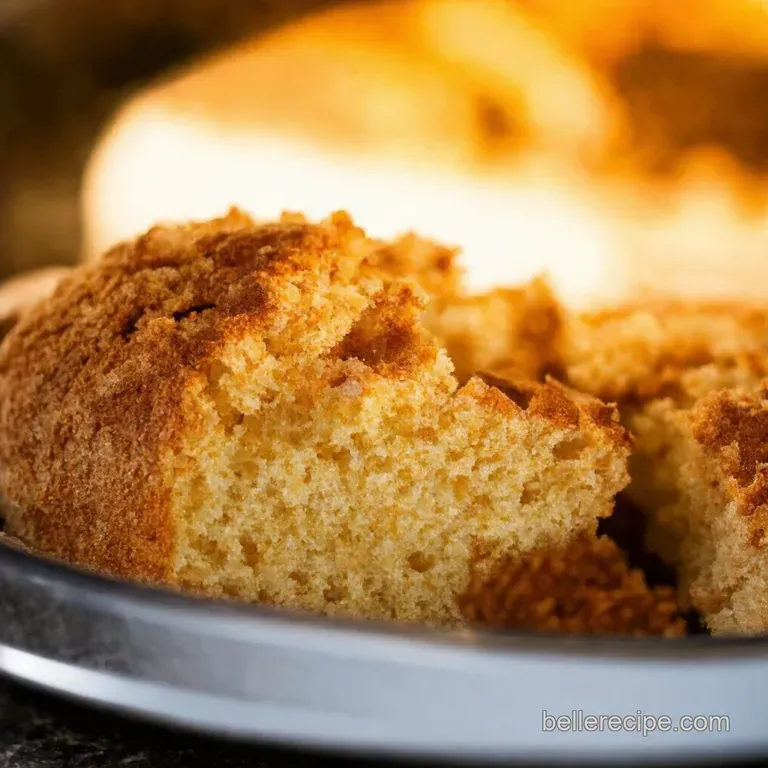
Don't burn the bread! burnt bread equals bitter breadcrumbs. experiment with different types of bread like sourdough starter discard recipe or homemade sourdough bread .
Seasoning is key! don't be afraid to get creative with your blends. pulse, don't puree. and freeze for freshness. this is how you make the perfect bread crumb recipe from scratch .
These breadcrumbs are the perfect way to use stale bread recipes . The secret is good bread.
Honestly, I was surprised to discover how good pan fried bread crumbs tasted, once toasted in olive oil, salt and pepper.
Whether it is your first time or not, this recipe is worth a try.
Ingredients & Equipment
Right, let's dive into what you'll need to create your very own Turning Trash to Treasure: Ultimate Homemade Breadcrumbs . honestly, it's dead easy. Even I can do it!
The Stars of the Show
For the Main Event:
-
4-6
slices of stale bread (any kind will do, innit?). Think that loaf you forgot about!
- US: 4-6 slices
- Metric: N/A (slices don't translate, darlin')
- Key Quality: The bread should be proper stale hard, but not mouldy, yeah?
Spice It Up (Optional):
-
2
tablespoons olive oil (optional, for a bit of posh frying)
- US: 2 tbsp
- Metric: 30ml
-
1
teaspoon dried Italian herbs (for that
mamma mia
flavour)
- US: 1 tsp
- Metric: 5ml
-
½
teaspoon garlic powder (because everything's better with garlic, innit?)
- US: ½ tsp
- Metric: 2.5ml
-
½
teaspoon onion powder (for a bit of depth, you know?)
- US: ½ tsp
- Metric: 2.5ml
-
¼
teaspoon salt (to bring out all the flavors)
- US: ¼ tsp
- Metric: 1.25ml
-
¼
teaspoon black pepper (because why not?)
- US: ¼ tsp
- Metric: 1.25ml
- Pinch of red pepper flakes (if you're feeling brave!)
Seasoning Notes: Flavours That Pop
For killer homemade seasoned breadcrumbs , think italian herbs! also, consider adding garlic and onion powder. want that extra oomph ? a pinch of red pepper flakes does the trick.
Don't have a particular herb? sub it for something else. thyme for oregano? sorted. it's your breadcrumbs, after all!
Honestly, DIY bread crumbs are where it's at. My nan used to make them ALL the time, and she knew what she was doing.
Kit You'll Need
You don't need fancy gadgets to turn trash to treasure, but you will need:
- Baking sheet (for drying)
- Food processor or rolling pin and zip-top bag (for smashing)
- Oven or frying pan (for drying or frying)
Don't have a food processor? A rolling pin and a sturdy bag work just as well. No oven? A frying pan will do the trick. Basically, make-do-and-mend.
Now you've got your arsenal ready! next, let's learn how to make bread crumbs the right way! if you've got sourdough starter discard recipe scraps, this could be a nifty way to use them up.
Don't let the bread starter go to waste! alternatively, if you fancy going the whole hog, try making homemade sourdough bread , let it go stale, and then use it for these crumbs.
Let's be clear: We're talking the best Bread Crumb Recipe from Scratch
Turning Trash to Treasure: Ultimate Homemade Bread Crumbs
Right, let's talk homemade bread crumbs . ever find yourself chucking out a loaf that's past its prime? stop! you're practically throwing away edible gold.
I mean, honestly, diy bread crumbs are so easy to make, there's no excuse for buying those boring, flavourless ones from the shops.
This is all about that lovely moment of turning what others throw away, into pure culinary magic.
Prep Like a Pro: Mise en Place Magic
First things first, get your act together! essential mise en place ? it's simple: grab 4-6 slices of stale bread .
The staler, the better, trust me. think of it as a culinary recycling project! a baking sheet will be your best mate, if you don’t have one use aluminium foil.
Finally, and don't forget this: either a food processor or a zip-top bag and rolling pin for smashing action. if you are trying pan fried bread crumbs make sure you have your olive oil ready.
Turning Bread to Crumbs: A step-by-step Guide
Okay, here we go:
- Oven Time: Preheat your oven to 200° F ( 95° C) . Or, if you fancy Pan-Frying Bread Crumbs , drizzle olive oil into your pan.
- Tear the bread into roughly 1 inch pieces. No need to be precise, this isn't Bake Off.
- Oven Method : Spread on your baking sheet. Bake for 30- 60 minutes , flipping halfway, until bone dry. Or Pan-Frying Method : Fry bread on medium heat until golden brown.
- Cool it: If you are using the oven, let the dried bread cool completely. Very important if you want to get the process right!
- Smash Time: Food processor? Pulse until desired consistency. Rolling pin? Whack that bag until you get the same result. Get your anger out!
- Seasoning is key, see below.
- Store those beauties in an airtight container.
Pro Tips: From Good to Great
Want to be a breadcrumb boss?
First, don't burn them! Nobody wants bitter crumbs. Secondly, experiment with different breads. Sourdough? Wholemeal? Go wild and use your Sourdough Starter Discard Recipe if you fancy!
Flavour it Up!
Seasoning is king (or queen)! i can't stress this enough. raid your spice rack! italian herbs, garlic powder, onion powder, salt, pepper, red pepper flakes if you like a kick.
Make it your own. a touch of oil is never bad. a good recipe that makes great results is a homemade seasoned breadcrumbs .
Make-ahead Magic
Good news, breadcrumbs are perfect for making ahead. store them in an airtight container for up to 2 weeks, or freeze them for up to 3 months.
Sorted! you know what you can do, try to make and sell your own bread starter . honestly, you'll never buy shop bought breadcrumbs again!
Recipe Notes for Your Homemade Bread Crumbs Adventure
Right then, before you dive into creating these amazing diy bread crumbs , let's have a quick natter about some tips and tricks.
Honestly, they'll make all the difference and stop you from chucking a wobbly in the kitchen. i've been there, done that, got the tea towel!
Serving Suggestions: Get Creative!
Listen, Homemade Seasoned Breadcrumbs are so much more than just a topping. Okay? Forget those bland, shop bought things! They can totally elevate your dishes!
Plating with Panache
Sprinkle a little on top of your mac 'n' cheese. proper chef style, innit? or use them to coat chicken or fish for a right crispy finish.
Presentation matters, even if it's just for you!
The Perfect Partners
Think about sides that complement the crunch. a simple salad with a vinaigrette, or roasted veg, for that little something extra.
And a nice cold beverage goes down a treat. i had a few beers while making this, to be honest.
Storage Tips: Keep 'Em Fresh
Alright, so you've made a batch of these beauties. Now, how do you keep them shipshape? Don't want to find a science experiment in your cupboard next week.
Fridge Frenzy
If you've used fresh herbs or ingredients with moisture, keep them in the fridge for up to a week. In an airtight container, obviously. Don't want any cross contamination, do we?
Freezer Fun
Freezing options are your best mate for longer storage. pop them in a freezer bag, squeeze out the air, and they'll be good for up to three months.
Perfect for when you need a quick bit of crunch!
Reheating Right
To reheat, spread them on a baking sheet and give them a few minutes in a low oven ( 300° f or 150° c ) to crisp them up.
Or just chuck them in a dry pan for a minute or two. easy peasy.
Variations: Mix it Up!
Fancy something a bit different? No worries, these are seriously adaptable.
Dietary Doings
If you're gluten-free, just use gluten-free bread. Boom! Sorted. You can even try using almond flour for a nutty twist.
Seasonal Swaps
Chuck in whatever fresh herbs are in season. basil in summer, rosemary in winter. keeps it interesting, doesn't it? or, if you're feeling brave, use your sourdough starter discard recipe with spices for homemade sourdough bread .
Nutrition Basics: Goodness Inside
Let's be real, homemade bread crumbs aren't exactly a health food. But! They're way better than the processed stuff.
Simple Stats
A quarter cup is roughly 50 calories . Not bad, eh? It gives you a bit of fibre and some carbs for energy.
Health Highlights
And you're getting the added benefits of whatever herbs and spices you use. Antioxidants and all that jazz. A little bit of goodness never hurt anyone, right?
Honestly, making your own homemade bread crumbs is so rewarding. it's a great way to use up stale bread recipes , saves you a few quid, and they taste amazing.
Give it a go, you might surprise yourself! now, go on, get in the kitchen and turn that bread into gold!
Frequently Asked Questions
What's the best way to store homemade bread crumbs to keep them fresh?
To keep your homemade bread crumbs fresh, store them in an airtight container at room temperature for up to 2 weeks. For longer storage, pop them in the freezer for up to 3 months. Just like keeping your biscuits from going soggy, proper storage is key!
Can I use any type of bread to make homemade bread crumbs?
Absolutely! That's the beauty of homemade bread crumbs; you can use pretty much any type of bread you have on hand. Sourdough, whole wheat, even slightly stale hot dog buns will work.
Experimenting with different breads can give you a unique flavour profile for your crumb topping think of it like finding your signature gravy recipe!
How do I make sure my homemade bread crumbs are nice and crispy?
Crispy bread crumbs start with properly dried bread. Ensure your bread is completely dried out in the oven at a low temperature (around 200°F/95°C) or by letting it sit out for a few days.
If you're pan-frying, keep the heat at medium so they brown and crisp instead of burning nobody wants a burnt offering!
What's the difference between using a food processor and a rolling pin for making homemade bread crumbs?
A food processor is quicker and easier, especially if you want finer, more uniform crumbs. Using a rolling pin (or even just a zip-top bag and your hands) is a great option if you don't have a food processor, or if you prefer chunkier, more rustic crumbs.
It's a bit more elbow grease, but sometimes the old ways are the best, eh?
How can I season my homemade bread crumbs to make them extra flavorful?
Get creative with your seasonings! Olive oil, dried Italian herbs, garlic powder, onion powder, salt, and pepper are a great starting point. You can also add a pinch of red pepper flakes for a bit of heat, or experiment with different spice blends like Cajun seasoning or smoked paprika.
It's your chance to be a culinary rockstar - so turn the volume up to 11!
Can I make gluten-free homemade bread crumbs?
Yes, absolutely! Simply use your favorite gluten-free bread to make your homemade bread crumbs. Follow the recipe as usual, ensuring your bread is completely dry before processing. gluten-free options are getting better and better these days, so you won't miss out on any flavour or texture!
Turning Trash To Treasure Ultimate Homemade Brea

