Smoky Sweet Secret Perfect Grilled Corn in the Husk
- Smoky Sweet Secret: Perfect Grilled Corn in the Husk
- The Ancient Art of Grilling Corn on the Cob, Reimagined
- Essential Components for Ultra-Tender Cobs
- Gathering Your Premium Produce and Pantry Staples
- Step-by-Step Mastery for Irresistible Grilled Corn on the Cob
- Executing the Perfect Husk-Wrapped Cook
- Elevating Your Classic Grilled Corn Experience
- Storage Wisdom and Nutritional Snapshot
- Recipe FAQs
- 📝 Recipe Card
Smoky Sweet Secret: Perfect Grilled Corn in the Husk
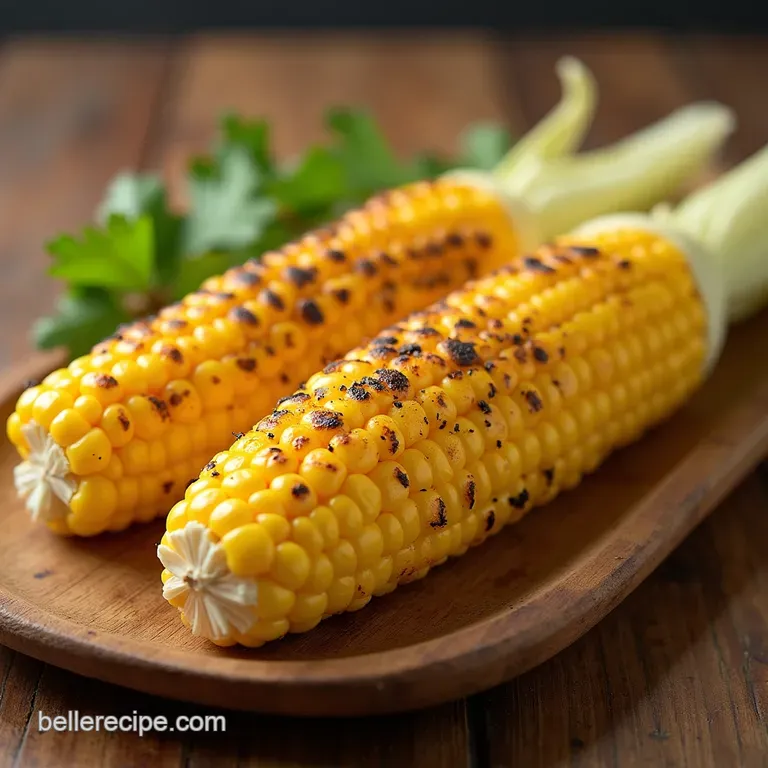
Forget dry, sad corn! This method involves soaking the husks before tossing the cobs onto the grill, allowing the corn to steam beautifully inside its natural wrapping. The result is incredibly sweet, tender kernels kissed with a subtle, irresistible smokiness.
It’s the quintessential taste of a summer barbecue feast. This Grilled Corn on the Cob Recipe is simple, pure, and utterly delicious, requiring only about 20 minutes of active preparation time before moving to the heat source.
The Ancient Art of Grilling Corn on the Cob, Reimagined
Grilling corn on the cob is one of the purest expressions of summer cooking. While many default to tearing off the husks and grilling naked kernels, utilizing the husk protects the delicate sugars inside, creating a naturally self basting environment.
This technique ensures you achieve the Best Grilled Corn Recipe imaginable one that sings with natural sweetness, amplified by the gentle heat of the fire.
Why Steaming in the Jacket Guarantees Supreme Moisture
The magic behind this technique lies in insulation. When you soak the husks and place the corn on the grill, the waterlogged husks heat up and create a mini steamer right around the kernels. This trapped moisture prevents the rapid evaporation that often leads to tough, chewy corn.
It is this internal steaming that produces the ultra tender texture we are aiming for in our Smoky Grilled Corn .
Unlocking Peak Summer Flavor: A Beginner Friendly Masterpiece
The beauty of preparing corn this way is its forgiving nature. This is truly an Easy Grilled Corn Recipe because the protective layer shields the cob from direct, harsh flames, significantly reducing the risk of burning or overcooking too quickly.
The heat penetrates slowly, coaxing out the natural sugars and integrating a subtle char flavor from the husk itself it’s complexity achieved with minimal effort.
The Difference Between Naked Grilling and Husk Protection
Naked grilling requires constant attention and basting, as the high, direct heat aggressively strips moisture from the surface of the kernels. In contrast, Grilled Corn in the Husk allows for a more relaxed cooking pace.
You are relying on indirect heat to cook the interior thoroughly while the exterior husks char slightly, infusing that coveted smoky character without sacrificing succulence.
Essential Components for Ultra Tender Cobs
To achieve the ultimate Perfect Grilled Corn , we focus on quality ingredients and ensuring the preparation supports the cooking process. The foundation is incredibly fresh produce, complemented by simple, high impact seasonings that allow the corn’s natural flavor to shine through.
Gathering Your Premium Produce and Pantry Staples
For this method, you’ll need six ears of fresh corn, ensuring the husks are fully intact, as they are central to the process. For the finishing touch, we use four tablespoons of softened unsalted butter, about one teaspoon of smoked paprika for an extra layer of depth, and salt and pepper to taste.
Having these few core items on hand is all you need to start your How to Grill Corn journey.
The Key Ingredient Ratio: Corn Quality Matters Most
Since the Grilled Corn Seasoning Ideas are kept minimal to highlight the fresh flavor, the quality of your corn is paramount. Look for ears that feel heavy for their size, with tightly wrapped, bright green husks.
Avoid any ears that feel dry or have visible gaps in the husks, as these will not steam effectively.
Simple Seasonings That Enhance Natural Sweetness
Our chosen finishing butter uses just a touch of smoked paprika to complement the smoke coming from the grill. Fine sea salt and freshly ground black pepper are non-negotiable, as they sharpen the inherent sweetness.
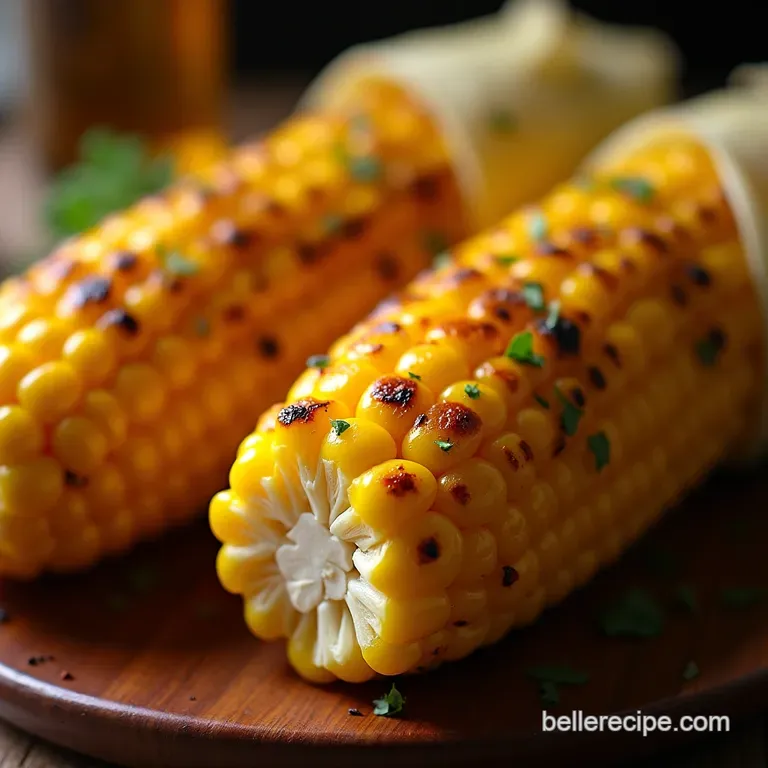
The richness of the butter, applied immediately after cooking, melts perfectly into the hot kernels, binding the flavors together beautifully.
Crucial Tools for Soaking and Handling Hot Husks
Preparation starts with a large stockpot or deep container capable of completely submerging the cobs. You will need tongs for easy turning on the grill and, most importantly, thick oven mitts for safely handling the scorching hot husks once they come off the heat.
Related Recipes Worth Trying
- The Best Homemade Reuben Sandwich with Tangy Russian Dressing — Forget the diner This easy Reuben Sandwich recipe delivers an authentic flavourpacked experience with perfectly crisp rye and homemade Russian dressing Get...
- The Ultimate ButterBasted Rib Cap Steak Recipe — Cook the Rib Cap Steak Spinalis Dorsi like a steakhouse pro Learn how to cook Rib Cap Steak using a simple highheat sear and aromatic baste for max flavour
- Authentic Smoky Chicken Sausage Jambalaya Recipe — Nail that classic Louisiana flavour with this simple smoky Jambalaya recipe Perfect rice texture guaranteed in one potits comfort food central
step-by-step Mastery for Irresistible Grilled Corn on the Cob
Once your supplies are gathered, the process moves quickly. The primary commitment is the soaking period, after which the actual cooking time is surprisingly short. This Grilled Corn Cooking Time is managed primarily by the heat of your grill.
Executing the Perfect Husk Wrapped Cook
The Essential Pre-Grill Soak: How Long and Why?
Before any heat is applied, you must prepare the jackets. Gently peel back the husks from each cob, keeping them attached at the base like a skirt, and meticulously remove all the silk threads. Place these partially husked cobs into cold water, ensuring they are fully submerged.
Aim for a minimum soak time of 20 minutes; this prevents the husks from turning into tinder immediately upon contact with heat.
Establishing the Ideal Grill Temperature for Steam Searing
Preheat your grill to a medium temperature, aiming for around 350° F ( 175° C). This recipe favors indirect heat meaning the cobs should sit over the side of the grill that has no active flames or direct coals underneath.
Close the lid to trap the heat and allow the steam to build inside the protective husk environment.
Flipping Frequency: Achieving Even Char Without Drying Out
Place the soaked and lightly shaken dry cobs onto the indirect heat zone. Close the lid and let them cook for about 10 minutes. For even cooking, turn the cobs a quarter turn every two to three minutes.
If you desire a slight crispness, you can transition the cobs over the direct heat for the final three to five minutes, turning constantly to achieve light toasting spots on the husk before removal.
The Moment of Truth: Peeling Back the Charred Wrapper
The cobs are ready when the kernels feel tender a good sign is when the husks appear slightly blackened and dry in spots. Carefully remove the cobs using tongs or thick mitts.
Allow them to rest for just a minute before peeling back the charred outer husk layers, often using the husk itself as a convenient, rustic handle for serving.
Elevating Your Classic Grilled Corn Experience
While simple butter and salt are phenomenal, the flavor profile of this Grilled Corn on the Cob can be endlessly customized. The warm, smoky base created by the grilling method pairs wonderfully with bold, bright toppings.
Storage Wisdom and Nutritional Snapshot
Flavor Twists: Beyond Butter and Salt (Think Ginger Glaze!)
For those looking to experiment with Grilled Corn Seasoning Ideas , consider making a compound butter. Mixing your softened butter with finely minced fresh chives, a hint of lime zest, or even a splash of honey and a dash of Sriracha transforms the experience entirely.
A creamy, spicy mayonnaise glaze reminiscent of Elote is another show stopping alternative applied post grill.
Quick Fixes for Crisp Corn Handling the Foil Alternative
If you find yourself without husks or are cooking in less than ideal conditions, heavy duty foil serves as a reliable substitute. Wrap each cob tightly in two layers of foil, ensuring a tight seal, and cook slightly longer (around 20– 25 minutes) over indirect heat.
While slightly less smoky, this method still locks in superior moisture compared to grilling naked cobs.
Calculating Per-Serving Goodness: A Quick Nutrition Look
One ear of corn, prepared simply with about one tablespoon of the savory finishing butter, yields roughly 180 calories. It provides a good source of carbohydrates for energy and a decent amount of dietary fiber, making it a satisfying side dish for any summer meal.
Keeping Leftover Cooked Corn Fresh and Flavorful
Should you have any leftovers, the best practice is to let the corn cool slightly, then wrap the individual cobs tightly in plastic wrap before refrigerating. Leftover cooked corn maintains excellent texture for up to three days and can be quickly reheated on a grill or in a pan before serving again.

Recipe FAQs
How long do I really need to soak the corn husks for the Grilled Corn on the Cob recipe?
For the best results, aim for at least 20 minutes, but up to an hour is spot on. This soaking is vital; it turns the husks into little steam jackets that keep the kernels tender and prevent them from scorching into charcoal on the grill. Don't skimp on this stage if you want that perfect, sweet result!
My corn husks keep burning! What am I doing wrong when grilling?
It sounds like you might be cooking over direct, blazing heat, which is a classic rookie error. Try to position the cobs over indirect heat where there are no active flames or coals directly underneath and keep the grill lid down.
This mimics an oven, allowing the corn to steam through before the husks get too crispy.
Can I make this Grilled Corn on the Cob ahead of time, or is it better fresh off the barbie?
Honestly, corn is always best eaten immediately after it comes off the grill; that smoky flavour really sings when it’s hot. If you must prep ahead, you can grill them until just tender, let them cool, and store them in the fridge for up to two days.
Reheat them wrapped in foil on the grill or in the oven before buttering.
What's the best way to know when the corn is perfectly cooked through?
The visual clue is that the husks will look nicely toasted and possibly slightly blackened, but the real test is gentle probing. Carefully peel back a bit of the husk and pierce a kernel with the tip of a small knife or skewer; if it slides in with absolutely no resistance, it’s done.
If you feel any crunch, give it another five minutes.
I don't have fresh husks, can I still grill the corn?
You absolutely can, but you’ll miss out on that lovely steaming effect. If you have no husks, wrap each cob tightly in two layers of heavy duty aluminium foil, leaving the top open slightly. Cook these foil packets over indirect heat for about 20-25 minutes, turning halfway, and they will still turn out tender.
What’s a cracking flavour alternative to standard butter for serving?
If you fancy jazzing things up, whip up a compound butter! Try mixing that softened butter with some smoked paprika (as suggested in the recipe), a good squeeze of fresh lime juice, and a sprinkle of finely chopped coriander.
It gives it a lovely zing, making it taste a bit more adventurous than your average summer side dish.
Smoky Grilled Corn In Husk

Ingredients:
Instructions:
Nutrition Facts:
| Calories | 537 kcal |
|---|---|
| Protein | 4.7 g |
| Fat | 33.1 g |
| Carbs | 23.4 g |
| Fiber | 10.2 g |
| Sodium | 6683 mg |
