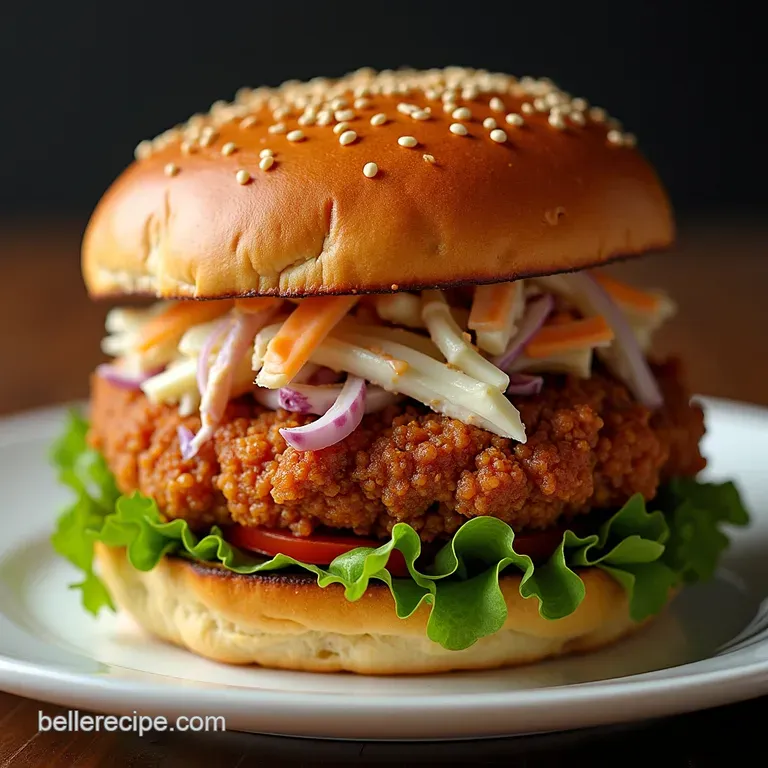
The Nashville Knockout Crispy Hot Chicken Sandwich with Tangy Slaw
- Unlocking the Secret to True Nashville Heat: Why This Hot Chicken Sandwich Reigns Supreme
- Beyond the Burn: What Makes This Recipe the Ultimate Home Kitchen Triumph
- Assembling Your Arsenal: Essential Components for the Perfect Crunch and Kick
- The Four Pillars of Preparation: Step-by-Step Deep Fry Mastery
- Tweaking the Firepower: Customizing Your Heat Level Safely
- From Leftovers to Lunch: Storing and Reheating Your Spicy Creation
- Recipe FAQs
- 📝 Recipe Card
Unlocking the Secret to True Nashville Heat: Why This Hot Chicken Sandwich Reigns Supreme
There are fried chicken sandwiches, and then there is the legendary Hot Chicken Sandwich . Born from the smoky kitchens of Nashville, Tennessee, this dish is more than just spicy; it’s an experience.
It’s the perfect collision of texture a shatteringly crisp exterior yielding to impossibly juicy meat, all enveloped in a cloak of deeply flavourful heat that builds with every bite. Achieving this masterpiece at home can seem daunting, given the legendary status of the authentic article.
However, by breaking down the process into manageable, intentional steps from the crucial brine to the final fiery glaze we can absolutely replicate that captivating culinary moment right in your own kitchen.
This Hot Chicken Sandwich recipe is designed to deliver that authentic, lingering warmth without sacrificing succulence.
Beyond the Burn: What Makes This Recipe the Ultimate Home Kitchen Triumph
Many recipes stumble because they focus solely on the capsaicin content just adding more cayenne pepper. That’s a rookie mistake. The Best Hot Chicken Sandwich we are creating here relies on depth, not just brute force heat.
Our method, which we call "The Nashville Knockout," ensures that every component plays a vital role. We utilize boneless, skinless chicken thighs, which boast more intramuscular fat than breasts, resulting in a richer flavour payoff. Crucially, we commit to a minimum four hour buttermilk brine.
This step is non-negotiable; it tenderizes the meat from the inside out, guaranteeing that even after the intense heat of deep frying, you are rewarded with unparalleled juiciness.
The Alchemy of Spice: Understanding Flavor Layers in Authentic Hot Chicken
Authenticity in a Nashville Hot Chicken Sandwich comes from layering spices, not just dumping them on at the end. We incorporate elements into our initial dredge smoked paprika, garlic powder, and a touch of brown sugar to build a flavour foundation that adheres firmly to the chicken.
The final heat delivery comes from a carefully constructed, cayenne dominant oil. This oil doesn't just burn; it carries complex notes of smoke and subtle sweetness, which are essential counterpoints to the vinegary tang of the accompaniments we will be adding later.
From Brine to Bite: A Roadmap to Perfection for Your First Spicy Chicken Masterpiece
Crafting this Spicy Chicken Sandwich Recipe requires patience, but the effort is surprisingly minimal. The bulk of the time is dedicated to marination. Once the chicken thighs are happily soaking in their buttermilk bath, your active preparation involves setting up your dredging station and heating your oil.
Success hinges on temperature control during the fry phase, which allows the Hot Chicken Sandwich coating to become spectacularly craggy and crisp without burning. Following this systematic roadmap ensures that the often intimidating deep fry process becomes smooth and predictable.
Assembling Your Arsenal: Essential Components for the Perfect Crunch and Kick
Before we even think about turning on the stove, we must prepare our specialized ingredients. The preparation for this Crispy Hot Chicken Sandwich is divided into four main areas: the tenderizing brine, the textured dredge, the cooking oil, and the signature spicy infusion.
For the chicken itself, we are using four substantial boneless, skinless chicken thighs, ensuring a robust sandwich centerpiece.
Curating the Critical Components for Your Signature Spicy Oil
This oil is the soul of the dish. For the Hot Chicken Sandwich Sauce Recipe , you will need a base of high smoke-point oil, skimmed directly from your fryer after use, which carries the flavour essence of the perfectly cooked chicken.
To this, we add a generous volume of high-quality cayenne pepper, balanced with brown sugar for caramelization notes, smoked paprika for depth, and garlic powder for aromatic complexity.
This blend is gently heated just long enough to bloom the spices, releasing their full volatile oils without scorching the cayenne, which would turn bitter instantly.
The Buttermilk Bath: Preparing the Chicken for Maximum Tenderness
For the brine, combine two cups of buttermilk with 1 tablespoon of Kosher salt, 1 teaspoon of black pepper, and 1 teaspoon of smoked paprika. Submerge your four chicken thighs entirely.
This mixture works wonders: the lactic acid in the buttermilk tenderizes the muscle fibers, while the salt penetrates deeply, seasoning the meat right to the core. This bath needs a minimum commitment of four hours in the refrigerator, though overnight yields superior tenderness for your Homemade Hot Chicken Sandwich .
The Dredge Matrix: Achieving the Flakiest Possible Exterior Coating
Achieving that famous jagged, craggy crust requires a meticulous dry mix and a specific handling technique. Our dredge matrix consists of two cups of all-purpose flour cut with half a cup of cornstarch the cornstarch is key for extra crispness.
To this, we add a precise blend of salt, garlic powder, onion powder, cayenne pepper, brown sugar, black pepper, and baking powder. The baking powder creates tiny air pockets that puff up during frying, maximizing the surface area for that incredible crunch.
Essential Tools for Deep Frying Safety and Success
Because we are dealing with high heat to create a truly Crispy Hot Chicken Sandwich , safety and accuracy are paramount. You absolutely need a heavy bottomed pot, like a Dutch oven, to maintain temperature stability.
More critical than the pot, however, is a reliable candy or deep fry thermometer. Guessing the oil temperature leads to either raw chicken or burnt coating; a thermometer ensures you maintain the ideal 325° F ( 160° C) necessary for this process.
Ensure you also have a sturdy wire cooling rack placed over a baking sheet ready for draining.
Related Recipes Worth Trying
- Crispy Air Fryer Southern Fried Chicken Easy GuiltFree — Get that classic Southern Fried Chicken crunch in your air fryer This easy recipe delivers crispy juicy chicken without the grease Ready in under an hour...
- Fiery Farmers Market hot pepper relish recipe — Spice up your life with my Fiery Farmers Market hot pepper relish recipe A sweet spicy kick for burgers more Ready in under 90 minutes Get the recipe now
- gluten free Chicken and Dumplings Proper Comfort Food — Craving gluten free chicken and dumplings This easy recipe delivers creamy homemade comfort Tender chicken fluffy dumplings the ultimate hug in a bowl Get...
The Four Pillars of Preparation: step-by-step Deep Fry Mastery
Once the chicken has marinated and your dredge is mixed, the kinetic phase begins. This is where technique separates an average fried chicken from the iconic Hot Chicken Sandwich . We must move efficiently but gently to ensure the coating adheres properly before the chicken ever touches the fat.
Step One: The Quick Soak and Initial Coating Process
Take the chicken from the brine, allowing any major drips to fall off, but do not pat it dry. The residual moisture helps the first layer of flour stick. Place the chicken into your seasoned flour mixture, pressing firmly with your hands to force the coating onto the wet surface.
Now, here is a small but powerful secret for the Easy Hot Chicken Sandwich variation: briefly dip the coated chicken back into the remaining buttermilk, and then immediately return it to the flour for a final, aggressive press. This creates a thick, craggy armor ready for the heat.
Let these coated pieces rest for 10 minutes before frying to allow the flour to hydrate slightly; this prevents shedding in the oil.
Step Two: Mastering the Oil Temperature for Golden Perfection
Heat your high smoke point oil (Canola or Peanut work well) in your Dutch oven to exactly 325° F ( 160° C) . This lower temperature is vital for fully cooked, juicy interiors.
Gently lower two pieces of chicken into the oil at a time never overcrowd the pot, as this will cause the oil temperature to plummet drastically. Fry each side for approximately 6 to 8 minutes, monitoring the thermometer constantly and adjusting the burner as needed to keep that 325° F mark steady.
You are aiming for a deep, rich golden brown colour, indicating the internal temperature has reached 165° F ( 74° C).
Step Three: The Crucial Drenching Technique for the Ultimate Hot Chicken Sandwich
Once fried, immediately transfer the chicken to the wire rack to drain excess oil. While the chicken rests briefly, gently warm the ingredients for your signature spicy oil in a small saucepan over low heat. Whisk in the cayenne, paprika, sugar, and seasonings.
Let this infuse for about two minutes, then remove from heat. Working one piece at a time, use a pastry brush or a spoon to generously coat every surface of the hot fried chicken with this warm infusion. The heat of the chicken helps the spices bloom further and adhere perfectly.
Final Assembly: Balancing the Fried Chicken with Cool, Crisp Toppings
The heat of the Hot Chicken Sandwich demands a cool, textural counterpoint. Toast your soft potato or brioche buns lightly. Place the glazed, fire breathing chicken thigh on the bottom half, layer it liberally with thick cut dill pickle slices, and top with a generous heap of our quick, tangy slaw (details on which follow shortly).
The vinegar and crunch from the pickles and slaw are essential components that cut through the richness and temper the cayenne’s sharpest edges.
Tweaking the Firepower: Customizing Your Heat Level Safely
If you are new to true Nashville heat, the specified amount of cayenne in the final oil application might be intimidating. Remember, this is a customizable process. For a medium level of warmth suitable for most palates, reduce the cayenne in the finishing oil by half, perhaps substituting the missing volume with additional smoked paprika or a touch of sweet paprika for colour.
If you desire true inferno level heat, you can introduce a pinch of ghost pepper powder into the dredging mix, but proceed with extreme caution and wear gloves when handling these potent ingredients.
From Leftovers to Lunch: Storing and Reheating Your Spicy Creation
While this sandwich is undeniably best enjoyed immediately, life happens. If you have leftover chicken pieces, allow them to cool completely before storing them in an airtight container in the refrigerator for up to three days. To reheat, avoid the microwave, which softens the crust instantly.
Instead, place the chicken on a wire rack set over a baking sheet and bake at 375° F ( 190° C) for 10– 12 minutes, until the internal temperature is warmed through.
Reapply a light brush of your leftover hot oil after reheating if you desire that fresh glazed sheen.
Tangy Counterpoint: The Essential Recipe for Quick Pickled Slaw
A creamy slaw collapses under the heat and richness of this sandwich. Instead, we need sharp acidity. Shred about 3 cups of green cabbage finely. Toss it with 1/4 cup apple cider vinegar, 2 tablespoons of white vinegar, 1 tablespoon of sugar, and a teaspoon of salt.
Let this sit for at least 30 minutes while the chicken fries. This sharp, refreshing element is non-negotiable for balancing the overall experience of your Homemade Hot Chicken Sandwich .
Alternative Methods: Air-Frying vs. Pan-Frying This Intense Fried Chicken
For those seeking a slightly lighter, but still crispy, rendition, the air fryer offers a viable alternative to deep frying. After dredging, spray the coated chicken lightly but thoroughly with cooking oil spray.
Air fry at 380° F ( 195° C) for 15– 20 minutes, flipping halfway through, until 165° F internal temperature is reached.
While this achieves excellent crispness, it will lack the deep, saturated richness provided by the traditional immersion oil bath. Pan-frying is generally discouraged as it’s very difficult to maintain the necessary even oil depth and temperature for consistent results.
The Best Buns and Spreads to Complement the Spice Profile
The foundation of a great Hot Chicken Sandwich should be soft and slightly sweet, capable of absorbing the spice without becoming soggy too quickly. Potato buns are the gold standard due to their subtle sweetness and tenderness, with brioche being a close second.
When it comes to spreads, we keep it simple: usually, none is needed, as the chicken itself is intensely flavoured. However, if you absolutely must add a layer beneath the chicken, a thin schmear of plain mayonnaise on the bottom bun offers a cooling fat barrier against the spice before the pickles and slaw take over.
Recipe FAQs
Can I make the Hot Chicken Sandwich less spicy? I don't want to blow a gasket!
Absolutely, that’s a very common query! For a milder experience, the key is reducing the cayenne pepper specifically in the final hot oil glaze perhaps dropping it down to just one tablespoon.
You can also substitute half of the cayenne in the oil with sweet paprika for colour and smokiness without the punishing heat.
My coating keeps falling off in the fryer what gives? How do I get that craggy crust on my Hot Chicken Sandwich?
That dreaded shedding crust is usually down to not letting the flour sit long enough! After you give the chicken its final heavy dredge in the seasoned flour, let it rest on a rack for about 10 minutes before frying.
This resting period lets the flour hydrate, essentially "gluing" itself to the chicken for that proper, rugged texture.
What is the absolute best way to store leftovers of this spicy chicken?
For the best texture, you’ll want to store the chicken and the slaw/buns separately in the fridge for up to three days. When reheating the chicken, avoid the microwave it ruins the crispness!
Instead, pop it in an air fryer or a preheated oven (around 375°F or 190°C) for about 8 10 minutes until piping hot.
I’m nervous about the deep frying part; what temperature should the oil actually be for this recipe?
You’re right to be cautious oil temperature is everything! Aim for a steady 325°F (160°C). If it’s too hot, the outside will burn before the inside is cooked through, and if it’s too cool, you’ll end up with a greasy bird. A reliable thermometer is your best mate here!
If I can’t find chicken thighs, can I use breasts instead for my Hot Chicken Sandwich?
Chicken breasts are perfectly fine, but they cook faster and can dry out easily. If using breasts, you must pound them to a uniform thickness of about 3/4 inch before brining. This ensures they cook evenly in the oil without turning into cardboard.
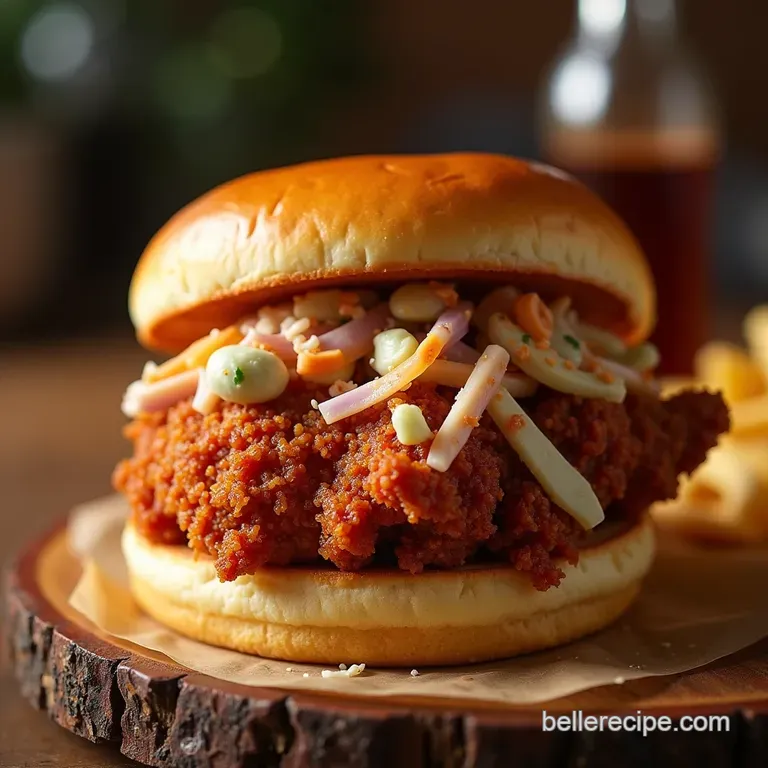
Crispy Hot Chicken Sandwich